

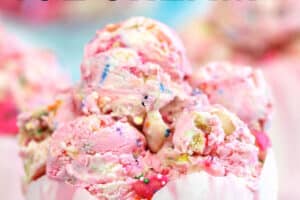


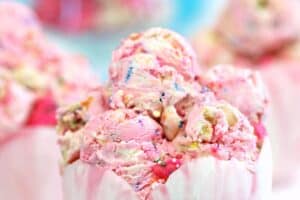


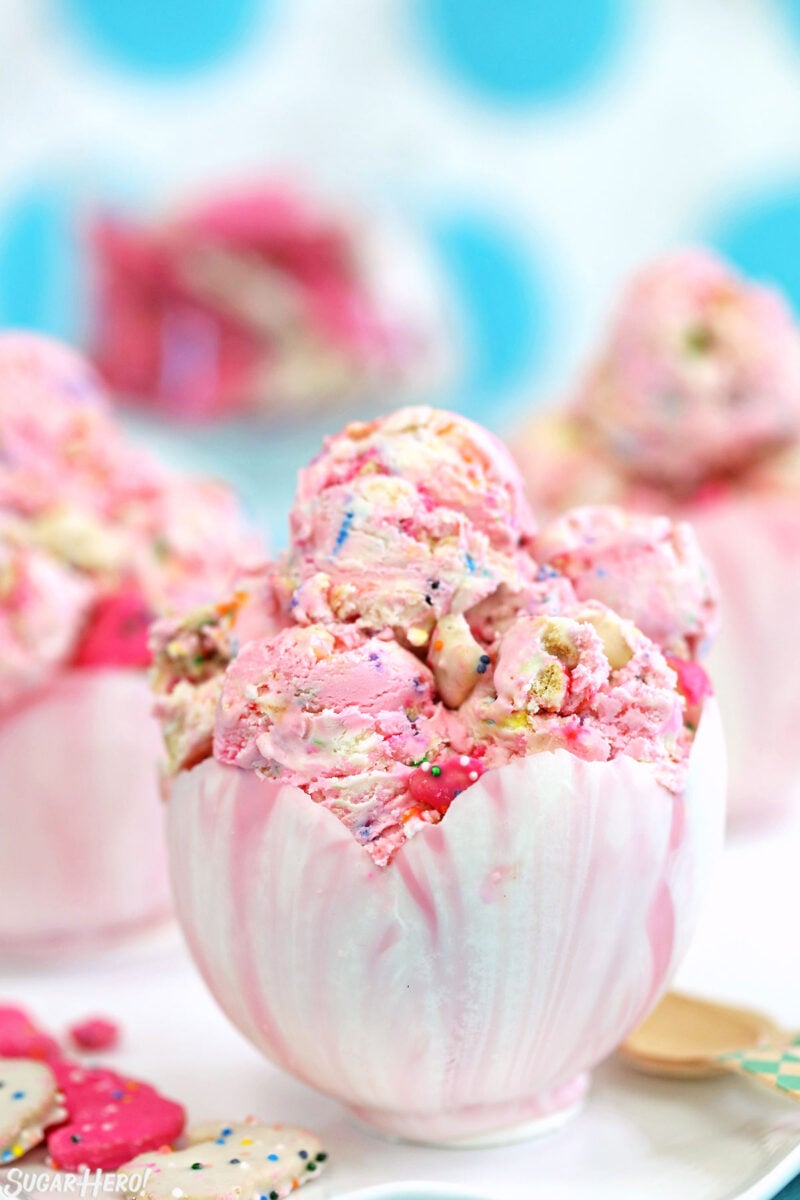
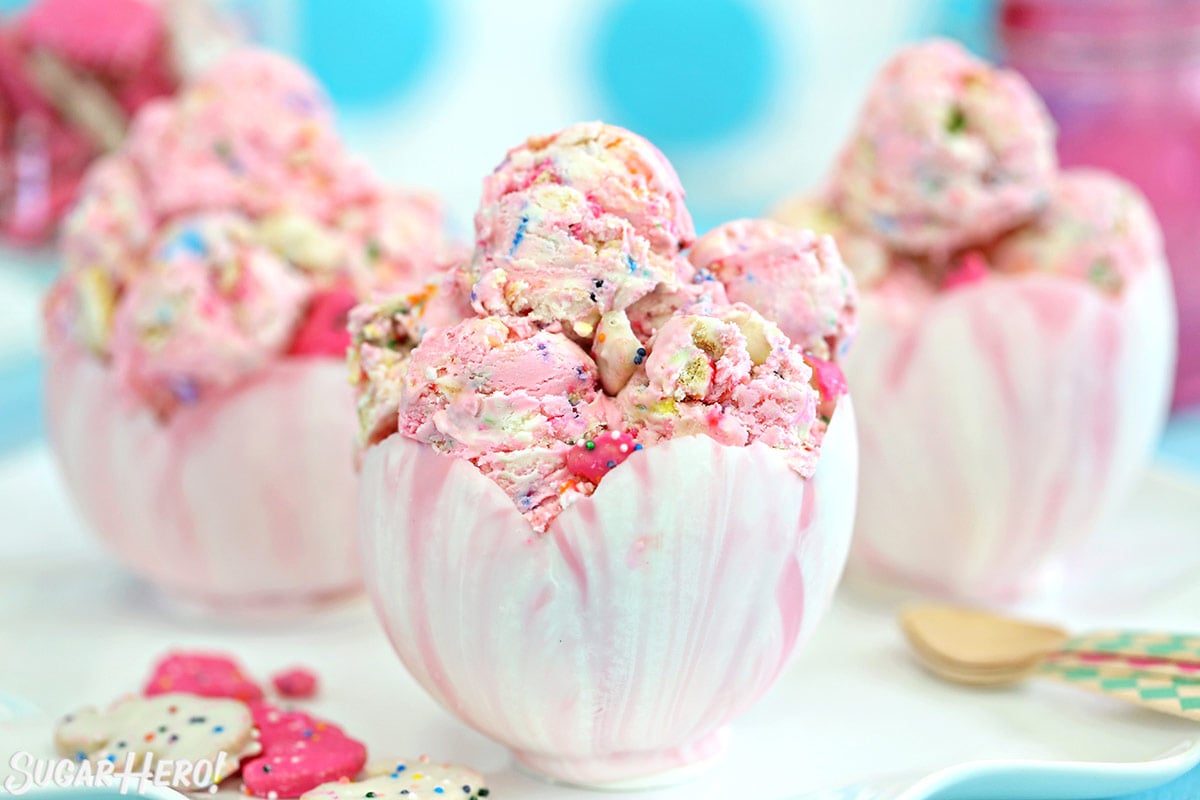
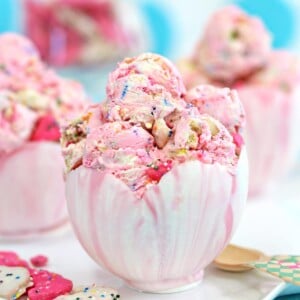
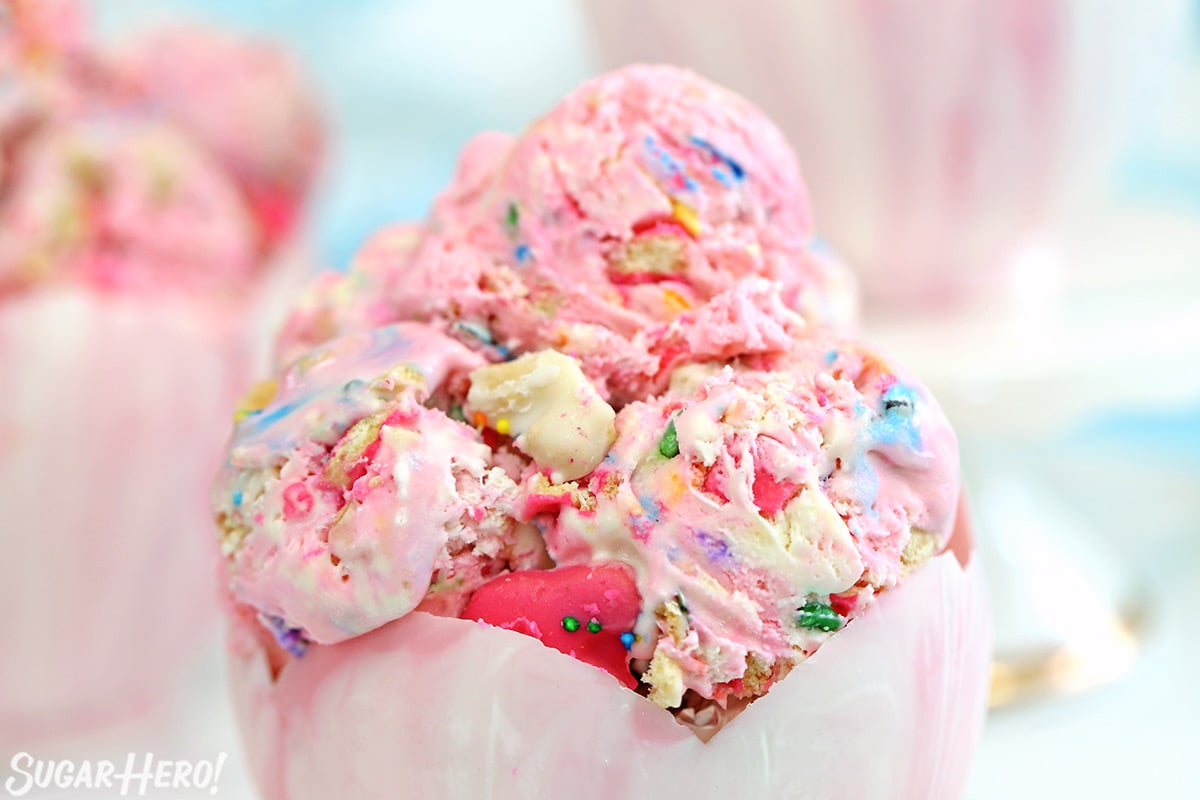
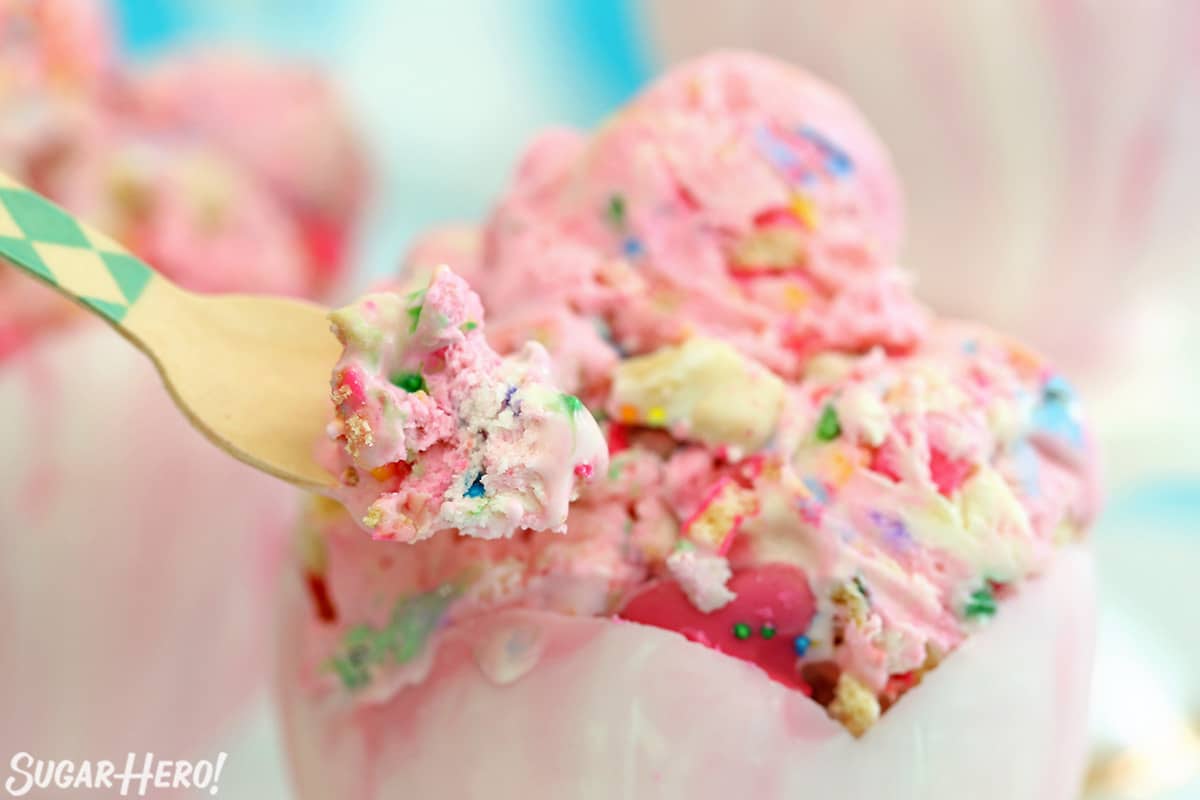
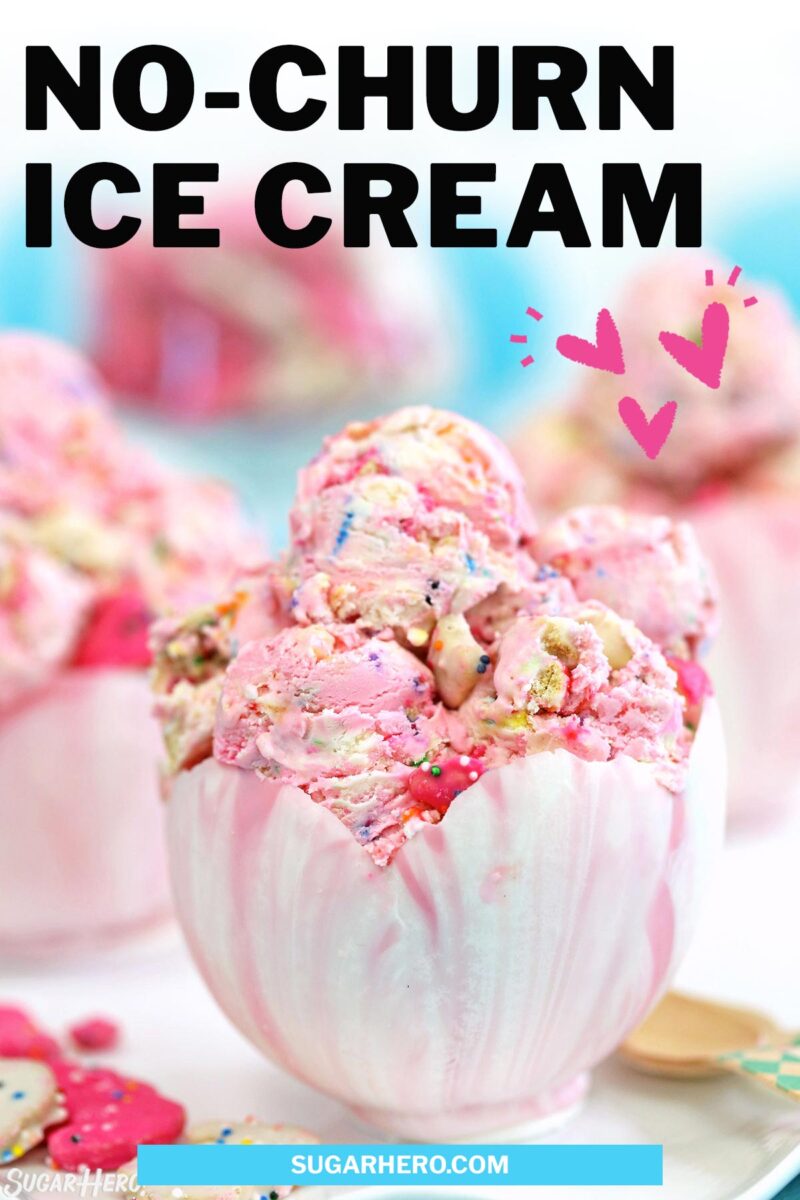
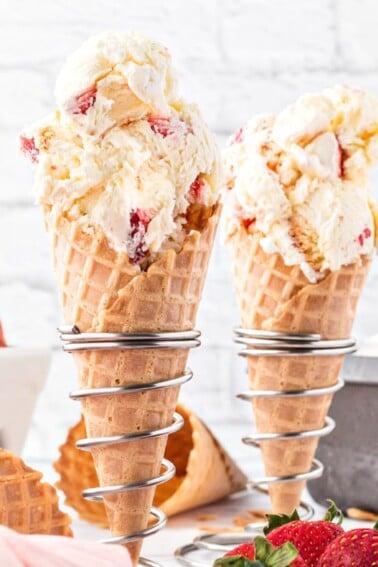
Circus Animal No-Churn Ice Cream is an easy no-churn ice cream the whole family will love. This cute homemade ice cream recipe has pretty pink-and-white swirls, LOTS of sprinkles, and chunks of frosted circus animal cookies mixed right in!
🍦 Animal Cookie Ice Cream
Watch out, friends, because this Circus Animal No-Churn Ice Cream is a dangerous recipe.
Circus animal cookies are already my kryptonite. I don’t know what addictive ingredients they’re putting into those things (um…other than sugar… *innocent whistling*), but somehow, if I get my hands on a bag of those pink and white temptations, the entire thing is gone before I know what’s happened. They are that addicting. (And when they’re added to a sky-high cake, like my Circus Animal Layer Cake? Fuggedaboutit. Absolutely irresistible.)
So when you combine THOSE cookies with THIS ice cream recipe, you’re really tempting fate. It’s rich and creamy, packed full of cookies, and absolutely gorgeous. Enjoy it plain or give it the SugarHero treatment by serving it in an Edible Chocolate Bowl–it’s an outrageously fun presentation!
Table of Contents
🧾 What You’ll Need
Ingredients
Grab these special ingredients and read my pro tips before getting started! Full ingredient amounts in the recipe card below. (Links are affiliate links and I earn a small commission from qualifying purchases.)
- Heavy whipping cream: I recommend using heavy cream or manufacturing cream over whipping cream, when possible. Heavy cream and manufacturing cream have the most fat, which produces a better flavor and texture. For best results, make sure the cream is very cold before whipping it.
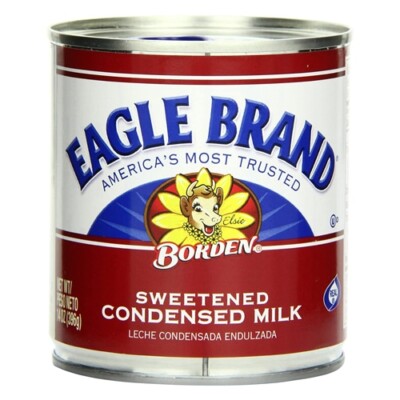
- Sweetened condensed milk: This thick, rich sweetener will ensure that your ice cream doesn’t freeze too hard and is a perfect scoopable consistency. Make sure you use sweetened condensed milk, NOT evaporated milk. The cans look similar, and they’re usually in the same section at the grocery store, but they are not the same thing.
- Vanilla extract: This Nielsen-Massey Madagascar Vanilla is my FAVORITE!
- Pink gel food coloring: To get that pretty swirl, half of the ice cream will be dyed a soft baby pink. I used Americolor Soft Pink for this recipe.
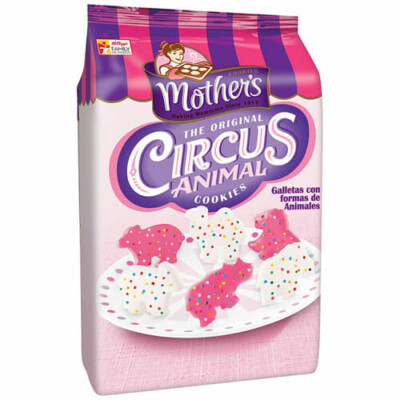
- Circus animal cookies: These cookies are the star of the show! I recommend using Mother’s Circus Animal Cookies.
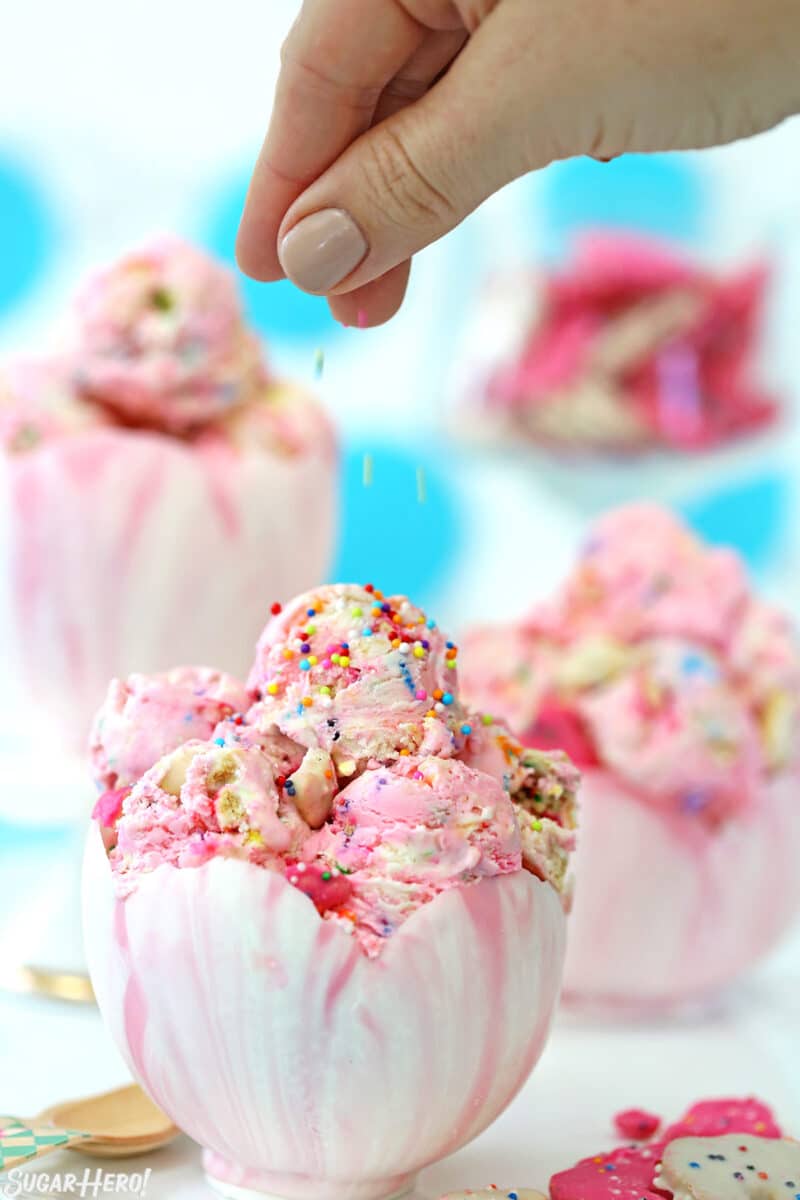
- Sprinkles: Use any sprinkles you have on hand. I used rainbow nonpareils, as well as, some other larger sprinkles I had in my stash.
Equipment
- Mixer: You’ll need either a stand mixer or hand mixer to whip the cream.
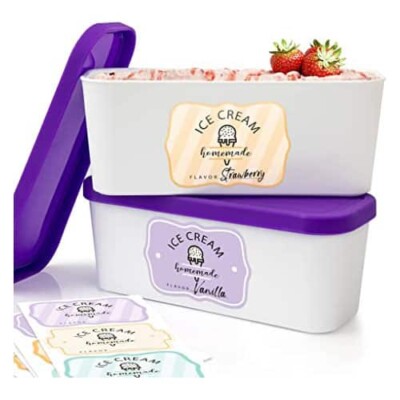
- Ice cream storage container: An ice cream storage container keeps the ice cream fresh in the freezer. I have this set, and can personally vouch that the containers are amazing. They keep the ice cream soft and fresh, while keeping out odors and ice crystals.
- Ice cream scoop: For serving of course! A high-quality ice cream scoop makes it so easy to portion the ice cream out in perfect rounded scoops.
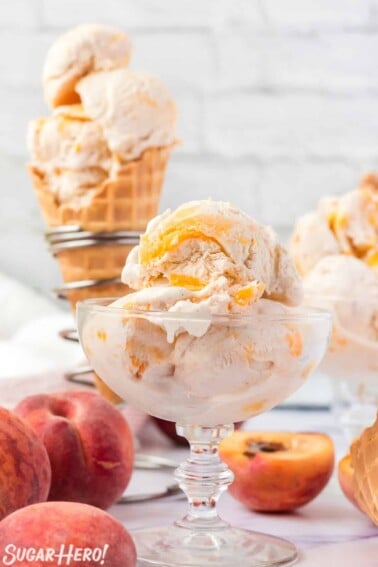
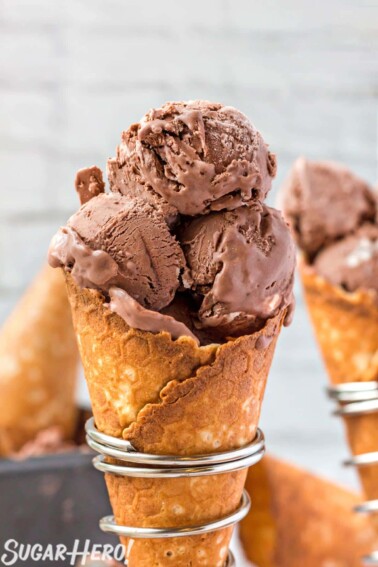
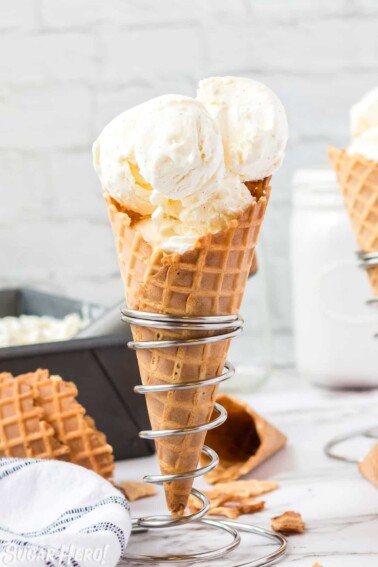
🍧 No-Churn Ice Creams
Leave a Review!
If you make this recipe, let us know! Leave a ⭐️⭐️⭐️⭐️⭐️ rating on the recipe below, and leave a comment, take a photo and tag me on Instagram @elabau, or use #sugarhero on IG!
No-Churn Circus Animal Ice Cream
Ingredients
- 2 ¼ cups heavy cream
- 14 oz sweetened condensed milk, (1 standard can)
- 1 TBSP vanilla extract
- Pink gel food coloring, I like Americolor brand
- 6 oz chopped circus animal cookies, (about 1 ½ cups)
- ¼ cup assorted sprinkles
Instructions
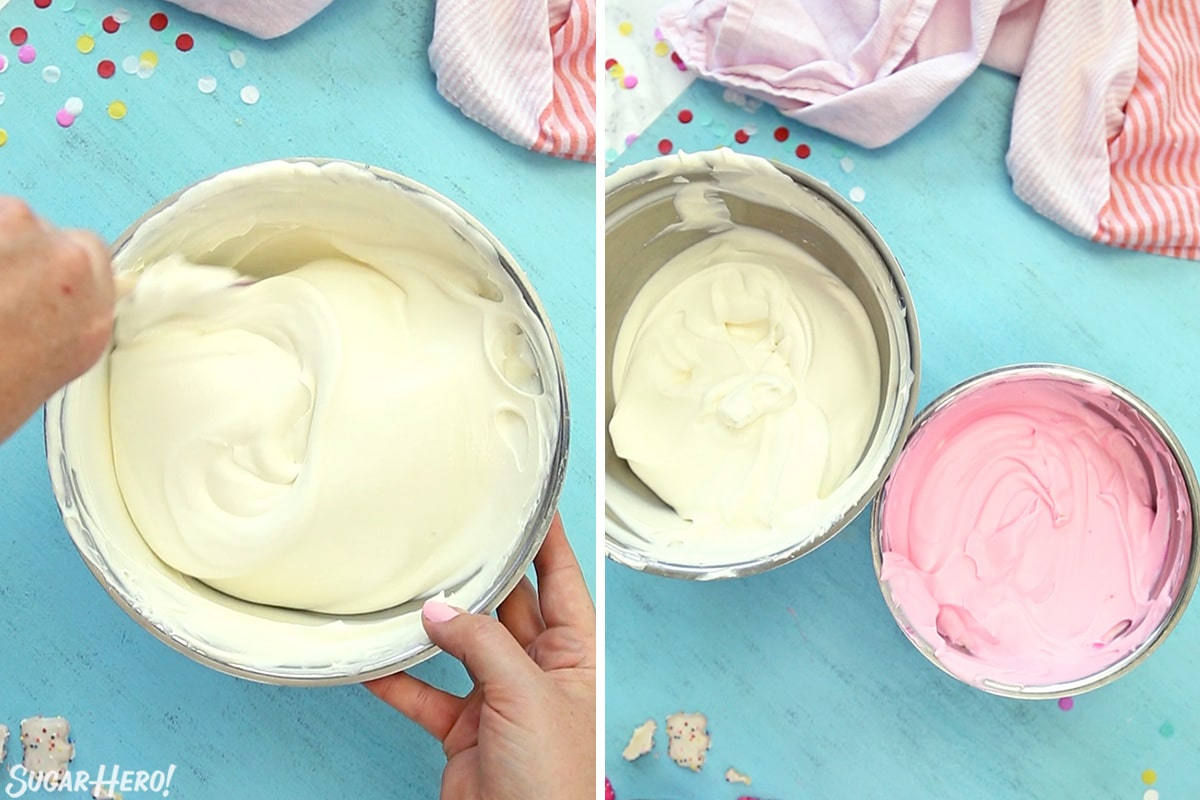
- Prepare whipped cream: Whip the cream to firm peaks. Set aside.
- Mix milk and vanilla: In a separate bowl, combine the sweetened condensed milk and vanilla extract, and stir well.
- Fold cream into milk mixture: Gently fold the whipped cream into the milk mixture, working in batches and stirring gently so the cream doesn’t deflate.
- Divide and color: Once combined, divide the mixture in half and color one half a soft pink color, and leave the other half white.
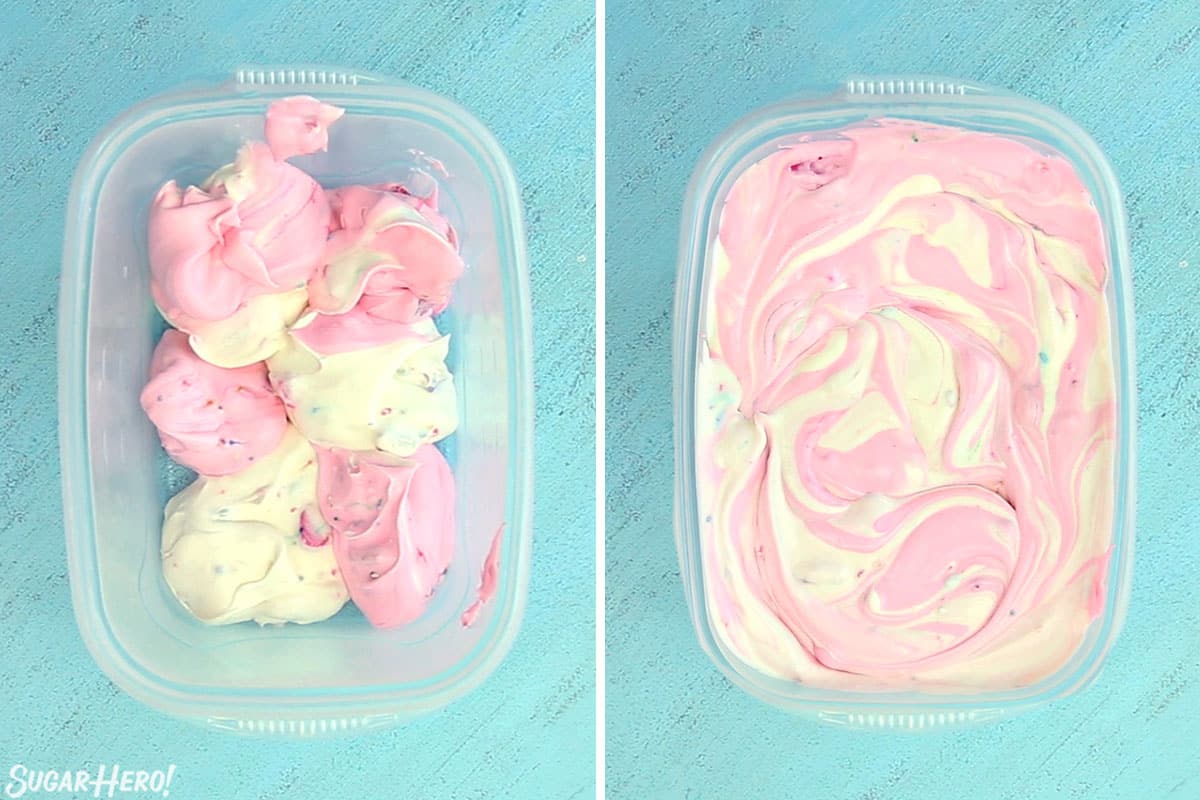
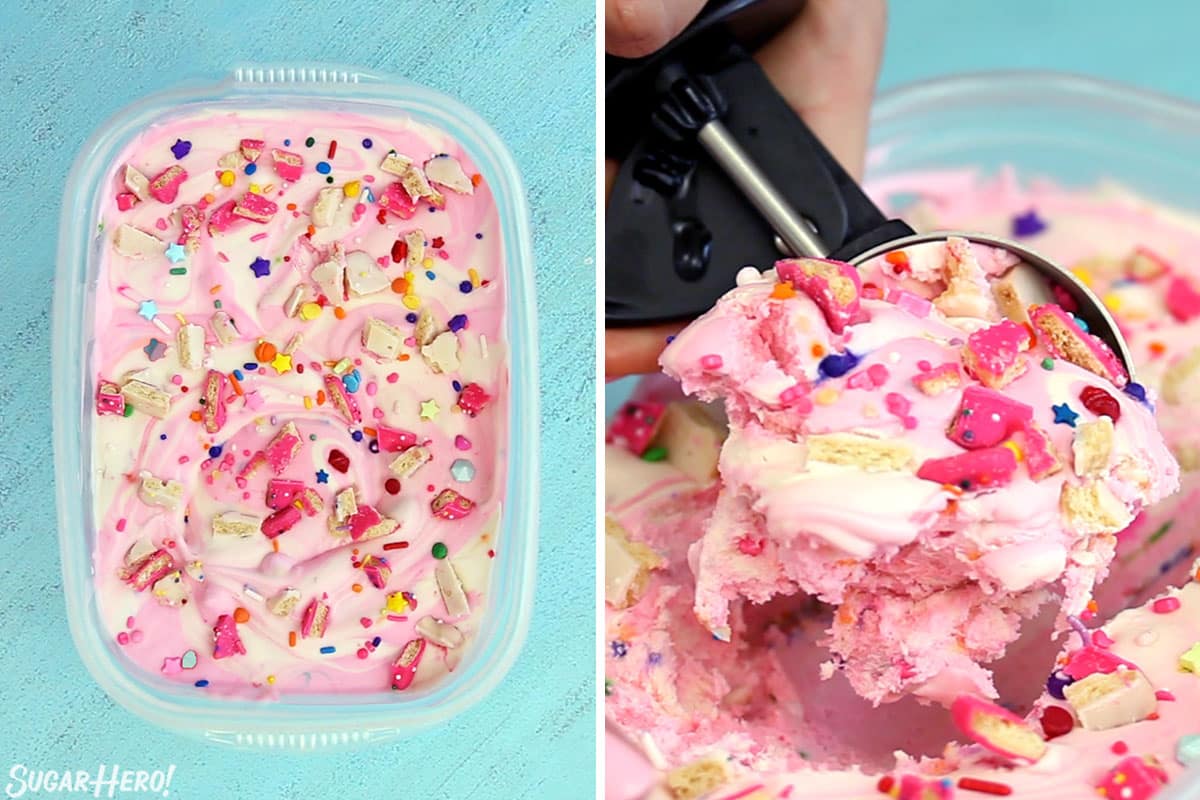
- Add cookies and sprinkles: Divide the cookies and sprinkles between the two bowls, reserving a few spoonfuls of each to use as toppings. Gently fold the cookies and sprinkles into both bowls.
- Fill storage container: Take a 6-cup storage container or loaf pan, and alternate adding scoops of white and pink cream into the container. Swirl a knife through the cream until the colors are mixed up in pretty swirls.
- Finish and freeze: Sprinkle the top of the ice cream with the reserved sprinkles and cookie pieces. Freeze the container for 4-6 hours, until very firm.
Video

Recipe Notes
Measuring Tips
Our recipes are developed using weight measurements, and we highly recommend using a kitchen scale for baking whenever possible. However, if you prefer to use cups, volume measurements are provided as well. PLEASE NOTE: the adage “8 oz = 1 cup” is NOT true when speaking about weight, so don’t be concerned if the measurements don’t fit this formula.
Want to learn more about baking measurements and conversion?
Nutrition
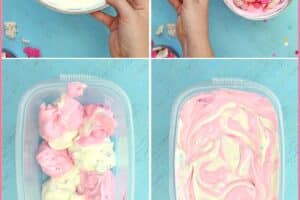
📸 Photo Tutorial: How to Make No-Churn Circus Animal Ice Cream
Here’s an overview of how to make Circus Animal No-Churn Ice Cream! Full instructions are included in the recipe card above.
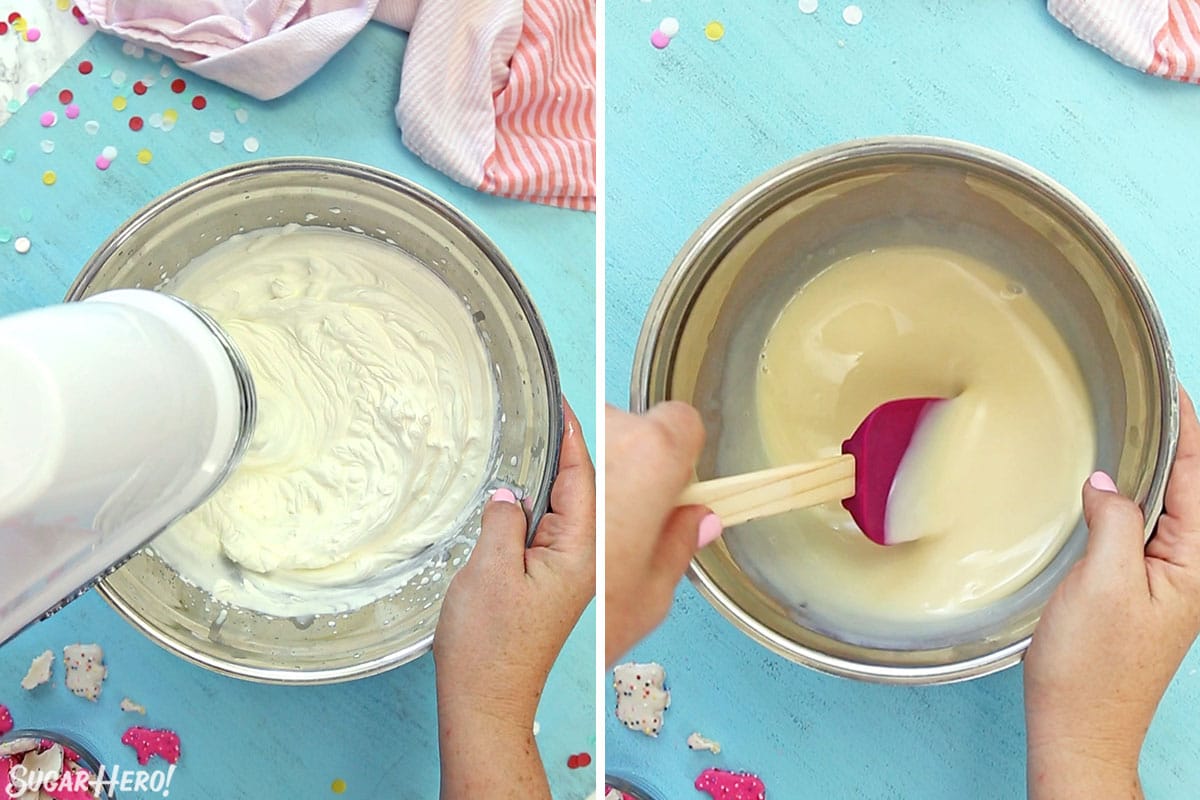
- Prepare whipped cream: Whip the cream to firm peaks. Set aside.
- Make milk mixture: In a separate bowl, combine the sweetened condensed milk and vanilla extract. Stir well.
- Fold cream into milk mixture: Gently fold the whipped cream into the milk mixture, working in batches and stirring gently so the cream doesn’t deflate.
- Divide and color: Once combined, divide the mixture in half and color one half a soft pink color, and leave the other half white.

- Fold in cookies and sprinkles: Gently fold the cookies and sprinkles into both bowls.
- Scoop ice cream into container: Alternate adding scoops of white and pink cream into an ice cream container or loaf pan.
- Swirl: Once all the ice cream is layered in the container, swirl a knife through the cream until the colors are mixed up in pretty swirls.
- Embellish: Sprinkle the top of the ice cream with the reserved sprinkles and cookie pieces.
- Freeze: Freeze the container for at least 4-6 hours, until very firm.
💡 Tips for Success
- Check the milk. It’s so easy to grab evaporated milk instead of sweetened condensed milk. It’s the key to getting creamy, scoopable ice cream!
- Chill the bowl and whisk. Using colder equipment to whip the cream will produce a lighter whipped cream which will create a lighter ice cream. Chill it for 15 minutes for best results.
- Whip to firm peaks: Cream goes through a few general stages of development as it incorporates air and thickens. The ideal stage for making the ice cream base is called firm peaks. You can identify this stage by how the cream reacts when you lift the whisk out of the mixing bowl. If the cream flops over and does not hold a pointy shape on the whisk, it’s at the soft peak stage and needs to be whipped longer. Continue mixing and test the cream again by pulling up the whisk. You’ll know it’s at the firm peak stage when the cream points upward with hardly any flopping and retains its shape well.
- Don’t over mix. As you combine all the ice cream ingredients be careful to fold them gently until just combined. Over-mixing will deflate the cream and ruin the texture of the ice cream.
- Store in the back of the freezer. Temperature regulation fluctuates at the front of the freezer where the door opens and closes. If the ice cream temperature fluctuates too much, ice crystals can form. Your ice cream will stay fresher if it’s stored toward the back at a constant temperature.
💭 FAQs
The most common reason no-churn ice cream gets icy is because of an accidental imbalance in the ingredients. Make sure to use the correct ingredient amounts and to use high-fat whipping cream. The added fat helps to bind the ice cream together and creates a creamy texture that won’t crystalize.
Most likely, it hasn’t had enough time to set in the freezer. Depending on the shape of your freezer container, it might take your batch of ice cream longer to freeze through. I recommend 4-6 hours, but it could take 8+ hours to get really firm. It’s best to let it freeze overnight.
Store your ice cream in a freezer-safe container in the freezer. It will keep for several weeks if it’s kept covered and airtight.


Oh my gosh! These are SO FREAKIN’ cute! I love animal cookies, I eat them by the box so this ice cream is to die for and YES! I can do this with no extra gadgets! 🙂 I’m going to be a happy girl this summer.
It’s seriously to die for! I shouldn’t even keep it in my fridge!! Let me know if you make it! I’d love to hear how it goes.
Omg, this pictures are treat for eyes, I bet young girls would go crazy for this one
Thank you! Oh yeah. Kids love these!!
So colorful! Oh, and I love those white chocolate bowls. Super creative!
Thank you! Means a lot!
Those tulip cups! Wow! They are so pretty! 🙂
Thank you so much!
Hi, Elizabeth. I’ve had my ice cream maker for a few years and I prefer custard based recipes. So I’ve passed this recipe by a few times thinking, “Meh, how good could it be with no yolks?” I must say, you’ve opened my mind to no-churn. The texture was really nice and it actually tasted better the longer it sat in the freezer. I didn’t make the bowls this time but I’m chomping at the bit to do them cause they are so CUTE. Thanks again for another fun and delicious recipe. On to the next one!
Hi Myra! I’m thrilled to hear that you liked the recipe, and that you’ve been introduced to the magic that is no-churn ice cream. 😀 Let me know how it goes if you give the chocolate bowls a try!
We don’t have the sweet cream creamer here. Can we substitute diffrent flavours??
Yes, of course! It’s very flexible and you can use your favorite creamer flavor, or even just swap in heavy cream and add an extract of your choice.
hi, should the bowl and beaters be cold to whip the heavy cream? im going to be brave and try this ice cream, so nervous as I have been to scared to try and make my own ice cream. ha ha
Totally understand the fear of trying something new! Having a cold bowl and beaters will help the whip cream turn out thick and creamy. Good luck!
These are really nice. Can the chocolate moulds be made in advance and how do you store them?
Many Thanks
Thanks Angela! They can definitely be made several weeks in advance. Ideally you would keep them at cool room temperature, stored on a baking sheet and loosely covered with plastic wrap or another type of protective cover. If your house is too hot then storing them in the refrigerator would be your next best option–just be aware they might get have some condensation on them after you remove them.
I decided to try the Circus Animal Ice Cream recipe and it did not disappoint! The ice cream was rich and creamy and the circus animals added a fun touch. I would definitely make this recipe again.
Awesome! So glad you tried it and loved it. Thanks for commenting Mandy!
This was so fun to make! I’m excited to check out your other no church ice cream recipes!
Hi Jen! So glad you enjoyed this recipe. It’s one of my absolute faves!