
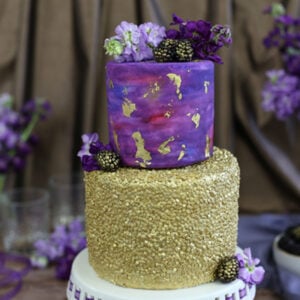
This stunning Gold Sequin Watercolor Cake is decorated with completely edible gold sequins, and a gorgeous watercolor fondant effect! It’s perfect for birthday parties, showers, and as a nontraditional wedding cake, and the best part is, it’s easier to make than you think!

I’ve been obsessed with sequin cakes ever since I saw one demonstrated on The Cake Blog several years ago. The idea behind a sequin cake is genius in its simplicity: a fondant-topped cake is covered with confetti sprinkles, then painted with edible metallic paint to make it look like it’s covered with sequins. Gorgeous? Yes! Easy? TOTALLY! And I have the videos and written instructions to take you through the whole thing.
There are two Facebook Live videos down below that will take you through all of the steps in real time, but if you want the short and sweet version, check out the how-to video here!
Sequin cakes are so pretty, they’re stunning when left totally plain, or when topped with a few simple flowers. But I wanted to take things up a notch and make a tiered cake, so I combined the idea of a sequin cake with another fun cake decorating technique: painting fondant to look like an abstract watercolor design.

Isn’t that pretty?! I love the watercolor effect, because it’s really forgiving. You don’t have to have any natural artistic talent to dab different shades of food coloring onto fondant, and if you mess up, you can wipe it off when the color is still wet and start over. I especially love the colors I use because it reminds me of a galaxy, but you can use any complimentary shades you like. Finally, I added some edible gold leaf to the watercolor layer, to reinforce the gold theme and tie both cake layers together.

There are full instructions down below, but since this technique requires some ingredients you might not have in your pantry, I wanted to highlight a few necessities you’ll need to pick up to make this gold sequin watercolor cake.

- White Confetti Sprinkles: these mini round sprinkles give the cake its signature sequined texture. The white ones were hard for me to find in-person, so I purchased them from Amazon. You can actually use regular colored confetti sprinkles–the Facebook Live video I’ve linked down below shows me using the colored variety! But it takes more gold paint to cover up all those colors, so if you’re able to find white ones, that’s what I recommend using.
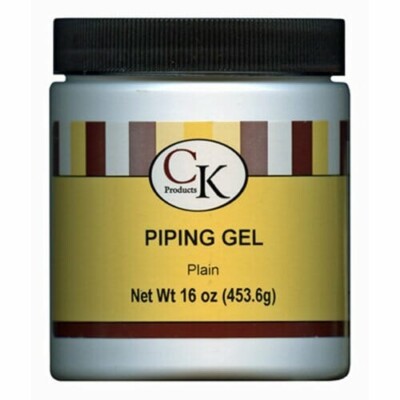
- Piping Gel: this is what you’ll use to stick the sprinkles to the fondant. Piping gel is a great all-around kitchen tool and can be used as a glaze for fruit desserts, and as an edible glue. You can buy it online, or find it at cake supply stores and craft stores like Michael’s. You can also try your hand at making your own, although I usually go the store-bought route.
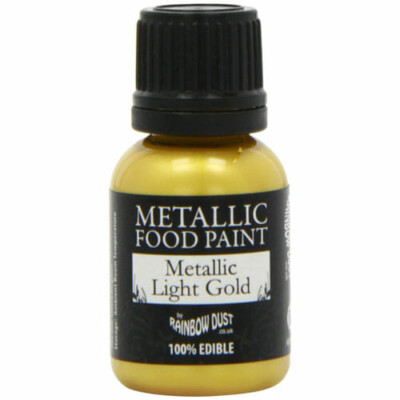
- Edible Gold Dust: Not all gold dusts are created equal! Some brands are labelled “nontoxic” or “for decorations only,” and these should only be used on decorations you know won’t be eaten. I used Rolkem brand gold dust, which is rated completely food safe in Europe, Canada and Australia. If you use gold dust, you’ll want to mix it with vodka or clear extract to make a gold paint. You can also buy edible metallic food paint if you’d prefer.
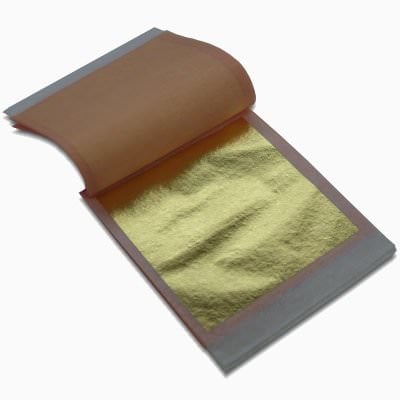
- Edible Gold Leaf: make sure you’re buying 22 or 24 karat gold leaf, which is the edible version. I like to buy transfer leaf gold sheets, because I think they’re easier to use than the loose-leaf variety. It’s an expensive purchase initially, but I think you’ll find you use it sparingly, and it lasts forever, so it’s a good cake decorating investment.


To finish off the cakes, I topped them with fresh flowers (just for decoration–these are not edible as far as I know!) and blackberries brushed with a bit of edible gold dust. I added the flowers and berries on top of the cake, and then placed a few along the base of both cakes to balance them out and add some color.

This is one of my favorite cakes I’ve made in a long time. The gold and purple colors, the combination of textured sequins and sleek watercolor, the chocolate-blackberry flavor…everything about it delights me. I think it would be perfect for a special birthday, a bridal or baby shower, or even as a nontraditional wedding cake!

💜Equipment You’ll Need
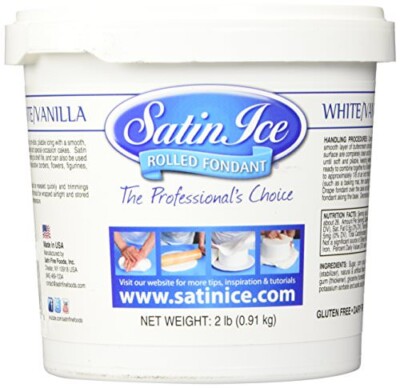
- White Fondant
- Fondant Smoothers (optional but verrrrry helpful)
- Piping Gel
- White Confetti Sprinkles
- Edible Gold Paint or Edible Gold Dust
- Edible Gold Leaf
- Vodka, other clear alcohol, or clear extract
- Deep Pink gel food coloring
- Sky Blue gel food coloring
- Purple gel food coloring (I used both Regal Purple and Electric Purple)
💜More Lovely Layer Cakes
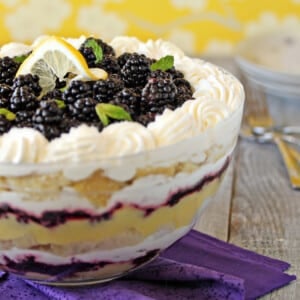
Lemon Blackberry Trifle
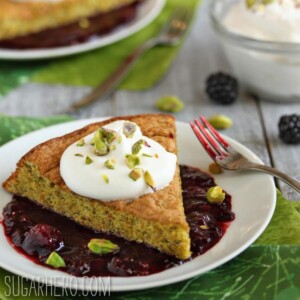
Pistachio Cake with Blackberry Sauce
Gold Sequin Watercolor Cake
Ingredients
For the Cakes:
- 6 oz unsalted butter, at room temperature
- 4.75 oz granulated sugar, (2/3 cup)
- 5 oz brown sugar, (2/3 cup), packed
- 2 large eggs, at room temperature
- 2 tsp vanilla extract
- 8 oz buttermilk, (1 cup), at room temperature
- 4 oz sour cream, (1/2 cup), at room temperature
- 2 TBSP water, or coffee
- 7.8 oz all-purpose flour, (1¾ cups)
- 3 oz unsweetened cocoa powder, (1 cup)
- 1½ tsp baking soda
- ½ tsp salt
For the Buttercream and Filling:
- 6 fl oz pasteurized liquid egg whites, (3/4 cup, see Note below)
- 24 oz powdered sugar, (6 cups)
- 1/2 tsp salt
- 24 oz unsalted butter, (6 sticks), at room temperature
- 2 TBSP vanilla extract
- 2 cups fresh blackberries, cut in half
To Decorate:
- 1.5 lbs white fondant
- 1/3 cup piping gel
- 4 oz white confetti sprinkles
- Edible gold dust, I recommend Rolkem brand
- ½ cup vodka, see Note
- Assorted gel food coloring, I used Americolor gel food coloring: Deep Pink, Sky Blue, Regal Purple and Electric Purple.
- Edible gold leaf, for decorating, optional
- Berries, for decorating, optional
- Flowers, for decorating, optional
Instructions
To Make the Cakes:
- Preheat the oven to 350 F. Line two 6-inch cake pans with parchment paper, and two 4-inch cake pans with parchment paper. Spray all pans with nonstick cooking spray.
- Add the butter and both sugars to the bowl of a large stand mixer fitted with a paddle attachment. Beat them together on medium-high speed, until light and fluffy, about 5 minutes. Add the eggs one at a time, beating well after each addition. Add the vanilla extract and mix it in.
- In a separate bowl, whisk together the buttermilk, sour cream, and water (or coffee, if using). In a different bowl, sift together the flour, cocoa powder, baking soda, and salt. With the mixer running on low, add a quarter of the sifted flour mixture. When the flour streaks have almost all disappeared, add a third of the liquid to the mixing bowl. When that’s incorporated, continue to add the drys and wets in an alternating pattern, ending with the dry ingredients.
- When the dry ingredients are nearly incorporated, stop the mixer. Scrape down the bottom and sides of the bowl with a rubber spatula, and finish mixing the cake by hand.
- Divide the batter between the prepared pans, filling each about 2/3 full. (The 6-inch pans should get about 16 oz batter, and the 4-inch pans should get about 6 oz batter.) Bake the cakes at 350 F until a toothpick inserted into the center comes out with just a few moist crumbs attached. The 4-inch cakes should take about 25 minutes and the 6-inch cakes about 35-40 minutes. Cool the cakes completely before using.
To Make the Buttercream:
- Combine the whites, powdered sugar, and salt in the bowl of a large stand mixer fitted with a paddle attachment. Mix everything together on low speed, until the sugar is moistened and no dry patches remain. Turn off the mixer, scrape down the sides and bottom of the bowl with a spatula, then turn the mixer to medium speed. Beat on medium for 5 minutes.
- After 5 minutes, turn the mixer to medium-low and start adding the softened room temperature butter, 1-2 tablespoons at a time. Once all of the butter is incorporated, add the vanilla extract and mix it in. Stop the mixer and scrape down the bottom and sides once more. Turn the speed to medium and beat the buttercream for 10 minutes. At the end, you’ll have a frosting with a wonderfully light and creamy texture. It can be used right away, or stored in the refrigerator for up to two weeks, or the freezer for up to two months. If you have chilled the frosting, let it come to room temperature COMPLETELY and then beat it for several minutes to smooth it out and restore its texture before using it.
To Assemble:
- Assemble the 6” tier first. Using a large serrated knife, cut each cake layer in half. Place one layer face-up on a cake cardboard, and place it on a cake turntable.
- Scoop some buttercream into a pastry bag fitted with a 1/2-inch round tip. Pipe a ring of buttercream all along the edge of the cake round to act as a barrier and make assembly neater. Scoop about 1/2 cup buttercream into the center, and spread it in an even layer until it covers the cake and reaches the buttercream ring. Scatter a generous handful of chopped blackberries on top, covering the surface evenly, but do not put strawberries on the outer ring of buttercream. Top the cake round with a second round, and repeat the process of piping a ring of buttercream, spreading the buttercream in the center, and add chopped berries.
- Repeat with the remaining 6” layers, until you have a 4-layer cake with 3 layers of buttercream. Spread buttercream along the sides and top of the cake in a very, very thin layer—this is just to hold the crumbs in. Refrigerate the layer while you assemble the 4” rounds in the same fashion. Refrigerate all the layers until they’re firm, at least 45 minutes.
- Once firm, go back and add another layer of buttercream on the outside of the cakes, this time trying to get it even and smooth. The smoother the buttercream is, the smoother the fondant coating will be. I like to use a bench scraper to go around the sides and get them very straight and clean. To do this, hold the bench scraper in your dominant hand, straight against the sides of the cake. With your other hand turn the cake turntable so the scraper removes any excess frosting from the sides. Use an offset spatula to smooth the frosting on the top of the cake. Once all of the cakes are frosted, refrigerate them again until they’re very firm, at least 1 hour or more.
- To cover the cakes with fondant, I used approximately 12-14 oz of fondant for the 6” cake, and 10 oz for the 4” cake.
- Dust your work surface with powdered sugar, and roll out the fondant for the 6” cake until it is a round circle a little less than 1/4-inch thick. Drape it over the cake and smooth it evenly against the top and sides—if you are unfamiliar with covering a cake with fondant, there are many excellent video tutorials to demonstrate this step. Trim the excess fondant from the bottom, and repeat with the 4” cake. I prefer to decorate the cakes when they’re chilled (so the fondant doesn’t dent), so if possible, refrigerate them for at least 45-60 mintues.
To Decorate:
- To make the gold sequin layer, brush the top of the 6” cake with a thin layer of piping gel. Use a clean pastry brush to paint the gel on. You only need enough to adhere to sprinkles—too much and it will look gloopy, so use a light hand!
- Scatter a handful of white confetti sprinkles on top, and brush them into an even layer on top of the cake, pressing down gently to adhere them to the piping gel. Make sure there are no bald spots without sprinkles!
- Next, brush the piping gel on the sides of the cake, and use a cupped hand to press the sprinkles onto the sides. I recommend doing this over a baking sheet, so the excess sprinkles can fall onto the sheet and be easily scooped up again. Once the entire cake is covered with sprinkles, refrigerate it to set the piping gel. This can take up to 24 hours before the piping gel is firmly set and no longer sticky.
- Combine some edible gold dust with a small spoonful of vodka in a small bowl. I like to start with a small amount of vodka, stir, and then adjust the liquid as necessary. You’re looking for a thin paint texture that still has good opacity and is not too transparent. Add more liquid or gold dust as necessary to get the right texture.
- Paint the entire sequin cake with the gold paint mixture. Depending on the thickness of your paint and if you used colored sprinkles, you might need to go back and add a second layer of gold paint after you do the first, to make a bold opaque gold color, or you might just need to do a few touch-ups here and there.
- When decorating the watercolor layer, I recommend wearing gloves for this step, unless you enjoy having bright purple and pink fingers. Mix together a teaspoon of pink coloring with a tablespoon of vodka, and stir well. Repeat with blue and shades of purple, so you have 4 different colors of edible paint. I like the start with the lightest color and then get darker, so I painted a light pink wash of color all over the 4” cake using a soft 1-inch paintbrush. (If the pink color you made is too dark, make a separate bowl of mostly vodka with just a drop or two of pink, to create a very light color.)
- Take a clean paintbrush and paint dabs of blue and purple in random intervals over the top and sides of the cake. Continue to add more colors, mixing lighter spots and darker spots to give the cake a variety of tones. As you add a color, brush it into the surrounding colors to blend it a bit. (Refer to the accompanying video for tips and tricks about this painting style.) Once you’re happy with the way the cake layer looks, let it dry for 1-2 hours, until the fondant is no longer shiny and tacky.
- Take the edible gold leaf and gently press a small section to the side of the cake, rubbing the back of the parchment sheet with your finger to transfer the leaf from the paper to the cake. Repeat in random intervals on the tops and sides of the cake, varying the shape and size of the gold patches.
- Use a small, dry paintbrush to tamp down any gold leaf edges that are sticking up. Be careful when you handle the cake, because the gold leaf can easily transfer back onto your hands if you rub it!
- Once both cakes are decorated, it’s time to stack them! Insert four wide plastic boba tea straws (or your preferred type of dowel) into the center of the 6” cake in a small circle less than 4” wide. Hold scissors flush against the top of the cake, and cut off the tops of the straws so that they are now even with the height of the cake. Smear a generous amount of buttercream on the top of the 6” cake in the center, and put the 4” cake on top, so it’s secured by the buttercream and resting on the dowels. There should be no gap between the cakes.
- Finish by decorating the cakes with fresh flowers and/or blackberries dusted with a bit of edible gold powder.
Video

Recipe Notes
Measuring Tips
Our recipes are developed using weight measurements, and we highly recommend using a kitchen scale for baking whenever possible. However, if you prefer to use cups, volume measurements are provided as well. PLEASE NOTE: the adage “8 oz = 1 cup” is NOT true when speaking about weight, so don’t be concerned if the measurements don’t fit this formula.
Want to learn more about baking measurements and conversion?


Wow that’s beautiful! Whoever gets that for their birthday would be a lucky person!
Omg, This looks amazing , can’t believe it’s a cake , beautiful work !
This looks fantastic!
I’ve been wondering how to make this kind of cake. My first impression, it must be tough to tackle, but you made it like a breeze. I pinned this for future reference. Thank you for sharing.
This is an edible work of art! Stunning from the outside and the inside looks just as appealing!! Awesome video too 🙂
Wow amazing artwork…Really beautiful. The colors, detailings, flowers etc everthing is just perfect.
This is a gorgeous cake! My kiddos watched the video with me and were concerned about the vodka and are wondering if there is something is can be substituted with.
Hi. Sorry I didn’t get to your message over the weekend. In order to make the color stick to the fondant you will ultimately need something that is alcohol based and not water based. Elizabeth likes to use vodka because it doesn’t leave an unpleasant taste and it is clear. If you try to use water instead of something alcohol based it will make the fondant sticky. I also want to put your mind at ease about using alcohol; it evaporates quickly so you don’t need to be worried about ingesting the alcohol. It will be long gone before you are ready to serve the cake. If you don’t want to use vodka, you could use lemon extract or any clear flavoring (just know that a little of the flavor will be added to the outside of the cake). And, since the time this recipe post was made there are actually a lot of food paints on the market. I don’t have a good recommendation for which ones to try, but you could check ratings and see if you can find a product that you like better. I hope that helps to answer your questions. All the best!