
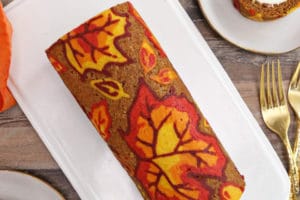


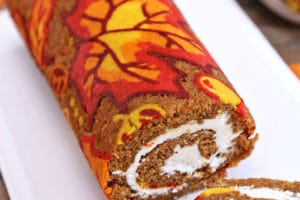
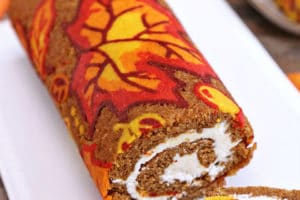


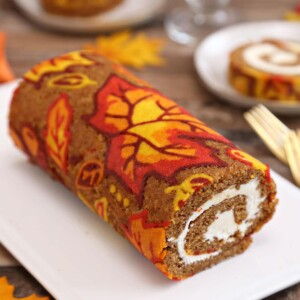
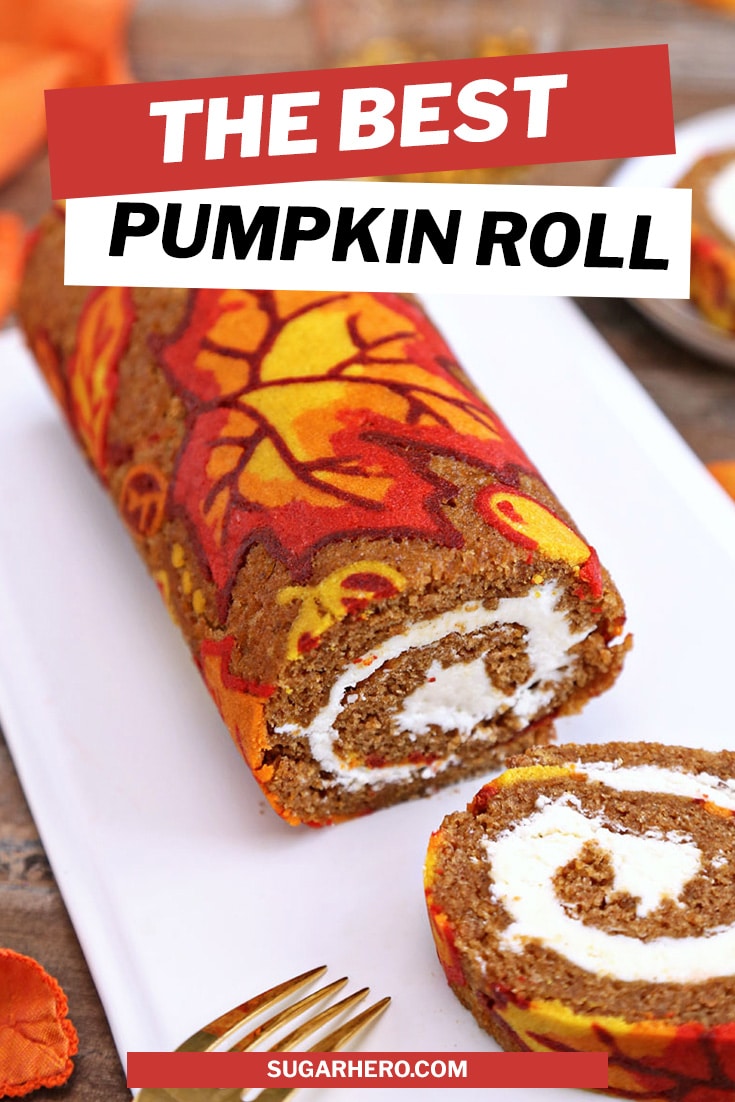
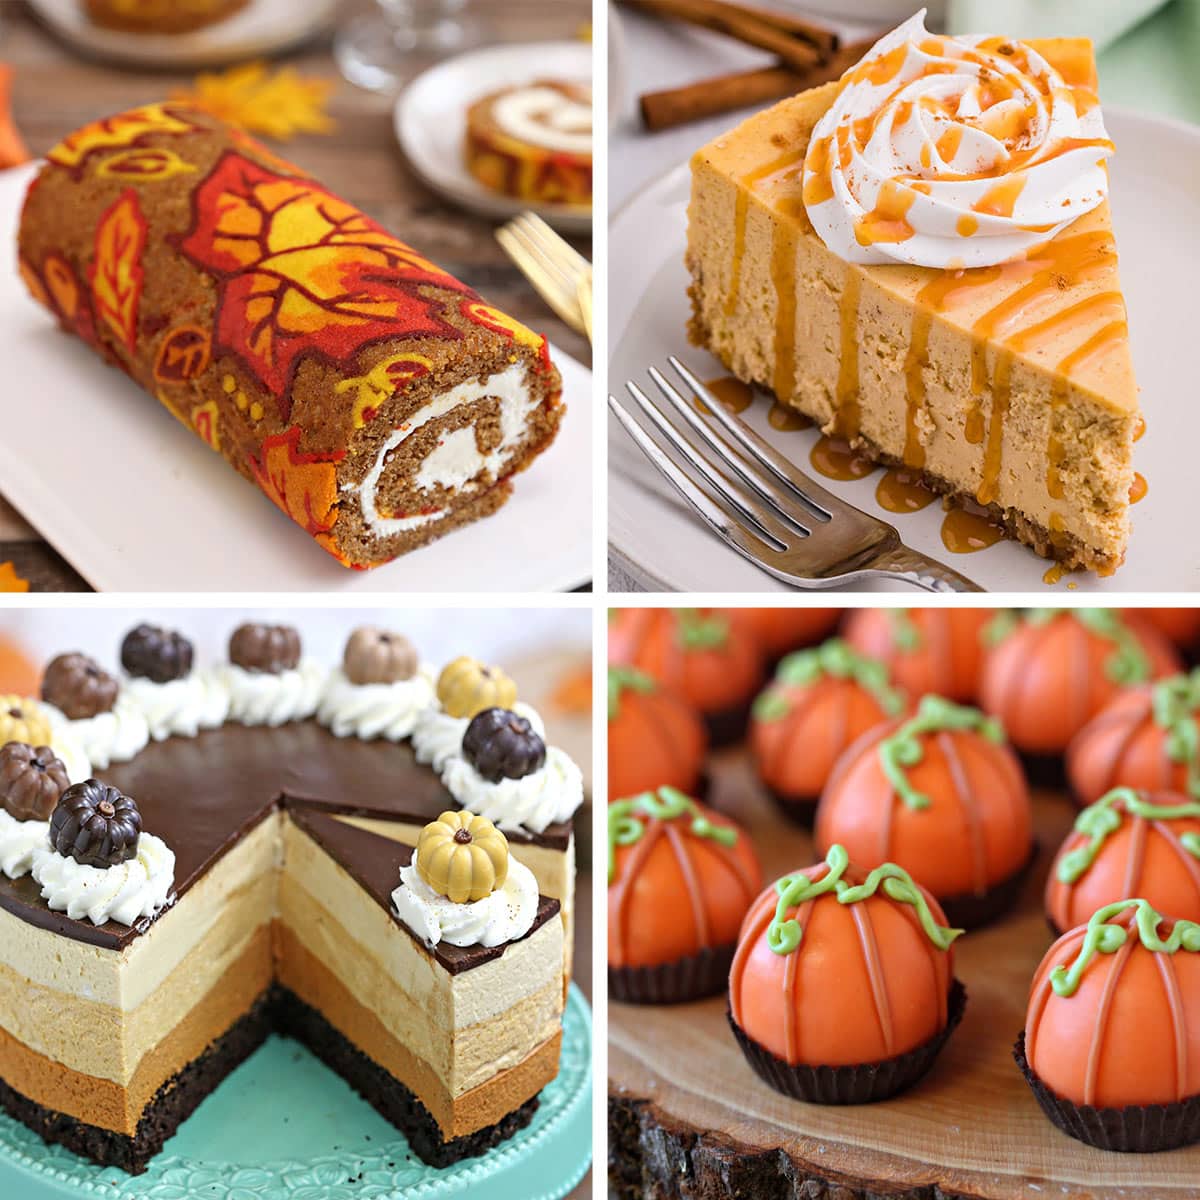
This Patterned Pumpkin Roll recipe is the perfect fall dessert! It’s a moist pumpkin cake with homemade cream cheese filling, decorated with a design of colorful fall leaves on the outside. With its gorgeous autumn pattern, this cake will be the star of your dessert table!

🍂 Make a Gorgeous Decorative Pumpkin Roll!
This recipe was originally published in 2018 and went viral practically overnight. It’s gorgeous, it’s delicious and it’s time to see what everyone is raving about!
One of the beautiful things about rolled cakes is their simplicity. Make basic sheet cake, top it with a delicious filling, give it a quick roll, and you’ve got yourself a stellar dessert!
It’s a classic for a reason, but it’s time to take it to the next level! We’re going to give a simple roll cake a fall upgrade that will take your breath away. We will start with a spiced pumpkin sheet cake and top it with a smooth cream cheese filling.
And, I’ll show you how to decorate the cake with a beautiful, completely edible autumn leaf design that will make it worthy of plating on even the fanciest Thanksgiving table.
Table of Contents
🧾 What You’ll Need

Ingredients
Although this recipe has several steps, you’ll find that the ingredients are pretty basic. Here’s what you need to know as you gather your ingredients. (Links are affiliate links and I earn a small commission from qualifying purchases.)
For the Pattern Batter
- Unsalted butter: I used unsalted butter to ensure that the batter flavor is very mild. Make sure to used softened butter to prevent a lumpy batter.
- Egg whites: It’s important to use the whites from large eggs (not medium or extra large). You’ll also want to bring them to room temperature so that they blend more easily with the other ingredients.
- Powdered sugar: Helps to sweeten and thicken the batter. Use a high-quality brand for the best texture.
- Flour: Use an all-purpose flour.
- Gel food coloring: To get deep colors without using a lot of product, I recommend using gel food coloring (I use Americalor brand). I made four colors of batter in yellow, orange, red and burgundy. I used the following colors of gel: egg yellow, orange, super red, and burgundy. I also added a little ivory to each of the colors to give them a warmer, fall tone. If you don’t have burgundy gel, you can make your own by mixing red with a little dark brown.
For the Pumpkin Cake
- Flour: Make sure to measure the all-purpose flour correctly. Adding too much flour will make your cake overly dense. If possible, I highly recommend weighing the flour with a food scale.
- Leaveners: Use both baking powder and baking soda to give the cake a soft, fluffy texture.
- Pumpkin pie spice: If you don’t have pumpkin pie spice, you can use ground cinnamon in its place.
- Sugars: This recipe uses both granulated sugar and brown sugar. They both help to sweeten the cake, but the brown sugar also provides a deeper flavor and extra moisture.
- Eggs: It’s important to use large eggs so that the batter has the right consistency. Bring the eggs to room temperature so that they blend easily with the other ingredients without over-mixing.
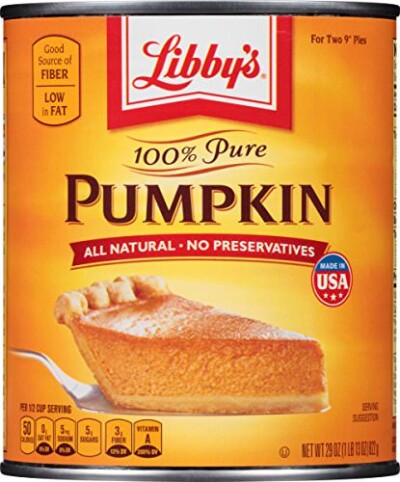
- Pumpkin puree: Double check that you get pure pumpkin puree and not pumpkin pie mix.
- Vanilla extract: You can use any brand you have on hand, but I love this vanilla extract by Nielsen-Massey.
- Powdered sugar: Sprinkling powdered sugar over the cake and tea towel will help them release more easily when it is time to unroll.
For the Cream Cheese Filling
- Unsalted butter and salt: I used unsalted butter and salt to adjust the saltiness to my preferences. Use room temperature butter to prevent a lumpy filling.
- Powdered sugar: To sweeten and thicken the filling.
- Half and half: Thins the filling to the right consistency. You can substitute milk, heavy whipping cream or even a seasonal coffee creamer if desired.
- Cream cheese: Use full-fat, brick-style cream cheese and bring it to room temperature so that it blends easily.

Equipment
To make sure your pumpkin roll turns out the first time, it’s important to have the right tools from the start. Here’s what I recommend. (Links are affiliate links and I earn a small commission from qualifying purchases.)
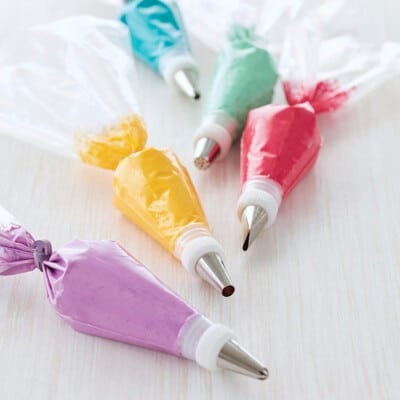
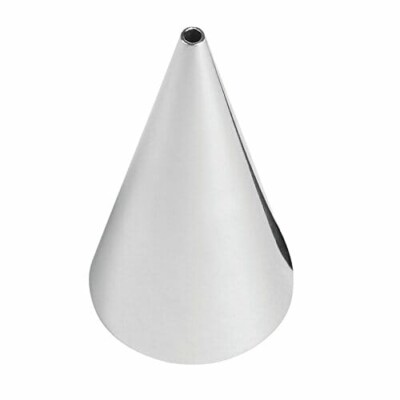
- Piping bags, couplers and tips: I like to use the washable piping bags to reduce waste. You’ll also need a small round tip, like Ateco #2, and standard couplers to pipe the pattern batter.
- Jelly roll pan: You’ll need a standard size jelly roll pan (approximately 10×15″ with a 1″ depth).
- Parchment paper: In order to pipe the pattern, you’ll need parchment paper to see and trace the design. You’ll also use a sheet of parchment paper when it’s time to remove the sheet cake from the pan.
- Baking spray: There are a couple steps in the recipe where you’ll need to cover parchment paper with cooking spray. I highly recommend using a baking spray that has flour in it.
- Stand mixer: For creamy, lump-free cake batter and filling, use a stand mixer. You can also use a hand mixer.
- Cotton tea towel: When it’s time to roll the cake, you’ll need a cotton tea towel (28×28″) to create a barrier between the cake layers and prevent sticking. It’s going to get powdered sugar and cake crumbs on it, so you don’t need anything fancy.
- Large cutting board: Getting the cake out of the cake pan can be a little tricky. I like to use a large cutting board to support the cake as I flip it out of the cake pan. You can also use a large baking sheet for the unmolding process. Just make sure the board or pan are at least the size of your jelly roll pan (10×15″).
- Plastic wrap: During the last step of the recipe, the cake roll needs to be covered with plastic wrap and chilled in the fridge.

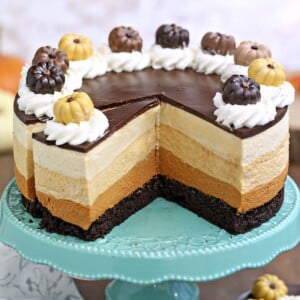
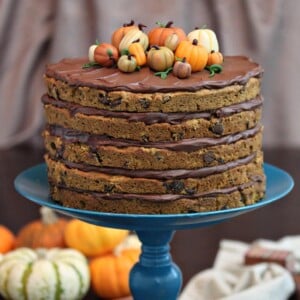
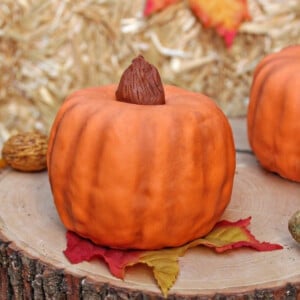
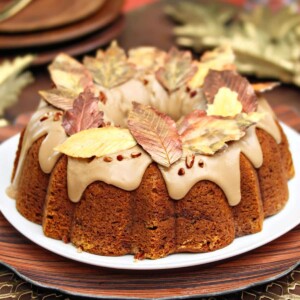
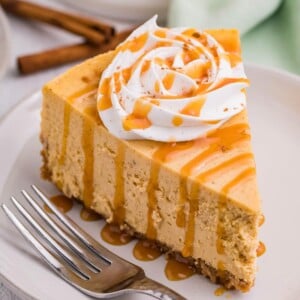
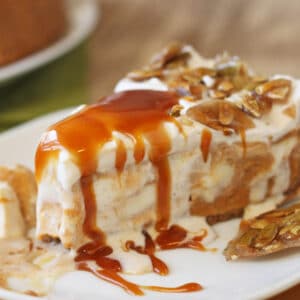
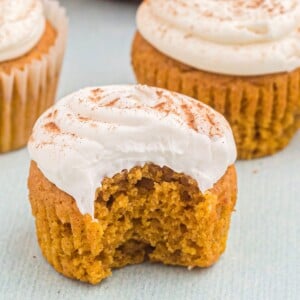
🧡 More Pumpkin Cake Recipes

Leave a Review!
If you make this recipe, let us know! Leave a ⭐️⭐️⭐️⭐️⭐️ rating on the recipe below, and leave a comment, take a photo and tag me on Instagram @elabau, or use #sugarhero on IG!
Patterned Pumpkin Roll
Ingredients
For the Pattern Batter:
- 1.5 oz unsalted butter, (3 TBSP), at room temperature
- 3 large egg whites, at room temperature
- 2 oz powdered sugar, (1/2 cup)
- 3 oz all-purpose flour, (2/3 cup)
- Assorted gel food coloring, I used Americolor Ivory, Egg Yellow, Pumpkin, Super Red, and Chocolate Brown
For the Pumpkin Cake:
- 3.3 oz all-purpose flour, (3/4 cup)
- ½ tsp baking powder
- ½ tsp baking soda
- 2 tsp pumpkin pie spice
- ½ tsp salt
- 7 oz granulated sugar, (1 cup)
- 2 TBSP brown sugar
- 3 large eggs, at room temperature
- 5.5 oz pumpkin puree, (2/3 cup)
- 1 tsp vanilla extract
- Powdered sugar
For the Cream Cheese Filling:
- 4 oz unsalted butter, at room temperature
- 6 oz powdered sugar, (1 ½ cup)
- ¼ tsp salt
- ¼ cup half and half, can substitute milk or cream
- 4 oz full-fat cream cheese, at room temperature
Instructions
To Make the Pattern Batter:
- Combine all the pattern batter ingredients in a medium bowl. Blend with a hand mixer or stand mixer until the batter is smooth. Do not keep mixing after it’s blended, or it might start to separate. The batter should have a medium consistency: thin enough to pipe easily pipe and thick enough to hold its shape and stay in place.
- Divide the batter into 4 portions. Add gel food coloring and stir until you have 4 vibrant autumn colors. I used Americolor gel food coloring to make the following colors: yellow (egg yellow + ivory), orange (orange + ivory), red (super red + ivory) and burgundy (burgundy + ivory). Place each color in a piping bag fitted with a small round tip. I used Ateco tip #2.
To Color the Pattern:
- Place your design template on a 10×15-inch jelly roll pan, and place a piece of parchment over it. (Alternately, draw or trace a design onto the back side of the parchment paper.) Spray the parchment and sides of the pan very well with nonstick cooking spray (the kind with flour in it). Then lightly wipe off the excess with a paper towel.
- Trace the pattern with your batter. You can make the pattern with solid colors, but it looks best with two-tone coloring. To make the two-tone look, outline elements of the pattern in single colors. Freeze the outlined pattern for 15-20 minutes. Now add the filler colors.
- Once your pattern is complete, freeze the pan for at least 20 minutes to set the batter (longer is okay). When fully set, remove the outline paper by sliding it out from under the parchment paper.
- While the pan is in the freezer, make the pumpkin cake batter.
To Make the Pumpkin Cake:
- Preheat the oven to 350°F (177°C). Sift together the flour, baking powder, baking soda, spice, and salt in a medium bowl, and set aside.
- Place both sugars and the room temperature eggs in the bowl of a stand mixer fitted with a paddle attachment, and beat them together for 3 minutes until thick and light yellow. Add the pumpkin and vanilla extract, and mix until combined.
- Add the flour to the mixer, and mix on low speed just until combined. Scrape down the bottom and sides of the bowl with a spatula to finish mixing the batter.
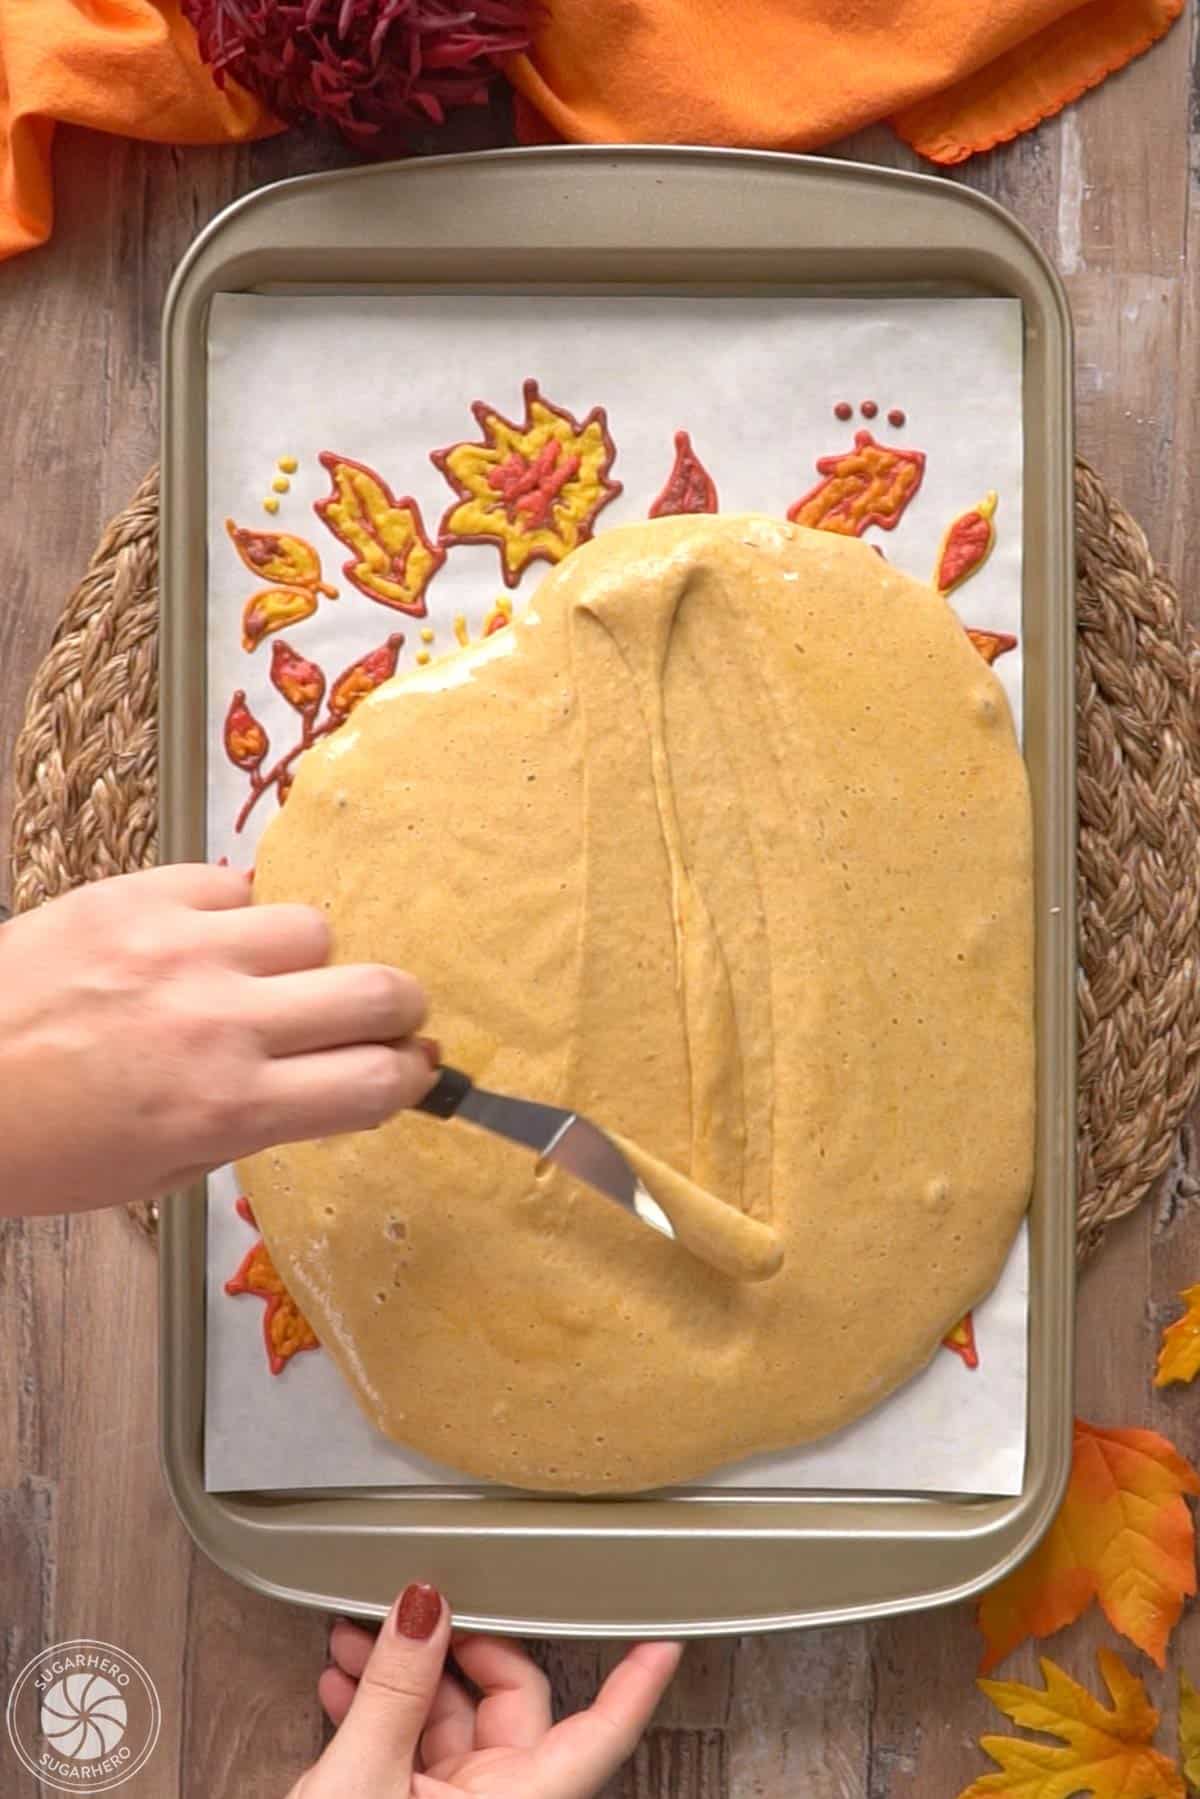
- Pour the pumpkin cake batter directly on top of the pattern you piped and chilled. Smooth it into a thin, even layer.
- Bake for 13-16 minutes, until the cake starts to slightly darken along the edges and it springs back when lightly pressed in the middle. Important: do not overbake! All ovens are different, so keep a close eye on the cake and remove it once the top springs back when pressed. Don't wait for it to take on a dark color all over.
To Roll the Hot Cake:
- While the cake bakes, prepare the tools needed for the next steps of rolling the cake. You’ll need a knife, a piece of parchment paper that has been sprayed with baking spray and a large cutting board close at hand.
- Prepare a tea towel by sprinkling both sides with a generous amount of powdered sugar, rubbing it into the fibers of the towel. It will help to prevent the cake from sticking together, so, don’t be shy with the powdered sugar.
- As soon as the cake is done baking, work quickly to remove it from the pan and begin the rolling process while the cake is still hot. (Rolling the cake while it is hot is the most important step of making a successful pumpkin roll because it encourages the cake to cool in a spiral shape. If you wait too long to begin rolling, the cake will crack.)
- Once the cake is out of the oven, immediately run a knife around the edges of the pan to gently loosen the cake. Place the greased parchment paper on top of the cake and cover it with a large cutting board. Carefully flip the cake upside-down, so the top of the cake is resting on the cutting board. Remove the jelly roll pan and set it aside.
- Peel the parchment off the bottom of the cake, revealing the design, and sprinkle it liberally with powdered sugar. Place the sugared towel on top of the design.
- Put a cutting board on top of the towel, and once again, flip the cake over—now the tea towel and patterned-side should be on the bottom.
- Remove the parchment paper and sprinkle this side of the cake liberally with powdered sugar. Place the short side of the cake directly in front of you and begin rolling it together with the towel into a spiral.
- Place the rolled cake in the refrigerator for at least one hour. The cake needs to be completely cool in order to hold its shape. If you try too unroll the cake too soon, it will crack. (You can also let the cake cool to room temperature on the counter but keep in mind it it will take much longer.)
To Make the Cream Cheese Filling:
- While the cake roll cools, combine the butter, powdered sugar, and salt in the bowl of a large stand mixer fitted with the paddle attachment. Mix them together on low speed, then gradually raise the speed to medium and beat it for 4 minutes, until the mixture is white and fluffy.
- Add the half and half to the bowl. Beat on low speed until it is incorporated. It will look chunky at this stage but will gradually come together. Slowly raise the speed to medium and beat for 1-2 minutes, until the filling looks smooth and glossy, with a stiffer texture. Set aside.
- Place the softened cream cheese in another mixing bowl and beat it with a paddle attachment until it’s smooth and free of lumps.
- Mix on low and slowly add the butter mixture into the cream cheese in 3-4 batches. Once all of the butter mixture has been added, stop mixing and finish stirring by hand. (Adding the butter mixture into the cream cheese this way gives the filling the best texture!)
- Cover with plastic wrap and chill the filling until you’re ready to assemble the cake.
To Assemble:
- When the cake is completely cool, carefully unroll it. Be gentle, since the cake might stick to the towel in some places. Some cracking on the top of the cake (the undecorated side) is normal.
- Spread the filling in an even layer across the cake, leaving a bare margin around the edge. Use the tea towel to guide the filled cake into a spiral shape, encouraging it to roll over on itself. Note: do not roll the towel into the cake during this step.
- Brush the top of the cake with a very light layer of milk or water to dissolve excess powdered sugar and fully reveal the colorful pattern. Wrap the cake in plastic wrap and refrigerate for at least 4 hours, or overnight, to firm.
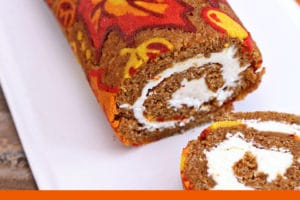
- Cut the cake in 1-inch pieces and enjoy! The cake can be stored, well-wrapped, in the refrigerator for up to a week.
Video

Recipe Notes
Measuring Tips
Our recipes are developed using weight measurements, and we highly recommend using a kitchen scale for baking whenever possible. However, if you prefer to use cups, volume measurements are provided as well. PLEASE NOTE: the adage “8 oz = 1 cup” is NOT true when speaking about weight, so don’t be concerned if the measurements don’t fit this formula.
Want to learn more about baking measurements and conversion?
Nutrition
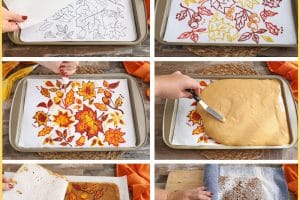
📸 Photo Tutorial: How to Make a Patterned Pumpkin Roll
Here’s an overview of how to make a Patterned Pumpkin Roll! For those who want to make pretty designs, this is where the fun begins! Otherwise, skip down to the sheet cake recipe directions. Full instructions are included in the recipe card above or you can view this web story tutorial for more help.
🍂Select a Pattern
I based my autumn leaves on a free coloring page I found online (original source here). I’ve converted it to a pdf, so if you want to make the same design, click here to download my pdf pattern. (You can also make your own design. Just choose something that doesn’t have too many fine lines or small details.)
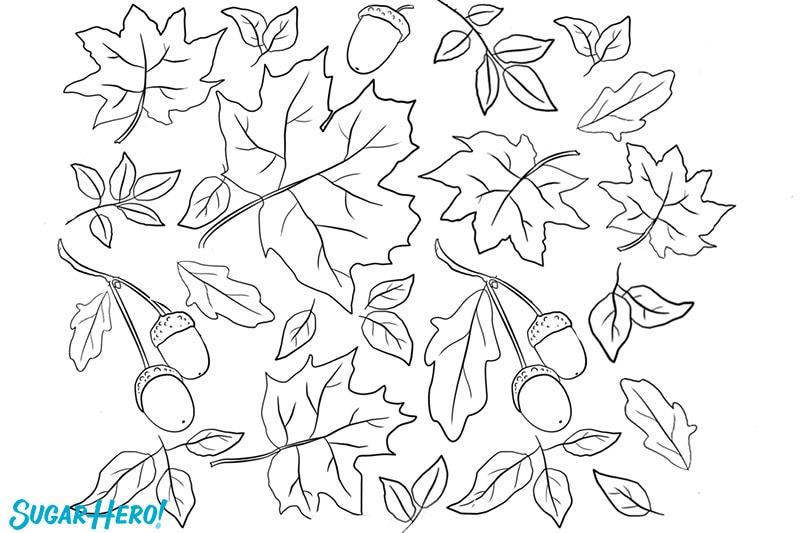
- Print pdf. You’ll notice the pdf design is divided into 2 pages, left and right. Print both pages in full size.
- Tape and trim. Tape them together in the center and trim the outside edges so it fits flush inside your jelly roll pan.
🍂Make the Pattern Batter


- Make batter. Combine 3 TBSP (1.5 oz) softened butter, 3 large egg whites (room temperature), 1/2 cup (2 oz) powdered sugar and 2/3 cup (3 oz) flour in a medium bowl. Blend just until smooth.
- Check the consistency. The batter should have a medium consistency: thin enough to easily pipe, but thick enough to hold its shape.
- Divide and color batter. Divide the batter into 4 portions. Add gel food coloring and stir until you have 4 vibrant autumn colors. I used yellow, orange, red and burgundy. I added a little ivory to each color to give it a warmer, fall tone.
🍂Color the Pattern


- Fill piping bags. Place each batter color in a piping bag fitted with a small round tip. I used Ateco #2.
- Prepare pan and template. Place your design template on a 10×15-inch jelly roll pan, and place a piece of parchment over it. Spray the parchment and sides of the pan very well with nonstick cooking spray (the kind with flour in it). Then wipe off the excess with a paper towel.
- Trace the pattern with your batter. You can make the pattern with solid colors or give it a two-tone look. To make the two-tone look, outline elements of the pattern with single colors. Freeze the outlined pattern for 15-20 minutes. Then add the filler colors.
- Set pattern and remove template. Place the fully colored pattern in the freezer to set for at least 20 minutes (longer is okay).
🍂Make the Pumpkin Sheet Cake
Whether you’re making the pattern or not, the steps to rolling and filling the pumpkin roll are the same from here on out, so let’s get rolling!


- Prepare to bake. Start the sheet cake while the pattern sets. Preheat the oven to 350°F.
- Mix dry ingredients. Sift together 3/4 cup (3.3 oz) flour, 1/2 tsp baking powder, 1/2 tsp baking soda, 2 tsp pumpkin pie spice and 1/2 tsp salt in a medium bowl. Set aside.
- Beat sugars and eggs. Place 1 cup (7 oz) granulated sugar, 2 TBSP brown sugar and 3 large eggs (room temperature) in the bowl of a stand mixer fitted with a paddle attachment. Beat for 3 minutes until thick and light yellow.
- Add pumpkin and vanilla. Add 2/3 cup (5.5 oz) pumpkin puree and 1 tsp vanilla extract, mixing until combined.
- Add dry mixture. While mixing on low, add the dry ingredients to the batter, mixing until just combined. Finish mixing the batter with a spatula by scraping down the bottom and sides of the bowl.
- Top pattern with cake batter. Slide the outline paper out from underneath the fully set pattern. Pour the pumpkin cake batter directly on top of the pattern and smooth it into a thin, even layer accross the parchment paper.
- Bake. Bake for 13-16 minutes, until the cake starts to darken along the edges and it springs back when lightly pressed in the middle. Important: do not overbake! All ovens are different, so keep a close eye on the cake and remove it once the top springs back when pressed. Don’t wait for it to take on a dark color all over.
🍂Roll the Hot Cake


- Prepare tools for next steps. While the cake bakes prepare the tools you’ll need for the next steps. Get out a knife, a piece of parchment paper (sprayed with baking spray) and a large cutting board.
- Prepare tea towel. You’ll also want prep the tea towel by sprinkling both sides with a generous amount of powdered sugar, rubbing it into the fibers of the towel. Don’t be shy with the powdered sugar–it helps prevent the cake from sticking when it gets rolled.
- Process hot cake quickly. As soon as the cake is done baking, work quickly to remove it from the pan and begin rolling while still hot. (This encourages the cake to cool in a spiral shape and helps reduce cracking.)
- Loosen and remove cake. Run a knife around the edges of the pan to gently loosen the cake. Place the greased parchment paper on top of the cake and cover it with a large cutting board. Carefully flip the cake upside-down, so the plain top of the cake is resting on the cutting board. Remove the jelly roll pan and set it aside.
- Remove parchment, sprinkle with powdered sugar. Peel the parchment off the bottom of the cake, revealing the design, and sprinkle it liberally with powdered sugar.


- Flip cake. Place the sugared towel on top of the design and a cutting board on top of the towel. Once again, flip the cake over—now the tea towel and patterned-side should be on the bottom. Remove the parchment paper


- Prepare to roll cake. Sprinkle the cake liberally with powdered sugar.
- Roll cake. Now, here’s the really crazy part: the cake is rolled up along with the towel! Place the short side of the cake directly in front of you and roll the cake and tea towel together into a spiral.
- Chill. Place the rolled cake in the refrigerator for at least an hour (or until completely cool) to set and hold its shape.
🍂Make the Cream Cheese Filling
- Start filling. While the cake roll cools, combine 1/2 cup (4 oz) softened unsalted butter , 1 1/2 cups (6 oz) powdered sugar, and 1/4 tsp salt in the bowl of a large stand mixer. Combine at low speed, then gradually raise the speed to medium and beat for 4 minutes, until white and fluffy.
- Add liquid. Add 1/4 cup half and half to the bowl and beat on low speed until the liquid is incorporated. It will look chunky at this stage but will gradually come together. Slowly raise the speed to medium and beat for 1-2 minutes, until the filling looks smooth and glossy, with a stiffer texture. Set aside.
- Beat cream cheese. Place the softened cream cheese in another mixing bowl and beat it with a paddle attachment until it’s smooth and lump-free.
- Add butter mixture. Mix on low while adding the butter mixture into the cream cheese in 3-4 batches. Once all of the butter mixture has been added, stop mixing and finish stirring by hand.
- Chill. Cover with plastic wrap and chill the filling until you’re ready to assemble the cake.
🍂Assemble the Pumpkin Roll


- Unroll cake. When the cake is completely cool, carefully unroll it. Gently remove the tea towel from anywhere it’s stuck to the cake. Some cracking on the top of the cake (the undecorated side) is normal.
- Layer filling. Spread the filling in an even layer across the cake, leaving just a small bare margin around the edge.


- Reroll cake. Use the tea towel to guide the filled cake into a spiral, encouraging it to roll over on itself.


- Remove excess powdered sugar. Place the cake roll on a piece of plastic wrap. Brush the top of the cake with a very light layer of milk or water to dissolve excess powdered sugar and fully reveal the colorful pattern.
- Set. Wrap the plastic wrap around the cake and refrigerate for at least 4 hours, or overnight, to firm.
- Serve. Use a sharp cake knife to cut the cake in 1-inch pieces and enjoy!

💡 Tips and FAQs
Want to learn how to make Patterned Pumpkin Roll like a pro? Avoid common mistakes with these tips for success!
I tried a few color variations of this pattern, including just outlining the shapes, a mix of outlined shapes and filled shapes, and completely filled shapes.
The best design by far was when I outlined each shape and then filled it in completely with a contrasting color. You can experiment for yourself, but for my design, coloring in the leaves was the way to go!
You can make a very delicious pumpkin roll without the pattern! It’s completely optional. The design is gorgeous, but it also adds extra time, so feel free to skip and go straight to the cake recipe if you’d like.
One of the most frustrating things about making a cake roll is the possibility that the cake might crack.
This can be due to SO many different factors. Overbaking is probably the most common reason. It is important to keep a close eye on the cake and make sure you remove it once the top springs back when lightly touched. The baking times are general guides, but your particular oven and pan used will greatly impact the outcome, so start testing it at the 12-13 minute mark, and stay close! Also, use an oven thermometer to make sure your oven doesn’t cook hot.
Other possible factors for cracking:
– Underbaking
– Handling the cake too roughly
– Not working quickly enough so that the cake has started to cool
– Mis-measuring ingredients
– Using a pan that’s the wrong size
– Bad kitchen karma…the list goes on.
Honestly, sometimes you can do everything right and you’ll still get a few cracks. It’s just a fact of baking life. And it’s fine – it will still taste great!
While the cake is baking, read the instructions very carefully and have everything prepped and ready to go as soon as the cake is out of the oven. This will go a long way towards preventing cracks.
With normal pumpkin cakes, my answer is almost always “just cover it with some whipped cream!” Unfortunately, that’s not as easy to do when you’ve created an intricate autumn leaf pattern on your cake!
So no, it’s not entirely possible to cover a patterned pumpkin cake that has cracked. If the cracks are towards the end, maybe slice off a few pieces and serve them on the side as if you meant to do it. If they’re in the center of the cake, serve your cake with a smile, remember that you’re amazing, and do as Julia Child said and never apologize for your cooking!
It might seem unusual to mix the cream cheese seperately from the butter mixture and then blend them together slowly, but it’s the secret to making the best tasting cream cheese filling. By adding the butter mixture into the cream cheese this way the filling develops the smoothest, most creamiest texture!
There are two ways to prepare this pumpkin roll cake recipe in advance:
Simply follow the first couple of steps in making the cake until you have rolled it for the first time. Leave it rolled and wrapped in plastic wrap and store it in the fridge. You can also prep the cream cheese frosting and store it in an airtight container until you are ready to put the whole cake together.
The second option is to follow the entire step by step process and make the pumpkin cake (just don’t slice it yet!). You can follow the steps below on how to store and save this pumpkin roll cake until you are ready to serve.
To properly store your pumpkin roll cake, wrap it tightly in several layers of plastic wrap. Then, store it in the refrigerator for up to 5 days, or the freezer for 2-3 weeks.
If frozen, keep it well-wrapped and let it defrost in the refrigerator overnight before serving.

Browse More:


soooo pretty!!
Thank you so much Becca!!
Hi Elizabeth, I love this design on the pumpkin roll so very pretty. I have a question, I know this may sound dumb but I have never sized a printed pattern before so how would I get the design as big a 10X15 sheet of paper? This would be great for Thanksgiving or any fall dessert. I suppose you could probably use this template for cookies also?
Thank you, Debbie! It’s not a dumb question at all! I actually taped two pieces of regular (8.5×11) paper together, then trimmed it to fit the pan. The other thing you could do is print out the coloring page I linked to (or another design of your choice!) and place it under the parchment, and trace the designs onto the parchment with a dark pen or marker. As long as you then flip the parchment so the ink doesn’t come into contact with the food, you’ll be good! The dark ink should show through the parchment enough for you to trace it with the pattern batter.
I hope this helps! Let me know if you have any questions.
I love this idea – any suggestions on how we could use it for Christmas? Also – I have a cornucopia shaped cake pan and a sand castle shaped cake pan – any ideas on how to use/decorate these? I’ve only done pound cakes in them and they are sort of plain. Thanks for all your amazing ideas!
Thank you Pat! The basic pattern batter and process is the same, but unless you want pumpkin cake for Christmas, unfortunately you’ll need to use a different cake recipe. BUT I’m actually planning a Christmas variation using a white chiffon cake and a holly berry pattern! 😀 So look for that next month.
Those shaped cake pans are tough–I know exactly the type you mean. People usually end up doing a simple glaze over them because they’re difficult to decorate. I think the sand castle one would be fun and easy to do a glaze and then press crushed graham crackers over it so it looks sandy, then decorate with chocolate (or fondant) sea shells and other ocean things. I’m not as sure about the cornucopia! I’ll have to think on that a bit. 🙂
Gorgeous!!! Can it be done a day ahead? Or it will be to dry?
You can definitely make it a day ahead–in fact, I recommend it! Because it should chill for at least 4 hours once assembled (to get really clean cuts) it’s easiest to make this a day or two before you’ll serve it. The pumpkin keeps the cake moist, and as long as you wrap it well in plastic wrap it should be fine! I do like to let it sit out for 20 minutes before serving just so it doesn’t have that straight-from-the-fridge taste and texture though!
Thank you! I can’t find a 10×15 pan. Can we use a different size?
Yes, I would recommend going a bit larger rather than smaller, and just watch the baking time! Please let me know how it goes if you give it a try!
How long can you leave the design in the freezer for? I would like to make the design ahead of time if I can. Thank you.
Hey Pam, I have had mine in the freezer for up to 24 hours so I can say for certain that amount of time wouldn’t be a problem. I am not sure of longer than that seeing as I haven’t had to do that for myself. My guess is it would be fine but again, I can’t say from experience. I am so excited for you to make this! I would love to hear how it goes!
I made it last year (not as pretty as yours)and am going to try it again. Can I make the piping batter and the filling batter a day or two before?
I’ve found when making any kind of a cake roll that trimming off the crispy edges prior to rolling the hot cake in a tea towel helps to prevent cracking. I use a pizza cutter to trim as close to the edge as possible.
This is such a great tip–thanks Sherri! 😀
Oh my goodness! This is so cute! Excellent work!
Hey Heather, Thank you so much! I really appreciate that!
I bet this could work great with regular round cakes as well! One of those with several layers of plain cake, and the frosting peeking out between layers… then a pretty design in the top layer!
Hey Susan, that’s a great idea! Thanks for following along!
Hi! This is so beautiful! Just what I was looking for- a different and decorated spin on the pumpkin roll. I’m going to try to make it today, fingers crossed!
A quick question- can I make the pattern today and freeze overnight? Will this mess things up? Can I simply pour the batter tomorrow and re-spray the pattern in non-stick spray after taking it out of the freezer tomorrow?
Sorry for all the questions! I appreciate your time and SO admire your work.You inspire me!
Happy Thanksgiving!
Thank you, Serena! You can DEFINITELY make it a day in advance! Freezing it overnight is no problem, and I wouldn’t even worry about re-spraying the next day. Please let me know how it turns out, and don’t hesitate to reach out with any questions!
This cake was such a hit at Thanksgiving! I am no professional, but with a little time I think anyone could make this. Mine cracked a bit, but it ended up still looking (and tasting) good. I didn’t do the pattern over the whole 10×15 surface because I figured only part of the pattern would be on top.
Hey Shira, That is amazing! Thank you so much for sharing! I love it, I am so happy it worked out. Thanks for following along!
I want to make this so bad. Where do I get a template from?
Hey Patt, There is actually a link in the post of the template used. I will include it here http://www.supercoloring.com/coloring-pages/autumn-leaves-and-acorns I would love to hear how it goes when you give it a try!