This Brown Sugar Cranberry Cake is the perfect ending to any holiday dinner! It features a moist brown sugar spice cake, brown sugar Swiss meringue buttercream, and a tangy filling made from fresh cranberries. Who needs pie when you can have a cake like this?

I am always the designated dessert maker at holiday gatherings. I’d say it’s an occupational hazard, but I actually enjoy it, so…maybe it’s an occupational benefit? I love making special desserts for my friends and family to enjoy.
But. The dirty truth about holiday desserts is that they can get a little boring. It’s always pumpkin pie this and apple pie that. Which is fine. They’re classics for a reason, after all. But one can only make so many pies before wanting to throw out the pie tins and go crazy with some cake pans…so that’s exactly what I’m going to do this year!

This Brown Sugar Cranberry Cake is going to have a special spot on my Thanksgiving dessert table. It’s inspired by the traditional flavors of Thanksgiving, but with a modern twist.

The foundation of this cake is a moist, flavorful brown sugar spice cake. I used dark brown sugar to give it a deep, rich taste with a subtle molasses flavor. Using brown sugar already imparts some cozy holiday vibes, but things get even cozier with the addition of lots of warm winter spices.
I hate it when spice cakes are basically white cakes with a tiny pinch of cinnamon added, so I like to go big and use aaaaalllll the spices–cinnamon, yes, but also cardamom, nutmeg, allspice, and ginger. You can adjust the specific spices of the quantities to suit your taste, but please remember the main motto around here: “More is more.”

The cake is filled with two layers of homemade cranberry compote, which might sound fancy but could not be easier to make. Can you combine cranberries, juice, and sugar in a pan, and then stir occasionally? Then you can make this filling! It’s tangy but sweet, soft but slightly chunky, and a great contrast to the sweetness of the brown sugar cake.

The thing I’m MOST excited about, however, is the brown sugar frosting that ties everything together! It’s actually a Swiss meringue buttercream, meaning it’s made with egg whites, so the texture is wonderfully light and smooth. It’s not heavy or ultra-sugary, like some frosting recipes can be.
Traditional Swiss meringue buttercream (SMBC) is made with granulated sugar, and is basically a blank slate for adding lots of different flavoring extracts, because it doesn’t have much flavor on its own. This Brown Sugar SMBC, however, is made with dark brown sugar, and just swapping out granulated for brown sugar makes a HUGE difference in the flavor.

The frosting has a deep, rich caramel flavor, with no caramel sauce added! The flavor is noticeable but not too overpowering, meaning this can be a good all-purpose frosting for many cakes–I’m imagining it on carrot cakes, pound cakes, sweet potato or pumpkin cakes, graham crackers, my fingers… oops, got a little carried away there.
My point is, I have a new favorite holiday frosting recipe, and if you try it, I think it’ll be your new favorite as well.

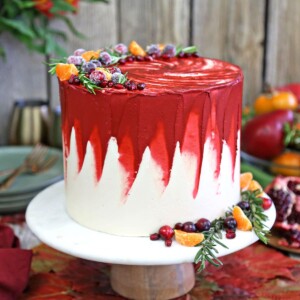
Finally, the cake was finished with some edible goodies: fresh clementine slices, pomegranate arils, sugared cranberries, and rosemary sprigs. (I don’t recommend actually eating the rosemary, but you do you). Feel free to add whatever seasonal treats you’d like. I think persimmons and figs would also be gorgeous additions! Or, accent your fresh goodies with decorative Chocolate Leaves or Chocolate Feathers!

A few other things you should know about this recipe:
- The frosting looks fairly white in pictures, but in real life it’s a lovely ivory/light beige color thanks to the brown sugar. Just a head’s up to any cake decorators who need to know about these things!
- I achieved the deep red color with gel food coloring. I love Americolor brand and used mostly burgundy with a touch of red and navy blue.
- I adore tall cakes — I just think everything looks better as a skyscraper! So I used 8″ cake pans for this recipe, and the final cake was probably close to 8 or 9″ tall. If you want your cake slices to be shorter (i.e., more manageable to eat, i.e. boooooring), you can use 9″ or even 10″ pans instead. Just monitor the cooking time because shallower layers will cook faster!

❤️ MORE CRANBERRY RECIPES YOU’LL LOVE:
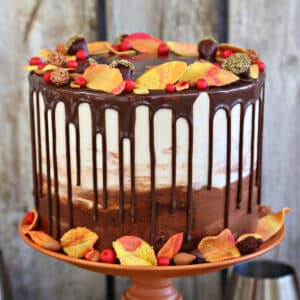
Festive Fall Layer Cake
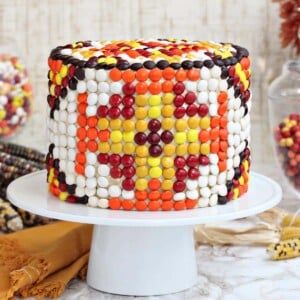
Patterned M&M’s Cake
Brown Sugar Cranberry Cake
Ingredients
For the Brown Sugar Cake:
- 16 oz cake flour, (4 cups)
- 7 oz granulated sugar, (1 cup)
- 7.5 oz dark brown sugar, (1 cup)
- 1 tsp baking soda
- 1 tsp baking powder
- 1 tsp salt
- 2 tsp ground cinnamon
- 1 tsp ground nutmeg
- 1 tsp ground cardamom
- ½ tsp ground ginger
- ½ tsp ground allspice
- 9 large egg yolks
- 11 oz sour cream, (1 1/3 cups), at room temperature
- 1 TBSP vanilla extract
- 12 oz unsalted butter, at room temperature
For the Brown Sugar Buttercream:
- 9 large egg whites
- 16 oz dark brown sugar, (2 cups + 2 TBSP)
- 24 oz unsalted butter, softened but still cool
- ½ tsp salt
- 2 tsp vanilla extract
- Assorted gel food coloring, I used Americolor brand burgundy, red, and navy blue
For the Cranberry Filling:
- 12 oz fresh cranberries, (about 3.5 cups)
- ¼ cup orange juice , or water
- 7 oz granulated sugar, (1 cup)
To Decorate:
- Fresh rosemary
- Fresh clementines
- Fresh pomegranate arils
- Fresh cranberries
Instructions
To Make the Brown Sugar Cake:
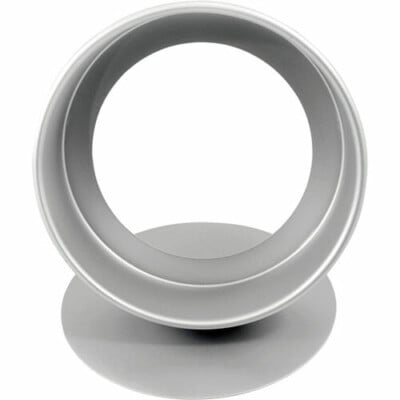
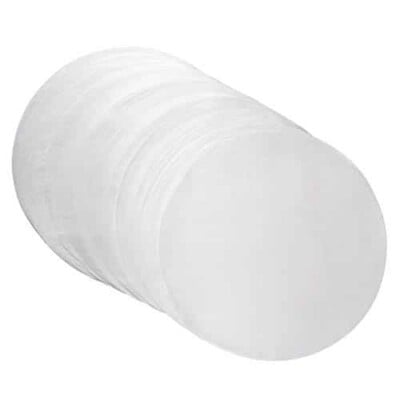
- Preheat the oven to 350 F. Line four 8-inch cake pans with parchment rounds, and spray the parchment and pan sides with nonstick cooking spray.
- Combine the cake flour, both sugars, baking soda, baking powder, salt, and all spices in the bowl of a stand mixer fitted with a paddle attachment. Mix on low speed for 1-2 minutes to combine the dry ingredients.
- Lightly whisk together the egg yolks, 1/3 cup of sour cream, and the vanilla extract, and set aside for now.
- Add the remaining 1 cup of sour cream and the softened butter to the large mixing bowl and mix on low speed until the dry ingredients are moistened. Turn the mixer to medium speed and mix for a minute and a half.
- Add the egg yolk mixture in three batches, mixing for 20-30 seconds after each addition, until you have a smooth batter. Scrape the bottom and sides of the bowl with a rubber spatula, and give the batter a few more stirs to make sure everything is incorporated. Divide the batter between the four prepared pans. If you’re using a kitchen scale, each pan should get about 13 oz of batter.
- Bake the cakes at 350 F for about 30 minutes, until the sides just start pulling away from the pan, and a toothpick inserted into the center comes out clean.
- Let the cakes cool on a wire rack for 10 minutes, then gently turn them out and let them cool completely before using. I find it’s easiest to work with cakes that have been chilled, so if you have time, wrap them with plastic wrap and put them in the freezer for at least 30 minutes, until they are firm but not frozen all the way through. If you are making these in advance, they can stay in the freezer for up to several weeks. Let them partially defrost before assembling.
To Make the Brown Sugar Buttercream:
- Combine the egg whites and the brown sugar in the bowl of a large stand mixer, and whisk them together. Choose a small saucepan that lets you fit the base of the stand mixer snugly into the top of the saucepan, add a few inches of water to the saucepan, and bring the water to a simmer over medium heat.
- Place the mixing bowl on top of the saucepan of simmering water, making sure that the bottom isn’t in contact with the water, and heat the egg white mixture. Whisk frequently so that the egg whites don’t cook. Continue to heat the whites until they are hot to the touch, and when you rub a bit between your fingers, you don’t feel any grittiness from the sugar. Once the whites are hot, transfer the mixing bowl to your mixer and fit it with a whisk attachment.
- Beat the whites on medium-high speed until they are a shiny, stiff, voluminous meringue, and are no longer warm to the touch—feel the outside of the bowl, and make sure that it is around room temperature. Depending on your mixer and the temperature of your environment, this may take up to 15-20 minutes.
- Switch to a paddle attachment, and reduce the speed of the mixer to medium-low. Add the softened but cool butter in small chunks, a tablespoon at a time, making sure to wait in between additions. It may separate or look a little gloopy at this point—this is normal! Once all of the butter is added, increase the speed again and whip until it comes together and is light and fluffy. If, after 5 minutes, it hasn’t come together, refrigerate the mixing bowl for 5-7 minutes, to cool the mixture down, and whip it again until it has thickened and is smooth and silky. Add the vanilla extract and salt.
- The buttercream can be made in advance and kept at room temperature if you’re going to use it the same day, or refrigerated. If it has been chilled, let it sit at room temperature until completely soft, then re-whip it to get the smooth texture back before you use it.
- To Make the Cranberry Filling:
- Combine all of the ingredients in a medium saucepan over medium heat. Cook the mixture, stirring frequently, until the cranberries pop and the mixture thickens. Once most of the cranberries have popped, remove the pan from the heat and let it cool completely before using.
- The cranberry filling can be made up to a week in advance and stored in an airtight container in the refrigerator until ready to use.
To Assemble:
- Place the cake rounds on 8-inch cardboard cake circles.
- Fit a piping bag with a coupler or a large round tip, and fill it with buttercream. Place one layer on a cake turntable. Pipe a circle of frosting around the outside edge of the cake layer. Spoon half of the cranberry filling inside the frosting circle, and spread it out to the edges until it meets the frosting. The frosting acts like a barrier to prevent the cranberry from seeping through the edges of the cake.
- Top the cake round with a second cake layer. This time, spread a layer of frosting about ½-inch thick over the top of the cake, and smooth it into an even layer.
- Top the cake with a third cake layer, and repeat the frosting circle/cranberry layer on top of this one. Finally, add a fourth cake layer on top. Cover the top and sides of the cake with a very thin layer of frosting—this is the crumb coat, which locks crumbs into the frosting and also provides some stability to the cake.
- Refrigerate the cake for 45-60 minutes, until the crumb coat is set and the cake feels firm and stable. If the buttercream has started to get spongy, re-whip it briefly until it is smooth and silky. Spread a thicker layer of frosting on the top and sides of the cake. Use a metal offset spatula or bench scraper to smooth out the frosting. Refrigerate it for about 10-15 minutes—it doesn’t need to be fully firm, but let the outside of the frosting set a bit.
- While the cake is chilling, color the remaining frosting a deep cranberry color. I used mostly burgundy food coloring, with a bit of red and navy blue added to get my desired shade.
- Use a metal spatula to spread the cranberry colored frosting along the top edge of the cake—make the layer about 1-inch tall and fairly thick, almost ¼-inch or so. Wipe off the spatula, then hold the end of the spatula against the top of the cake and drag it downwards, spreading the red frosting down in a streaking line. Repeat around the entire cake, wiping off the spatula when necessary. For the top, place the spatula at the edge of the cake, and drag it towards the center in a curved motion. Repeat all around the edge of the cake.
- Decorate the top of the cake with segments of fresh rosemary, clementine sections, pomegranate arils, and fresh cranberries. (Since I find the taste of raw cranberries to be too strong on a cake, I like to use sugar-coated cranberries instead. To make these, just roll cranberries in egg whites, then in granulated sugar. The sugar will dry to be a crackling coating on the berries, which helps temper the sour flavor.)
- This cake is best served at room temperature, and can be kept, well-wrapped, at room temperature for 2-3 days or in the refrigerator for 5-6 days.
Recipe Notes
Measuring Tips
Our recipes are developed using weight measurements, and we highly recommend using a kitchen scale for baking whenever possible. However, if you prefer to use cups, volume measurements are provided as well. PLEASE NOTE: the adage “8 oz = 1 cup” is NOT true when speaking about weight, so don’t be concerned if the measurements don’t fit this formula.
Want to learn more about baking measurements and conversion?
Nutrition


I would love to make this for Thanksgiving this year. It’s a beautiful cake and sounds delicious! Plus, you’re right about all the never-ending pies! My problem is I live an hour away from where my family lives (and where I bring all my desserts). Assuming I make it as it says and not remove a layer or two, do you have any ideas on how I could transport this? I have cake holders but none of them would accommodate a 9″ tall cake. I might be able to assemble it at my family’s house, but I’d prefer to make an entrance with this one!
And if I did decide to assemble it on site, could I have everything prepped/made and waiting to assemble? Would the individual components travel well by themselves?
Hi Brooke! Travelling with tall layer cakes is always a little tricky. There are actually products made just for this that are really amazing, but if you’re a hobby baker as opposed to a pro it’s probably not worth the money investment (but see CakeSafe.com if you want some ideas!) If the trip is an hour and your car will be a reasonable temperature, I would be inclined to assemble it in advance and travel with it, mostly because assembling it on-site will be a pain. (I always like to do a crumb coat, chill for an hour, then do final decorating, so to do these steps at someone else’s house for Thanksgiving and fight for fridge room/time sounds complicated.)
A few ideas for ensuring successful travel: put a tall dowel through all the layers of the cake (remove before serving, obviously.) Keep the cake in the fridge until you’re ready to leave, because a chilled cake will hold together better and with a multi-layered cake, the inside of the cake will stay cold for hours. Securely attach the cake to a thick cake board, set it on the car floor (not a seat!) and put nonskid shelf liner underneath so the cake board doesn’t move at all. Also, be sure that you’re not blasting hot air from the heater down on the cake while driving! (My husband made that mistake…ONCE.) Finally, be sure to bring an emergency repair kit (some extra icing and a little spatula) so you can try and fix anything that might accidentally happen en route.
Honestly an hour in the car’s not that long as long as it’s not super hot in the car, and I think it’s infinitely easier than stressing about assembly before the meal…but if you decide to go the other way, you definitely can bring the components and assemble there, they’ll travel fine!
I’m from New Zealand where cranberries are rare (I’ve never even seen one!!) Is there another fruit I could substitute them with in this recipe?
if Im not planning on making a large cake (not as large as yours) I can just cut the buttercream recipe in half, right?
Making this right now and watching the video at the same time. 🙂 All of my cake layers sank in the middle and they are very short. I’m in Utah as well so altitude should be the same. Any ideas? Thank you!
This cake was delicious!! I did not get my icing to the deep red though. It was very deep pink but still it was a pretty presentation.
Hello Margaret! I’m so glad you enjoyed this recipe. I’m sure the deep pink color was very beautiful. If you try making a deep red color of frosting again, I’d recommend using gel food coloring. I really like the Americolor brand and usually buy it from Amazon. Here are some links to the colors that would be helpful for making a deeper shade: burgundy, red, and navy blue. I would use mostly burgundy and then a touch of red and navy till you get the shade you like. Hope that helps! Merry Christmas!