
This sweet two-tiered Bumblebee Cake is perfect for birthday parties! It’s a vibrant lemon layer cake with a sweet-tart lemon meringue buttercream.

I made this sweet little bumblebee cake for a friend’s daughter’s birthday last week. I don’t do too many special occasion cakes any more, so it’s always fun to dust off the old fondant rolling pin and get down to business.
The party was bee themed, and I took my design inspiration from the super-cute invitations. [Below, with personal information removed.] The cake itself was a lemon cake with lemon buttercream. I used fondant to cover the cake and make the decorations. Scale can sometimes be hard to tell from pictures, but the bottom tier is 10”, the top is 6”, and the beehive topper is about 3”.

With simple designs like these, I honestly think half the work is coloring the fondant. (How is it possible that such an easy thing always takes so long?) Three different yellows, an orange, two greens, a gray, and pretty soon hours have passed and I’m just getting started. As soon as I figure out how to trick a culinary school student into interning for me for free, I am going to make them do all my fondant coloring.

The giant recipe is below, just in case you too want to make a big ole layered lemon bee cake, but here are a few quick close-ups of the layers.
The bottom tier was simply flowers and leaves. I used a variety of fondant cutters—some that were flower-shaped, and some that were repurposed, like the yellow and orange acorns below, or the “tulip” you can see above that is actually a half-moon. One thing I’ve learned from reading different cookie decorating blogs is to be creative with cookie (and fondant) cutters—no one will know what it was originally intended for, so think outside the box and play with different shapes!
The flowers & leaves were randomly painted and outlined with food coloring, and the green dotted tendrils were done with food coloring markers. Those markers are a lazy girl’s best friend.

The bees were even easier than the flowers. I cut them out with oval cutters, pulled them slightly to make them longer, and painted them with thick stripes of black food coloring. The dotted trails between them were done with food markers as well. (Food coloring and a brush would also work, it would just take longer.)

Finally, the beehive on top is pure fondant. I debated making a marshmallow crispy treat to cover with fondant, but that seemed like an awful lot of work for something that would probably be tossed, so I just kneaded together a bunch of yellow-orange fondant, patted it into a rough cone shape, and used a veining tool to press indentations around the cone. (An orange peeler or even a toothpick/skewer would also work.) Finished off with a light layer of gold luster dust, and boom. The beehive is done, and this bee cake is ready to party.
Equipment You’ll need
- 10″ cardboard cake rounds
- 6″ cardboard cake rounds
- Dowels—I like to use boba tea straws
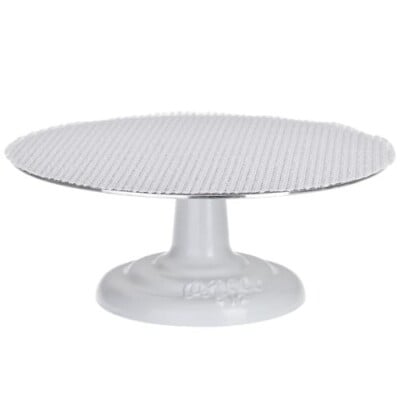
- Cake turntable—optional but makes decorating easier
- Bench scraper
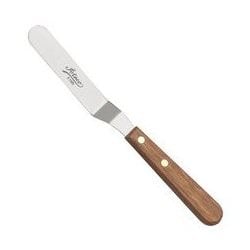
- Offset spatula
How To Assemble Fondant Cakes
If this is your first time making a tiered cake, I highly recommend watching video tutorials of how to cover a cake with fondant and assemble it, instead of simply reading a recipe. It’s a visual process, and you will learn more by watching someone else do it than by reading these instructions. I’ve included assembly instructions for the sake of completeness, but beginners should absolutely watch tutorials before attempting to assemble the cake.

🍋More Lemon Desserts You’ll Love
- Lemon Madeleines
- Lavender Lemon Bars
- Strawberry Lemonade Ice Cream Pie
- Lemon Mousse Cakes in White Chocolate Shells
- Lemon Sour Cherry Ice Cream
- Lemon Coconut Snowball Cake
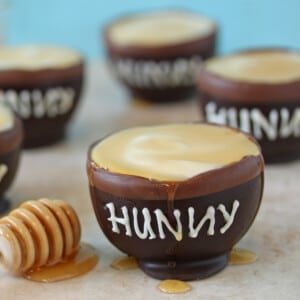
Chocolate Hunny Pots
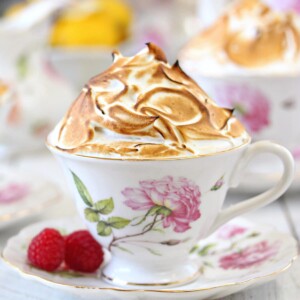
Lemon Meringue Teacup Cakes
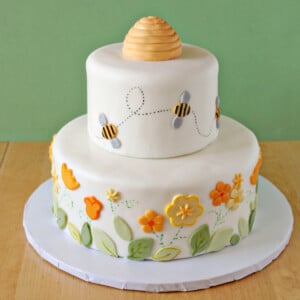
Bumbleblee Cake
Ingredients
Lemon Layer 6"
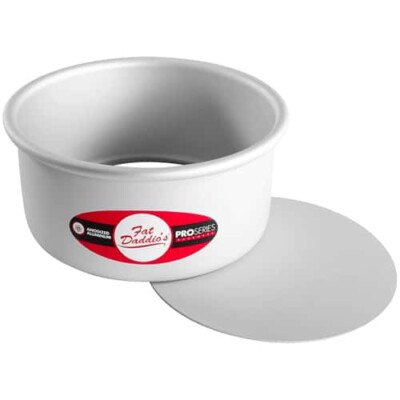
(two 6" cake pans)
- 1 TBSP lemon zest, (from approximately 1 large lemon)
- 7 oz granulated sugar
- 7 oz cake flour, sifted
- 1 TBSP baking powder
- 1/2 tsp salt
- 4 oz unsalted butter , cubed and at room temperature
- 2/3 cup whole milk, at room temperature
- 4 large egg yolks
- 2 tsp vanilla extract
- 1 tsp lemon extract
Lemon Layer 10"
(two 10" cake pans)
- 2 TBSP lemon zest, (from approximately 2 large lemons)
- 17.5 oz granulated sugar
- 17.5 oz cake flour, sifted
- 6 2/3 tsp baking powder
- 1 1/4 tsp salt
- 10 oz unsalted butter, cubed and at room temperature
- 1 2/3 cup whole milk, at room temperature
- 10 large egg yolks
- 4 tsp vanilla extract
- 1 TBSP lemon extract
Lemon Italian Meringue Buttercream
(You will need to make this recipe twice)
- 8 large egg whites, at room temperature
- 21 oz granulated sugar, (3 cups)
- 1/3 cup water
- 1/3 cup fresh lemon juice
- 1/4 tsp cream of tartar
- 1 lb unsalted butter, soft to the touch but still cool
- 1-2 tsp lemon extract
- Pinch of salt
To Decorate
- 3 lbs fondant
- Assorted gel food coloring, I use Americolor gel food coloring: Orange, Lemon Yellow, Leaf Green, Avocado, Super Black.
Instructions
To Make the Cake Layers:
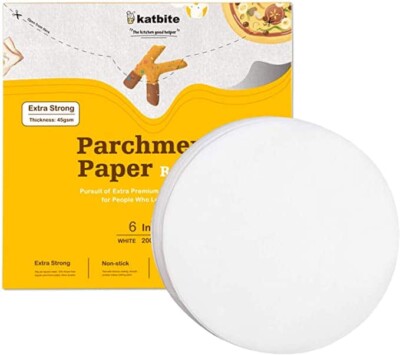
- Preheat the oven to 350 F. Line each cake pan with parchment rounds, and spray the parchment and pan sides with nonstick cooking spray.
- Begin by making the 6” batch. Combine the lemon zest and sugar in the bowl of a large stand mixer, and rub them together between your fingers until the sugar is moist and very fragrant. Add the cake flour, baking powder, and salt to the bowl of the stand mixer, and fit the mixer with a paddle attachment. Mix on low speed for about a minute.
- Lightly whisk together the egg yolks and about a quarter of the milk (it doesn’t have to be a precise measurement) and both extracts, and set aside for now.
- Add the remaining milk and the softened butter to the large mixing bowl and mix on low speed until the dry ingredients are moistened. Turn the mixer to medium speed and mix for a minute and a half.
- Add the egg yolk mixture in three batches, mixing for 20-30 seconds after each addition, until you have a smooth batter. Scrape the bottom and sides of the bowl with a rubber spatula, and give the batter a few quick turns to make sure everything is incorporated. Divide the batter between the two pans and bake at 350 F for 25-30 minutes, until the top is golden, the sides just start pulling away from the pan, and a toothpick inserted into the center comes out clean.
- Repeat this process with the 10” batch, baking the 10” layers at 350 F for 35-40 minutes. Let the cakes cool on a wire rack for 10 minutes, then gently turn them out and let them cool completely. I find it’s easiest to cut and stack cakes that have been chilled, so if you have time, wrap them with plastic wrap and put them in the freezer for at least 30 minutes, until they are firm but not frozen all the way through. If you are making these in advance, they can stay in the freezer for up to several weeks. Let them partially defrost, until they are firm but not rock-hard, before assembling.
To Make the Lemon Italian Meringue Buttercream:
- Place the room temperature egg whites in the *very clean* bowl of a large stand mixer fitted with the whisk attachment. Place the water, lemon juice, and sugar in a medium saucepan over medium-high heat and stir until the sugar dissolves. Insert a candy thermometer and cook until it reaches 245 degrees F.
- While you are waiting for the sugar syrup to reach the proper temperature, begin beating the egg whites. (I usually start beating them when the temperature is around 225 degrees.) Turn the mixer to medium speed and beat until the whites look foamy. Stop the mixer briefly and add the cream of tartar. Turn the mixer back on and begin to beat on medium-high speed until the whites are stiff but not crumbly. You can turn the mixer off if the egg whites are finished before the syrup is ready.
- When the whites are stiff and the sugar syrup is 245 degrees, turn the mixer back on to medium-high and pour the syrup into a cup or pitcher with a spout. Slowly and carefully pour the hot syrup down the sides of the bowl into the egg whites while the mixer is running. The whites will rise in volume. After all of the syrup is added, let the mixer run on medium speed until the sides of the bowl feels barely warm, which may take anywhere from 10-20 minutes.
- Once the egg white mixture has cooled, gradually add the softened butter bit by bit until it is all incorporated. Scrape down the sides of the bowl with a spatula. The egg white mixture will deflate and might look soupy. If it looks soupy or broken, continue to beat the mixer on low or medium speed until it comes back together. (This is why it’s important to use butter that’s soft but cool: butter that is too warm will just liquefy and make soupy buttercream.) If it resists coming together, refrigerate the bowl briefly, for about 10 minutes, then continue beating until it smooths out.
- Once the frosting has come together, add the salt and lemon extract to taste. The buttercream can be made in advance and kept at room temperature if you’re going to use it the same day, or refrigerated. If it’s been chilled, let it sit at room temperature until it softens, then re-whip it to get the fluffy texture back before you use it.
To Assemble the Cake:
- Assemble the 10” tier first. Using a large serrated knife, cut each cake layer in half. Place one layer face-up on a cake cardboard.
- Scoop about 1 cup of buttercream into the center, and spread it in an even layer until it covers the cake and reaches the outer edge. Top the cake round with a second round, and repeat the process of spreading frosting on the layers, until you have a 4-layer cake with 3 layers of buttercream. Spread buttercream along the sides and top of the cake in a very, very thin layer—this is just to hold the crumbs in. Refrigerate the layer while you assemble the 6” cake in the same fashion. Refrigerate all the layers until they’re firm, at least 45 minutes.
- Once firm, go back and add another layer of buttercream on the outside of the cakes, this time trying to get it even and smooth. The smoother the buttercream is, the smoother the fondant coating will be. I like to use a bench scraper to go around the sides and get them very straight and clean. To do this, hold the bench scraper in your dominant hand, straight against the sides of the cake. With your other hand turn the cake turntable so the scraper removes any excess frosting from the sides. Use an offset spatula to smooth the frosting on the top of the cake. Once all of the cakes are frosted, refrigerate them again until they’re very firm, at least 1 hour or more for the larger cakes.
- To cover the cakes with fondant, I used these approximate amounts: 10” cake: about 2 1/4 lbs fondant 6” cake: about 1 lb fondant
- Dust your work surface with powdered sugar, and roll out the fondant until it is a round a little less than 1/4-inch thick. Drape it over the cake and smooth it evenly against the top and sides—if you are unfamiliar with covering a cake with fondant, there are many excellent video tutorials to demonstrate this step. Trim the excess fondant from the bottom, and refrigerate the cakes until you’re ready to decorate and stack them. To refrigerate them, wrap them in plastic wrap to prevent them from getting sticky in the refrigerator.
- Use excess fondant to make decorations of your choice. Glue them on with glue made from tylose powder (preferred) or corn syrup. Make a small fondant beehive as a topper.
- To stack the rounds, insert a boba tea straw (or other type of dowel) into the center of the 10” cake. Hold scissors flush against the top of the cake, and cut off the top of the straw so that it is now even with the height of the cake. Add four more straws in a circle around the straw in the center, each about 2” from the center (so that they don’t extend past a 6” radius) and cut those straws so that their height is the same as the cake. These straws will be used to support the 6” cake. Smear a generous amount of buttercream in the center of the 10” cake, and put the 6” cake on top, so it’s secured by the buttercream and resting on the dowels. There should be no gap between the cakes.
- Smear some buttercream on the 6” cake to secure the beehive, and place it on top. If you’d like, finish your cake by piping buttercream or tying ribbon around the bottom of the cakes to make them look polished.
Recipe Notes
Measuring Tips
Our recipes are developed using weight measurements, and we highly recommend using a kitchen scale for baking whenever possible. However, if you prefer to use cups, volume measurements are provided as well. PLEASE NOTE: the adage “8 oz = 1 cup” is NOT true when speaking about weight, so don’t be concerned if the measurements don’t fit this formula.
Want to learn more about baking measurements and conversion?


Ooooh, I love it!! I have just made my first fondant cakes, with some guidance from your recipes (and YouTube – seriously, is there anything you can’t learn from YouTube?), and I think I’m hooked! Thanks for the inspiration!!
Yay, that is awesome! I would love to see some pics of your creations sometime, either by email or shared on the facebook page–so exciting!
And I agree about youtube. That’s why I sometimes cop out with my cake assembly directions, because it’s easier to just watch a 20-second video than to read 5 paragraphs explaining how to cover a cake with fondant. Some things just need to be explained visually!
Really?? I would be honoured to send you some pics, although it is perhaps a little like Picasso asking my four year-old to see her paintings!! (ahem, gushing fan here!)
I made the above cake for my dad’s birthday yesterday, just the 10″ layer, but I decorated it with a springtime theme (as it is spring in our hemisphere. Not very manly, but I had some leftover fondant decorations from the last project), but including a few bees! It was very well received, so thank you!
I did wonder whether it could be possible to use fresh lemon juice as some of the liquid (maybe the milk would need to be swapped for yoghurt then?) in the cake so that the lemon extract can be omitted? And similarly in the buttercream, could all lemon juice be used to make the syrup? (Maybe it’s an Aussie thing, but I’ve only ever used lemon juice and zest to flavour cakes before, and I prefer it to the taste of the extract. I just don’t want to ruin 10 egg yolks worth of cake/8 whites of buttercream if you think it will flop!!)
Of course I’d love to see them! elizabeth @ sugarhero.com, or posting them on the wall of the facebook page works too. 🙂 That birthday cake for your dad sounds super cute–so glad he liked it!
I totally understand about preferring fresh lemon juice to an extract. To me, they add different dimensions–the lemon juice is super tart and fresh, but a little one-note, and the extract is a bit more artificial on its own, but somehow rounds out the lemon juice a bit. (Just explaining why I often call for both–personal preference!) You can definitely omit the extract if you don’t like it.
For the buttercream, you probably don’t want to use ALL lemon juice, but you could increase the amount and decrease the water by the same amount if you wanted more of a lemon flavor. For the cake, I wouldn’t try substituting lemon juice for the milk–I imagine it would mess with the leavening to have such an acidic addition. I would instead look for a cake recipe that already included lemon juice, so you know it’s formulated to handle the acid. You could also just increase the lemon zest. In addition to that, you could brush the cut layers with a lemon simple syrup (made by boiling lemon juice, water, and sugar together until the sugar dissolves.) This keeps the layers moist, helps the cake stay fresh longer, and also adds lemon flavor to the cake. (PS this works with other flavors too–you can add different extracts or liqueurs to simple syrup and change a basic vanilla cake into a lot of different variations.) Aaaaanyhow, longest comment ever, but I hope this helps! Feel free to give me a holler anytime you have a question.
Thank you!!! I added extra lemon zest and only 1 tsp of extract to the cake, but lemon syrup will be perfect! I am about to send you cake pictures, too 🙂
Dayum. You have got the skillz to pay the billz. Amazing!
Dang, if only I COULD pay my bills with cake! That would be amazing.
What a beautiful cake!! I love your special occasion cakes. I just went to a baby shower that was bee themed and this would have been perfect.
I have seen so many cute bee decorations lately! I think it’s getting trendy…watch out, hipster mustaches! I approve, though, because I love how it can go either sweet and vintage (like these invites) or bold and graphic, with the honeycomb pattern and black and yellow color scheme. I’m into it!
This look incredibly pretty! I wish my cakes turned out this beautiful! I love it so so much, it’s really lovely 😉
Thanks so much, Consuelo! It’s definitely been a process and I have a lot of “practice” cakes to show for it. 🙂
Thanks again, Elizabeth! The cutest cake in the history of two-year-old parties. It was ridiculously delicious too!
Only ’cause I had great source material to work with! Take THAT, all you other Pinterest parties!
How adorable!
What a cute cake! Your friend’s daughter is very lucky.
Thanks Natasha! She’s a great friend of the family and it was a pleasure–it’s always so fun to share talents with friends!
Beautiful (or should I say beeutiful) cake. Whenever I see a beautiful cake I think it’s always such a shame to cut it. I know that it’s cake and it’s meant to be eaten, but sometimes cakes are more like artwork.
Haha, I had to work very hard not to put too many bee-related puns in the post! I tried so hard it gave me hives. (zing!) And I totally agree–it is hard to cut up my creations! I’m so glad that people enjoy eating them, but it’s bittersweet to see those hours of work get destroyed so quickly. 🙂
Oh my gosh, adorable!
Also, seriously, I bet you could score interns by just making taste-testing part of the gig. Of course, that means you’d have to share…
I would be SO HAPPY to pay people in cookies or something! But apparently folks can’t pay their rent with cookies, so it’s not a very appealing offer. Hmph.
This cake is SUPER adorable!! Sending a link to
my sis – she’s a bumble bee lover!
Thanks Sara! Watch out–you might end up making her a bumblebee cake for her birthday. 🙂