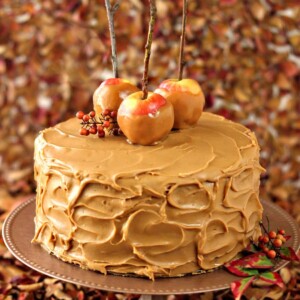
This Caramel Apple Cake with Salted Caramel Buttercream ended up light and fluffy, made with oil instead of butter, applesauce, caramel sauce, and a good handful of chopped apples…this cake is just that good!

Believe it or not, this indulgent cake got its start in the healthiest of places—the produce section of the market.
There I was, walking along, minding my own business, buying cauliflower like the responsible adult I pretend to be, when I saw the cutest miniature Gala apples, about 2 1/2 inches across. Obviously there are many things they could be used for—stuffing the mouths of teensy pigs for roasting? Afternoon snacks for forest elves and other tiny creatures? Being bobbed for by small-mouthed toddlers at holiday parties? All good options, obviously.

But when I saw them, I immediately had a vision of them dipped in caramel, sitting proudly atop a caramel apple cake. I snatched them up, gave them a long, lingering look, and like a character in a soap opera, declared with steely resolve, “Oh, yes. You will be mine.”

Dipping them in caramel was a cinch, because I took the easy way out and used store-bought caramels. They can sometimes be hard to find throughout the year, but my local Target always carries the Kraft caramels around the holidays. They’re no match for homemade, but since I envisioned the apples as an edible garnish—instead of the main event—I was happy to take a shortcut.

All you have to do is unwrap the caramels, add a spoonful or two of water or cream, then microwave them until melted. My secret for getting good-looking apples is to shape them after they’re dipped. The caramel has a tendency to pool around the bottom and it looks sloppy, so once it’s partially set, I wet my hands and mold it back around the apple until it’s smooth and even. This method will be featured in my next book, The Obsessive’s Guide to Tweaking Details That Ultimately Don’t Matter. On shelves soon!

The cake, now, that was a labor of love. I actually made two versions. The first was a fairly dense cake, with apple butter and shredded apples, and was covered in a caramel cream cheese frosting. I thought the idea of the frosting was delicious, but it was a hot mess in reality. It had a terribly runny texture and no caramel taste—it was mostly slightly salty cream cheese. Paired with the heavy cake, it was heartbreakingly gross, and definitely not worthy of my cute mini apples. Into the trash it went.

Take #2 was much better. This time, the cake was light and fluffy, made with oil instead of butter, applesauce, caramel sauce, and a good handful of chopped apples. I would eat this cake on its own dusted with powdered sugar, it was that good.

But why eat it on its own when it could be slathered with salted caramel buttercream? I discovered this recipe a few months ago when I was working on some sandwich cookies. Those never made it past the experimental stage, but I couldn’t get the thought of the buttercream out of my head. This is one of those thick, fudgy, almost candy-like frostings that’s so good, you’ll want to roll it into balls and dunk it in chocolate. It’s very sweet, but the caramel flavor and the hit of salt keep it from being too cloying.

I know we’re all ready to hop aboard the Holiday Baking Express, but it is still technically November. So if you have it in you to enjoy one last autumn dessert, make it this one. You still have a whole month to bust out the gingerbread and peppermint. Viva la apples!

💗More Tasty Dessert Recipes
- Salted Caramel Chocolate Mousse Hearts
- Mile High Apple Pie
- Caramel Cheesecake-Topped Brownies
- Apple Cranberry Gouda Puff Pastry Roses
- Salted Caramel Milk
- Easy Vanilla Ice Cream (No-churn recipe!)
- Salted Honey Walnut Bars
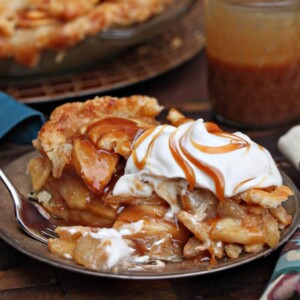
Salted Caramel Apple Pear Pie
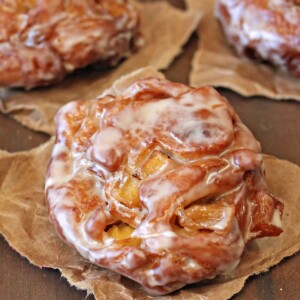
Apple Cider Fritters
Caramel Apple Cake with Salted Caramel Buttercream
Ingredients
For the cake:
- 3 3/4 cups all-purpose flour
- 1 tbsp baking powder
- 1 1/2 tsp baking soda
- 2 tsp ground cinnamon
- 1/2 tsp salt
- 1 1/2 cups brown sugar, packed
- 3/4 cup vegetable oil, or canola oil
- 3/4 cup unsweetened applesauce, not chunky
- 3/4 cup jarred caramel dessert sauce, I used Trader Joe’s Fleur de Sel Caramel Sauce
- 1 tbsp vanilla extract
- 3 large eggs, at room temperature
- 1 1/2 cups buttermilk, at room temperature
- 1 apple, peeled, cored, and finely diced
For the salted caramel frosting:
- 3 cups granulated sugar
- 1 1/2 cups buttermilk
- 18 oz unsalted butter, divided use
- 1 tsp baking soda
- 3/4 tsp salt
- 3 cups powdered sugar
- 1 tsp vanilla extract
For the caramel apple decoration:
- 3-4 mini apples, mine were about 2 1/2 inches in diameter, smaller is okay
- 7 oz soft caramels
- 1 1/2 tsp heavy cream, or water
- Lollipop sticks, wooden skewers, or wooden popsicle sticks
Instructions
To make the cake:
- Preheat the oven to 350 degrees Fahrenheit. Line two 9-inch cake pans with parchment paper, and spray the pans and paper well with nonstick cooking spray. (Note: these cake layers bake up high, so it’s best to use cake pans that are at least 2 inches high.)
- In a bowl, combine the flour, baking powder, baking soda, cinnamon, and salt, and whisk them together. Set aside.
- In the bowl of a large stand mixer,combine the brown sugar and oil, and whisk them together on medium speed until well-combined. Add the applesauce, caramel sauce, and vanilla extract, then mix well again. Add the eggs one at a time, beating well after each addition.
- Finally, with the mixer running on low, add a third of the dry ingredients. Once that’s mostly mixed in, add half of the buttermilk, then half of the remaining drys, then the rest of the buttermilk, and finally the rest of the drys. Stop the mixer when there are just a few streaks of flour remaining. Fold in the rest of the dry ingredients with a spatula, scraping the bottom and sides of the mixing bowl well. Add the diced apples and fold them in as well.
- Divide the batter evenly between the two cake pans. Bake the cakes at 350 degrees for about 40 minutes, until the top springs back lightly when pressed and a toothpick inserted into the center comes out clean. Let the cakes cool at room temperature, then when they’re barely warm to the touch, invert them from the pans and let them cool completely. Wrap them well with plastic wrap and place them in the freezer for 30 minutes to firm up before cutting them and assembling the cake—otherwise, the somewhat heavy frosting will tear the light and fluffy crumb of the cake.
- Once the cakes are firm (they do not need to be completely frozen), remove them from the freezer. Use a very long, sharp serrated knife to cut them in half through the middle, so that you have four cake rounds. If the tops are very domed, trim off the tops to make them even as well.
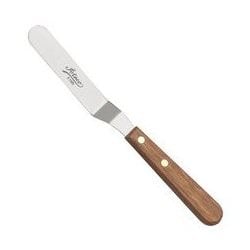
- Place one cake round on a cardboard circle the same size as the cake. Spoon about 3/4 cup of frosting in the center of the cake, and use an offset spatula to spread it out to the edges of the cake. Top the frosting with another cake round, and repeat this process, until you have stacked all 4 cake rounds on top of each other. Place a generous spoonful of frosting on top of the cake, and use the spatula to spread it to the edge of the top in random, artful swirls.
- Now get a good scoop of frosting on the edge of the spatula, and spread it on the sides of the cake, repeating until the sides are covered. While this frosting can be smoothed out with a hot spatula, I think it looks great with some rustic swirls from the spatula. Top the cake with a few small caramel-covered apples.
To make the salted caramel frosting:
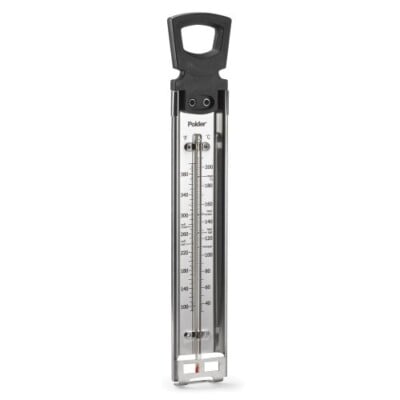
- Combine the granulated sugar, buttermilk, 12 ounces of butter, and baking soda in a large pot. It will bubble up a lot, so use a 6-quart pot. If you don’t know the size of your pots, make sure that the mixture has room to expand to at least 3 times its size. Place the pan over medium-high heat, and stir until the butter melts and sugar dissolves. Bring the mixture a boil, and insert a candy thermometer.
- Continue to cook the mixture, stirring occasionally, until it reaches 240 degrees Fahrenheit (115 C). It will get dark brown and fragrant. Once at 240, remove the pan from the heat and pour the hot mixture into the bowl of a large stand mixer fitted with a whisk attachment. Whip the mixture on medium speed until the caramel has slightly cooled and thickened, about 6 minutes. It might start to look a little grainy; that’s okay.
- Add the remaining 6 ounces of butter, the salt, and the vanilla extract, and mix well. Add the powdered sugar in 1/2-cup increments, mixing on well after each addition. Once all the ingredients are added, whip on medium-high speed for about 10 seconds, until it’s light and fluffy. Use immediately.
To make the caramel apples:
- Wash the apples, and dry them extremely well. Twist out the stem, and insert the lollipop sticks or wooden skewers in the top of each apple. Line a baking sheet with foil and spray the foil well with nonstick cooking spray.
- Unwrap the caramels, and place them in a medium microwave-safe bowl, along with the cream or water. Microwave the caramels in 30-second increments, stirring after every 30 seconds, until it’s completely melted and smooth. Holding an apple by the stick, dip it until it is mostly submerged in the caramel. If necessary, use a spoon to spoon some caramel over the sides of the apple. Let the excess caramel drip back down in the bowl, and use the spoon to scrape the bottom of the apple to get excess caramel off. Place the apple on the baking sheet and repeat until the rest of the apples are dipped.
- If the caramel pools at the bottom of the apple a bit, and you want to tidy it, wait until it’s barely warm, then wet your hands, and shape it around the apple, smoothing it with wet hands until it’s round and neat. Store caramel apples in the refrigerator.
Recipe Notes
Measuring Tips
Our recipes are developed using weight measurements, and we highly recommend using a kitchen scale for baking whenever possible. However, if you prefer to use cups, volume measurements are provided as well. PLEASE NOTE: the adage “8 oz = 1 cup” is NOT true when speaking about weight, so don’t be concerned if the measurements don’t fit this formula.
Want to learn more about baking measurements and conversion?
Nutrition


I’m planning on making this next weekend. If I made the cake and frosted it on Friday and put it in the freezer would it taste ok on Saturday? Or should I just put it in the fridge overnight? Would appreciate any make ahead tips. Also could I make the cake part on Thursday and frost it on Friday?
You can definitely make the cake on Thursday and frost it on Friday, however I would not recommend freezing the cake when frosted. I would say refrigeration is the way to go.
I wondered that too about the butter. I am goinf to go with what the recipe steps actually do so 18oz. If it doesnt work then i will know it was 1lb2oz lol
I’m sorry for the confusion. I think I wrote it in a confusing way, but the correct amount is 18oz of butter!
I’ve just made your cake and it at least smells delicious. I made it, but I would really appreciate a picture of the colour of the frosting mixture before you whip it. I don’t own a candy thermometer and I had to pray for the right temperature. But the recipe is great! Thank you. I hope, it’ll make the honoree happy.
Thanks Jana! I hope the cake and frosting turned out. 🙂 This recipe is from 6 years ago, and I wasn’t in the habit at taking progress pictures then…but it’s definitely something I should re-shoot at some point, because you’re right–it would be extremely helpful.
My 12 year old granddaughter made this cake yesterday. The caramel frosting between the layers melted into the cake, while in the fridge over night. Any Ideas what could have caused this? Also her frosting was very hard to spread, got hard on the outside, but melted out of the inside.
If Its too hard to spread it may be because it was overcooked, I would suggest cooking for less time. In the post I mention that as a feature of this recipe it does tend to melt into the cake overtime. If this is something you want to avoid then I would recommend using buttercream if you have to keep it for longer. Thanks so much!
I love this recipe. The cake is moist and delicious and the frosting is awesome. My family loved it. I will make it again.
Hey Elena, that is so good to hear!!! I’m glad you all loved it. I appreciate you letting me know!
This cake is amazing!!!! It has become the highlight of Christmas desserts in our home. Make this cake!
Hey Christina, I am so happy to hear that! Thanks so much for letting me know!
My mom made this cake for my birthday years ago and it was THE best cake I’d ever had, I’ve spent all day hunting for this recipe so I can have it again, I’m so glad I found it!!!
Hi Rachel, I am thrilled to hear it! I am glad you found it too, thank you so much for your feedback! I would love to hear how it goes if you try it again!!
The flavor is great but my frosting turned out more like play dough. I read the recipe multiple times & triple checked my ingredients. I don’t know what I did wrong.
Hi Mindy, I am sorry to hear the consistency of the frosting didn’t turn out. I’d be happy to help troubleshoot what may have happened if you’d like to email more details to elizabeth@sugarhero.com.
First let me say, I am happy to find your site. I have been using your recipes from Spruce Eats for some time and know they are recipes that can be counted upon to work. I have a question regarding the frosting. I donate birthday cakes to my local PD. I have an apple spice cake on the horizon. It is a 3 layer 9 inch cake. Is this enough frosting to cover a cake that size? I look forward to exploring your many recipes. Em.
Hi Em! What a wonderful service you provide to your local PD. Sounds like your apple cake will be delicious. The Salted Caramel Frosting recipe easily covers two 9″ cakes. Since you will be frosting three, I’d recommend making a batch and a half of the recipe so that you have enough to cover the 3rd layer. If you want to play it extra safe, you could double the recipe and freeze any left over frosting for another project in the future. All the best!
This recipe sounds AMAZING! Would this translate well into cupcakes or is the cake too delicate for peeling away a cupcake liner?
Hi. I’ve never tried making them as cupcakes, but I don’t see why it wouldn’t work. I’d love to know what you think if you give it a try. Happy Baking!