
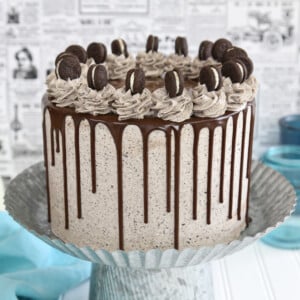
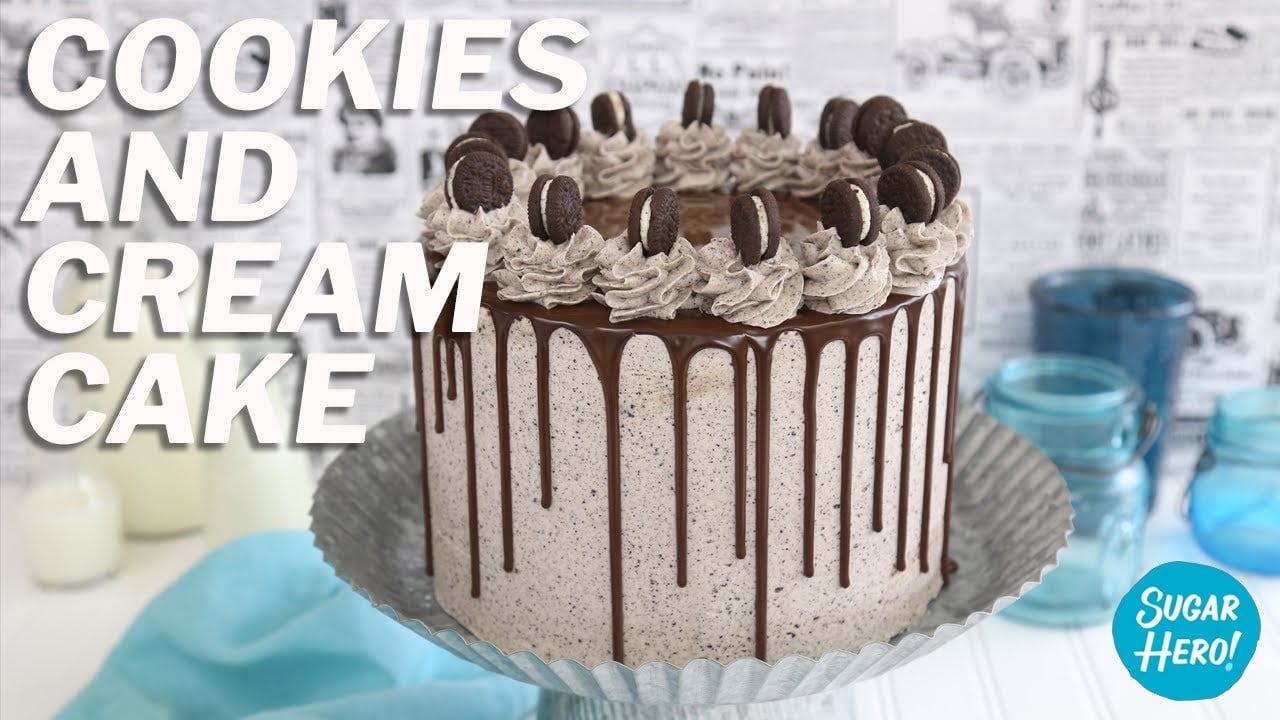
Why choose between cookies and cake when you can enjoy both together?! This Cookies and Cream Cake has ultra-moist layers of devil’s food cake and buttercream with lots of crushed cookies mixed right in. It’s finished with a drippy chocolate ganache and adorable mini Oreos. This is a MUST for all chocolate cake lovers!

Calling all chocoholics, cakeoholics, cookieholics…okay, I’m basically calling EVERYBODY to the kitchen, because I think everyone will dig this epic Cookie and Cream Cake!
It features…drumroll please…four layers of soft, dense devil’s food cake, three layers of buttercream mixed with chopped Oreo cookies, and an outer coating of frosting with real cookie crumbs mixed right in. THEN it’s finished with a shiny chocolate glaze, tall frosting rosettes, and the cutest lil mini Oreos ever. If that doesn’t bring everyone to the kitchen, I don’t know what will!
If you find yourself with extra Oreos after making this cake, put them to good use in Oreo Milkshakes, Oreo Fudge, Dirt Pudding Cups, or Mini Oreo Icebox Cakes!

The Secret Ingredient for Making This Cookies and Cream Cake
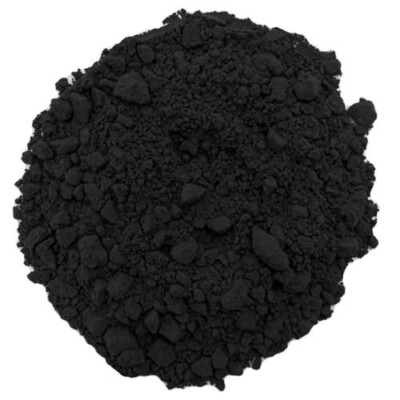
One thing I really wanted to do with the cake portion of this recipe was mimic the actual flavor of an Oreo cookie. Oreos are known for their super dark, almost black color, which is typically achieved by using black cocoa powder. Black cocoa undergoes a special processing that removes a lot of the acidity, giving the cocoa an extremely dark color and very intense chocolate taste. It also tends to be lower in fat than other cocoa powders, and if it’s used by itself in recipes, can produce dry baked goods. So I rarely use it all on its own–instead, I like to substitute black cocoa powder for a portion of the cocoa a recipe calls for, usually a third to a half of the recommended cocoa.
This is the black cocoa powder I use and recommend. It’s reasonably priced, especially considering you’ll only use it for a portion of the cocoa needed in any given recipe, and can last for several years if stored properly. If you don’t have black cocoa powder, you can just use an equal amount of the regular cocoa powder, no harm, no foul! Nothing else about the recipe needs to be changed, although you might notice your cake rounds are not quite as dark as mine turned out.

You’ll also want to stock up on Oreos (I recommend the family pack size, because it’s basically impossible to cook with Oreos without munching on some, am I right?) and the cute lil mini Oreos for decorating. You could also just decorate with regular Oreos cut in half, if you hate fun and whimsy in your life. Your choice!

How Do I Make Cookies and Cream Cake Frosting?
For the frosting, I made my usual favorite Easiest Swiss Meringue Buttercream, and after it was finished, I stirred in a few cups of very fine Oreo cookie crumbs. I had my doubts during the process (it went from a beautiful white with black specks to a dismal concrete gray and I got worried) but I think the end result really works! Not only does it taste great, but the spotted light gray appearance really does look like “cookies and cream.” If you’re new to making my cheater’s Swiss Meringue, I definitely recommend reading the post because it covers a lot of frequently asked questions!
For the frosting between the cake layers, I also added a healthy handful of chopped-up Oreo cookies. I loved the texture they added, but they did make cutting beautifully clean and neat slices kind of difficult! Just be prepared to have a few stray Oreo chunks embed themselves in your cake layers as you slice. Trust me when I tell you it’s a small price to pay for cookies and cream bliss.

How Do I Make Perfect Ganache Drips?
Whenever I post a dripping ganache cake, I get a lot of troubleshooting questions about how to get “good” drips. So here’s my advice about getting picture-perfect drippy cakes:
- Know your ingredients. You can make ganache drips with either candy melts (like Wilton or Merckens brand) or real chocolate. I never recommend using real white chocolate (it always turns out translucent) and always recommend candy melts if you’re looking to make white or any type of colored drips. For chocolate drips, I do like using real chocolate just because I think the flavor is better, but chocolate candy melts also work just fine. But be aware that candy melts and chocolate require VERY different cream ratios! Candy melts call for very little cream to be added–just a few tablespoons for 4-6 ounces of candy melts will get you gorgeous drips. Real chocolate, on the other hand, requires much more cream, up to double the amount of chocolate depending on the brand. So if you’re following a recipe but swapping out ingredients, keep this in mind and be flexible with your cream amount.
- Texture is everything! After you’ve whisked the chocolate and cream together, it should be fairly thin and fluid. If you lift a spoonful and let it drop back into the bowl, the chocolate should blend back into the bowl within about 1 second. If it is thick or gloopy, you will have drips that do not flow well down the sides of the cake, and a cake top that is not shiny and seamless. Don’t be afraid to whisk in a touch more cream if it seems too thick. Different brands of cream and chocolate have different fat percentages, which means there is not one perfect recipe for everyone. Just play with it until it moves the way you want it to!
- Temperature is everything too. The cake should be well chilled–I usually leave it in the fridge until I’m ready to glaze it, so that it’s nice and cold. The ganache should be warm and fluid, although preferably not piping hot. Cold cake + warm ganache = a cake that doesn’t melt, and ganache that starts to set up soon so some of those drips are suspended halfway down the cake. Thumbs up!
- A few good tools go a long way. You CAN do drips with a spoon, but I like using a squeeze decorating bottle! It makes it a lot faster and less frustrating. A turntable is also a huge help!
- You can fix mistakes! If your drips are a complete disaster, never fear! Chill the cake, then carefully peel off the ganache layer and fix any frosting imperfections. You’ll have to make another batch of ganache to try the drip again, but it’s really not a bad fix, and hey, practice makes perfect!

I hope you try this and love it–and as always, I want to see pictures if you give it a try! Enjoy!
🖤 More Delish Oreo Desserts
- Oreo Fudge
- Oreo Milkshakes
- Oreo Peppermint Ice Cream Bonbons
- Mini Oreo Icebox Cakes
- Gourmet Homemade Oreos
- Oreo Brookies
Rocky Road Layer Cake
Mint Chocolate Chip Layer Cake
Leave a Review!
If you make this recipe, let us know! Leave a ⭐️⭐️⭐️⭐️⭐️ rating on the recipe below, and leave a comment, take a photo and tag me on Instagram @elabau, or use #sugarhero on IG!
Cookies and Cream Cake
Ingredients
For the Devil’s Food Cake:
- 12 oz all-purpose flour, (2 2/3 cup)
- 2.25 oz black cocoa powder, (3/4 cup), can substitute regular unsweetened cocoa powder (dutch-processed cocoa) if desired
- 2.25 oz unsweetened cocoa powder, (3/4 cup), also known as dutch-processed cocoa
- 1 3/4 tsp baking powder
- 3/4 tsp baking soda
- 1 1/2 tsp salt
- 24.50 oz granulated sugar, (3 1/2 cups)
- 1 1/4 cups coffee, at room temperature, can substitute water
- 1 1/4 cups buttermilk, at room temperature
- 3/4 cup vegetable oil
- 2 large eggs, at room temperature
- 2 large egg yolks, at room temperature
- 1 tbsp vanilla extract
For the Cookies and Cream Frosting:
- 6 fl oz pasteurized liquid egg whites, (3/4 cup, see Note below)
- 24 oz powdered sugar, (6 cups)
- 1/2 tsp salt
- 24 oz unsalted butter, at room temperature (6 sticks)
- 2 TBSP vanilla extract
- 20 Oreo cookies, (8 oz cookies)
To Assemble and Decorate:
- 20 Oreo cookies, (8 oz cookies)
- 4 oz dark chocolate, finely chopped
- 6-8 fl oz heavy cream
- Mini Oreo cookies , for decorating
Instructions
To Make the Devil’s Food Cake:
- Preheat the oven to 325 F. Line four 8×2-inch round baking pans with parchment paper, and spray the paper with nonstick cooking spray.
- In a large bowl, sift together the flour, both cocoa powders, the baking powder, baking soda, and salt.
- In the bowl of a large stand mixer, combine the sugar, coffee or water, buttermilk, oil, eggs, yolks, and vanilla. Beat with a paddle attachment on low speed until well-mixed.
- Stop the mixer and add the dry ingredients to the mixing bowl. Beat on low speed until the flour is moistened. Raise the speed to medium and beat for about 4 minutes, scraping the sides of the bowl occasionally, until the batter is smooth. It will be very thin.
- Divide the batter evenly between the four pans. If you have a kitchen scale handy, each pan should get about 18 oz of batter.
- Bake the cakes at 325 F for 40-45 minutes, until a toothpick inserted into the center comes out with just a few moist crumbs attached. Cool the cakes in the pans, then turn them out onto a wire rack. Once cool, wrap them in plastic wrap and place them in the freezer until semi-firm—these cakes are much easier to work with when they’re partially frozen. The cakes can be made in advance and kept in the freezer for several weeks. When you are ready to assemble the cake, allow the rounds to partially defrost before assembly.
To Make the Cookies and Cream Frosting:
- Combine the whites, powdered sugar, and salt in the bowl of a large stand mixer fitted with a paddle attachment. Mix everything together on low speed, until the sugar is moistened and no dry patches remain. Turn off the mixer, scrape down the sides and bottom of the bowl with a spatula, then turn the mixer to medium speed. Beat on medium for 5 minutes.
- After 5 minutes, turn the mixer to medium-low and start adding the softened room temperature butter, 1-2 tablespoons at a time. Once all of the butter is incorporated, add the vanilla extract and mix it in. Stop the mixer and scrape down the bottom and sides once more. Turn the speed to medium and beat the buttercream for 10 minutes. At the end, you’ll have a frosting with a wonderfully light and creamy texture.
- Place 20 Oreos in a food processor and process until they’re very fine crumbs. Add the crumbs to the frosting, and stir them together with a spatula until well-mixed.
To Assemble and Decorate:
- Chop the remaining 20 Oreos with a knife until they’re in coarse crumbs and small pieces.
- Place the cake rounds on 8-inch cardboard cake circles. Place one layer on a cake turntable.
- Place a big dollop of frosting on the cake layer—about 3/4 generous cup—and use a metal spatula to spread the frosting into a layer going all the way out to the edges of the cake.
- Sprinkle a third of the chopped cookies on top of the frosting, leaving a margin around the edge, and press gently to embed them. Add a little more frosting—about ¼ cup—on top of the cookies, and spread it out on top.
- Top the cake round with a second cake layer, and repeat the frosting and cookie process again. Do it with a third layer, and finally, add the last cake layer. Cover the top and sides of the cake with a very thin layer of frosting—this is the crumb coat, which locks crumbs into the frosting and also provides some stability to the cake. Refrigerate the cake for 45-60 minutes, until the crumb coat is set and the cake feels firm and stable.
- Cover the top and sides of the chilled cake with a thicker layer of frosting. Use a bench scraper or metal spatula to smooth out the sides and top of the cake as much as possible. Chill for 30-45 minutes, until firm.
- Combine the chopped semi-sweet chocolate and 6 oz of cream in a medium bowl, and microwave for 1 minute. Whisk well, and if any chunks of chocolate remain, whisk again briefly until it is completely melted and smooth. The chocolate glaze should have a fairly thin texture, and if you dip a spoon in and let excess drip out, it should almost immediately blend back into the glaze in the bowl. If it seems too thick, add up to 2 more oz of cream, a little bit at a time, and whisk well to incorporate it. (Different brands of chocolate and cream will yield different textures, so it’s always best to play around with the ratios if it seems too thick or thin.)
- Transfer the chocolate to a squeeze bottle with a narrow tip. Squeeze a dime-sized amount of glaze along the top edge of the chilled cake, and nudge it gently so it starts to slide down the side. Repeat right next to the first drip, and continue around all the edges of the cake. Squeeze more glaze into the center of the cake, and use a small spatula to smooth it into an even layer that joins with the outer ring. You may not need to use all of the glaze. Let the glaze set for 10 minutes in the refrigerator, or about 20 minutes at room temperature, so that it’s not completely soft and liquid when adding the decorations on top.
- Transfer the remaining buttercream to a piping bag fitted with a medium star tip (I used a Wilton 1 M tip), and pipe tall frosting rosettes all along the edges of the cake. Top the rosettes with mini Oreo cookies. Make sure the ganache is full set before slicing the cake and serving.
- For the best taste and texture, serve this cake at room temperature. The chilled cake is not nearly as good! Leftovers keep well, and can be stored in an airtight container in the refrigerator for up to a week, but will taste best when eaten within 3-4 days.
Video
Recipe Notes
Measuring Tips
Our recipes are developed using weight measurements, and we highly recommend using a kitchen scale for baking whenever possible. However, if you prefer to use cups, volume measurements are provided as well. PLEASE NOTE: the adage “8 oz = 1 cup” is NOT true when speaking about weight, so don’t be concerned if the measurements don’t fit this formula.
Want to learn more about baking measurements and conversion?


I make this every year for my son’s birthday. I’m not very good at cakes but this one works out for me and is so good!
Hi Aub! So fun for your son! I bet he really looks forward to this tradition. Thanks for commenting.
Making this for a Harvest Festival so I did a test run, cake is not as moist as I think it should be… any advice on how to make it more moist? Frosting is to die for will upload pics of the final cake… maybe if it turns out. Thanks for sharing your recipe.
Hi Jackie! I do have a few suggestions of things you can try. First would be to look at the baking time and possibly take the cake out earlier. Different ovens and pans can affect how quickly cakes bake, and maybe reducing the baking time by a few minutes could help the cake be less dry. You can also swap in some (full fat) sour cream for some of the buttermilk – I’d suggest replacing maybe 1/4 cup of the buttermilk with an equal amount of sour cream. Finally, black cocoa powder does have a drying effect, so you could change the ratio of black:regular cocoa, which is currently 1:1, and maybe use more regular and less black cocoa.
Please come back and let us know how it turns out for you!
Hi what type of coffee can we use;
Hi Giota! You can use any type of coffee that you have on hand. The coffee flavor isn’t actually noticeable in the cake. I really just helps to enhance the chocolate flavor. If you don’t have coffee, you can just use water. All the best to you!
Hi, I am really excited to make this cake for a friend’s 90th birthday! I have special dark cacao which is Dutch process, and I have 100% cacao natural unsweetened. In your recipe, it says the natural unsweetened is the Dutch process and the dark is the natural, which is just the opposite of what my labels states. So…can I use my Hershey’s 100% cacao natural unsweetened and my Hershey’s special dark Dutched cocoa with the same measurements 3/4 Cup of each?
Thank you so much
Kathee
Hi Kathee! How fun to make this for your friend! I got a little confused about your question, but hopefully I’m answering you with the correct info. Hershey’s special dark cocoa is not the same as black cocoa powder, but it is natural Dutch-process). You can definitely use it, but the cake layers won’t have the traditional black color of Oreos. They will have a brown color. If you want to try and bump the chocolate flavor, you could actually use the special dark cocoa for both types of cocoa powder (1 1/2 cups of the special dark instead of 3/4 cups of each). Please let me know if you still have questions. Happy baking.
Jill, Thank you so very much. I will definitely take your suggestion.
In appreciation,
Kathee
You’re welcome Kathee!
Finding it rather annoying that your page states, “Our recipes are developed using weight measurements, and we highly recommend using a kitchen scale for baking whenever possible” and yet the metric measurements include things like 177.44 milliliters of liquid egg whites. Obviously developed with cups and then auto-converted by the website software without even being proofread by an actual person.
Hi. I’m sorry that is frustrating for you. You’ll see that when the recipe is in its standard US form, the weight measurements are in ounces and have been input manually. However, the metric conversion button is an automated feature that converts the measurements to grams. It’s intended to be helpful and provide options for all different kinds of bakers. If the decimals bother you, just round up or down to the nearest whole number or keep the recipe card in standard US form. I hope that helps. All the best to you.