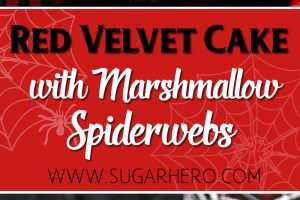
This Red Velvet Marshmallow Spiderweb Cake is a classic red velvet cake, frosted with deep black chocolate buttercream, and covered with a spooky web of spiderwebs, made entirely from marshmallows!

Believe it or not, it’s been three years since I last made a spooky spiderweb cake for SugarHero–like, what have I even been doing with my life since then? Clearly nothing worthwhile. It was definitely time to revisit our creepy 8-legged friends again, and tackle a different version of a spiderweb cake (although, if you haven’t yet tried your hand at my naked spiderweb cake, get thee to a kitchen! And while you are there check out this amazing collection of Halloween Cake Recipes!)

This was also a good excuse to try a fun technique I learned from The Cake Blog way back in 2012–using melted marshmallows to make long, stringy strands of (edible) spiderwebs! I’ve wanted to try method this ever since I saw Carrie’s post all those years ago, and finally got around to it this year, putting my own spin on the idea of a marshmallow spiderweb cake.
I wrapped my marshmallow spiderweb around a red velvet cake, frosted with chocolate buttercream, and topped it all off with a cute candy spider. Here’s how it all breaks down…

The spider (which just might be my favorite part!) is made from chocolate plastic, sometimes also called candy plastic or candy clay. It’s REALLY simple to make–you just mix melted chocolate (or candy coating) with corn syrup, and it forms a soft, dough-like texture. After an overnight rest, the chocolate plastic is much harder and can be kneaded and sculpted, much like fondant or marzipan.
Speaking of fondant or marzipan, of course you could use those materials instead (or hey, just buy a novelty chocolate spider and call it good!). I think chocolate plastic usually tastes a bit better–since it tastes like chocolate or white chocolate–and it also has the advantage of hardening sooner, so you don’t need to let it air cure as long as you might need to with fondant or marzipan.
Whatever you decide to use, don’t forget the sugar pearl eyeballs, so your food can stare right at you and make you feel guilty! My 5-year old scolded me for not giving the spider 8 eyes, so if you’re looking for realism, don’t look to my example…although that didn’t stop him from eating the spider, leg by leg, later that night…

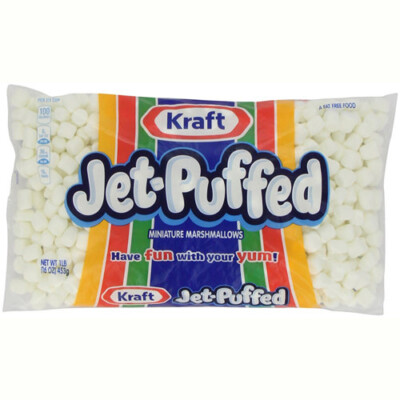
The web is, as I said, just made from marshmallows. If you melt marshmallows and let them cool slightly, until warm but not scalding hot, you can take a pinch of the marshmallow and pull it out into long, stringy strands that are perfect for wrapping around a cake (or cupcakes, or any other dessert, really.)
This technique is surprisingly fast and easy, and unsurprisingly quite messy! There’s really no “wrong” way to do it, so even if some of the webs are a little too fat, or don’t overlap quite right, by the time all of the strands are layered on top of each other, it looks gorgeous anyhow! I recommend putting the webs on shortly before serving the cake, because they do tend to get softer and stickier over time.

One more marshmallow spiderweb pro tip: it probably works best on fondant-covered cakes, or cakes frosted with a crusting buttercream. I didn’t like the thought of fondant on top of red velvet, so I used my favorite non-crusting buttercream and just made sure to wrap it when the cake was very cold, otherwise the marshmallow strands would drag through the frosting and cut into the corners. It worked out just fine, but using it on fondant is probably the path of least frustration.

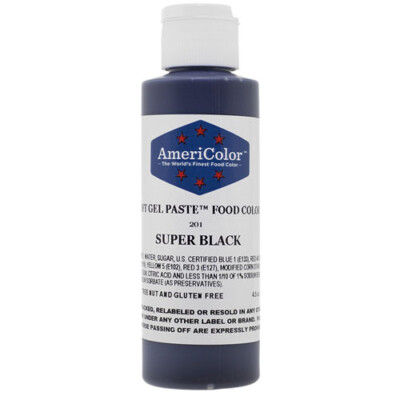
Cream cheese is the traditional frosting for red velvet cake, but I wanted to do something a little different this time, plus I knew I needed something sturdy to hold up to the marshmallow spiderwebs. I used a chocolate buttercream, dyed black with Americolor Super Black gel coloring.
Whenever possible, I like to start with chocolate buttercream when making black frosting, because it’s easier to get to a true black color from brown than from white. (Plus, chocolate just tastes really good–and it’s great paired with red velvet!) The gel coloring is quite strong, so it gives it an intense color without needing to add quite so much food coloring.
The final touch was bright streaks of red frosting along the sides and top of the cake. They’re partially hidden by the web, which is good news for people who want to cover any decorating mistakes, but they still show up and give the cake a little extra pop!

👻More Halloween Recipe Inspiration👻
- Matcha Chocolate Tarts
- Devil’s Food Cake with Pumpkin Butterscotch Frosting
- Skull Cake for Dia de los Muertos
- Spiderweb Cupcakes and Chocolate Spiders
- Sugar Cookie Pinwheels
- Donut Hole Eyeballs
- Red Velvet Hot Chocolate
Zombie Brain Brownie Bites
Breaking Bad Blue Rock Candy

Red Velvet Marshmallow Spiderweb Cake
Ingredients
For the Candy Spider:
For the Red Velvet Cake:
- 11.25 oz all-purpose flour, (2 1/2 cups)
- 10.5 oz granulated sugar, (1 1/2 cups)
- 1 tsp baking soda
- 1 tsp salt
- 2 tbsp unsweetened cocoa powder
- 8 fl oz vegetable oil, (1 cup)
- 12 fl oz buttermilk, (1 1/2 cups)
- 2 large eggs
- 2 tbsp red gel food coloring
- 1 tsp white vinegar
- 2 tsp vanilla extract
For the Buttercream:
- 6 oz unsweetened chocolate, finely chopped
- 4 fl oz pasteurized liquid egg whites, (1/2 cup)
- 16 oz powdered sugar, (4 cups)
- 1/4 tsp salt
- 16 oz unsalted butter, (4 sticks), at room temperature
- 1 TBSP vanilla extract
- Red gel food coloring, I used Americolor Super Red
- Black gel food coloring, I used Americolor Super Black
To Decorate:
- 6 oz large marshmallows
Instructions
To Make the Candy Spider:
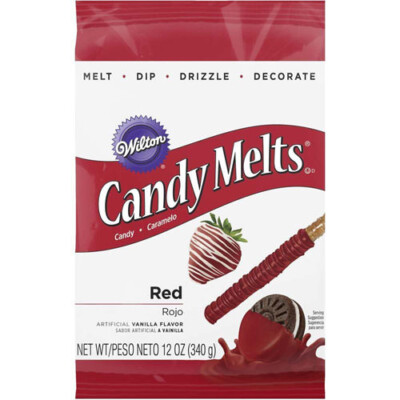
- To make the chocolate plastic, melt the red candy coating in a medium bowl in the microwave, until melted and smooth. Add the light corn syrup, and stir it in—it will quickly become thicker, like a paste. Stir just until all of the coating is incorporated and it come together in a ball. Don’t over-mix, or the oil might start to separate. Less is more!
- Scrape the chocolate plastic out onto a sheet of plastic wrap, and wrap it tightly into a package. Let sit overnight.
- The next day, the chocolate plastic will be quite hard at first. Sprinkle your work station with powdered sugar, and knead it until it becomes soft and pliable.
- To make the candy spider, break off a piece of plastic about the size of a golf ball, and roll it between your hands to form an oval shape. Pinch one end so that it tapers—this is the back of the spider’s body. Make a second ball of candy, smaller than the first, to be the head, and press it against the spider’s body. Press two black sugar pearls into it for the eyes. If the plastic is sticky, the two body parts should stick together without a problem, but you can also brush a light layer of corn syrup between the two to help them stick.
- Form 8 legs, with tapered feet. They can either stick straight out, or you can give them a bend in the knee for more of a 3-D effect. If you’re assembling the spider in advance, place the body on top of the legs, attaching everything with a bit of corn syrup, and let the spider sit overnight to firm up before you move it. Alternately, you can cover the cake with spiderwebs and assemble the spider right on top of the cake before serving.
To Make the Red Velvet Cake:
- Preheat the oven to 350 F. Line four 8-inch cake pans with parchment circles, and spray with nonstick cooking spray.
- In a large bowl, sift together the flour, sugar, baking soda, salt, and cocoa powder.
- In the bowl of a large stand mixer fitted with a paddle attachment, combine the vegetable oil, buttermilk, eggs, red gel food coloring, vinegar, and vanilla extract. Mix on medium-low speed until well-combined.
- Add the dry ingredients and mix on low speed until combined. Scrape down the bottom and sides of the pan with a spatula, then mix on medium speed until the cake batter is smooth and all the lumps of flour have disappeared.
- Divide the batter between the four prepared pans – if you have a kitchen scale, each should get about 12 oz of batter. Spread it into an even layer in each pan.
- Bake the cakes at 350 F for 20 minutes, until they spring back when lightly pressed with your fingertips. Cool completely before using. The cakes can be baked several days in advance, and wrapped in plastic wrap and refrigerated or frozen before using.
To Make the Buttercream:
- Place the chocolate in a medium bowl, and melt it in the microwave, stirring frequently so it doesn’t overheat. When the chocolate is smooth and entirely melted, set it aside to cool to room temperature.
- Combine the whites, powdered sugar, and salt in the bowl of a large stand mixer fitted with a paddle attachment. Mix everything together on low speed, until the sugar is moistened and no dry patches remain. Turn off the mixer, scrape down the sides and bottom of the bowl with a spatula, then turn the mixer to medium speed. Beat on medium for 5 minutes.
- After 5 minutes, turn the mixer to medium-low and start adding the softened room temperature butter, 1-2 tablespoons at a time. Once all of the butter is incorporated, add the vanilla extract and mix it in. Stop the mixer and scrape down the bottom and sides once more. Turn the speed to medium and beat the buttercream for 10 minutes. At the end, you’ll have a frosting with a wonderfully light and creamy texture.
- Remove about ½ cup of frosting, and add red food coloring until you have a bright red color. Add the melted chocolate to the remaining frosting, and once it is mixed in, add black gel food coloring to the chocolate frosting to get a black color.
- The frosting can be used right away, or stored in the refrigerator for up to two weeks, or the freezer for up to two months. If you have chilled the frosting, let it come to room temperature COMPLETELY, and then beat it for several minutes to smooth it out and restore its texture before using it.
To Decorate:
- Place a cake round on top of a cake cardboard, and put it on a cake turntable. Place a generous cup of frosting on top of the cake round, and use an offset spatula to smooth it into an even layer, all the way to the edge of the cake. Repeat with the remaining cake rounds. Spread a thin layer of frosting on the sides and top of the cake, to catch any crumbs, and refrigerate for about 45 minutes, until the frosting is firm.
- Add another layer of black frosting all over the top and sides of the cake, smoothing it into an even layer. Take the red frosting, and add streaks of red to the top and sides of the cake. Use a spatula to gently smooth it into the black frosting, so that it blends but the red is still vibrant. Refrigerate the cake until the frosting is VERY firm, at least 1-2 hours.
- To make the marshmallow spiderwebs, place the marshmallows in a microwave-safe bowl and heat them for 1 minute. Stir, and if any unmelted marshmallows remain, heat for another 10-20 seconds. Stir well, and let the marshmallows cool until they’re no longer piping hot, but still warm and melted.
- Take a big pinch of melted marshmallow between your fingers, and start pulling it apart between your hands, until the marshmallow strand is quite thin. Wrap it around the cake, going over and around in different directions. Once that strand is finished, take a second strand and wrap it at a different angle. Continue to pull strands of marshmallow all over the cake until it looks the way you want it to. If at any point the marshmallow gets too thick to pull effectively, and the strands start to snap, heat it briefly until it is workable again.
- Top the cake with the giant spider, allow to come to room temperature, and serve!
- Note that the marshmallow gets sticky and wet after a while, so for the best taste and texture, serve within a few hours of covering the cake. The cake can always be made several days in advance and kept, refrigerated, until you’re ready to decorate and serve it.
Video

Recipe Notes
Measuring Tips
Our recipes are developed using weight measurements, and we highly recommend using a kitchen scale for baking whenever possible. However, if you prefer to use cups, volume measurements are provided as well. PLEASE NOTE: the adage “8 oz = 1 cup” is NOT true when speaking about weight, so don’t be concerned if the measurements don’t fit this formula.
Want to learn more about baking measurements and conversion?


I only used the spider web making part, because it was for a spider man cake. It’s AWESOME!! The marshmallows work perfectly. Messy? Yes. But so what? Thank you SO MUCH for posting this!!!
Hey Meredith, I am so thrilled to hear it! The mess is totally worth it, I agree! Once it is done, it is so satisfying! Thank you so much for your response, I really appreciate it! I love hearing that other people enjoy my recipes!
I like the cake
Thank you so much for this. I made it for my son’s 2nd spideman birthday. I just made the spider blue instead if red. Wonderful step by step instructions. I thoroughly enjoyed it and it gave me renewed excitement for baking again
Sounds like a perfect use for this recipe! So glad your son enjoyed it and that you enjoyed baking it!