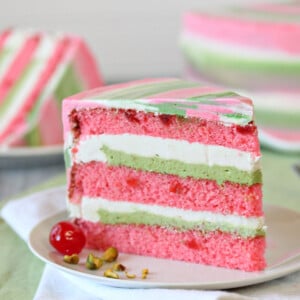
This Spumoni Cake features three layers of moist cherry chip cake, filled with layers of pistachio and vanilla buttercream on the inside. It has a gorgeous swirling pink, green and white watercolor design on the outside.

You could not have PAID me enough money to eat spumoni ice cream as a child.
Okay, that’s probably a lie. I was perpetually broke and hustlin’ like only a third grader who reeeaaally wants a new Dr. Pepper Lip Smackers can hustle. I most definitely would have eaten spumoni ice cream for money. But I wouldn’t have enjoyed it.
Fast-forward a few decades, and pistachio is now pretty much my favorite flavor ever. If there’s a way to cram my little green nut friend into a dessert, you’d better believe I’ll find it. So naturally my thoughts turned to spumoni, the classic combination of cherry, pistachio, and vanilla ice cream. (I’ve seen some variations that use chocolate instead of vanilla. I respect that! For these cake-ing purposes, I went with vanilla so it wouldn’t overpower the other flavors.)

My spumoni-inspired cake featured three layers of moist cherry chip cake, filled with layers of pistachio and vanilla buttercream on the inside, and a swirling pink, green, and white watercolor design on the outside.

Truth be told, I wasn’t sure what I thought of the watercolor decorations after I’d done them. I put the cake back in the refrigerator to chill, and then spent the next few hours opening the fridge, tilting my head to the side, squinting a bit, and saying, “It’s cute, right? Or does it look like moldy rings? But, like, cute moldy rings? Or not?” It was a confusing time. Jason got tired of reassuring me that it was, in fact, cute. I vague-posted on Twitter about it and got a bunch of “put up or shut up!” comments. Thanks, Twitter friends. Your tough love inspired me to suck it up, move on, and stop stressing about my moldy-ish cute-ish cake.

Once I cut into the cake I liked it much better—the combination of the stripes on the outside and the pink, green, and white stripes on the inside are legitimately cute, no squinting required! The colors are a little spring-y, but seasons be damned, who needs to look at a calendar when you have such a cheerful, happy cake in front of you?

Best of all, this cake hit all the right flavor notes. The sweet, candy-like maraschino cherry cake layers, the slightly salted roasted pistachio taste, and the fragrant vanilla to tie them all together…it was delicious! You know I’m often a dark chocolate girl, but sometimes even chocolate people need to take a walk on the lighter side. (Flavor-wise, not calorie-wise…just so we’re clear.) I’ll be dipping into the pumpkin can soon enough, but for now, I’m savoring one last summery treat before baking All The Fall Things. Happy weekend, friends!

💗More Dessert Recipes You’ll Love
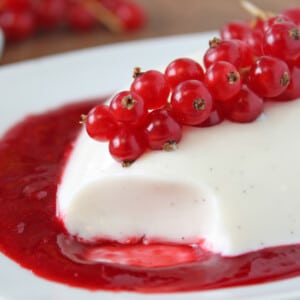
Vanilla Bean Panna Cotta
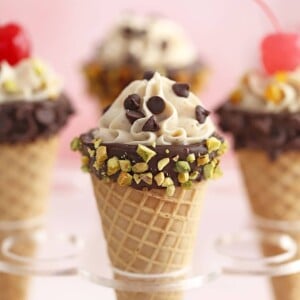
Cannoli Cones
Spumoni Cake
Ingredients
For the Cherry Cake:
- 6 oz maraschino cherries, (1 cup)
- 10.5 oz granulated sugar, (1 1/2 cups)
- 10.5 oz cake flour, (3 cups), sifted, measured after sifting
- 1 tbsp baking powder
- 3/4 tsp salt
- 6 large egg yolks
- 1 cup milk
- 1 1/2 tsp cherry extract, or more to taste
- 2 tsp vanilla extract
- 6 oz unsalted butter, at room temperature
- pink gel food coloring, I used Americolor brand gel food coloring
For the Buttercream:
- 12 large egg whites
- 18.33 oz granulated sugar, (2 2/3 cups)
- 21 oz unsalted butter, (1 lb 5oz), soft but still cool
- 1 1/2 tbsp vanilla paste, or 2 tbsp vanilla extract
- 1/4 tsp salt
- 4.75 oz pistachios, (1 cup), roasted, salted, shelled
- Assorted gel food coloring, I used Americolor gel food coloring: Leaf Green, Lemon Yellow, Soft Pink.
Instructions
To Make the Cherry Cake:
- Preheat the oven to 350 F. If you have a 9-inch pan with 3-inch high sides, line it with parchment and spray the pan with nonstick cooking spray. Otherwise, line three shorter 9-inch cake pans with parchment and spray them with nonstick spray.
- Finely chop the maraschino cherries. Pat them dry between layers of paper towel, getting them as dry as possible so that they won’t sink to the bottom of the cake batter. Set aside.
- Combine the sugar, cake flour, baking powder, and salt in the bowl of the stand mixer fitted with a paddle attachment. Mix on low speed for about a minute to combine the dry ingredients.
- Lightly whisk together the egg yolks and about 1/4 cup of the milk (it doesn’t have to be a precise measurement) and the cherry and vanilla extracts, and set aside for now.
- Add the remaining milk and the softened butter to the large mixing bowl and mix on low speed until the dry ingredients are moistened. Turn the mixer to medium speed and mix for a minute and a half.
- Add the egg yolk mixture in three batches, mixing for 20-30 seconds after each addition, until you have a smooth batter. Add a few drops of pink food coloring, scrape the bottom and sides of the bowl with a rubber spatula, and give the batter a few more stirs to make sure everything is incorporated and the coloring is even. Taste the batter and add more cherry flavoring if desired.
- Pour the batter into the 9×3-inch pan, or divide it between the 3 shorter 9-inch pans. Scatter the chopped cherries on top and swirl them into the batter.
- If you are baking a single cake in the 9×3 pan, bake it for about 50 minutes, until the sides just start pulling away from the pan, and a toothpick inserted into the center comes out clean. If you are baking three cake layers, they will take more like 25 minutes to bake. Let them cool completely before proceeding. The cake can be made in advance and kept, well-wrapped, in the refrigerator for several days or in the freezer for several weeks. If frozen, thaw partially before assembling.
To Make the Buttercream:
- Combine the egg whites and the granulated sugar in the bowl of a large stand mixer, and whisk them together. Choose a small saucepan that lets you fit the base of the stand mixer snugly into the top of the saucepan—this is your makeshift hot water bath. (Alternately, you can use a different bowl or an actual bain marie and then transfer the mixture to a mixing bowl once it’s heated.) Add an inch of water to the bottom of the saucepan, and bring the water to a simmer.
- Place the mixing bowl on top of the saucepan, making sure that the bottom isn’t in contact with the water, and heat the egg white mixture. Whisk frequently so that the egg whites don’t cook. Continue to heat the whites until they are hot to the touch, and when you rub a bit between your fingers, you don’t feel any grittiness from the sugar. Once the whites are hot, transfer the mixing bowl to your mixer and fit it with a whisk attachment.
- Beat the whites on medium-high speed until they are a shiny, stiff, voluminous meringue, and are no longer warm to the touch—feel the outside of the bowl, and make sure that it is around room temperature. Depending on your mixer and the temperature of your environment, this may take 15-20 minutes, or more. Reduce the speed to medium-low and add the softened but cool butter in small chunks, a tablespoon at a time, making sure to wait in between additions. It may separate or look a little gloopy at this point—fear not. Once all of the butter is added, increase the speed again and whip until it comes together and is light and fluffy. If, after 5 minutes, it hasn’t come together, refrigerate the mixing bowl for 5-7 minutes, to cool the mixture down, and whip it again until it has thickened and is smooth and silky. Add the vanilla extract and salt.
- The buttercream can be made in advance and kept at room temperature if you’re going to use it the same day, or refrigerated. If it has been chilled, let it sit at room temperature until completely soft, then re-whip it to get the smooth texture back before you use it.
- To make the pistachio buttercream, process the pistachios in a food processor until they turn into pistachio butter, scraping down the sides periodically. This may take 5 minutes or more. If the butter is warm, let it cool to room temperature before proceeding.
- Place about 1 1/2 cups of buttercream into a bowl, and add the pistachio butter. Stir it in until well-mixed. Add a drop or two of green gel food coloring, and a bit of yellow, to make a nice pistachio color.
To Assemble:
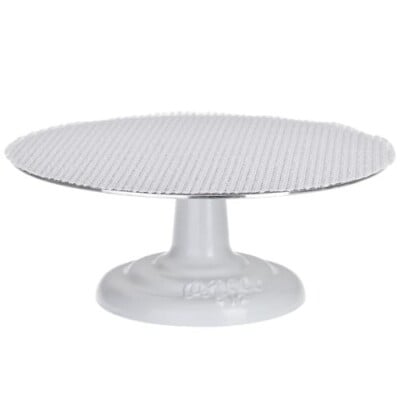
- Set the cake on a cardboard cake round, and place it on a cake turntable. Use a sharp serrated knife to slice it into three even rounds. (If you baked the cake in 3 cake pans, then you can skip this step.) Fit a piping bag with a large round tip, and fill it with vanilla buttercream. Pipe a circle of buttercream around the outer edge of the cake layer.
- Scoop half of the pistachio buttercream into the center of the cake and spread it into an even layer out to the edge of the buttercream round. Scoop some vanilla buttercream on top and spread it evenly to the edge. Place a second cake round on top, and repeat with the buttercream ring, pistachio layer, and vanilla layer. Finish by placing the third cake round on top. Spread a thin layer of buttercream on the sides and top of the cake, to seal in the crumbs, and refrigerate the cake for an hour.
- While you wait for the cake to chill, divide the remaining buttercream into three portions. Keep one portion white, add pink coloring to a second portion, and add green and a bit of yellow coloring to the last portion, to make a pistachio color.
- Fill three piping bags fitted with round attachments with the white, pink, and green colors. (Alternately, you can use large plastic bags with holes cut in the corners.) Pipe stripes around the side of cake, alternating colors as you move from the bottom to the top. You can make thin strips, like I did, or just do three stripes total. Pipe a bulls-eye design on top of the cake. I recommend making the outer edge of the top and the top of the sides of the cake the same color, for easier blending.
- Angle the side of a metal offset spatula against the side of the cake, and turn the cake on the cake turntable. As the spatula smooths out the frosting, it will blend together and create a watercolor effect. You can take several passes around the side, but don’t try to go around too many times or the stripes will start to blur together. Do the same thing with the top of the cake. If you make a mistake, you can pipe on more frosting and try to gently blend it in. Use a smaller offset spatula to clean up the top edges and blend them together.
- For the best taste and texture, enjoy this cake at room temperature.
Recipe Notes
Measuring Tips
Our recipes are developed using weight measurements, and we highly recommend using a kitchen scale for baking whenever possible. However, if you prefer to use cups, volume measurements are provided as well. PLEASE NOTE: the adage “8 oz = 1 cup” is NOT true when speaking about weight, so don’t be concerned if the measurements don’t fit this formula.
Want to learn more about baking measurements and conversion?


I love your spumoni recipe. i’m always looing for new ideas for egg yolks too. only trouble in the uk we don’t have cake flour and I would want to get any substitute correct. what would you suggest?????
Hi Cathe! I usually use a combo of all-purpose flour and corn starch (I believe it’s called cornflour in the UK?) You can read more about it and get suggested measurements here: http://www.thekitchn.com/the-easy-way-to-make-cake-flour-substitute-baking-tips-from-the-kitchn-44521
What a fabulous cake! But I am confused by the baking powder measurement! Is it 1 tablespoon PLUS 1 teaspoon? Thanks!
Yes it is!! Sorry, the way the recipe card is formatted, it doesn’t let me enter it as 1 tablespoon plus 1 teaspoon, so I write it in the comments!
Having multiple measurements is really confusing. Your flour amount the ounces do not match the cups.
Hi Claire, I’m sorry if you find the multiple measurements confusing. Most bakers prefer to give measurements by weight because they are more accurate, but many home cooks only have cups, so I try to provide both for my readers. The ounces and cups are correct. You can read more about why they are correct here:
https://www.sugarhero.com/frequently-asked-questions/#measurements
Th am you for this recipe. My hubby loves Spumoni and I want to make this for his birthday. How would I make your recipe using 3-6” round cake pans.
Hi Holly! If you want cake layers about the height of those in the pictures, I would recommend halving the recipe so you can bake it in 3 6″ pans. I would start checking for done-ness around the 20 minute mark, and anticipate the total baking time being around 25 minutes or so. Please come back and let us know how it turns out if you give it a try!
I would like a taller cake with 4-6” in round pans. And I would like to get a choc layer in there. I won’t cut the cake layers in half. I was thinking two cherry and two choc with your pistachio buttercream frosting between the layers. Spumoni Is cherry, choc and pistachio. Then I would do the pretty water colors you have on the outside of the cake. So I won’t cut your cherry cake in half. Do you have a choc cake recipe using cake flour that would work for two 6” pans ? Let me know what you think or any ideas you have. I live this cake. My hubby is going to love this
That sounds amazing! Super delicious. 🙂 I do have a chocolate cake recipe but it calls for regular (all-purpose) flour, not cake flour. This cake recipe, cut in half, should work for two 6″ cakes:
https://www.sugarhero.com/chocolate-candy-cane-cake/
This cake is gorgeous! I want to make it, but I am confused about the amount of butter for the buttercream. The amount given is 5 oz, but beside it in parentheses it says 1 lb. Should that be 16 oz of butter or am I misreading something? Thanks.
Hi Rachel. I took a look at the recipe and there was an error for the butter. I think something got mixed up when we converted the recipe to a newer format recently. Originally it read 1 lb 5oz which equals 21 oz total. I hope that helps. Thank you so much for bringing that to my attention. I really hope you enjoy the recipe.