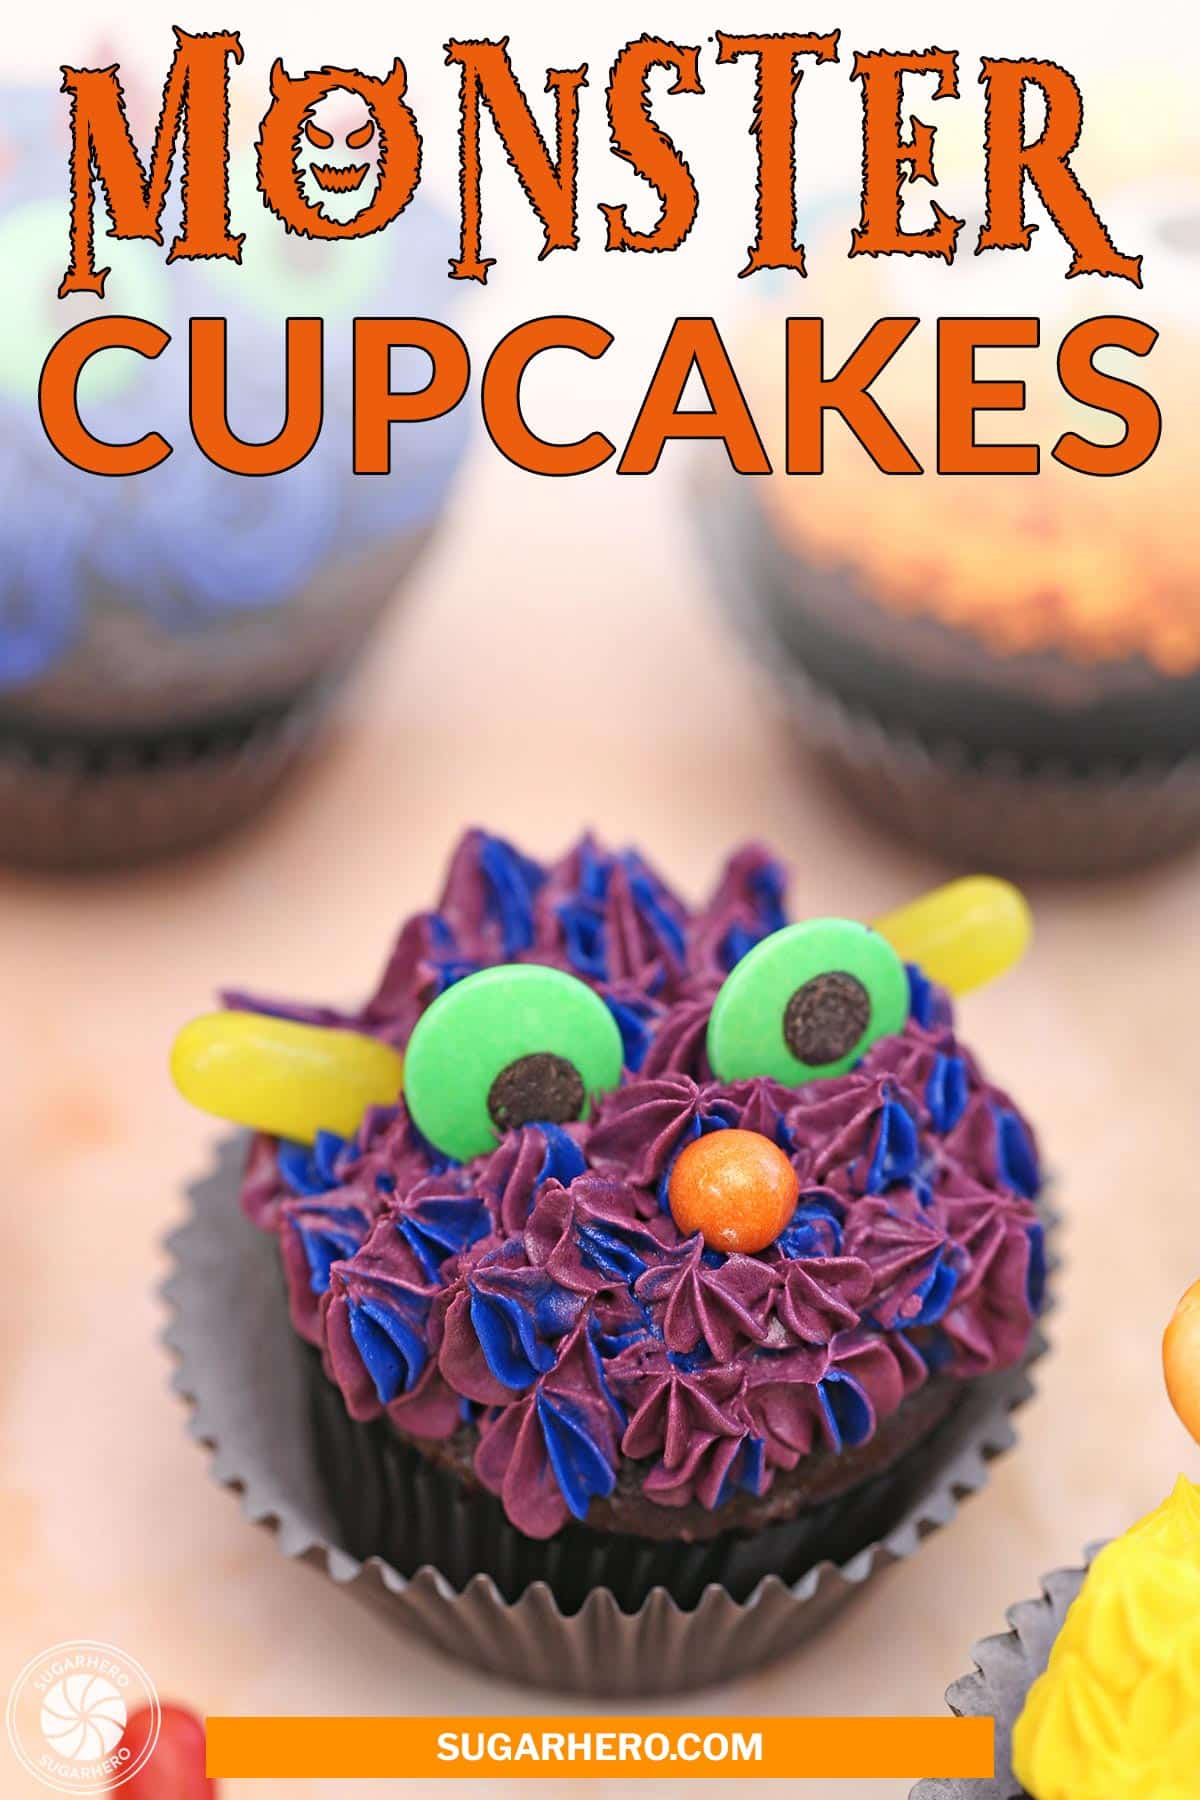
Get ready for some monster fun! All you need is frosting, candy, and a bit of creativity to transform ordinary cupcakes into colorful Monster Cupcakes for Halloween. Follow our easy recipe and step-by-step photos to make your own monster menagerie.
👹 Halloween Monster Cupcakes
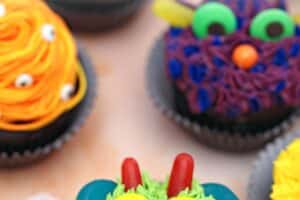
Get ready to unleash your inner monster-maker! These easy Halloween cupcakes use colorful frosting, a few different piping tips, and assorted candies to make a whole range of different monster faces and personalities.
Make them extra-creepy and spooky, or keep things fun with goofy monster faces – it’s completely up to you!
Because these monsters are all about the decorating, I encourage you to take a shortcut and use your favorite cake mix for these cupcakes. But if you’re looking for some homemade inspiration, browse our list of cupcake recipes here.
🎃 More Spooky Sweets
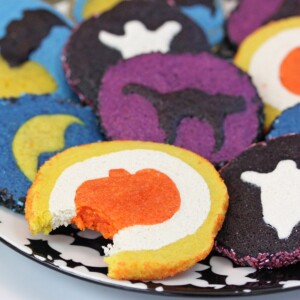
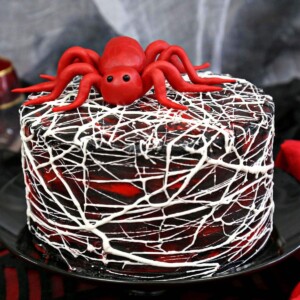
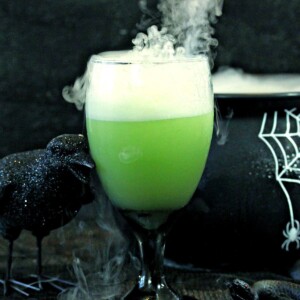
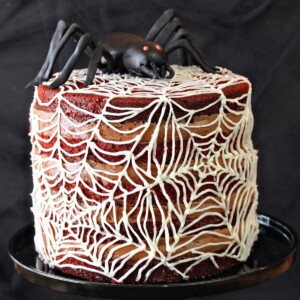
If you like to put the “treat” in “trick or treat,” check out all of our fun Halloween dessert recipes, like Witch’s Brew Halloween Punch, Red Velvet Marshmallow Spiderweb Cake, and Witch Finger Cookies.
Table of Contents
🧾 What You’ll Need
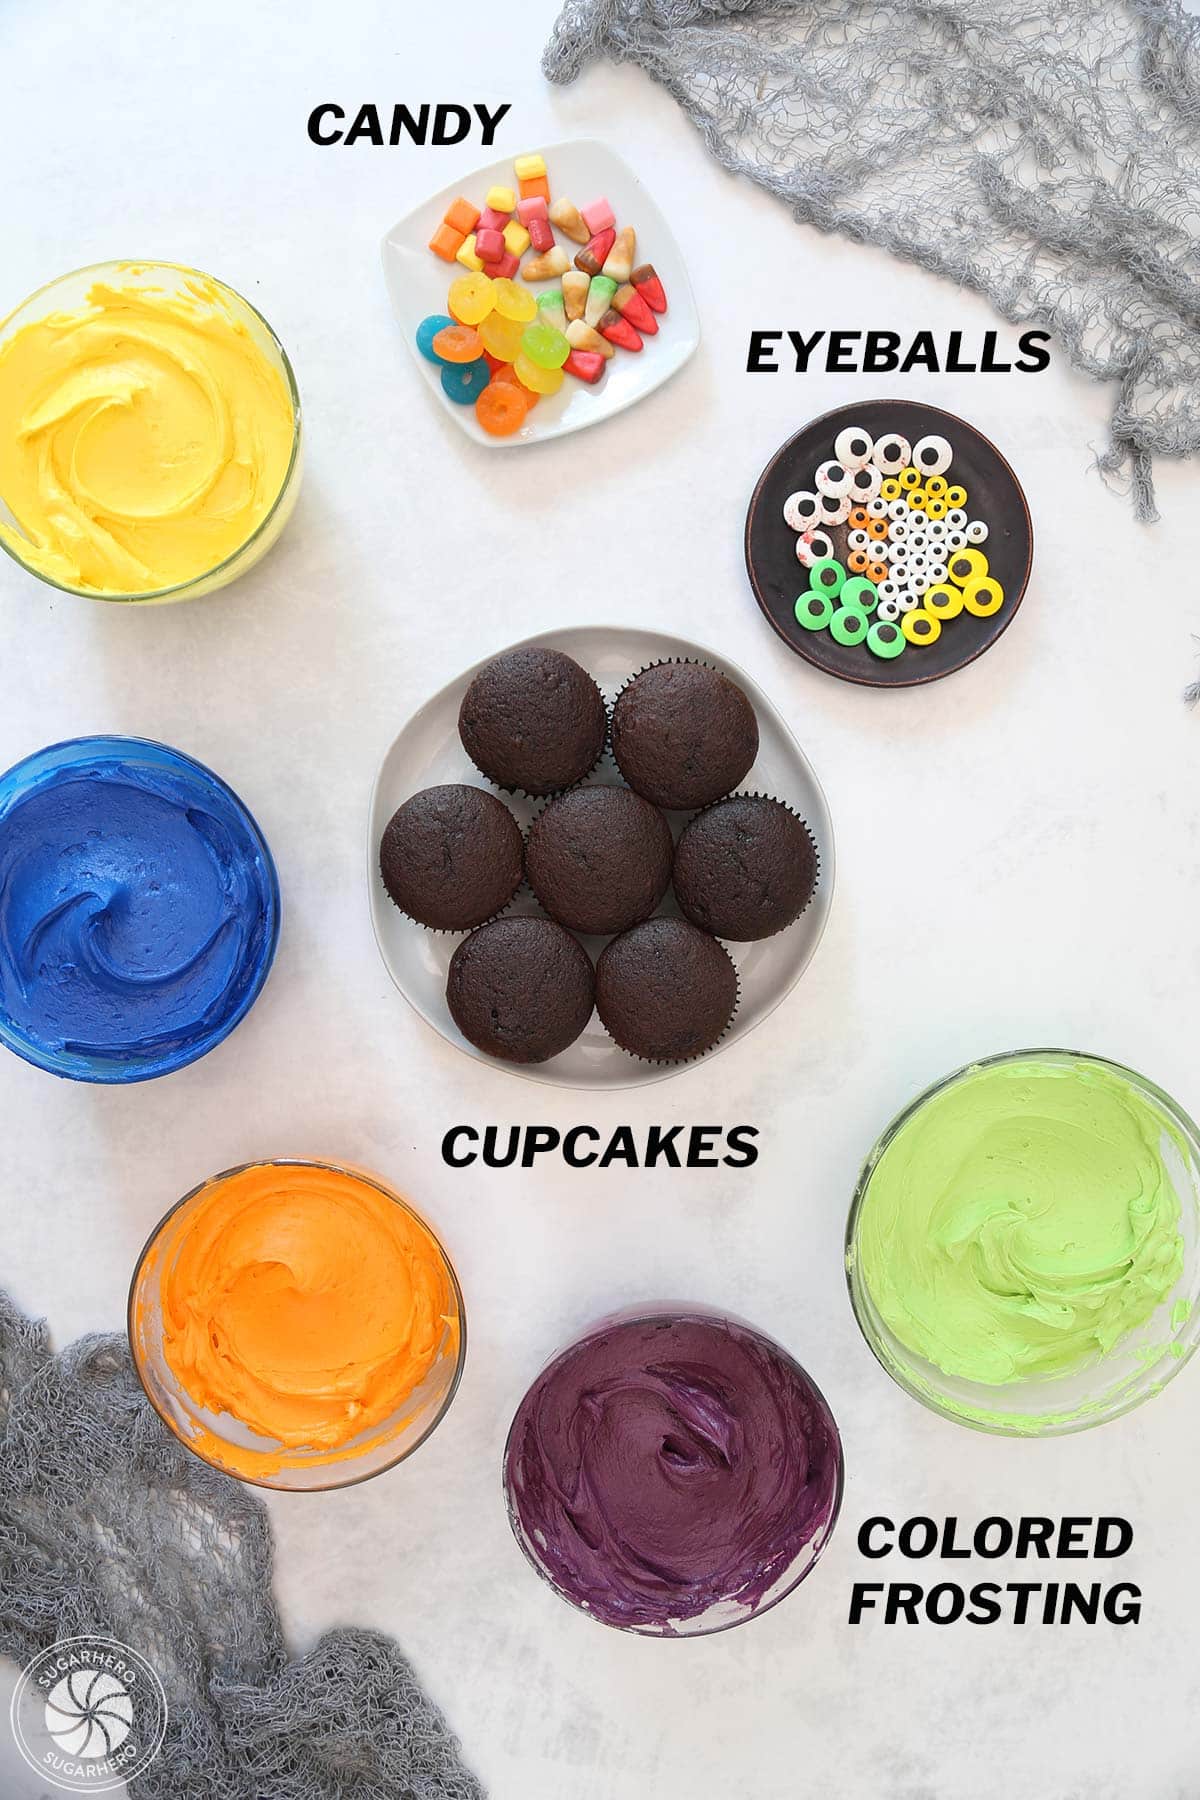
Ingredients
You’ll likely have most of what you need to make the cupcakes and frosting at home. Check out these helpful ingredient tips as you make your shopping list, and don’t forget the candy! (Links are affiliate links and I earn a small commission from qualifying purchases.)
For the Cupcakes and Frosting
- Cupcakes: You’ll need 24 baked and cooled cupcakes. Make cupcakes from scratch or use your favorite mix! I made chocolate cupcakes for my little monsters, but you can make any flavor you like.
- Unsalted butter and salt: I like to control the amount of salt in my frosting. I used unsalted butter and then added salt separately. If you don’t have unsalted butter, use salted butter and omit the salt. The butter should be at cool room temperature.
- Milk: Use milk or water to adjust the consistency of the frosting.
- Vanilla extract: My favorite brand of vanilla extract is Nielsen-Massey Madagascar Vanilla, but you can use whatever brand you have on hand.
- Powdered sugar: This frosting recipe is an American Buttercream, which is powdered sugar-based. You’ll want to measure the sugar with a scale if possible and then sift it into the mixture.
For the Decorations
- Assorted gel food coloring: You’ll want to use gel or powdered food coloring because they are highly concentrated, so you need less to get a vibrant shade. I love the Americolor brand of gel food coloring because you only need a little to achieve deep coloring. I used: lemon yellow, regal purple, royal blue, orange and electric green.
- Candy eyeballs: If you plan to give each cupcake two eyes, you’ll need at least 48 candy eyeballs. However, don’t be afraid to change things up. Decorate some of the cupcakes all over with eyeballs, or give them unique numbers of eyes just for fun.
- Assorted candy: You can use as much or as little candy as you’d like! I used quite a few different options to give you lots of ideas, but it’s definitely not necessary to make them all different. For my cupcakes I used, Lifesavers Gummies, Mike & Ikes, candy corn, Skittles, and Airheads.
Equipment
All you’ll need for these cupcakes is some basic piping supplies! (Links are affiliate links and I earn a small commission from qualifying purchases.)
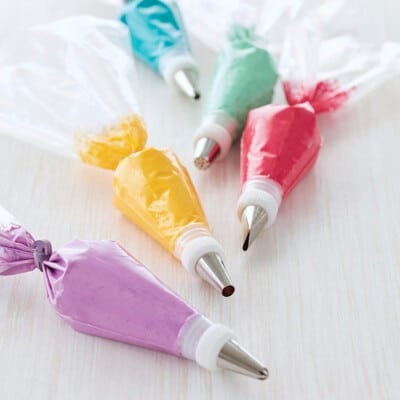
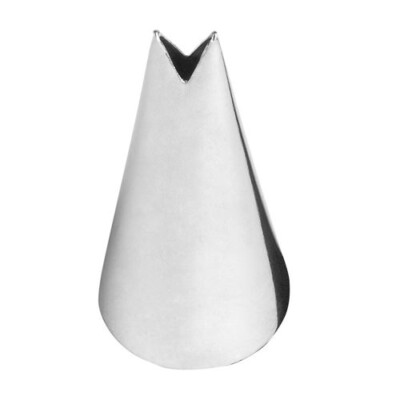
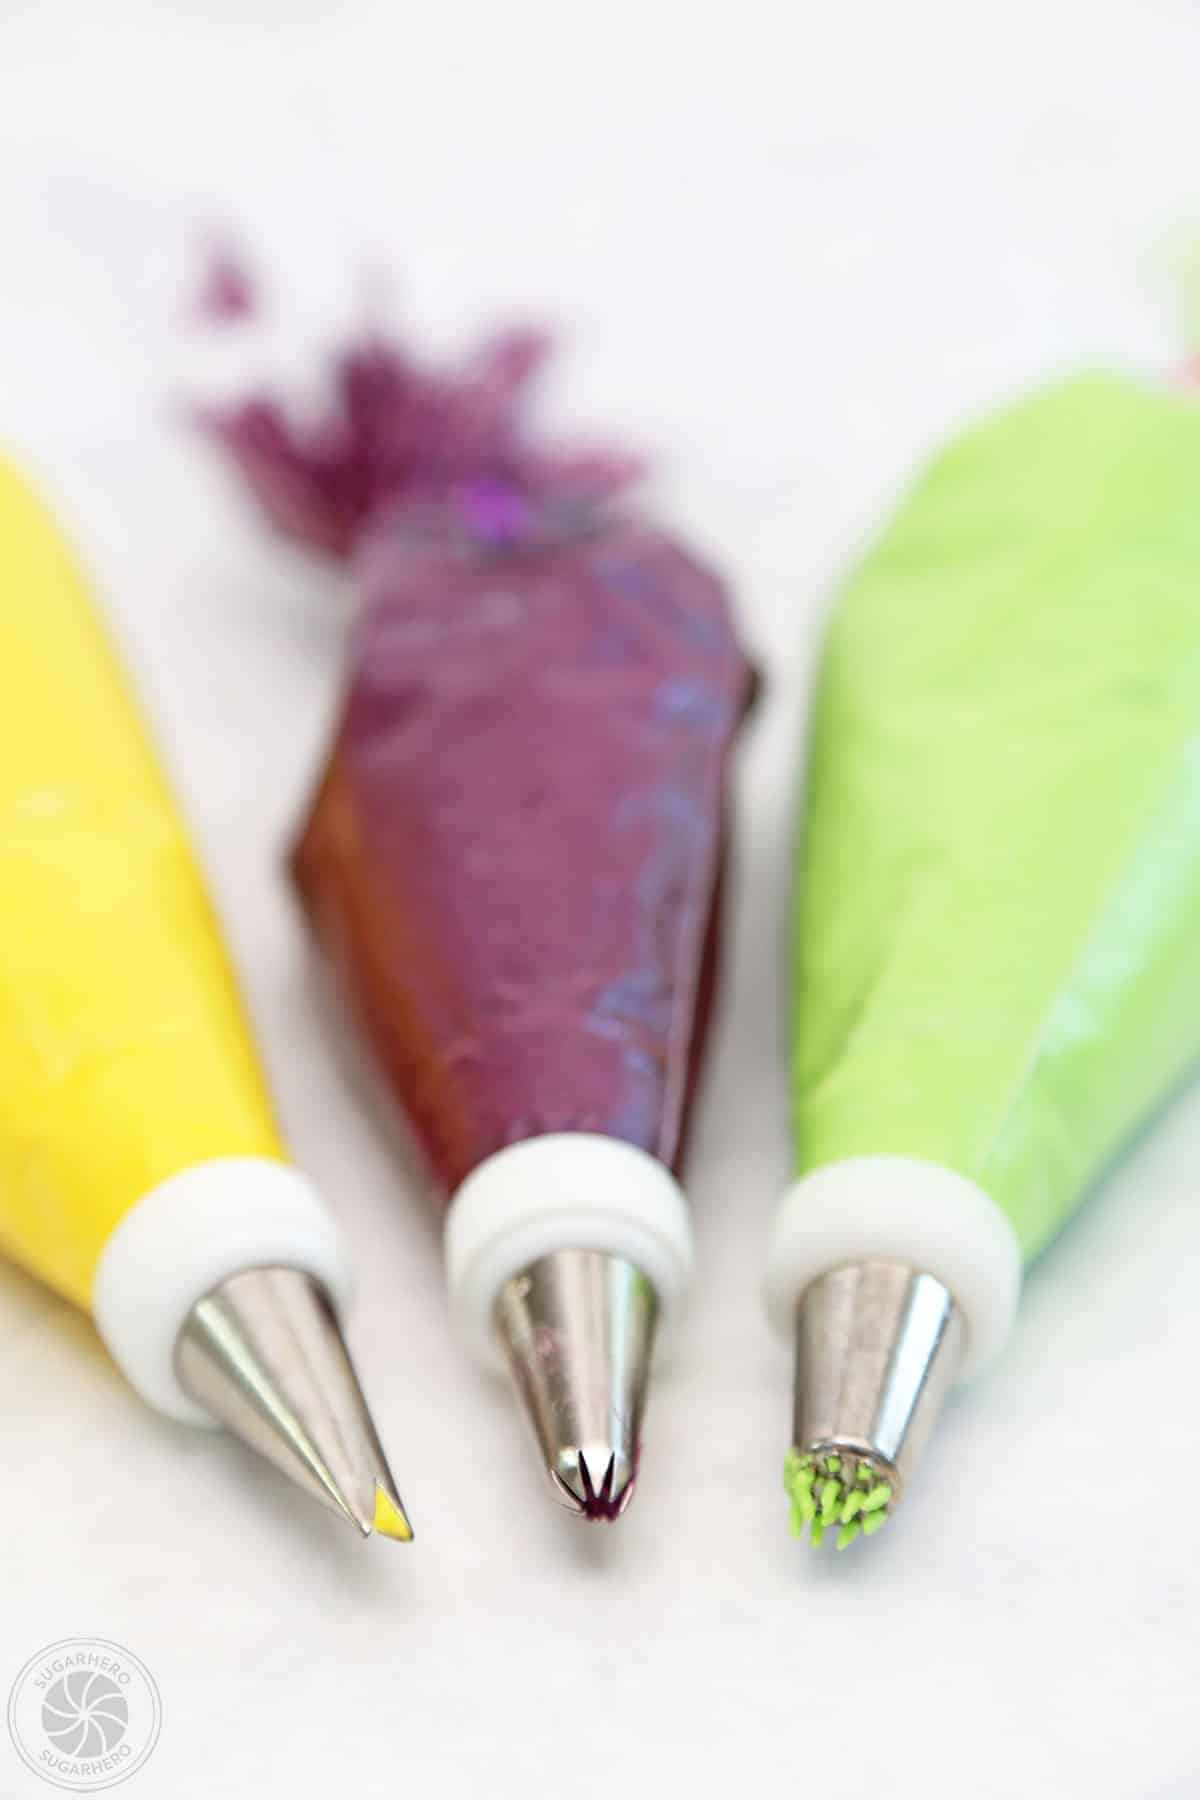
- Piping bags and couplers: I like these piping bags (I wash them and re-use them to reduce waste!) and these couplers. You can also make your own piping bags from plastic zipper bags. If you go this route, you won’t need couplers or tips, but keep in mind that you won’t have as much variety for the shape of the monster body and fur.
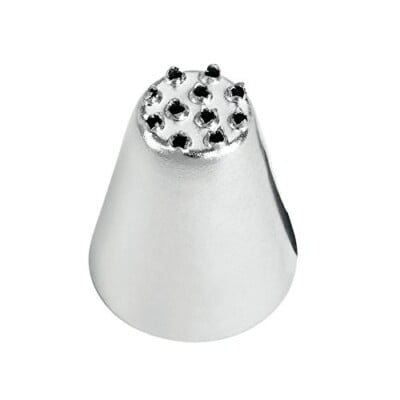
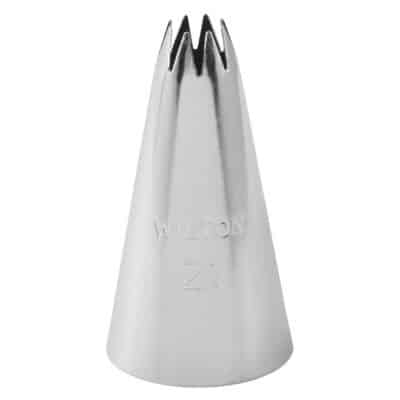
- Assorted piping tips: You really only need a couple of tips to make a variety of different designs. I recommend a grass tip (Wilton 233) for long fur or a swirling mound of fur, a small leaf tip (Ateco 352) for spiky fur, and a small open star tip (Wilton 21) for shaggy fur.
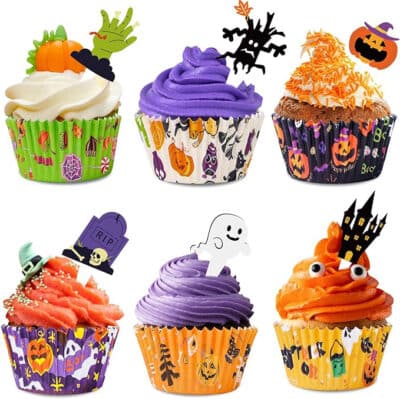
- Cupcake liners:I used plain black cupcake liners when I baked my cupcakes. However, you can have fun when it’s time to serve them by dressing them in solid colored rainbow liners or special Halloween cupcake liners.
🧡 Spooky & Sweet
Leave a Review!
If you make this recipe, let us know! Leave a ⭐️⭐️⭐️⭐️⭐️ rating on the recipe below, and leave a comment, take a photo and tag me on Instagram @elabau, or use #sugarhero on IG!
Monster Cupcakes
Ingredients
For the Cupcakes
- 24 baked and cooled cupcakes, from scratch or your favorite mix, I used chocolate cupcakes
For the Frosting
- 1 lb unsalted butter, at cool room temperature
- 2 TBSP milk, can substitute water
- ½ tsp salt
- 1 TBSP vanilla extract
- 28 oz powdered sugar, (7 cups), sifted after measuring
For the Decorations
- Assorted gel food coloring, I used Americolor brand: lemon yellow, regal purple, royal blue, orange, electric green
- 48 Candy eyeballs, Use any size or color you like
- Assorted candy, I used Gummy lifesavers, Mike & Ikes, Candy corn, Skittles, and Airheads
Instructions
Make the Frosting
- Beat the butter: Place the butter in the bowl of a large stand mixer. Beat on medium speed with a paddle attachment until very white and pale, about 3-4 minutes.
- Add milk, salt, and vanilla: Turn the speed lower, and add 1 tablespoon of milk, the salt, and the vanilla extract. Mix until everything is well incorporated with the butter.
- Slowly add powdered sugar: With the mixer running on low, slowly add the powdered sugar. Once all of it is added, stop and scrape down the bottom and sides of the mixing bowl, then mix the buttercream on medium speed for 30 seconds.
- Adjust consistency: If the buttercream is too stiff for your needs, add the remaining tablespoon of milk and mix it in well. You can adjust the final texture by adding more powdered sugar or milk until you like the consistency.
- Color the frosting: To dye the frosting, separate it into smaller bowls that correspond to the number of colors you plan to use. Use gel food coloring to color the frosting into colorful shades. I made green, orange, yellow, blue and purple frosting.
- Chill: You can use the colored frosting right away, but it’s best to chill it for at least 1 hour before use. See Note below.
Frost the Cupcakes
- Prep piping bags: When you are ready to frost the cupcakes, place each color of frosting in a piping bag fitted with a piping tip. I used a grass tip, leaf tip, large star and small star.
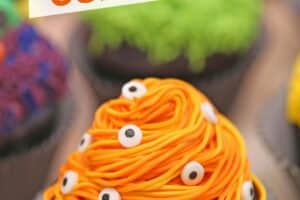
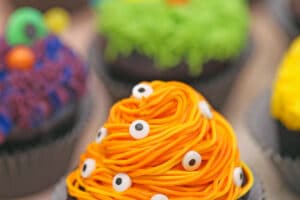
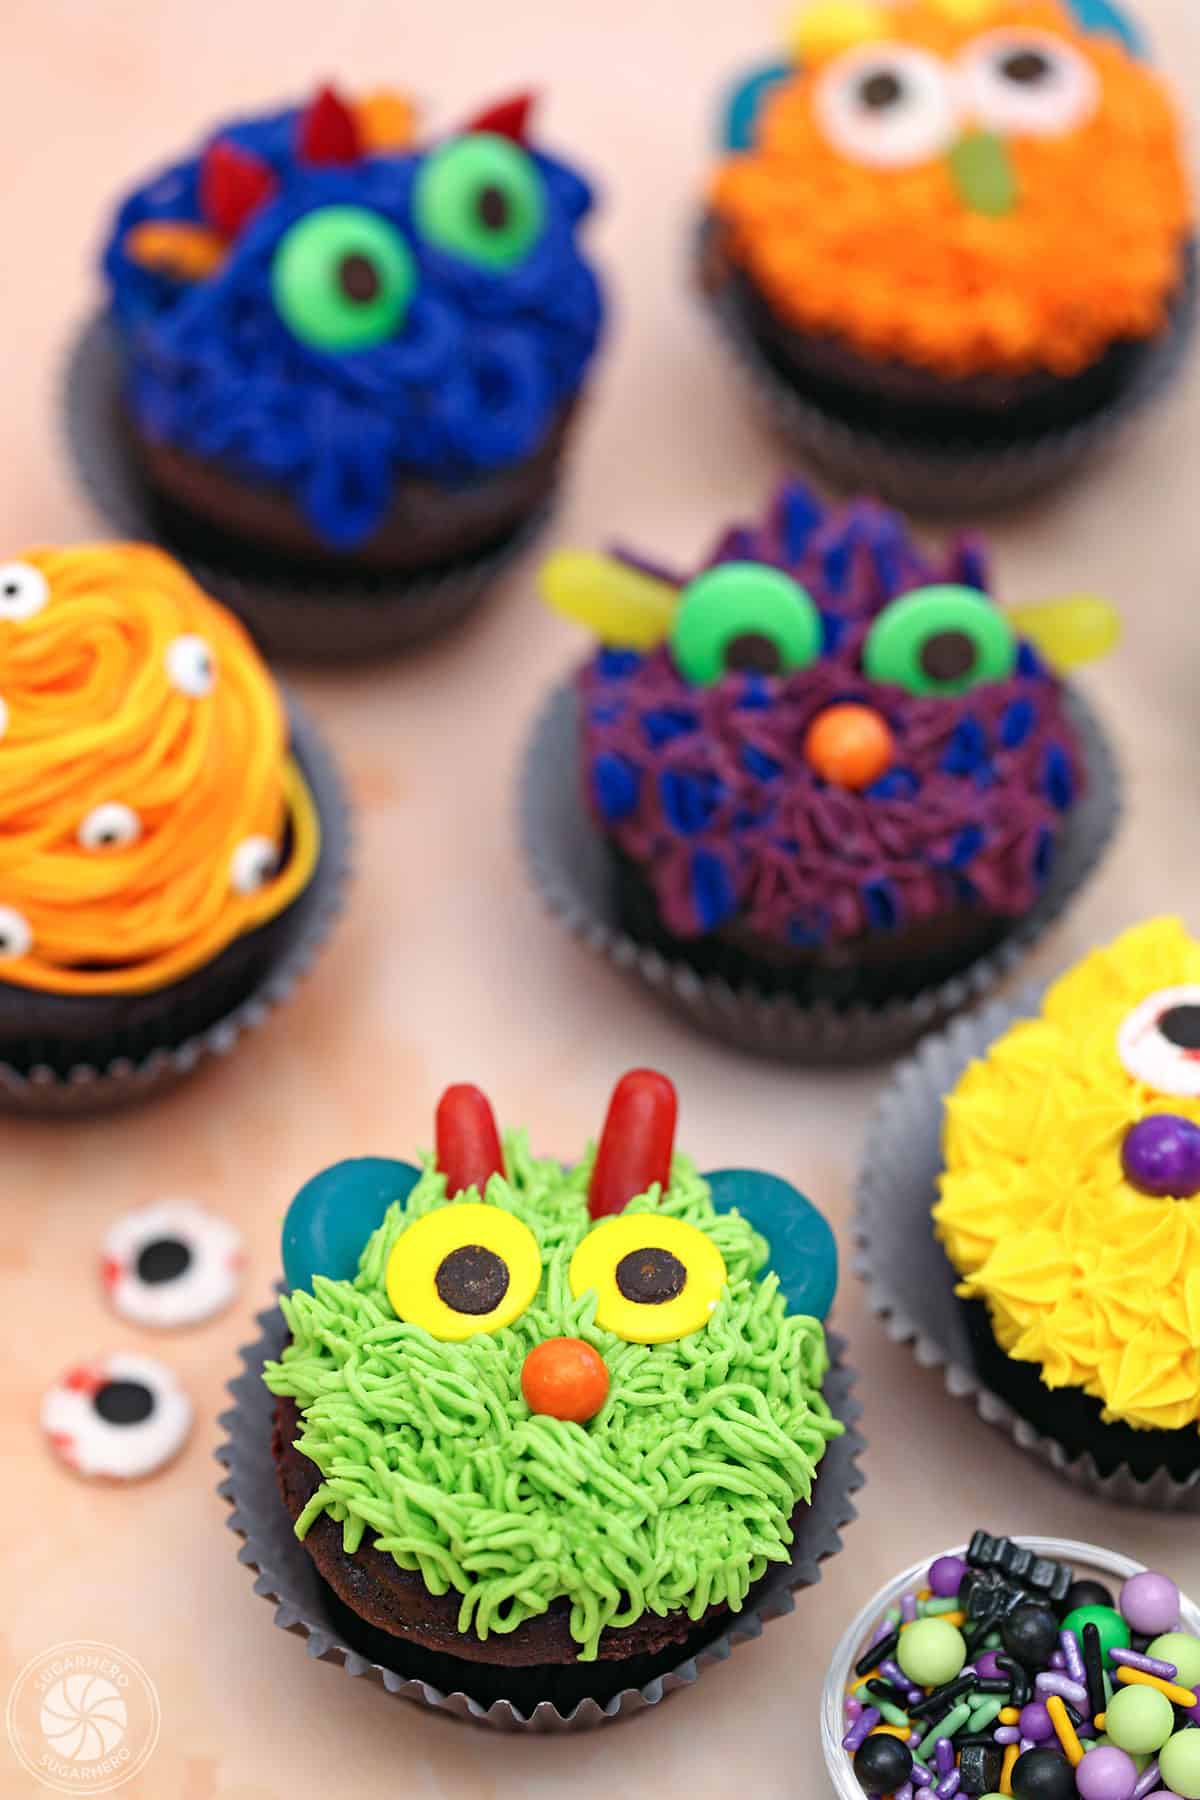
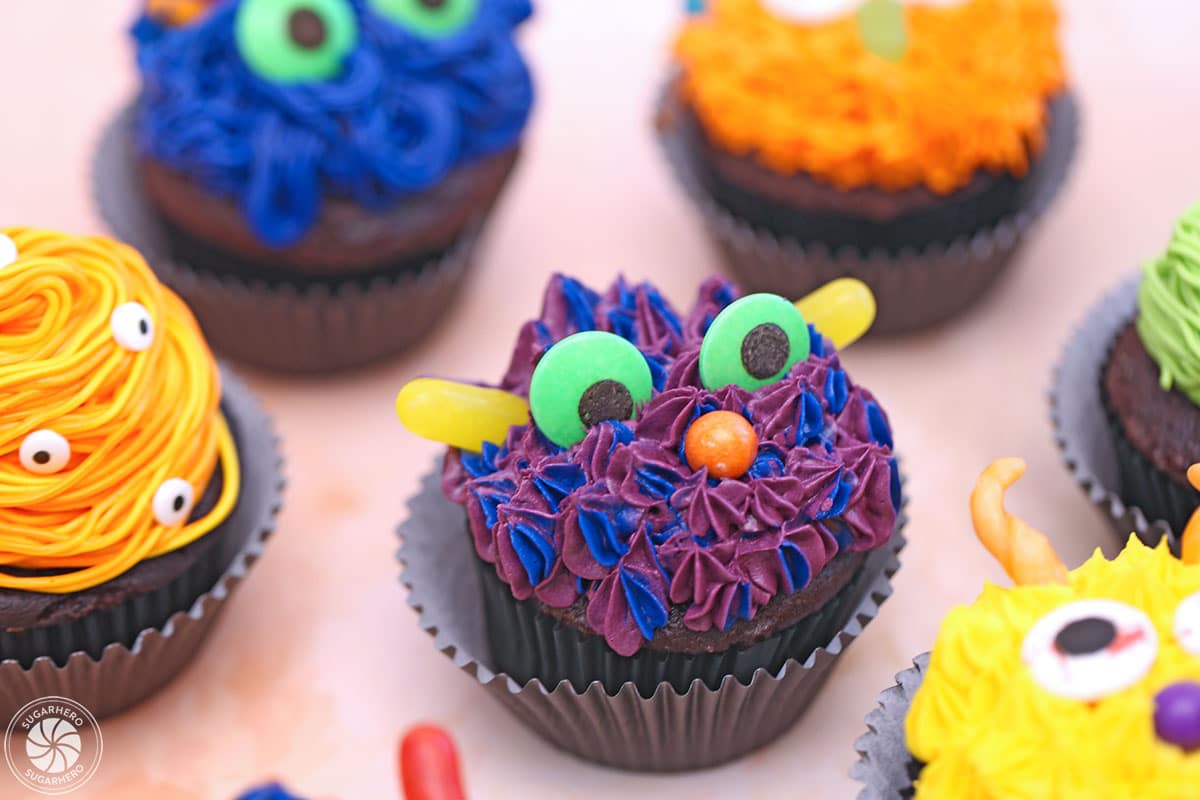
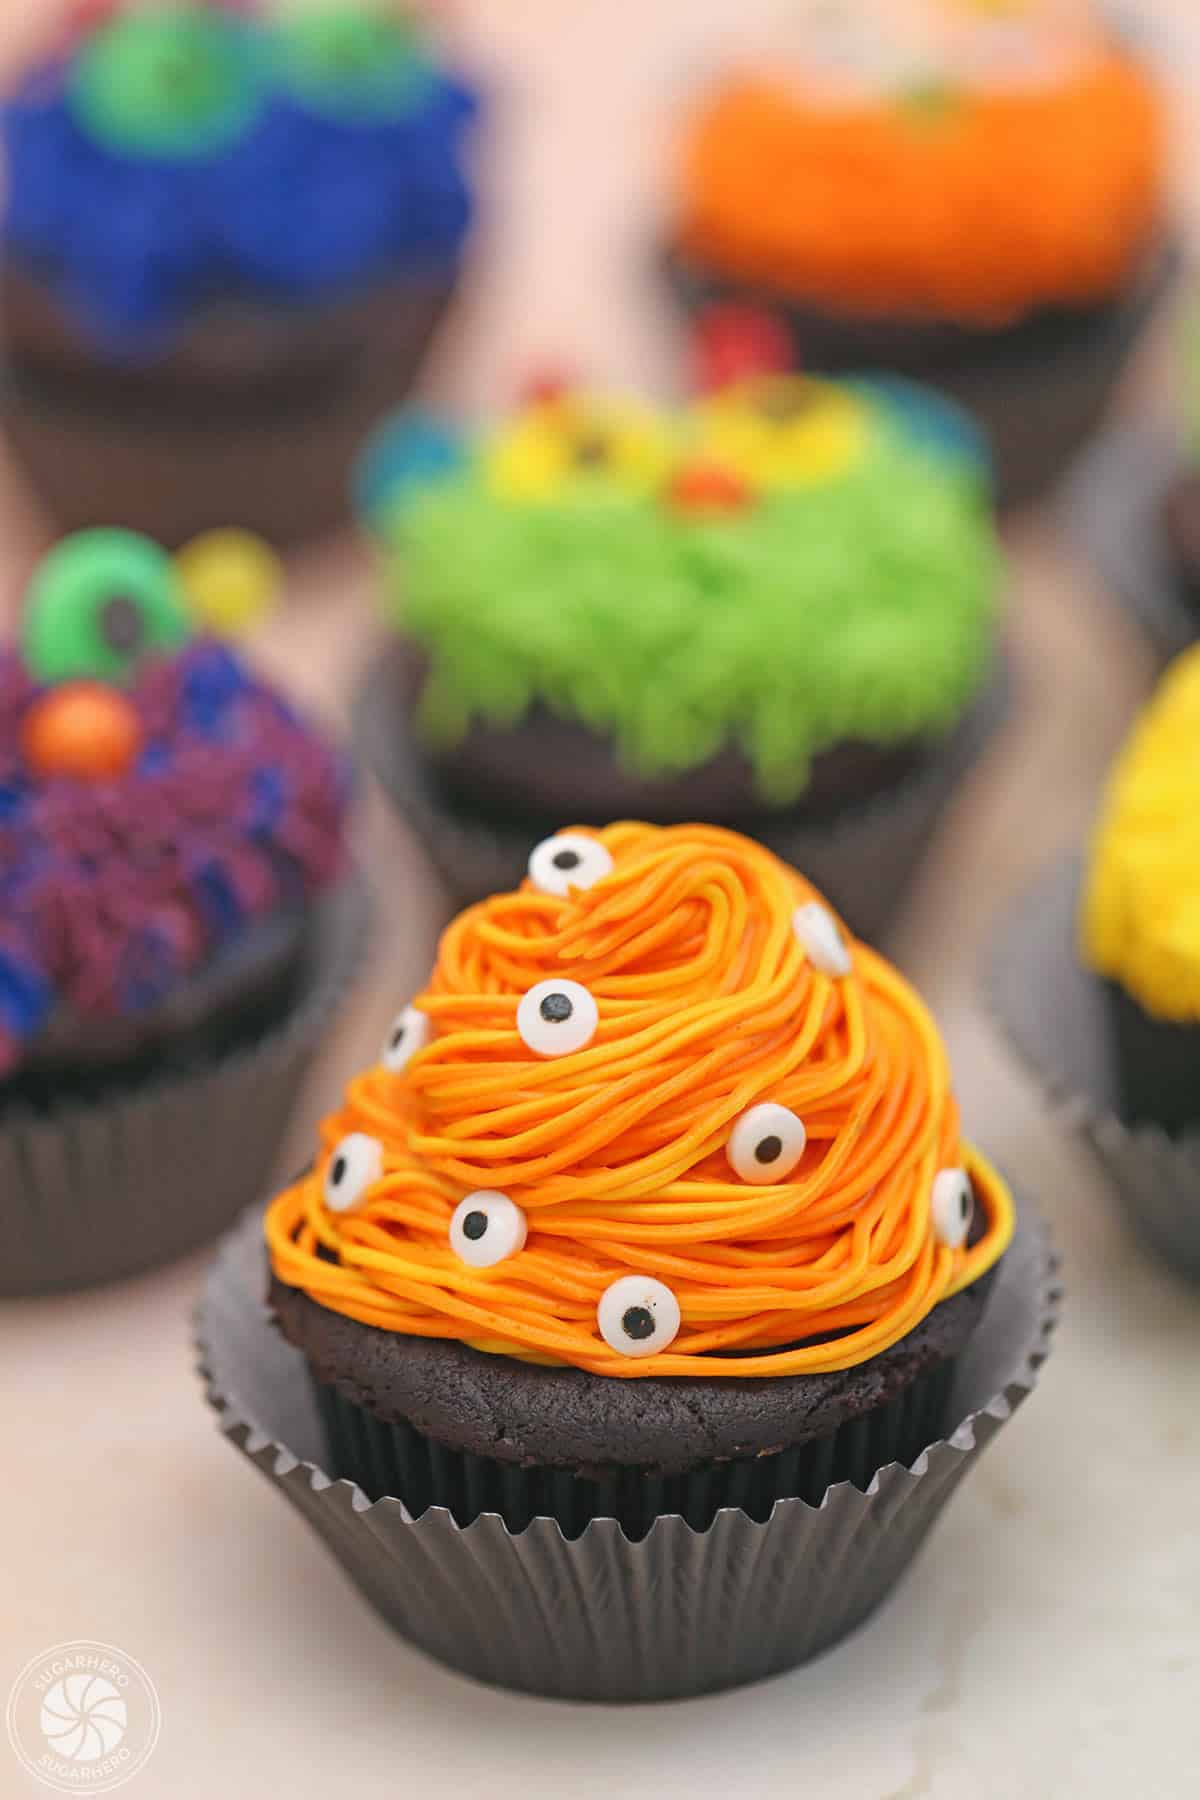
- Lotsa Eyeballs Monster: Use a piping bag fitted with a coupler to pipe a large round ball of frosting on top of a cupcake (approximately 3 TBSP). Then place a grass tip on the end of the piping bag and swirl strings of frosting over the frosting blob to give the monster body some texture. I decorated mine all over with eyeballs instead of making a more traditional face.
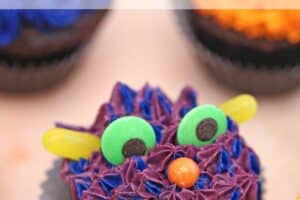
- Shaggy Monster: Use a piping bag fitted with a grass tip. Cover the top of the frosting with strings of frosting that overlap and swirl around.
- Hairy Monster: Use a piping bag fitted with a grass tip. Use small, short pulses of frosting to cover the top of a cupcake with frosting hair. Pull upward with each pulse of frosting to make the hair stand up.
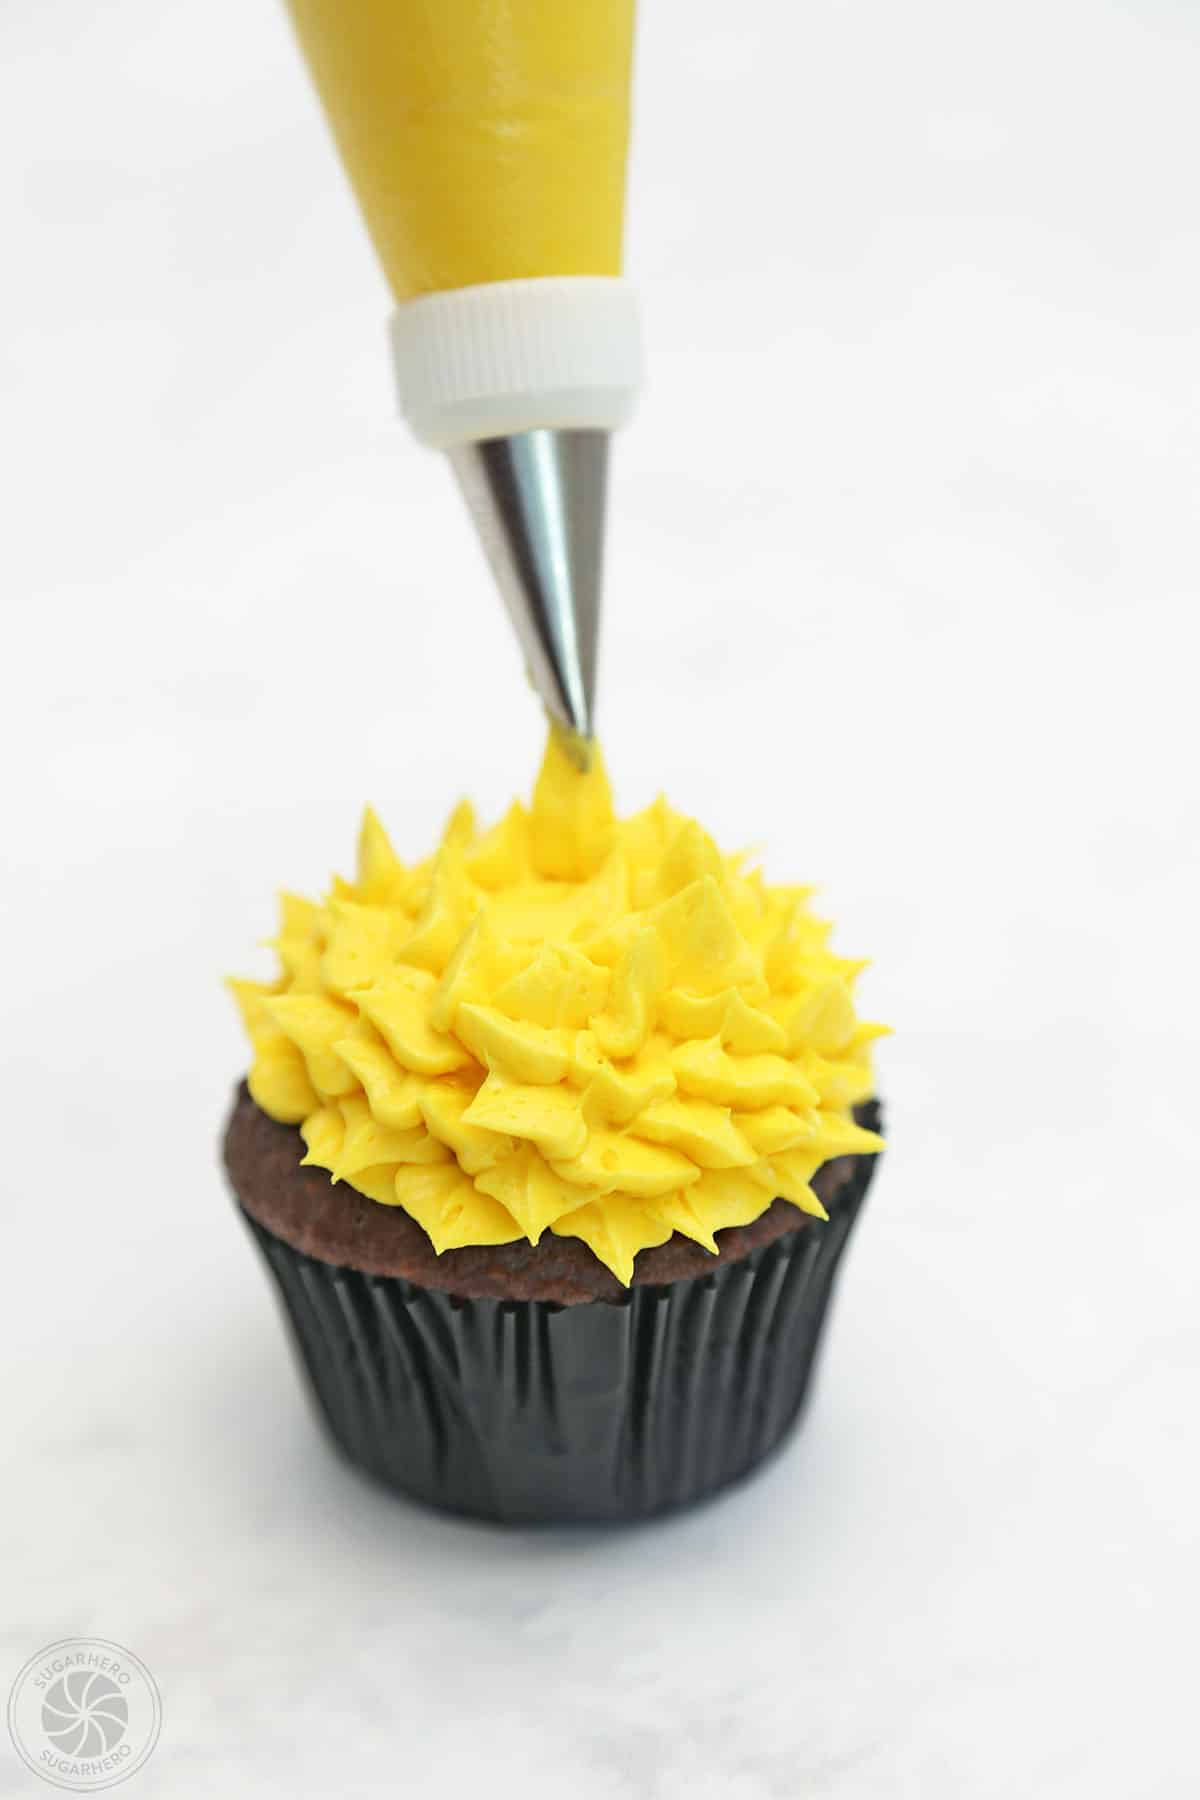
- Spiky Monster: Use a piping bag fitted with a small star tip or leaf tip. Use small, short pulses of frosting to cover the top of the cupcake with a layer of textured frosting. You can make a flat layer of frosting or build the pulses upward to give the body of the monster some height.
Decorate the Cupcakes
- Decorate: Immediately decorate frosted cupcakes with monster faces. (American buttercream forms a crust on the outside as it dries. You’ll have the best results if you work to decorate in batches of 2-3 cupcakes at a time). You can use any type of candy you like to make eyes, ears, mouths, noses, and horns. Keep in mind that you can cut the candy into smaller pieces and/or roll them into different shapes.
- Store: Store extras in an airtight container at room temperature for 2-3 days, or in the refrigerator for up to a week. If they have been chilled, allow them to come to room temperature before serving for the best taste and texture.
Recipe Notes
Measuring Tips
Our recipes are developed using weight measurements, and we highly recommend using a kitchen scale for baking whenever possible. However, if you prefer to use cups, volume measurements are provided as well. PLEASE NOTE: the adage “8 oz = 1 cup” is NOT true when speaking about weight, so don’t be concerned if the measurements don’t fit this formula.
Want to learn more about baking measurements and conversion?
Nutrition
📸 Photo Tutorial: How to Make Monster Cupcakes
Ready to get started? Follow these simple step-by-step directions and photos to make each type of monster. Don’t forget, these are just examples – let your imagination run wild and make your own designs, too! Find full, printable instructions in the recipe card above.
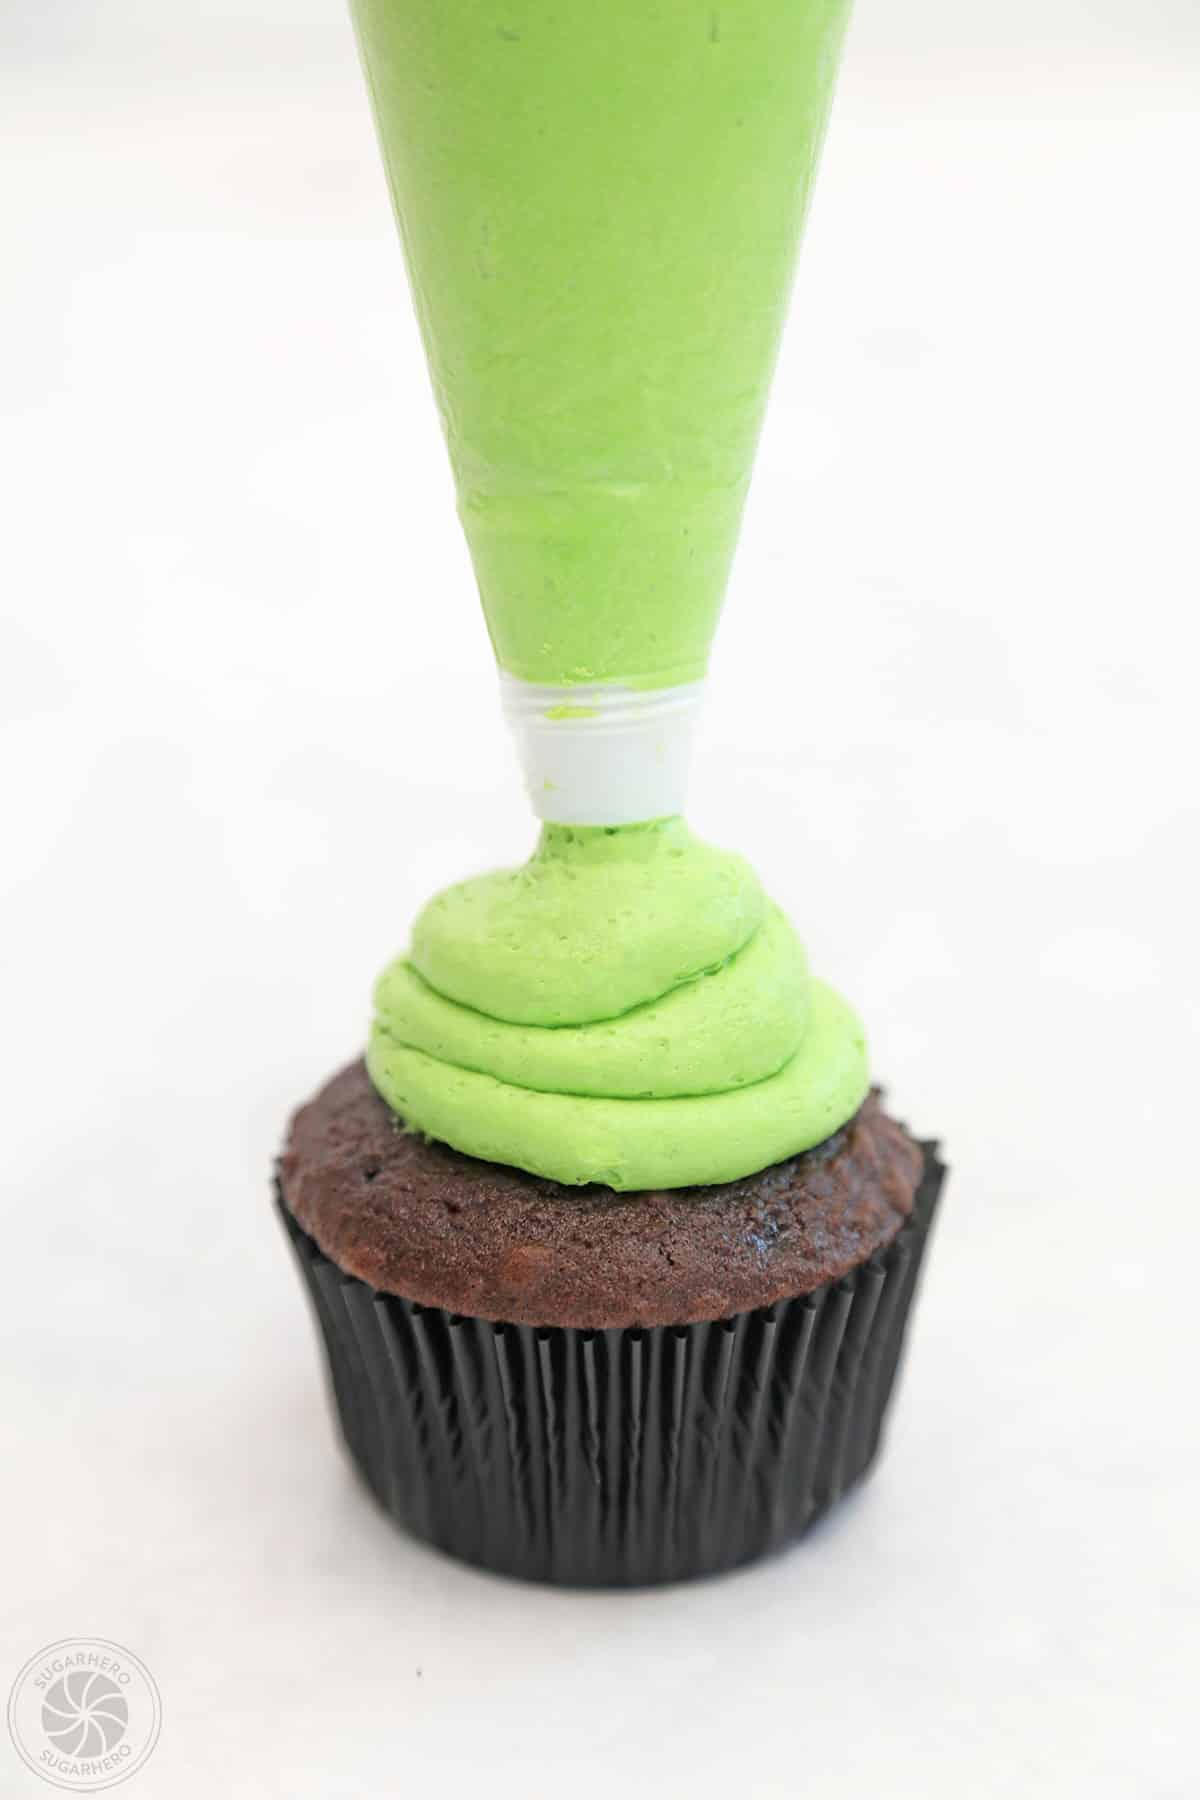
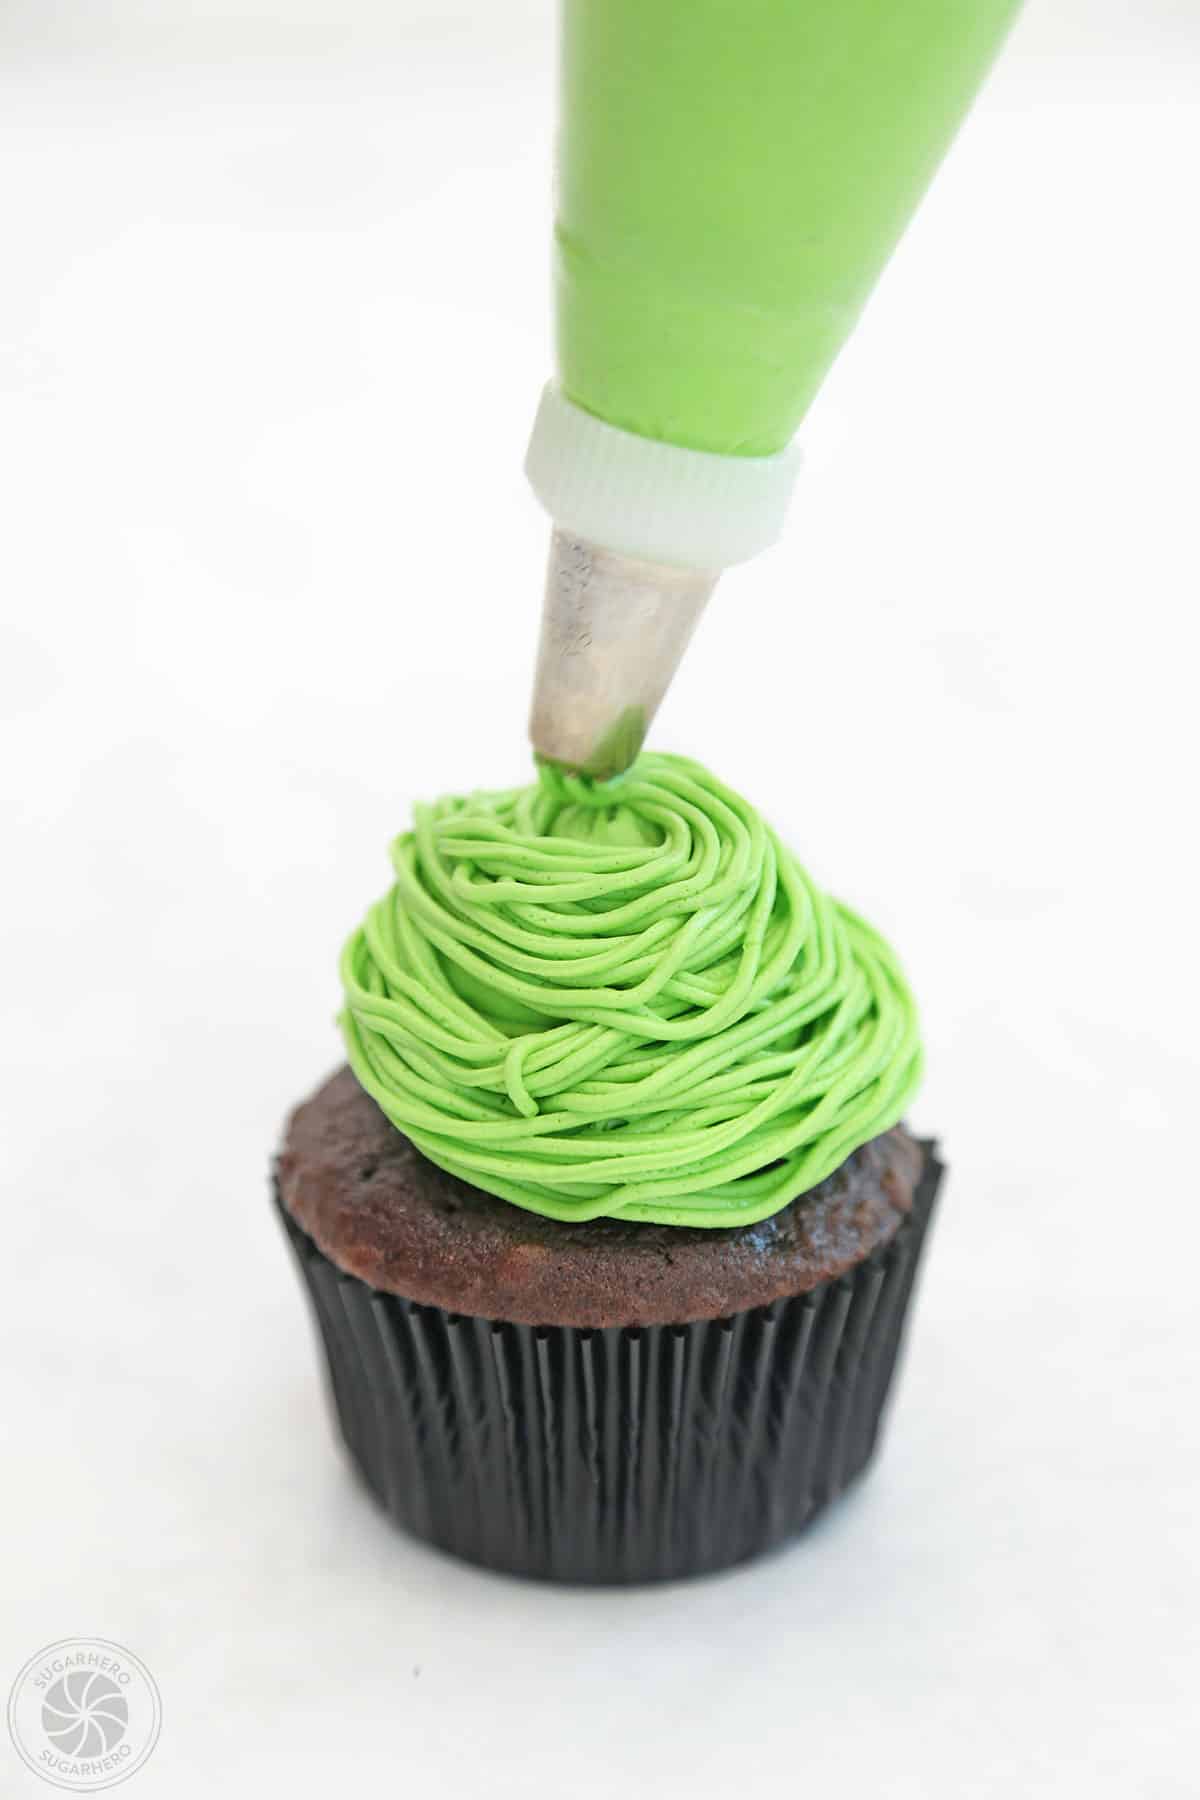

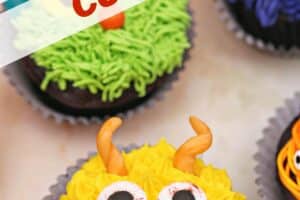
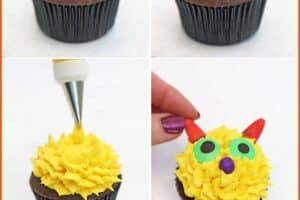
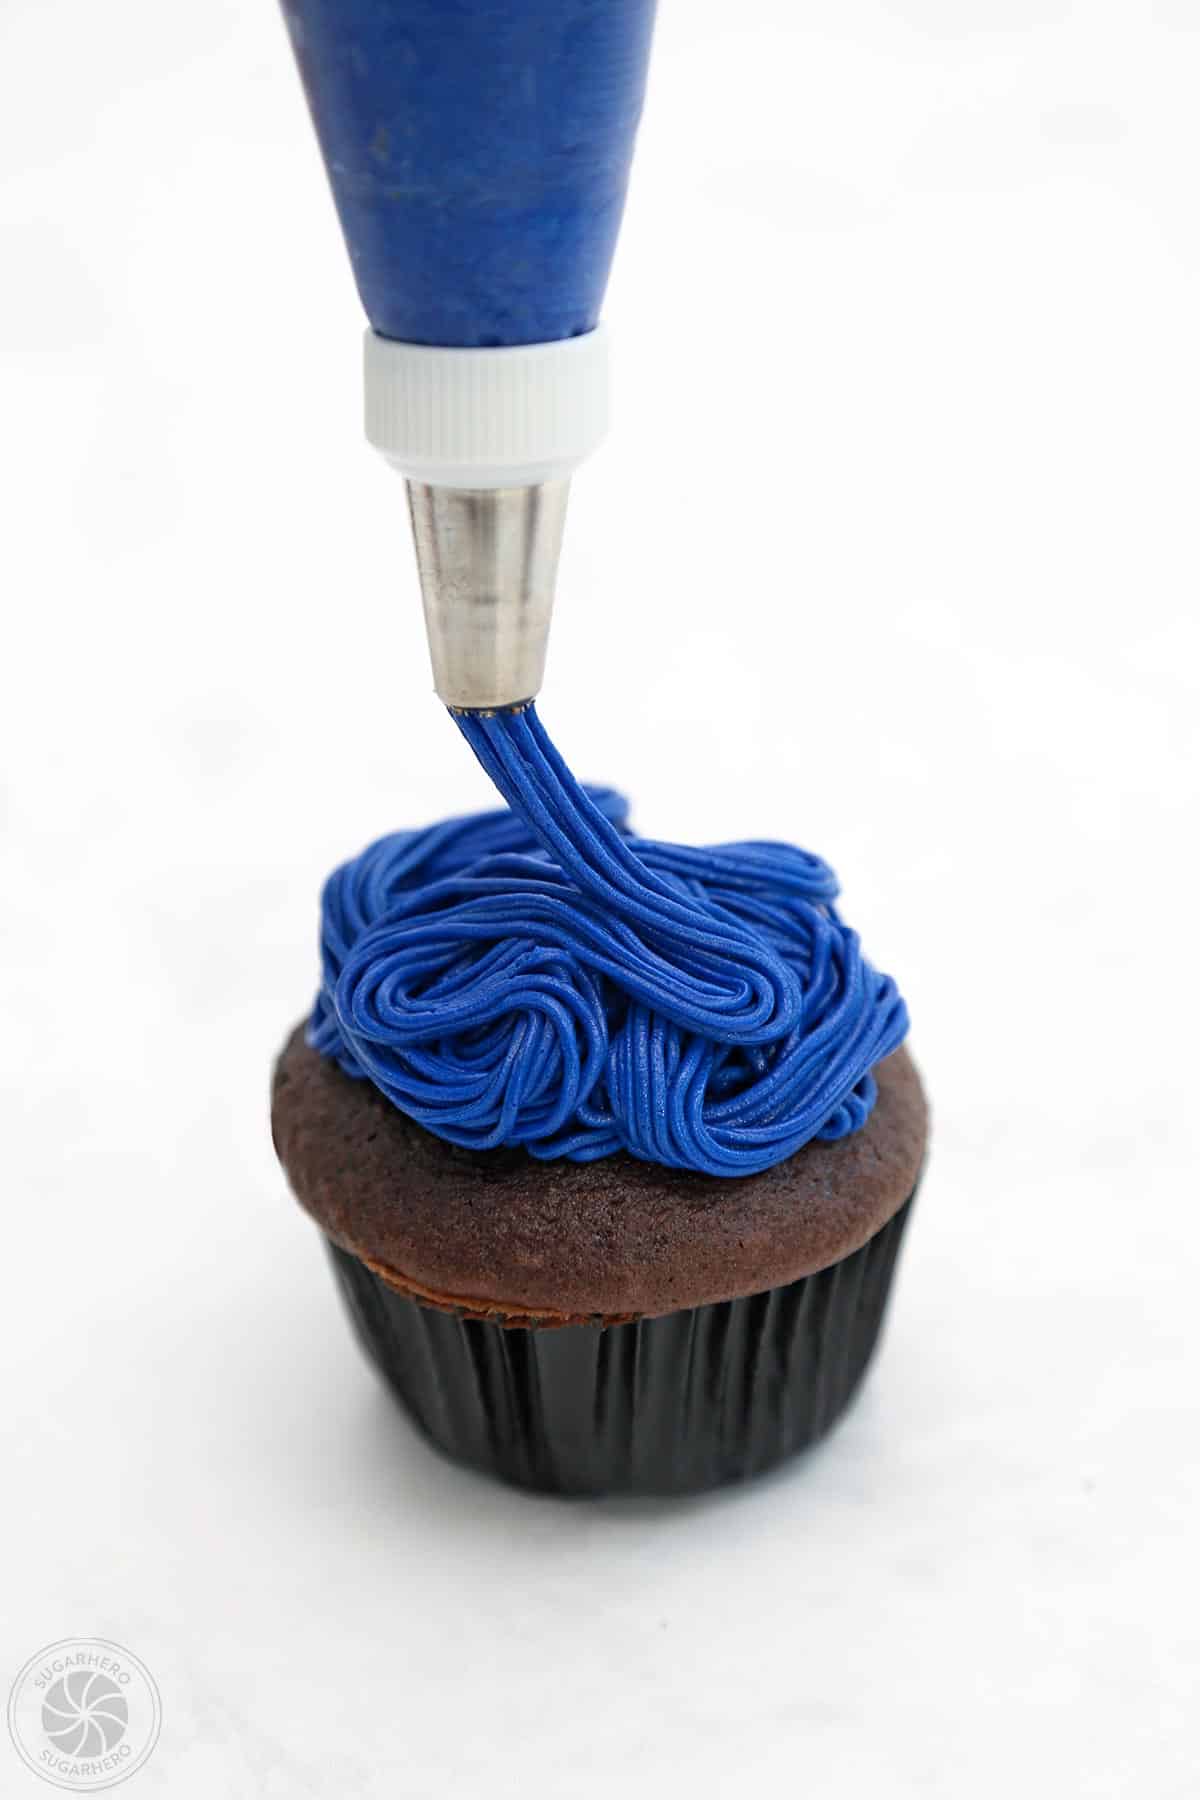
Lotsa Eyeballs Monster
- Pipe a frosting ball. Use a piping bag fitted with a coupler to pipe a large round ball of frosting on top of a cupcake (approximately 3 TBSP).
- Cover with stringy swirls. Then place a grass tip on the end of the piping bag and swirl strings of frosting over the frosting blob to give the monster body some hairy texture.
- Add eyes. Press a variety of candy eyeballs all over the frosting – you can use different colors and sizes too.
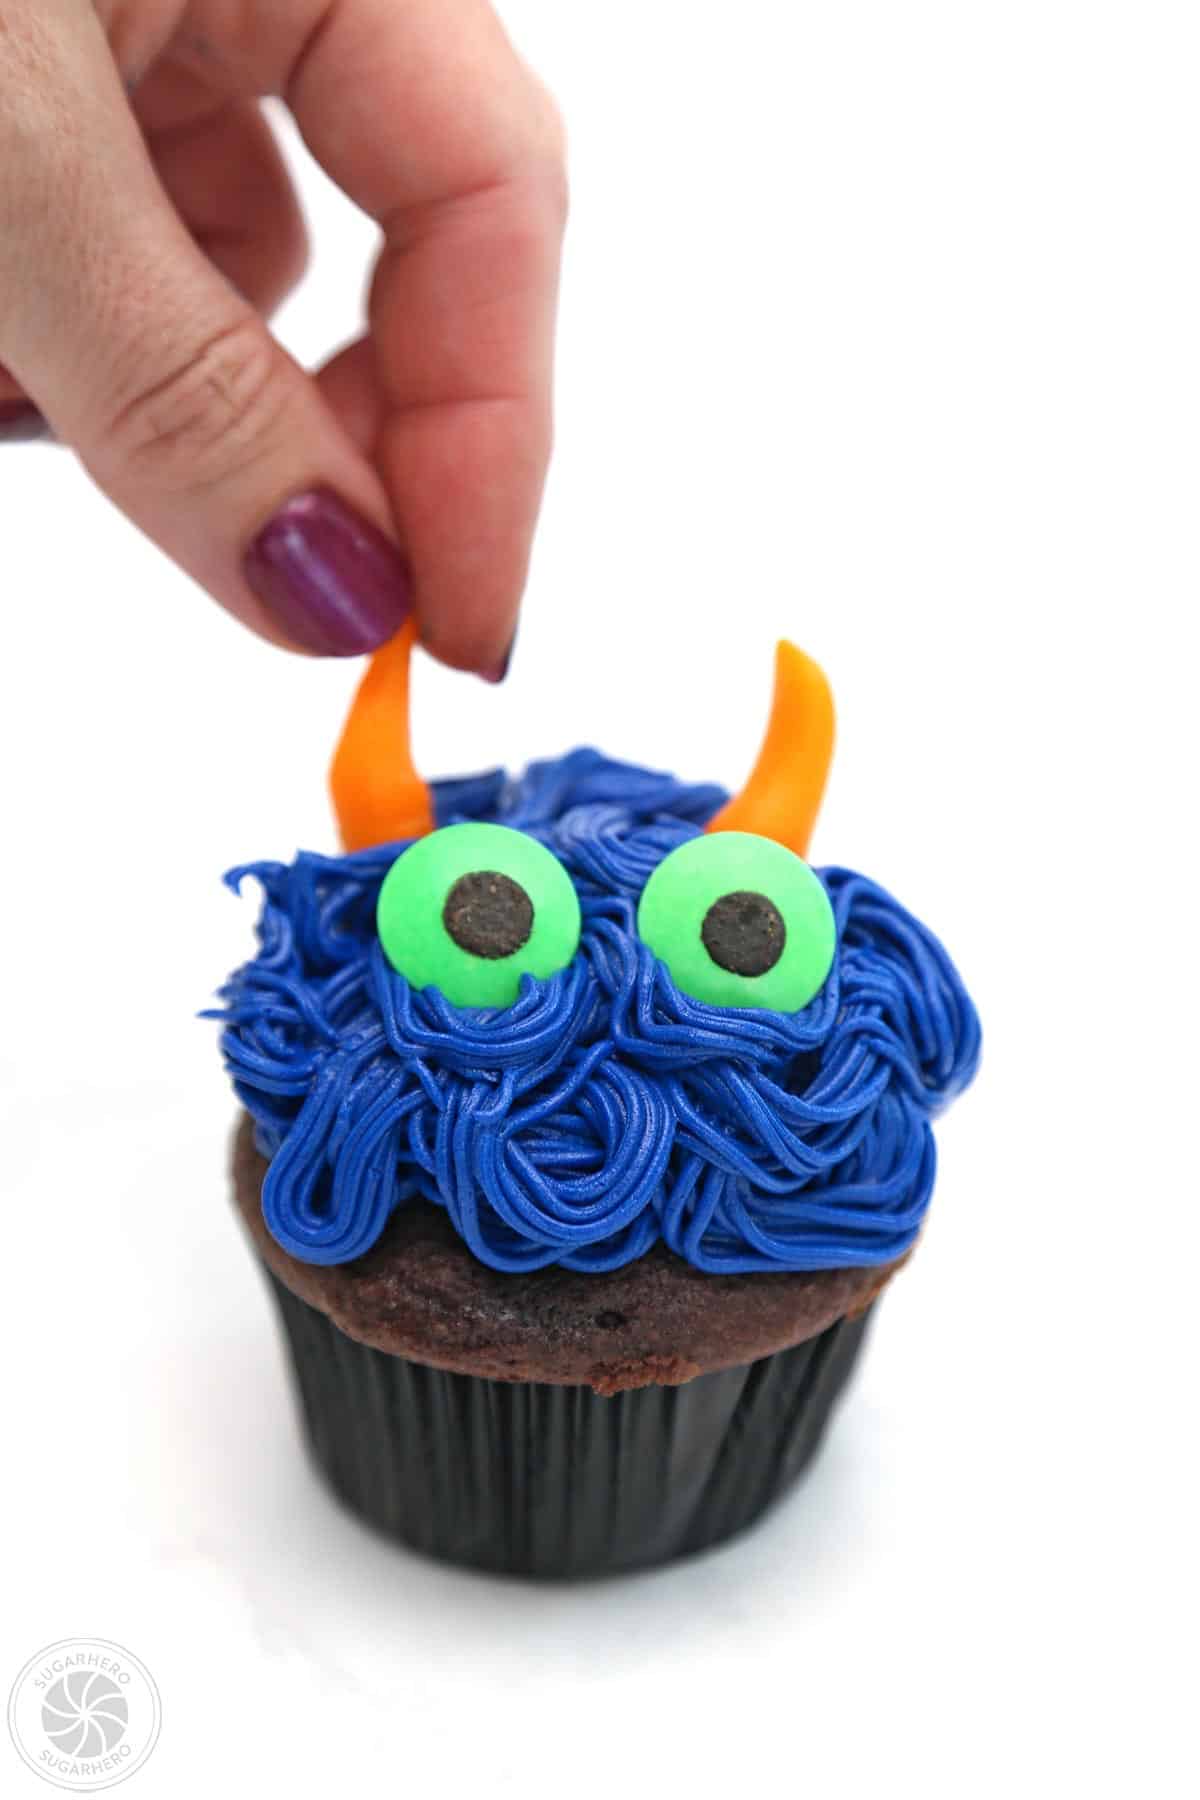
Shaggy Monster
- Make a swirled body. Use a piping bag fitted with a grass tip. Cover the top of the frosting with strings of frosting that overlap and swirl around.
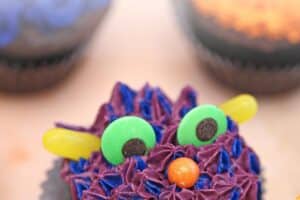
- Decorate. Take a Starburst fruit chew and cut it into quarters. Shape two quarters into horns, and press them into the top of the monster. Add two large candy eyeballs as a finishing touch.
Hairy Monster
- Make frosting hair. Use a piping bag fitted with a grass tip. Use small, short squeezes of frosting to cover the top of a cupcake with frosting hair. (Just like when we made Cookie Monster Cupcakes!) Pull upward with each pulse of frosting to make the hair stand up.
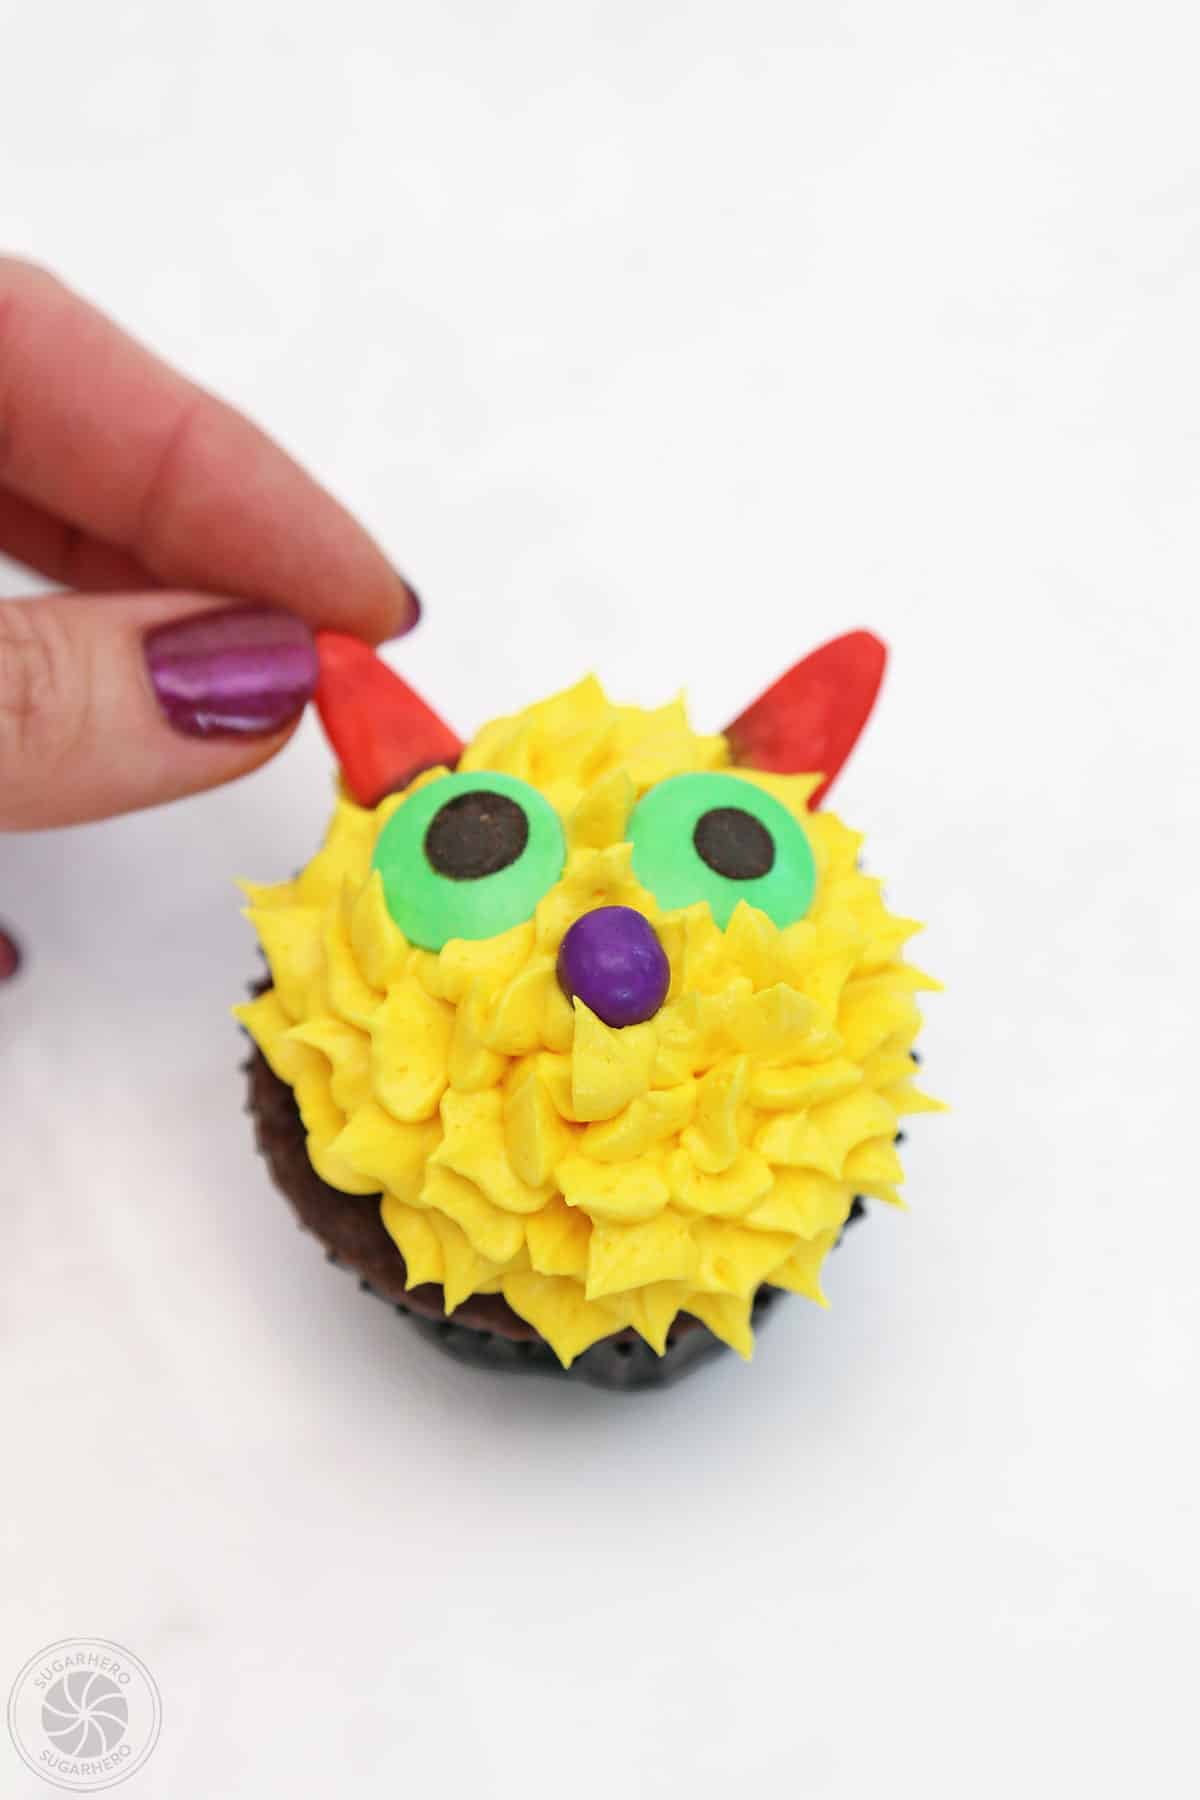
- Decorate. Use pieces of starburst to make two horns, and insert them at the top. Cut a gummy lifesaver in half, and add the halves next to the horns to make ears. Add half of a Mike & Ike’s for a nose, and finish with two large candy eyeballs.
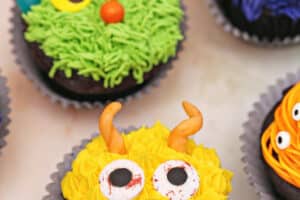
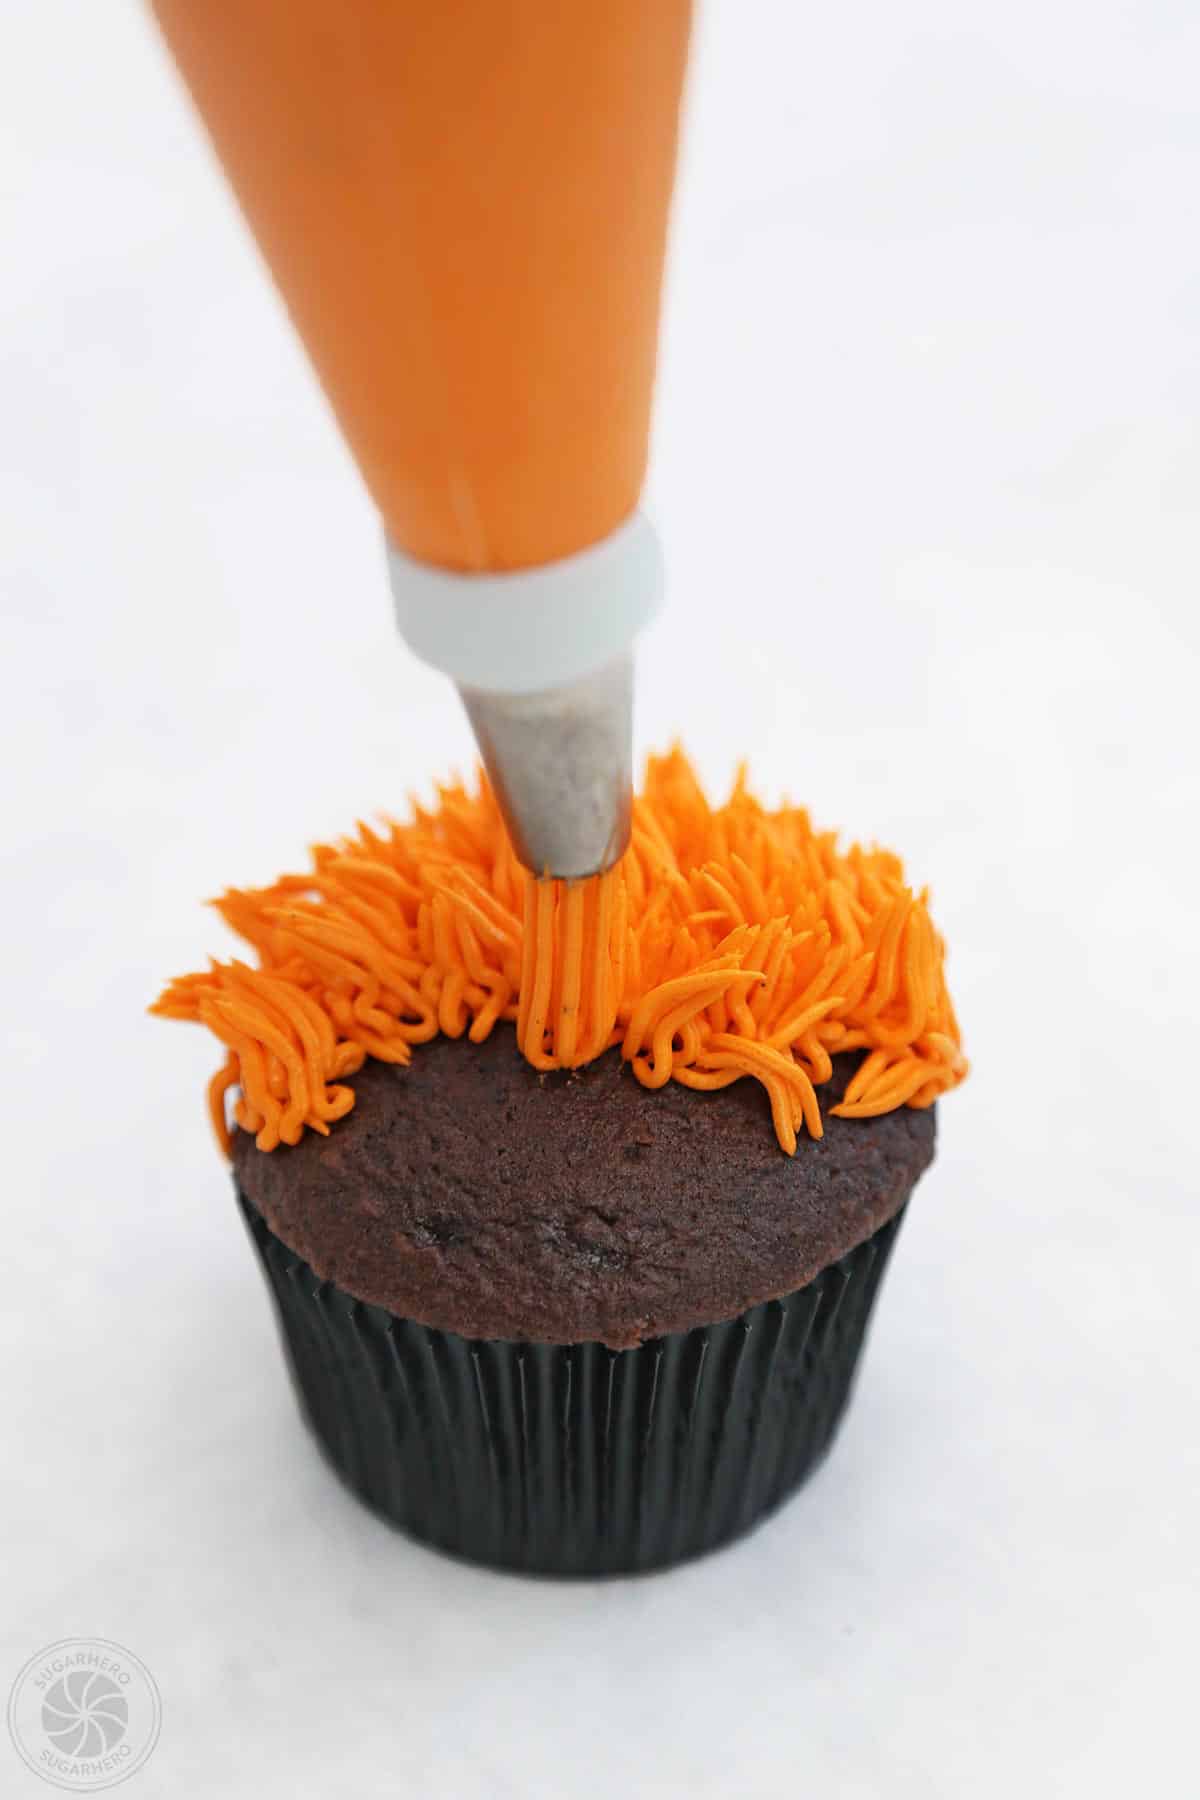
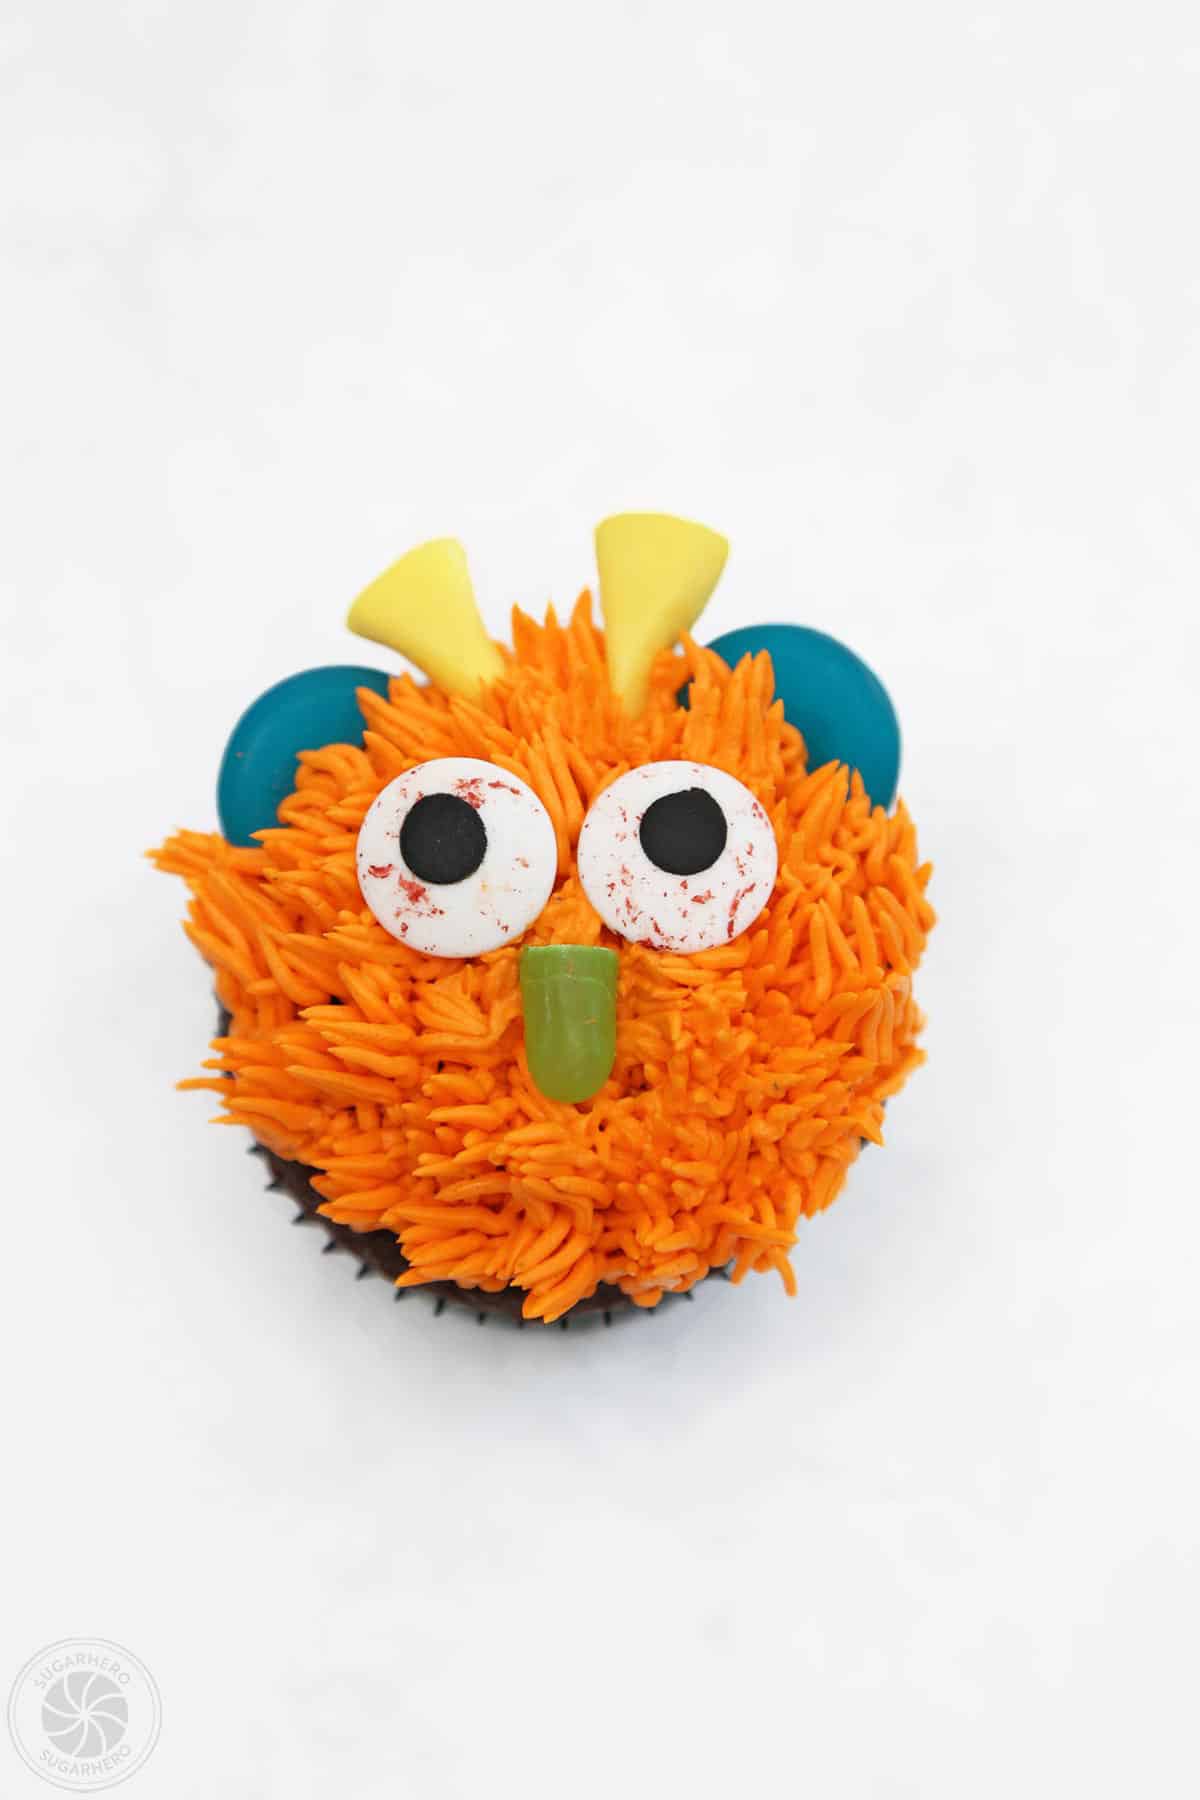
Spiky Monster
- Make frosting fur. Use a piping bag fitted with a small star tip or leaf tip. Use small, short squeezes of frosting to cover the top of the cupcake with a layer of spiky textured frosting. You can make a flat layer of frosting first, or build the spikes upward to give the body of the monster some height.
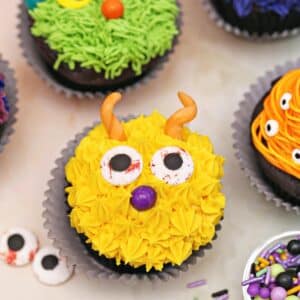
- Decorate. Add colorful candy corn to the top of the cupcake to be horns. Finish with candy eyeballs and a Sixlet or Skittle nose.
💡 Tips and FAQs
Just a few tips to help you make the BEST Halloween Monster Cupcakes ever!
If you don’t have piping bags on hand, you can use Ziplock bags, and cut a small hole in one of the corners to insert the piping tip through.
And while sometimes you can get away with not using piping tips, unfortunately for many of these designs (especially the hairy monsters) you will need the specific piping tips mentioned.
Bright, colorful frosting really makes these monsters roar, so here are my best tips for vivid colors. Your best chance of success is to use a high-quality gel or powdered food coloring, and to make the frosting at least a day in advance.
I frequently use and recommend Americolor gel food coloring, but other gel and powdered options will also work. Just avoid liquid color, which is not as strong and will require a LOT of coloring to get your desired shade.
After mixing in the coloring, it greatly helps if you give it time to sit and deepen. This extra time allows the color to fully develop and become more vibrant. I recommend making and coloring the buttercream a day before you want to use it.
Both components of these cupcakes can be made in advance and used later.
Frosting: The frosting can be made up to a week in advance. Place the frosting in an airtight container and press a layer of cling wrap directly on top of the frosting to prevent a crust from forming. Store the frosting in the refrigerator. When you’re ready to use it, let it come to room temperature on the counter, then whip it on medium speed until it regains its light, creamy texture.
Cupcakes: Baked and cooled cupcakes can be frozen in airtight containers. Let them defrosting in their container on the countertop before decorating.
Store extra cupcakes in an airtight container at room temperature for 2-3 days, or in the refrigerator for up to a week. If they have been chilled, allow them to come to room temperature before serving for the best taste and texture.