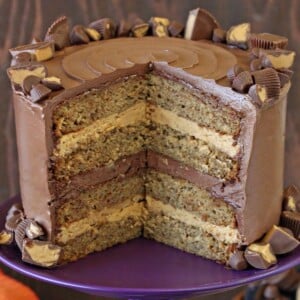
This rich Peanut Butter Cup Banana Cake is the ultimate banana layer cake! Moist, delicate banana cake is covered with layers of flavorful chocolate and peanut butter frosting.

What up, my New Year Resolutionaries?! How is everyone doing with their New Year commitments? Still drinking green juice, are we? Still hitting those early morning kickboxing classes? Still avoiding sugar? If you raised your hand at that last one, just scroll on by, nothing to see here…
So, in the interest of keeping things real, I’m also trying to eat less sugar right now. For the past few months I’ve been running on a lethal combination of no sleep, lots of stress, and too many sugary snacks used for energy and comfort…and it’s made me feel pretty gross. I have still not given up the dream of turning over a new leaf along with a new calendar page, so if you’re on the healthy food train, I’m right there with you! (…for now…duh duh DUH.)
This does NOT mean I’m suddenly going to start posting about date paste instead of doughnuts. There are other bloggers who fill that niche much better than I do, and honestly, I’m much more inspired to make, write about, and photograph beautiful pastries than healthy wannabe desserts. So the content here won’t change, but hopefully the amount I’m eating after the photo shoots will! I think desserts can have a place in a healthy diet (everything in moderation!), and I’m just hoping that they have a slightly smaller place in mine, at least for awhile.

But enough about my layers, let’s talk about cake layers instead! This cake combines 3 of my favorite things: peanut butter, chocolate, and banana. I don’t know if I have Elvis to thank for this or what, but I grew up eating peanut butter and banana sandwiches, and it’s still one of my favorites when I need a quick lunch or comforting snack. (I also like “banana tacos”—a banana split in half lengthwise, with a PB filling and maybe a bit of granola sprinkled in there. Should I rebrand as BananaHero? Tempting…)

This cake starts with four layers of moist banana cake, with a bit of cinnamon and vanilla thrown in there too. The peanut butter frosting is thick and rich, like the inside of a peanut butter cup, only less grainy and more velvety. And the milk chocolate frosting is light and glossy, but it has a deep flavor from 3 (three!) types of chocolate. I leaned toward milk chocolate with this one, so it wouldn’t completely overpower the more delicate banana cake, but if you’re firmly in dark chocolate territory then you can make that swap easily.

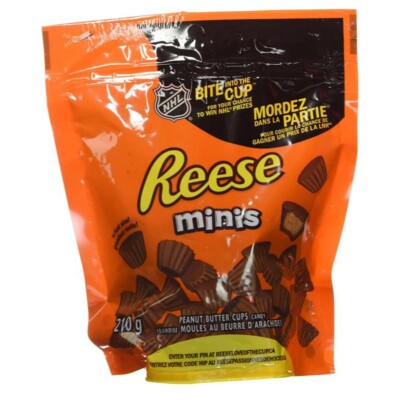
True story, 75% of the reason I made this cake is so that I could decorate it with peanut butter cups. Is there anything better or easier than throwing gobs of candy on top of a cake?! I used 3 different sizes of cups: mini, small, and standard, and cut some up while leaving others whole. Whenever possible I try to use peanut butter cups from Trader Joe’s, because they have a LOT of peanut butter filling and always taste really fresh, but of course any peanut butter/chocolate candy you can find will work! You can also use crushed peanuts or peanut butter chips on the outside.

This was a massive cake that easily served about a dozen people at the party we took it to, with lots of leftovers to spare. It’s rich, so smaller pieces are very satisfying. Fortunately, the banana cake is a keeper and stays moist and fresh for days, so this is one you can enjoy for about a week after making it. (Score!)

Tell me, did you set resolutions this year? Are you on the healthy eating train too? Cursing my name and wishing I’d posted a kale smoothie instead? Let me know down below!
🥜 More Peanut Recipes You’ll Love
Chocolate Cake With Banana and Hazelnut Filling
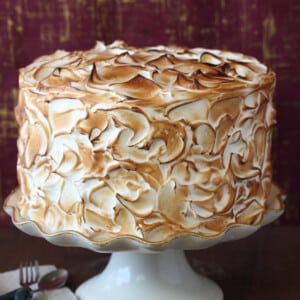
Banana Meringue Cake with Cinnamon-Sour Cream Ganache
Peanut Butter Cup Banana Cake
Ingredients
For the Banana Cake:
- 10.5 oz granulated sugar, (1 1/2 cups)
- 8 oz large bananas, (1 cup), mashed, ripe
- 4 fl oz vegetable oil, (1/2 cup)
- 2 large eggs, at room temperature
- 2 fl oz buttermilk, (1/4 cup)
- 1 tsp vanilla extract
- 9 oz all-purpose flour, (2 cups)
- 1 tsp baking soda
- 1 tsp ground cinnamon
- 1/2 tsp salt
For the Milk Chocolate Frosting:
- 12 oz unsalted butter, (1 1/2 cups), at room temperature
- 2 oz powdered sugar, (1/2 cup), sifted
- 1.5 oz unsweetened cocoa powder, (1/2 cup), sifted
- 1/3 cup hot water
- 2 oz sour cream, (1/4 cup)
- 2 tsp vanilla extract
- 1/8 tsp salt
- 10 oz milk chocolate, chopped, melted and cooled slightly
- 5 oz dark chocolate, chopped, melted and cooled slightly
For the Peanut Butter Frosting:
- 4 oz powdered sugar, (1 cup)
- 9.5 oz peanut butter, (1 cup)
- 2.5 oz unsalted butter, (5 TBSP), at room temperature
- 1 tsp vanilla extract
- 1/4 tsp salt
- 2 oz heavy cream, (¼ cup)
To Assemble:
- 3-4 cups assorted sizes peanut butter cups
Instructions
To Make the Banana Cake:
- Preheat the oven to 350°F. Spray four 8-inch cake pans with nonstick cooking spray, line the bottoms with parchment rounds, then lightly spray the parchment. (You can use 2 or 3 9-inch cake pans if you want fewer, wider layers.)
- Combine the sugar, banana, oil, eggs, buttermilk, and vanilla in the bowl of a large stand mixer fitted with a paddle attachment. Beat everything together on medium-low speed until well blended.
- In a separate bowl, sift together all of the dry ingredients. Add the drys to the banana mixture and beat well. Finish by scraping the bottom and sides of the bowl with a rubber spatula to make sure there are no dry patches. Divide the batter equally between the four pans.
- Bake the cakes until the tops spring back lightly when pressed and a toothpick inserted into the center comes out clean, about 20 minutes. Cool the cakes in the pans for 15 minutes, then turn out onto wire racks and cool completely. Cakes can be made in advance, wrapped in plastic wrap, and frozen until ready to use. I find it’s a bit easier to work with cold banana cake (it’s less delicate) so even if you’re assembling these the same day you bake them, try to put them in the freezer for at least 20-30 minutes to firm them up a bit before assembling the cake.
To Make the Milk Chocolate Frosting:
- In the bowl of stand mixer fitted with a paddle attachment, beat the butter on medium speed until pale and fluffy, about 6 minutes. Reduce to speed to low, and add the powdered sugar, cocoa powder, water, sour cream, vanilla, and salt and beat until incorporated, about 1 minute. Increase the speed to medium and beat for 2 more minutes.
- Add the melted chocolates and beat on medium speed until smooth, about 1 minute. Use immediately for the best texture.
To Make the Peanut Butter Frosting:
- Combine the powdered sugar, peanut butter, butter, vanilla, and salt in the bowl of a large stand mixer fitted with a paddle attachment. Mix them together on medium-low speed until they’re combined and the dry sugar disappears, scraping down the bowl with a rubber spatula as you work. Add 2 tablespoons of cream and beat on medium-high speed until the mixture is light, fluffy and smooth. Add up to 2 more tablespoons of cream if necessary, to get a light and smooth texture. The peanut butter frosting can be made in advance and kept in an airtight container in the refrigerator for several days. Let it come to room temperature before spreading it if you make it in advance.
To Assemble:
- Place one cake on a cardboard cake round, and top it with about half of the peanut butter frosting. Use an offset spatula or knife to spread the frosting evenly to the edge of the cake. Press a second cake round on top, and this time top it a generous cup of chocolate frosting.
- Repeat again, using the remaining peanut butter frosting as the third frosting layer. After all the cake layers are added, spread a very thin layer of chocolate frosting over the top and sides of the cake. Refrigerate the cake for 30 minutes to firm it up and make it easier to decorate.
- Once the cake has firmed up, spread the remaining chocolate frosting over the top and sides of the cake. Decorate around the edges of the top and bottom with peanut butter cups or any other decorations you’d like. Store the cake in the refrigerator for up to 7 days, but for the best taste and texture, serve it at room temperature.
Recipe Notes
Measuring Tips
Our recipes are developed using weight measurements, and we highly recommend using a kitchen scale for baking whenever possible. However, if you prefer to use cups, volume measurements are provided as well. PLEASE NOTE: the adage “8 oz = 1 cup” is NOT true when speaking about weight, so don’t be concerned if the measurements don’t fit this formula.
Want to learn more about baking measurements and conversion?


The prettiest cake I ever did see! So glad to hear you aren’t going to post about date paste anytime soon. I find the best way to eat less dessert is to ship it out of house as soon as possible! Hahaha But really, this cake is just TOO GOOD to resist. I would gladly spend my calories here! Pinned! x
YES, that’s my strategy too! Bonus, giving people dessert is a great way to bribe them into liking you! We’re totally buying our friendships with baked goods. 😀
I’m on that healthy train, man! It feels good, I won’t lie. And taking the pressure off myself from the blog thing really helps.
BUT. This is beautiful, and I love that it keeps so long! There’s nothing like a little pumpkin or banana to keep a cake moist and lovely for days. Days!
Man, blogging makes it so much harder to eat well! I think because I never want to blog healthy food, haha. But it definitely feels good. I notice such a big change in my afternoon energy when I don’t have sugar slamming through my system. Even though I want you to be happy and healthy, selfishly I miss your blog and want you baaaaack!
Wowsers!
I think dessert is an important part of any day and is quite acceptable in a healthy lifestyle. I’ll often eat cake for breakfast: I figure it’s no extra calories than s normal breakfast and i have all day to wear it off! See; totally justified dessert!!!
You’re a dessert-justifying genius! Plus I know you have all sorts of tricks for making your cakes both healthy and delicious, so I definitely wouldn’t feel bad eating one of your cakes for breakfast!
Oh wow that looks amazing! Better than any date paste treat you could possibly make 🙂 The frosting : cake ratio in this cake looks perfect too 😛
Haha, thanks June! I actually love dates and have lots of love for date-sweetened desserts, I just like writing about sweet sweet sugar. 🙂
1/12th of this cake is conservatively 1000 calories.
Possibly. What I actually said was it easily served 12 people with lots of leftovers to spare, and I also mentioned that small pieces are very satisfying. I’d say you could get 18-20 decent-sized servings from this cake, more if some of those are children.
Oh my w-o-r-d Elizabeth this layer cake is too good to be true!! Can I have s piece PLEASSSEEEEEE 🙂 🙂
I wish! When are you visiting from Spain, already? 🙂
Chocolate and peanut butter! I can’t imagine better cake!
Thanks Medeja! We thought it was pretty dreamy too. 🙂
I’m trying to eat healthier, but its almost impossible when I’m surrounded by food 24/7..haha
And this cake is heaven wrapped in chocolate.
Haha, I feel that! Blogging is not my friend when it comes to the healthy train. 🙂
I made the cake today, just with a Swiss Meringue buttercream though. It is delicious and so easy to make. I can’t seem to stop snacking on the trimmings!
Yaaaay! I imagine this would be fabulous with a swiss meringue buttercream–so light and tasty! Thanks for the feedback Buffi. 🙂
Those layers… *drool* I wouldn’t mind a slice right now, thank you. 😉
Thanks Lexi. You and me both! 😀