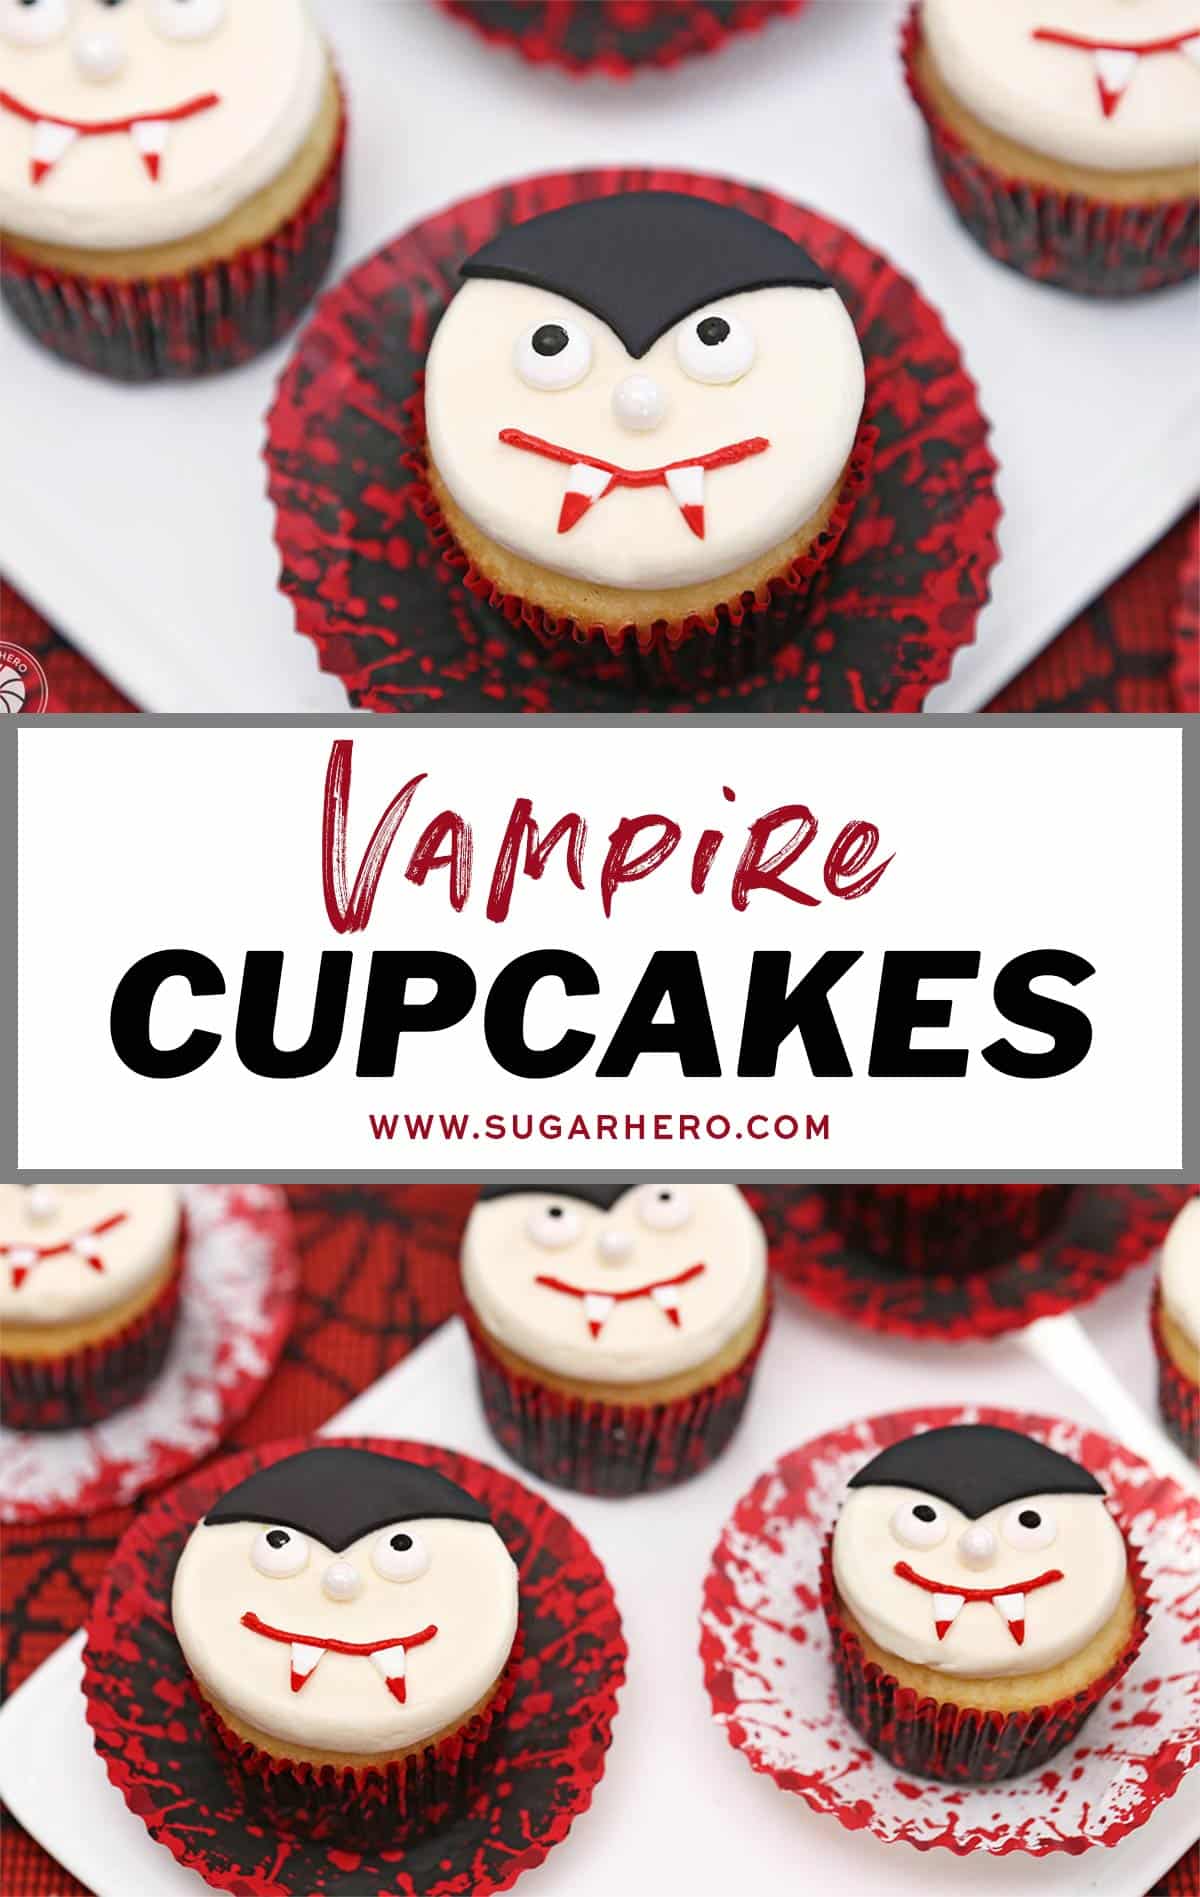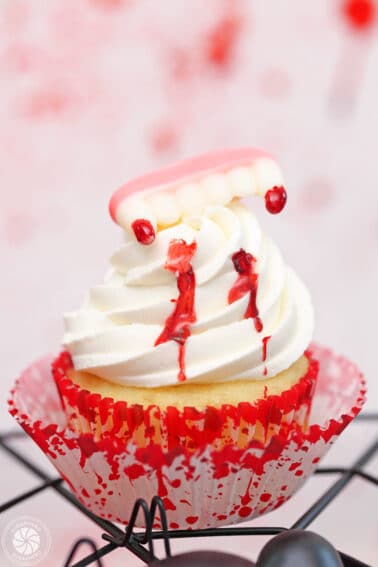

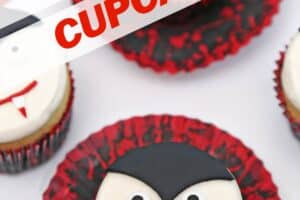
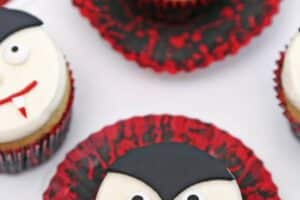


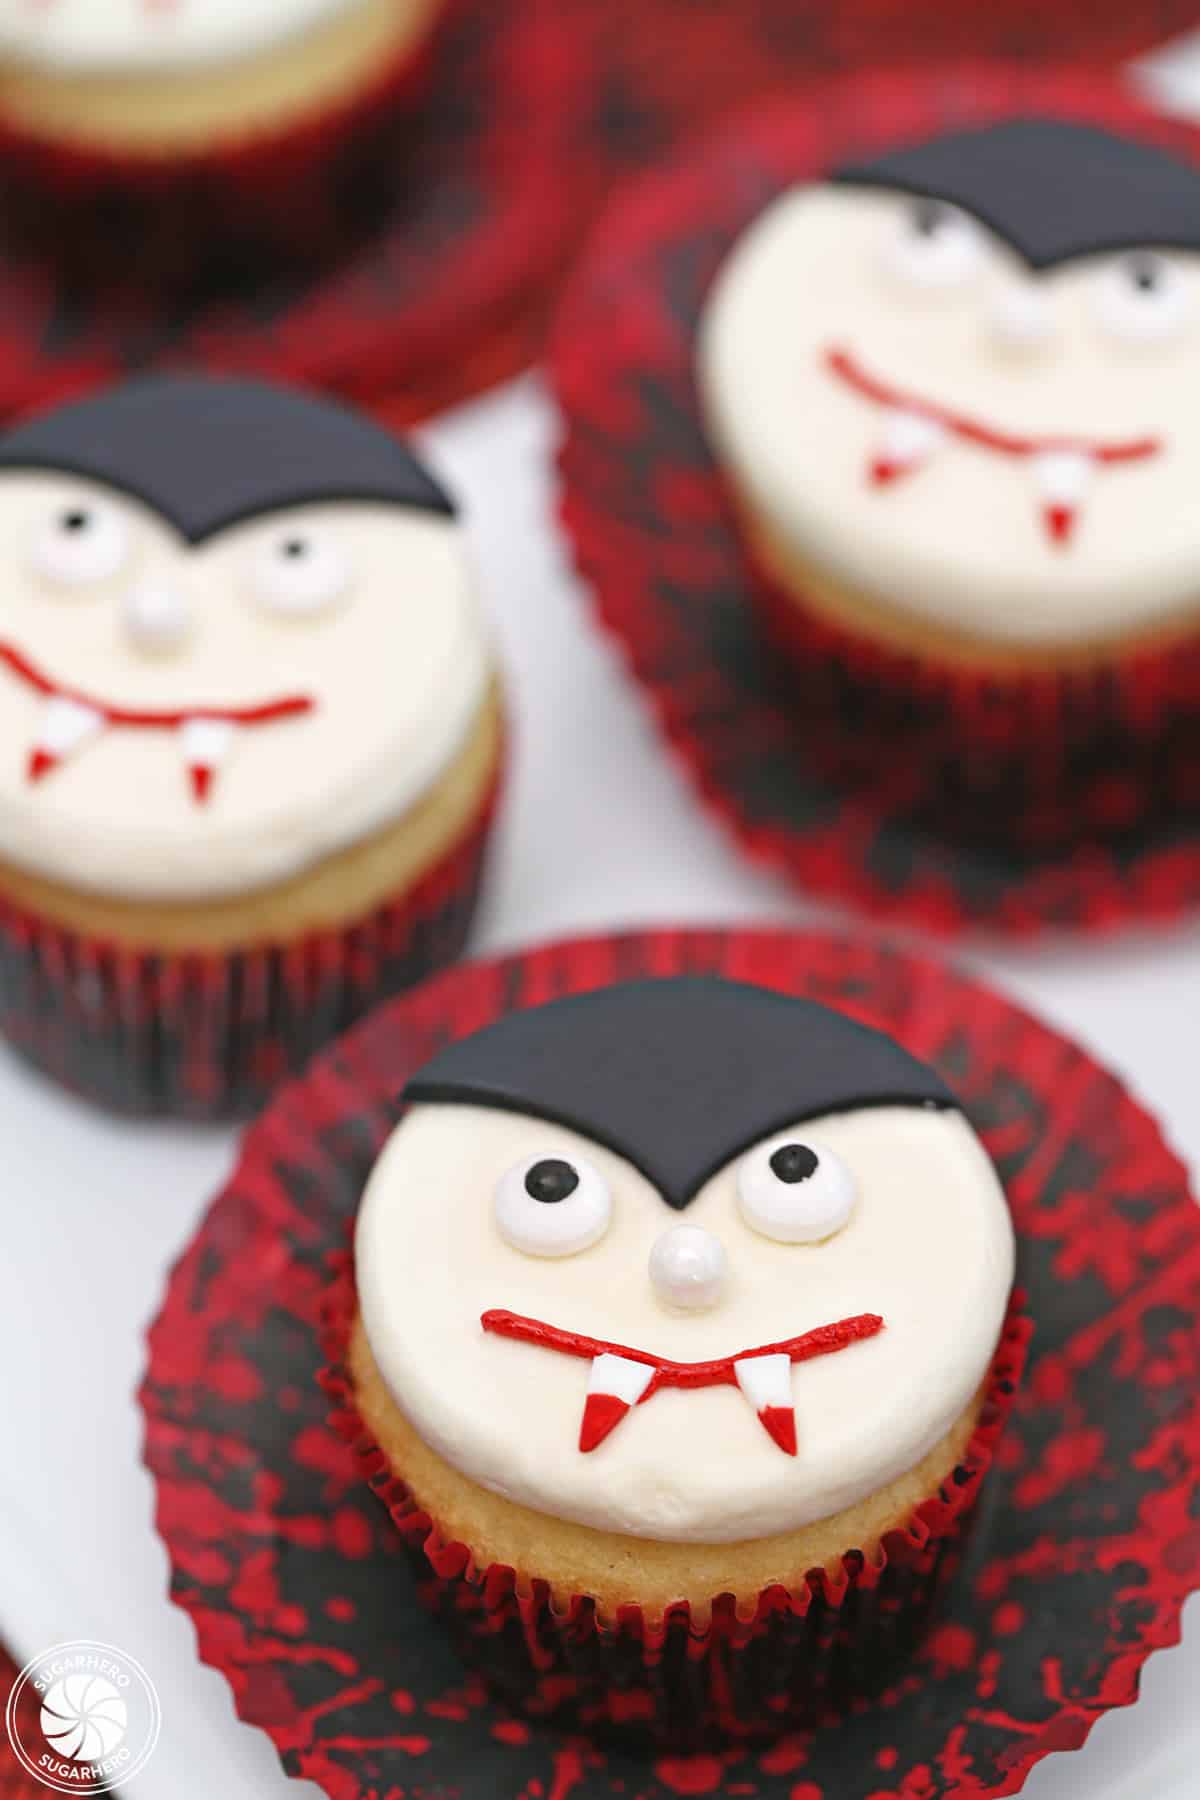
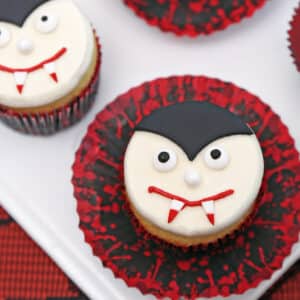
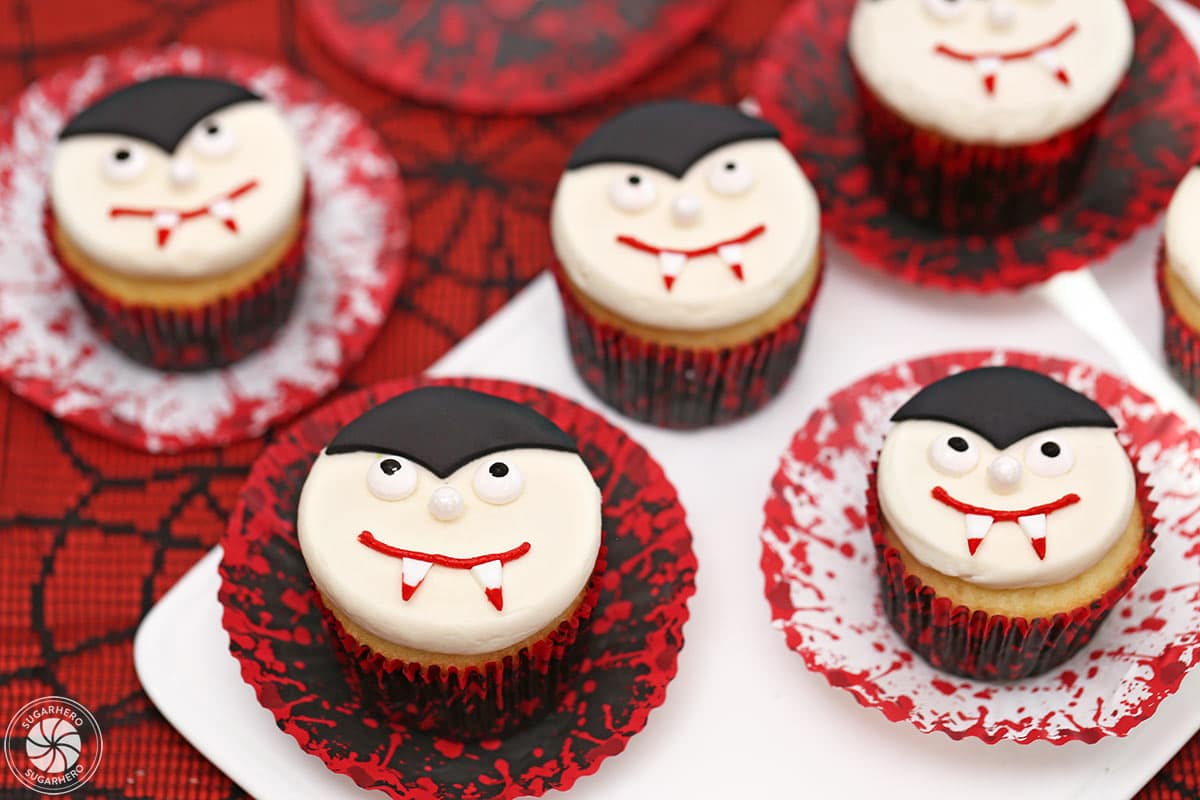
Don’t wait to sink your teeth into these Vampire Cupcakes! Use buttercream, fondant and candy to turn your cupcakes into cute (and spooky!) vampires for Halloween.

🧛🏼♂️ Spooky Vampire Cupcakes
The secret to a killer Halloween? Desserts that are both cute and creepy, like these easy Vampire Cupcakes.
Today I’m sharing my decorating tricks to make these bloody cute Vampire Cupcakes. You’ll start with prepared cupcakes of your choice, easy homemade frosting, fondant, and a few candy decorations. Just follow the simple step-by-step directions, and you’ll be ready to party vampire-style in no time!
Because we’re all about the decorating, I encourage you to take a shortcut and use your favorite cake mix for these cupcakes. But if you’re looking for some homemade inspiration, browse our list of cupcake recipes here.
🎃 More Spooky Sweets
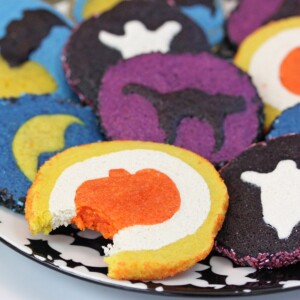
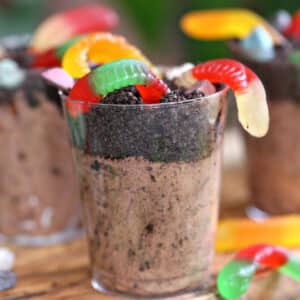
If you like to put the “treat” in “trick or treat,” check out all of our fun Halloween dessert recipes, like Witch’s Brew Halloween Punch, Red Velvet Marshmallow Spiderweb Cake, and Witch Finger Cookies.
Table of Contents
🧾 What You’ll Need

Ingredients
You’ll only need a few things to make and decorate these cupcakes. Don’t miss these important ingredient tips. Full ingredient amounts can be found in the recipe card below. (Links are affiliate links and I earn a small commission from qualifying purchases.)
For the Cupcakes and Frosting
- Cupcakes: You’ll need 24 baked and cooled cupcakes. Make cupcakes from scratch or use your favorite mix! I used white cupcakes for these little bloodsuckers, but you can make any flavor you like.
- Unsalted butter and salt: I like to control the amount of salt in my frosting. I used cool room temperature unsalted butter and then added salt. If you don’t have unsalted butter, you can use salted butter and omit the salt.
- Milk: Use milk or water to adjust the consistency of the frosting.
- Vanilla extract: I like to use Nielssen-Massey Madagascar vanilla extract because it has amazing flavor. You can use any brand you like.
- Powdered sugar: This frosting recipe is an American Buttercream, which is powdered sugar-based. You’ll want to measure the sugar with a scale if possible and then sift it into the mixture.
For the Decorations
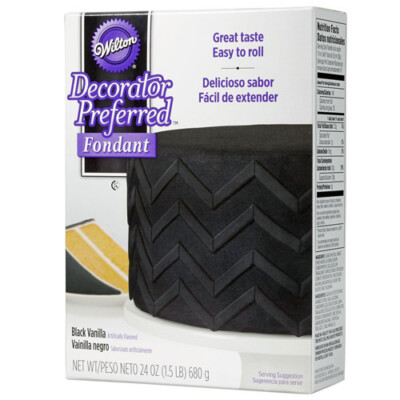
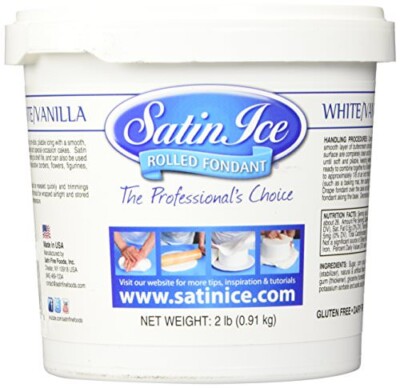
- Fondant: To make the vampire hair and teeth, you’ll need some black fondant and white fondant.
- Candy for the eyes and nose: I used small candy eyeballs and white candy pearls for the nose. Feel free to substitute other types of candy.
- Red gel food coloring: I recommend using Americolor red gel food coloring. It’s highly concentrated, so you’ll only need a little to make a deep shade of red frosting for the mouth. You’ll also use it to add a bit of ‘blood’ to the vampire teeth.
Equipment
Although optional, getting a few decorating tools will make the process of creating these cupcakes even eaiser. (Links are affiliate links and I earn a small commission from qualifying purchases.)
- Piping bag and couplers: I like these piping bags because they are washable and reusable. You’ll also need some couplers. You can also make your own piping bags from plastic zipper bags. If you go this route you won’t need couplers or tips, either.
- Piping tips: I’d recommend using a small round tip, like Ateco tip #3, for the mouth.
- Cupcake liners: I used some fun red, black and white cupcake liners when I baked my cupcakes. You could also dress them in solid colored rainbow liners or Halloween cupcake liners.
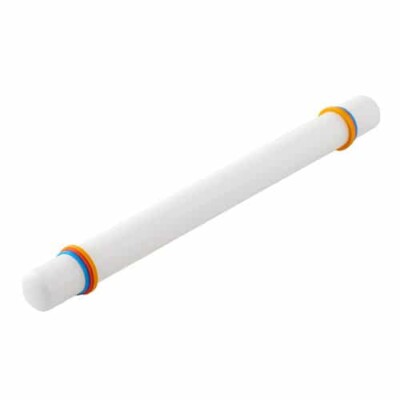
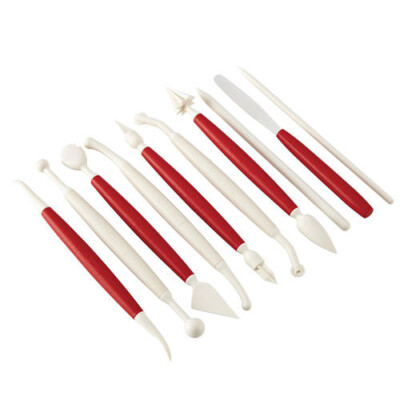
- Fondant tools: A small fondant roller will help you to make the fondant smooth and even.
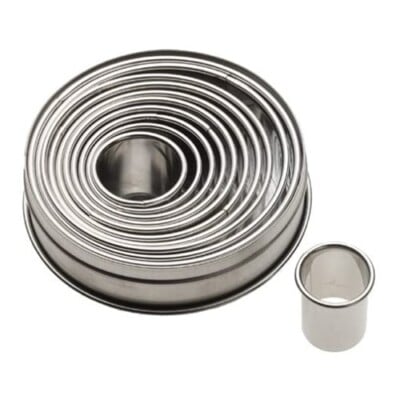
- Round cutter: And last but not least, you’ll need a round cutter with a 2.5-inch diameter.
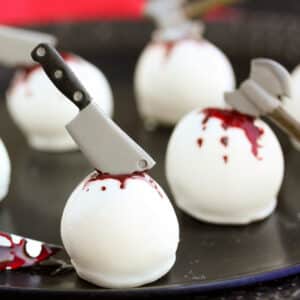
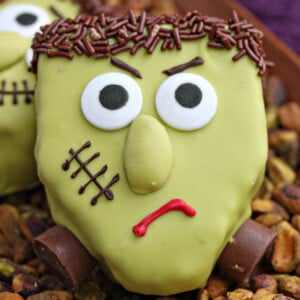
🎃 More Halloween Desserts
Leave a Review!
If you make this recipe, let us know! Leave a ⭐️⭐️⭐️⭐️⭐️ rating on the recipe below, and leave a comment, take a photo and tag me on Instagram @elabau, or use #sugarhero on IG!
Vampire Cupcakes
Ingredients
- 24 cupcakes, from scratch or your favorite mix, I used white cupcakes
For Frosting
- 1 lb unsalted butter, at cool room temperature
- 2 TBSP milk, can substitute water
- ½ tsp salt
- 1 TBSP vanilla extract
- 28 oz powdered sugar, (7 cups), sifted after measuring
For Decorating
- 8 oz black fondant
- 2 oz white fondant
- 48 candy eyeballs
- 24 candy pearls
- Red gel food coloring, I used Americolor Super Red
Instructions
To Make the Frosting
- Beat the butter: Place the butter in the bowl of a large stand mixer. Beat on medium speed with a paddle attachment until very white and pale, about 3-4 minutes.
- Add milk, salt, and vanilla: Turn the speed lower, and add 1 tablespoon of milk, the salt, and the vanilla extract. Mix until everything is well incorporated with the butter.
- Slowly add powdered sugar: With the mixer running on low, slowly add the powdered sugar. Once all of it is added, stop and scrape down the bottom and sides of the mixing bowl, then mix the buttercream on medium speed for 30 seconds.
- Adjust consistency: If the buttercream is too stiff for your needs, add the remaining tablespoon of milk and mix it in well. You can adjust the final texture by adding more powdered sugar or milk. See Note below.
- Chill: You can use the frosting right away, but you’ll get the best results chilling it for about 1 hour before use.
- Use or store: If you want to make it several days in advance, place the frosting in an airtight container and press a layer of cling wrap directly on top of the frosting. When you’re ready to use it, let it come to room temperature on the counter, then beat it on medium speed until it regains its light, creamy texture.
To Frost the Cupcakes
- Prep piping bag: When you are ready to begin decorating, place the white frosting into a piping bag fitted with a plain coupler or large round tip like Ateco tip #809.
- Frost cupcakes: Cover two baking sheets with parchment paper. Pipe a large round ball of white frosting on top of a cupcake (approximately 3 TBSP). Invert the cupcake and gently press it onto one of the lined baking sheets so that the frosting spreads evenly and covers the top of the cupcake. Repeat with remaining cupcakes.
- Chill: Chill the cupcakes in the refrigerator for about an hour, until the buttercream is very firm. Peel the cupcakes off the parchment, revealing a completely flat buttercream layer on top.
To Decorate the Cupcakes
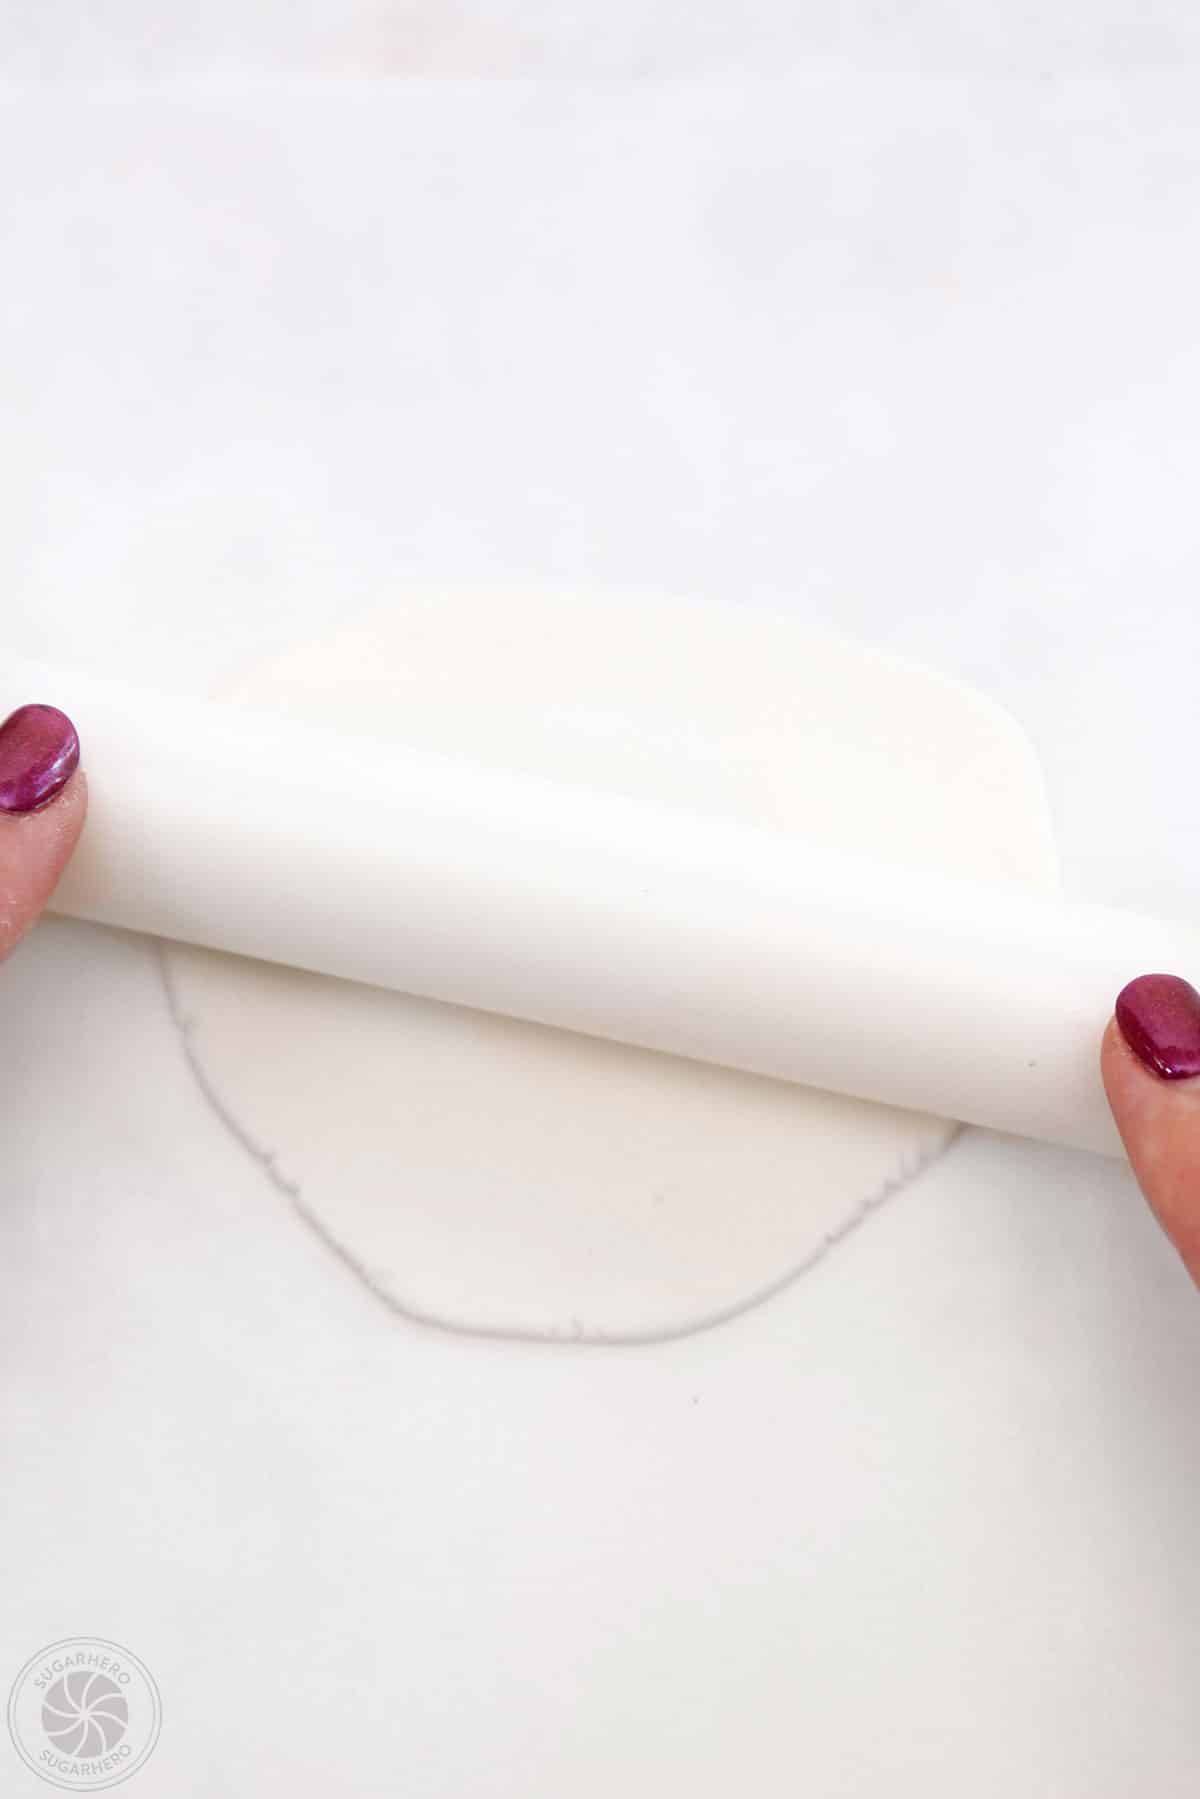
- Make black fondant circles: While the cupcakes chill, prepare your decorations. Roll out the black fondant until it’s about 1/8-inch thick. Use a circular cutter (about 2.5 inches wide) to cut out a black circle.
- Cut fondant: Use the cutter to shape the black circle into vampire hair. Place the top of the cutter over the center of a black circle of fondant. Press down to cut away an eye-shaped piece of the circle.
- Finish vampire hair: Then use the cutter to cut the remaining moon-shaped piece of fondant in half. Take the symmetrical piece of fondant and set it aside to use for vampire hair. Unused pieces of the fondant can be reincorporated into the main block of fondant and rolled out again. Roll, cut and shape fondant circles until you have 24 pieces of black fondant vampire hair.
- Make vampire teeth: Roll out the white fondant until it’s about 1/8-inch thick thick. Cut the fondant in a strip that is approximately 1/2-inch wide. Cut in a diagonal line across the width of the white fondant strip to cut a pointy white vampire tooth. Continue cutting triangular shapes off of the strip of fondant until you have 48 fondant vampire teeth.
- Dip teeth: If desired, lay out a piece of parchment paper and fill a small bowl with a few drops of red gel food coloring. Dip the tip of each fondant tooth into the red gel food coloring and then set them on the parchment paper to dry.
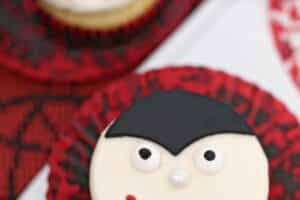
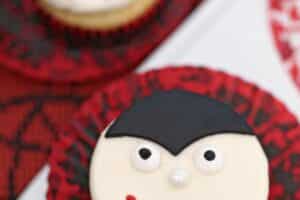
- Top cupcake with vampire hair: Remove the chilled cupcakes from the refrigerator and place a piece of black fondant vampire hair on the top of the cupcake.
- Make eyes and nose: Just below the hairline, press two candy eyes and a candy nose gently into the buttercream.
- Make mouth: Fill a piping bag with red frosting and a small piping tip (I used Ateco #3). Pipe a red line for the mouth and place two vampire teeth on top. Press them into the buttercream gently so they stick.
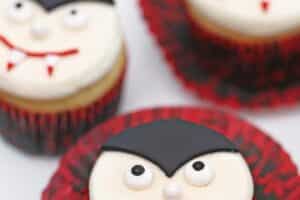
- Finish cupcakes: Repeat the process of making a vampire face on each of your cupcakes. Enjoy!
- Store: Store extras in an airtight container at room temperature for 2-3 days, or in the refrigerator for up to a week. If they have been chilled, allow them to come to room temperature before serving for the best taste and texture.
Recipe Notes
Measuring Tips
Our recipes are developed using weight measurements, and we highly recommend using a kitchen scale for baking whenever possible. However, if you prefer to use cups, volume measurements are provided as well. PLEASE NOTE: the adage “8 oz = 1 cup” is NOT true when speaking about weight, so don’t be concerned if the measurements don’t fit this formula.
Want to learn more about baking measurements and conversion?
Nutrition
📸 Photo Tutorial: How to Make Vampire Cupcakes
Whoever said “there’s no such thing as love at first bite” never tried these cupcakes! Follow this step-by-step tutorial to find out what I mean! Full instructions are included in the recipe card above.
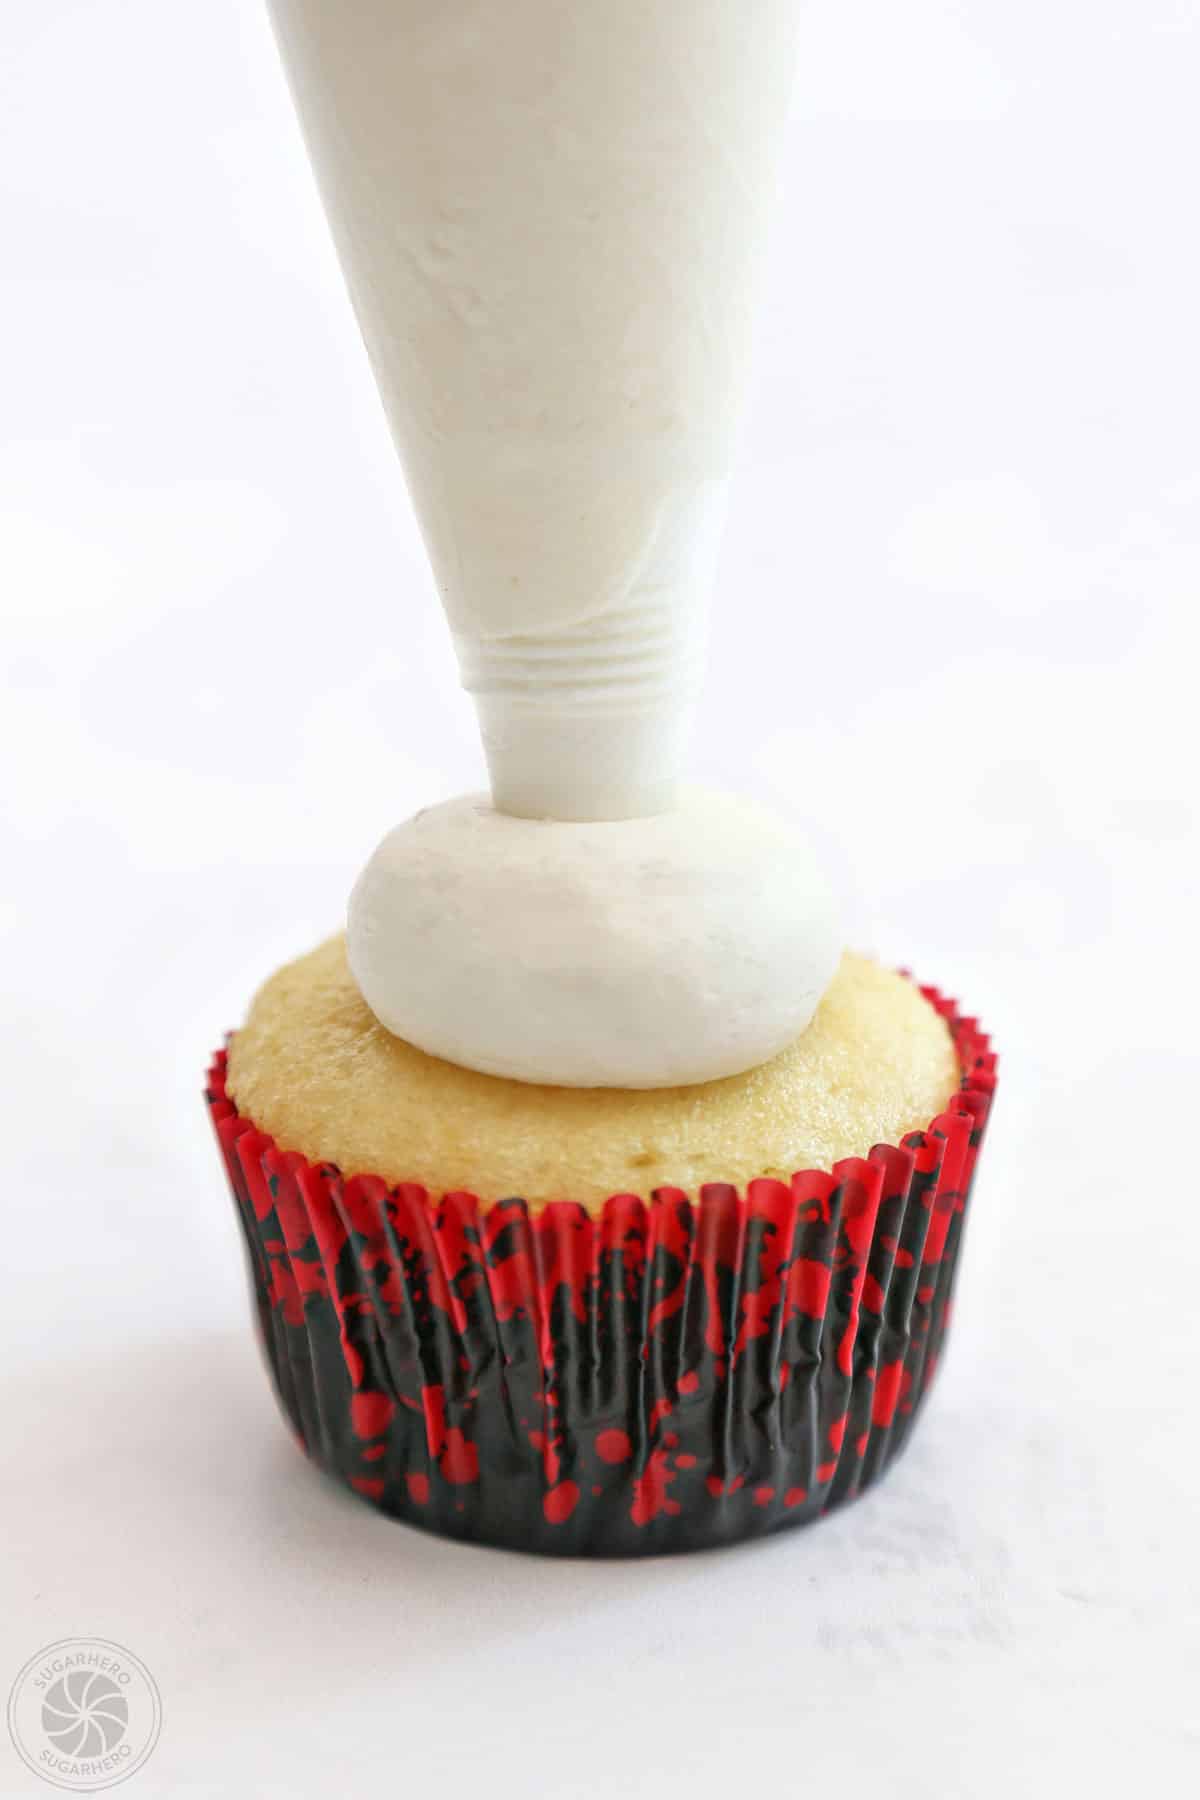
Frost the Cupcakes
- Prepare to frost. Place the white frosting into a piping bag fitted with a plain coupler. Cover two baking sheets with parchment paper.
- Pipe frosting ball. Pipe a large round ball of white frosting on top of a cupcake (approximately 3 TBSP).
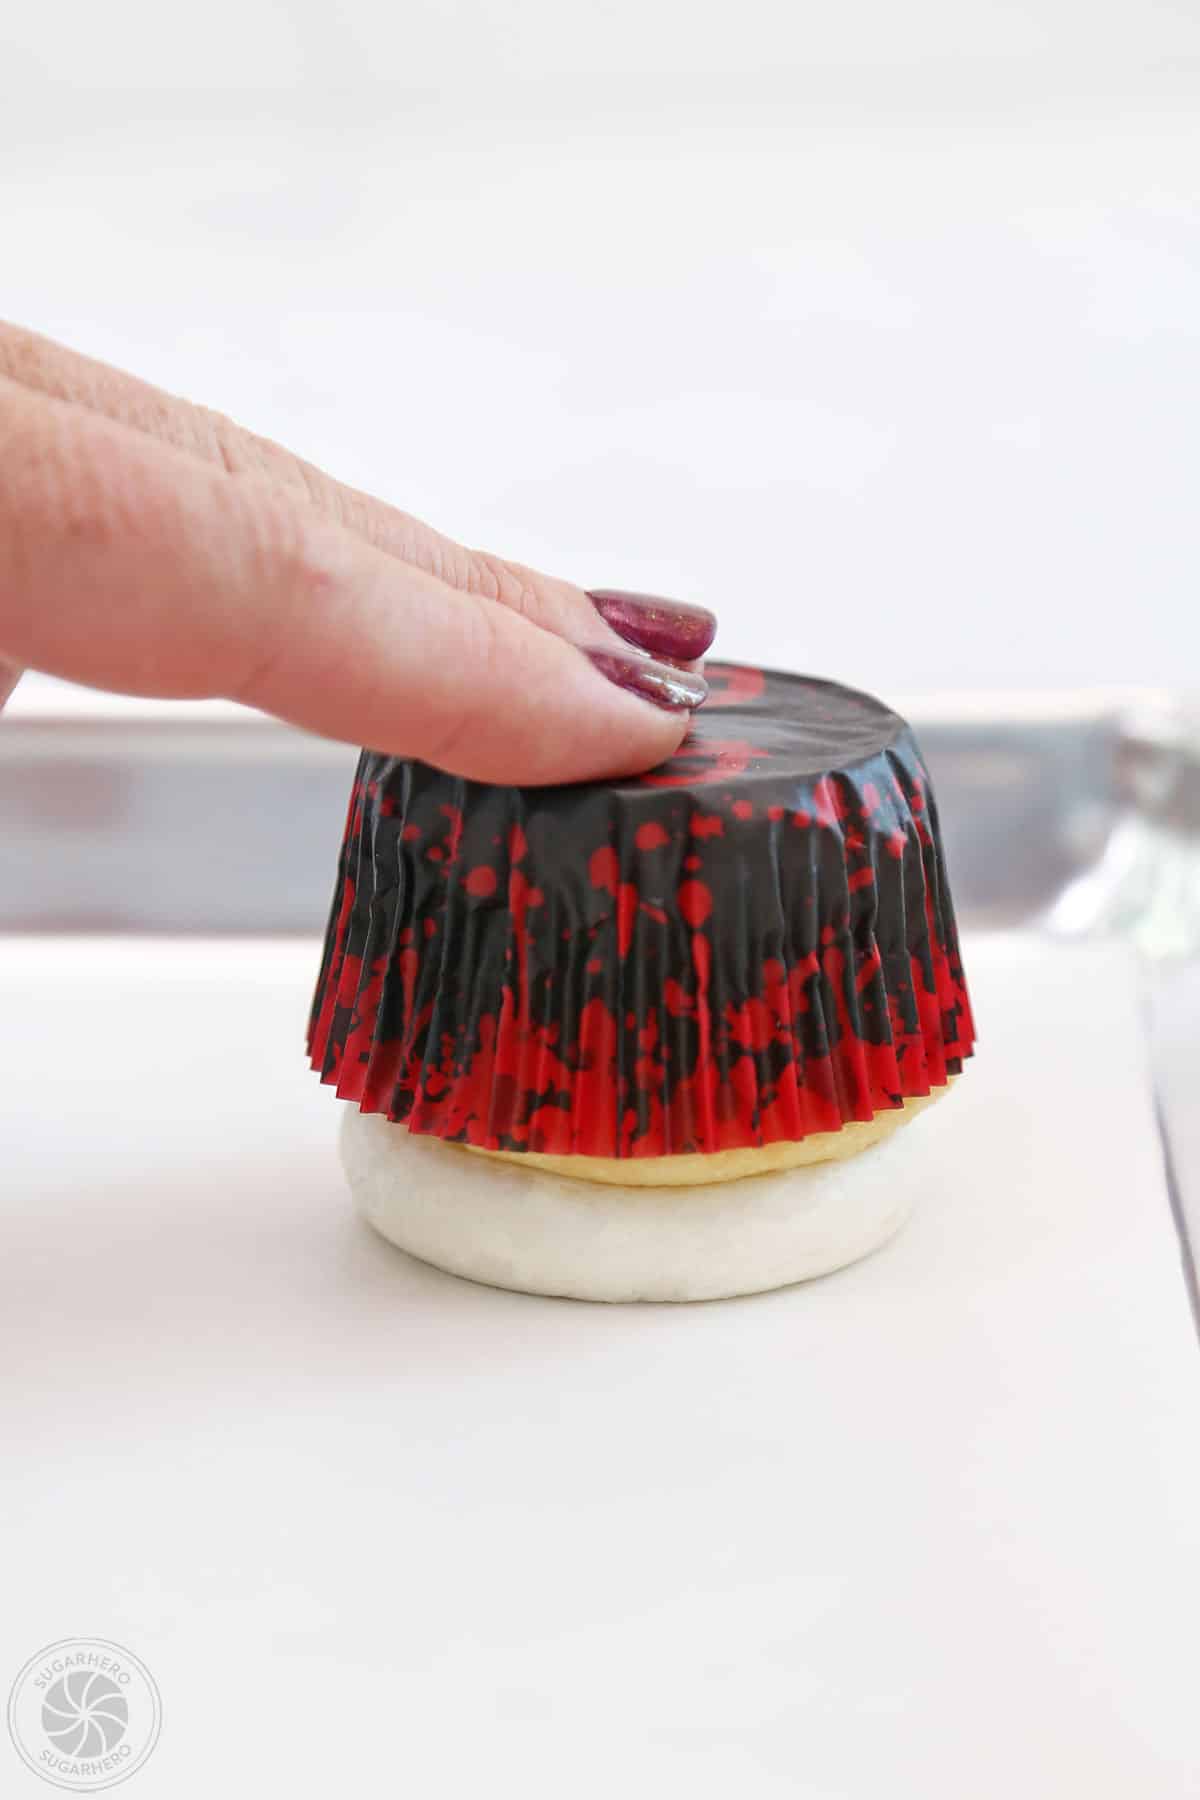
- Flatten frosting. Invert the cupcake and gently press it onto one of the lined baking sheets so that the frosting spreads evenly and covers the top of the cupcake. Repeat with the remaining cupcakes.
- Freeze. Chill the cupcakes in the refrigerator for about 60 minutes or in the freezer for 30 min, until the buttercream is very firm.
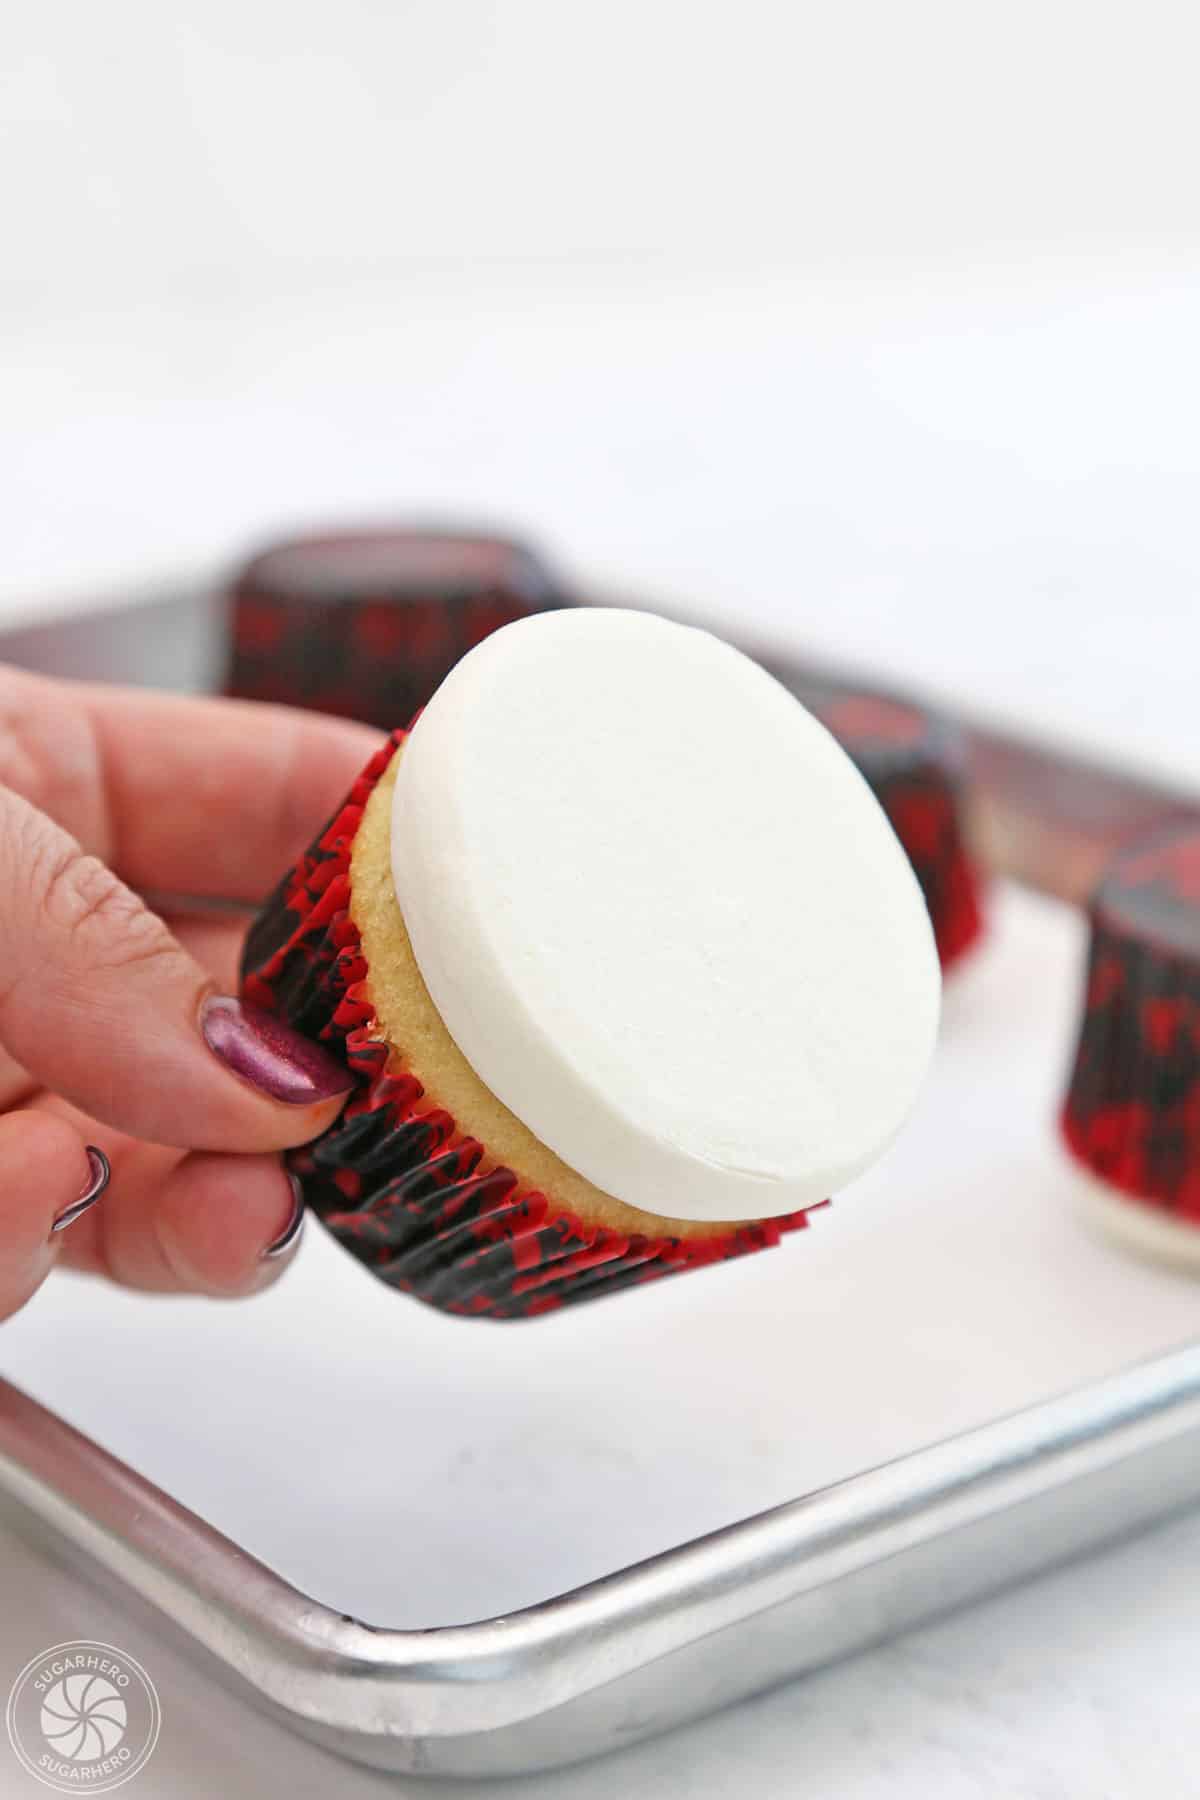
- Remove from parchment. Peel the cupcakes off the parchment, revealing a completely flat buttercream layer on top.
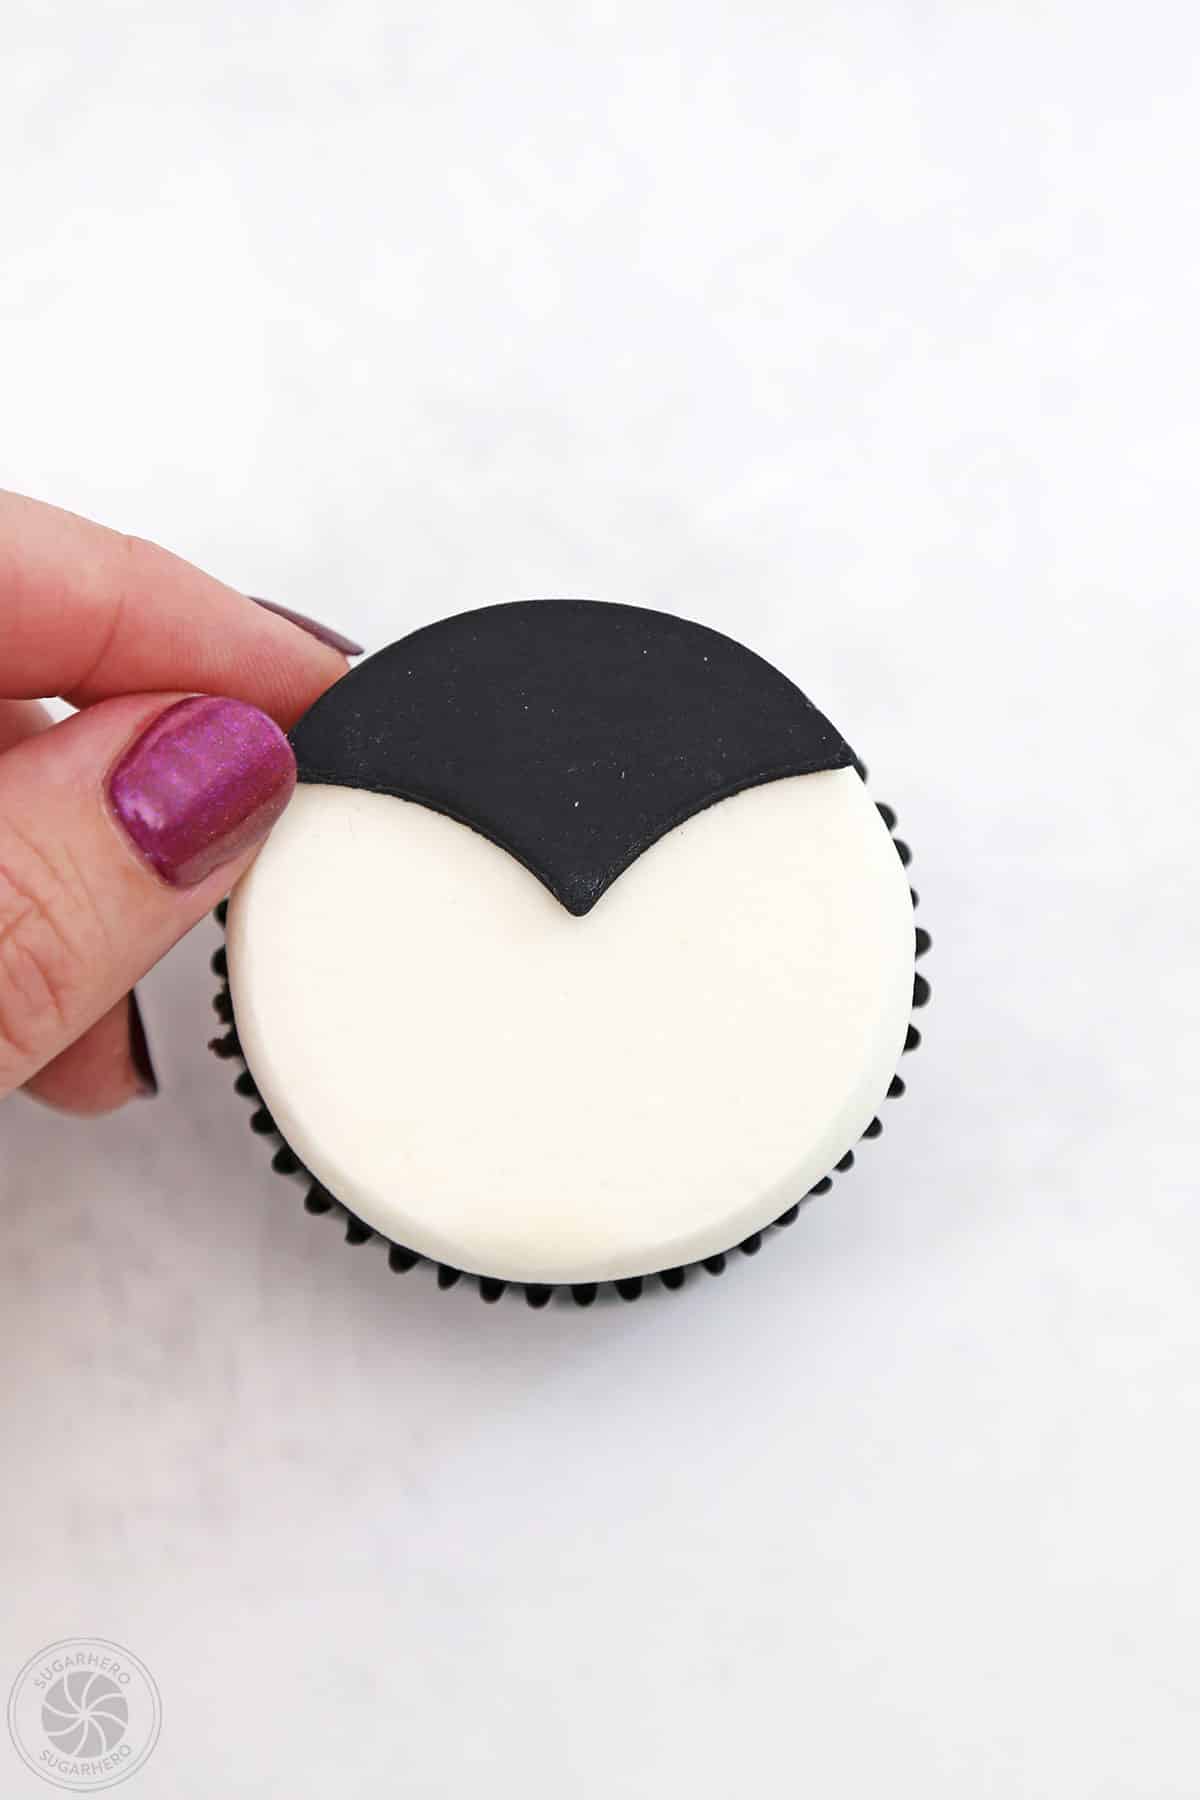
Make the Vampire Hair
While the cupcakes chill, prepare the fondant hair and teeth. First, for the hair:
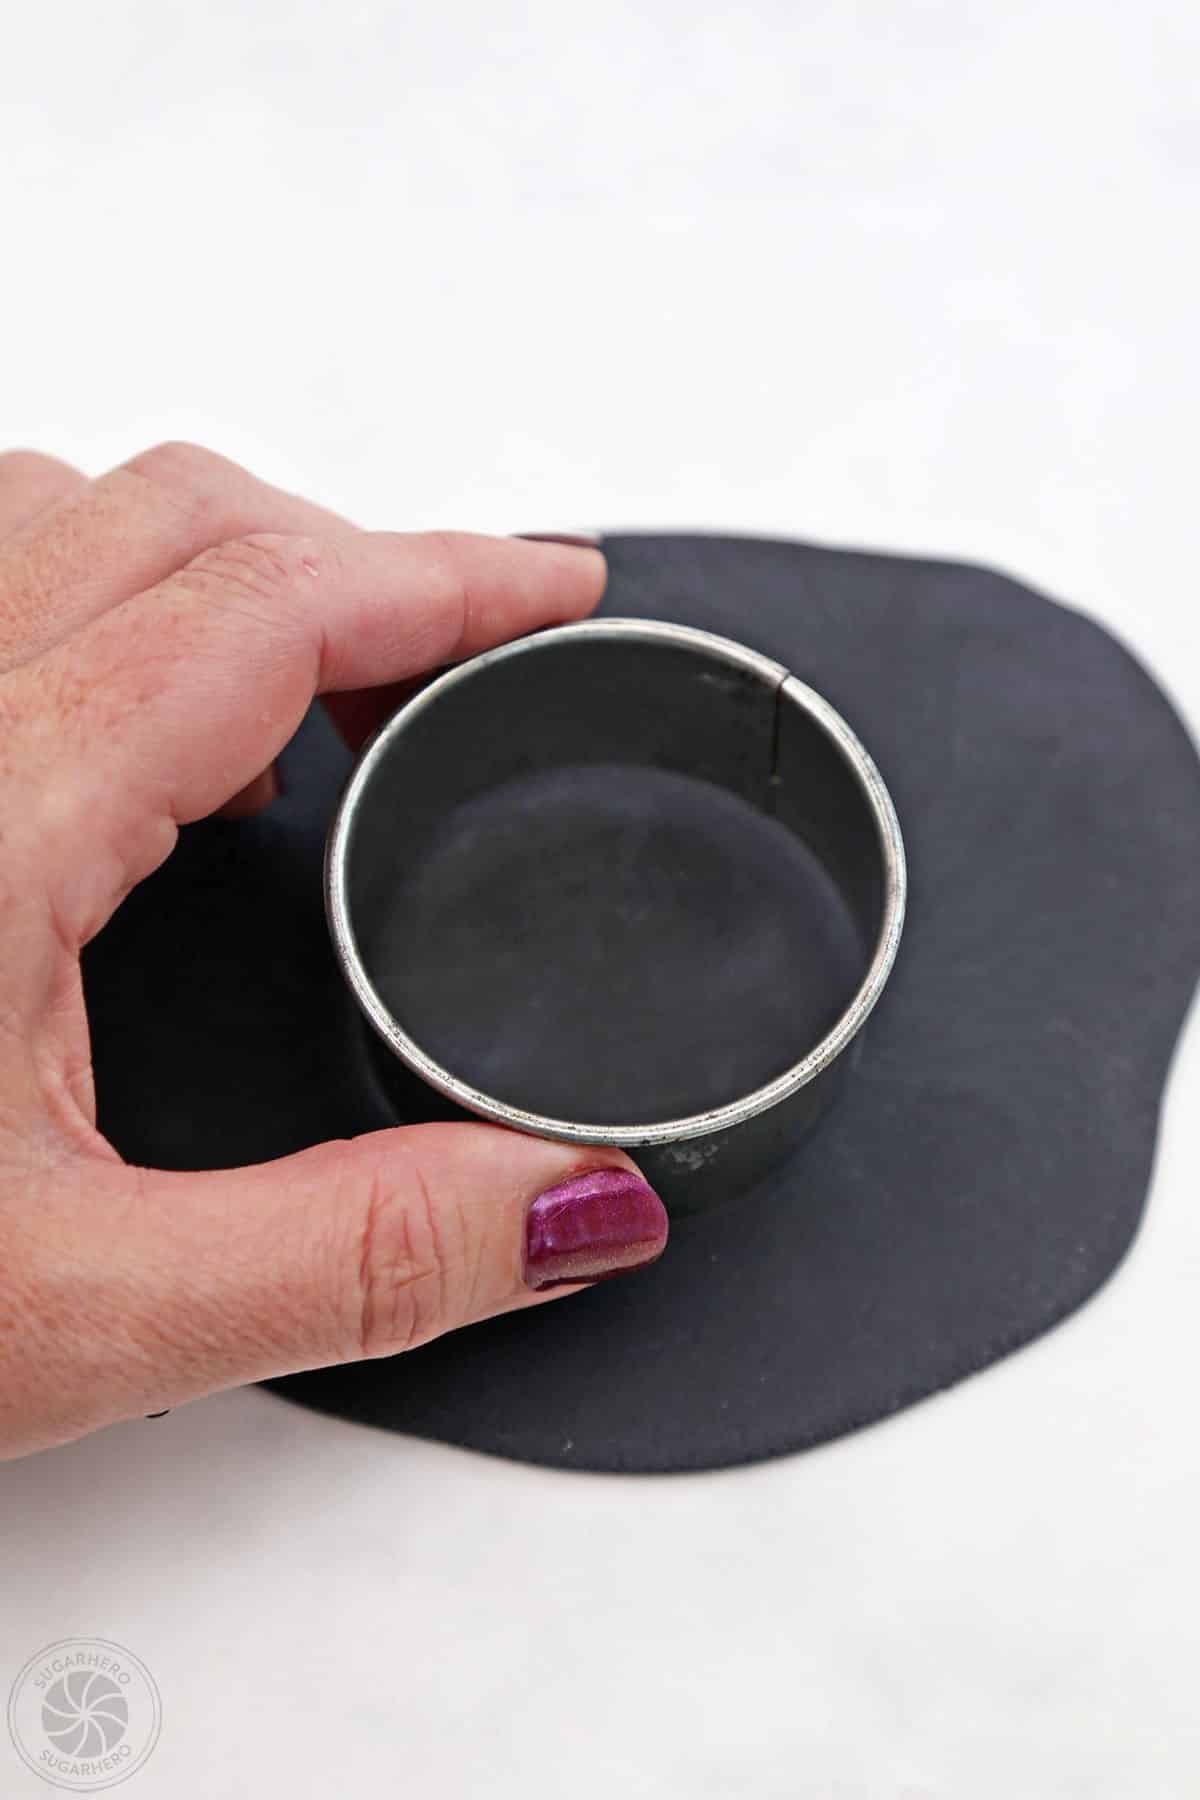
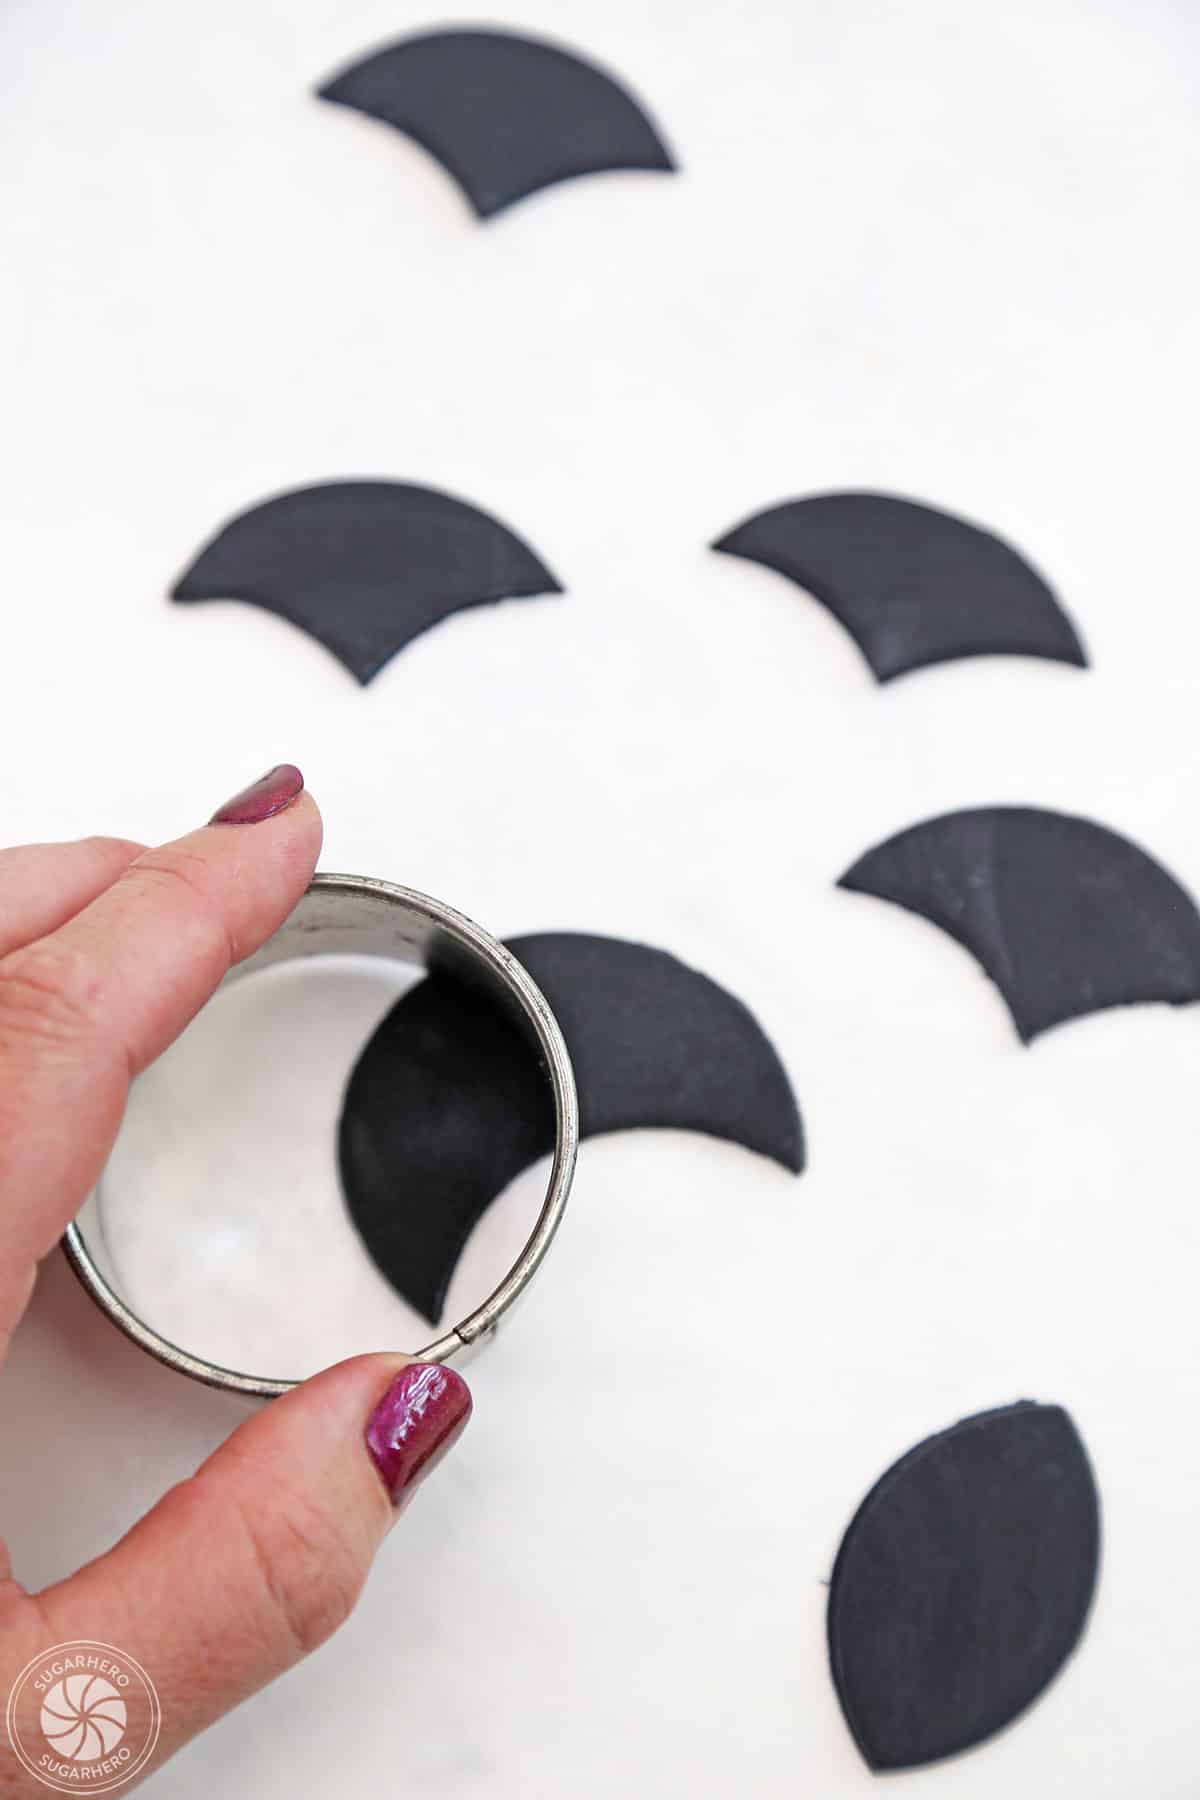
- Cut a black fondant circle. Roll out the black fondant until it’s about 1/8-inch thick. Use a circular cutter (about 2.5 inches wide) to cut out a black circle.
- Cut the circle twice. Position the cutter about halfway up the fondant circle, press down to cut away the bottom half of the circle, leaving you a crescent-shaped piece. Then, use the cutter to cut that crescent in half. This is your vampire’s hair.
- Make 24 vampire hair pieces. Continue to roll and cut the fondant until you have 24 pieces of black fondant vampire hair. You can re-roll the fondant as many times as necessary.
Make the Vampire Teeth
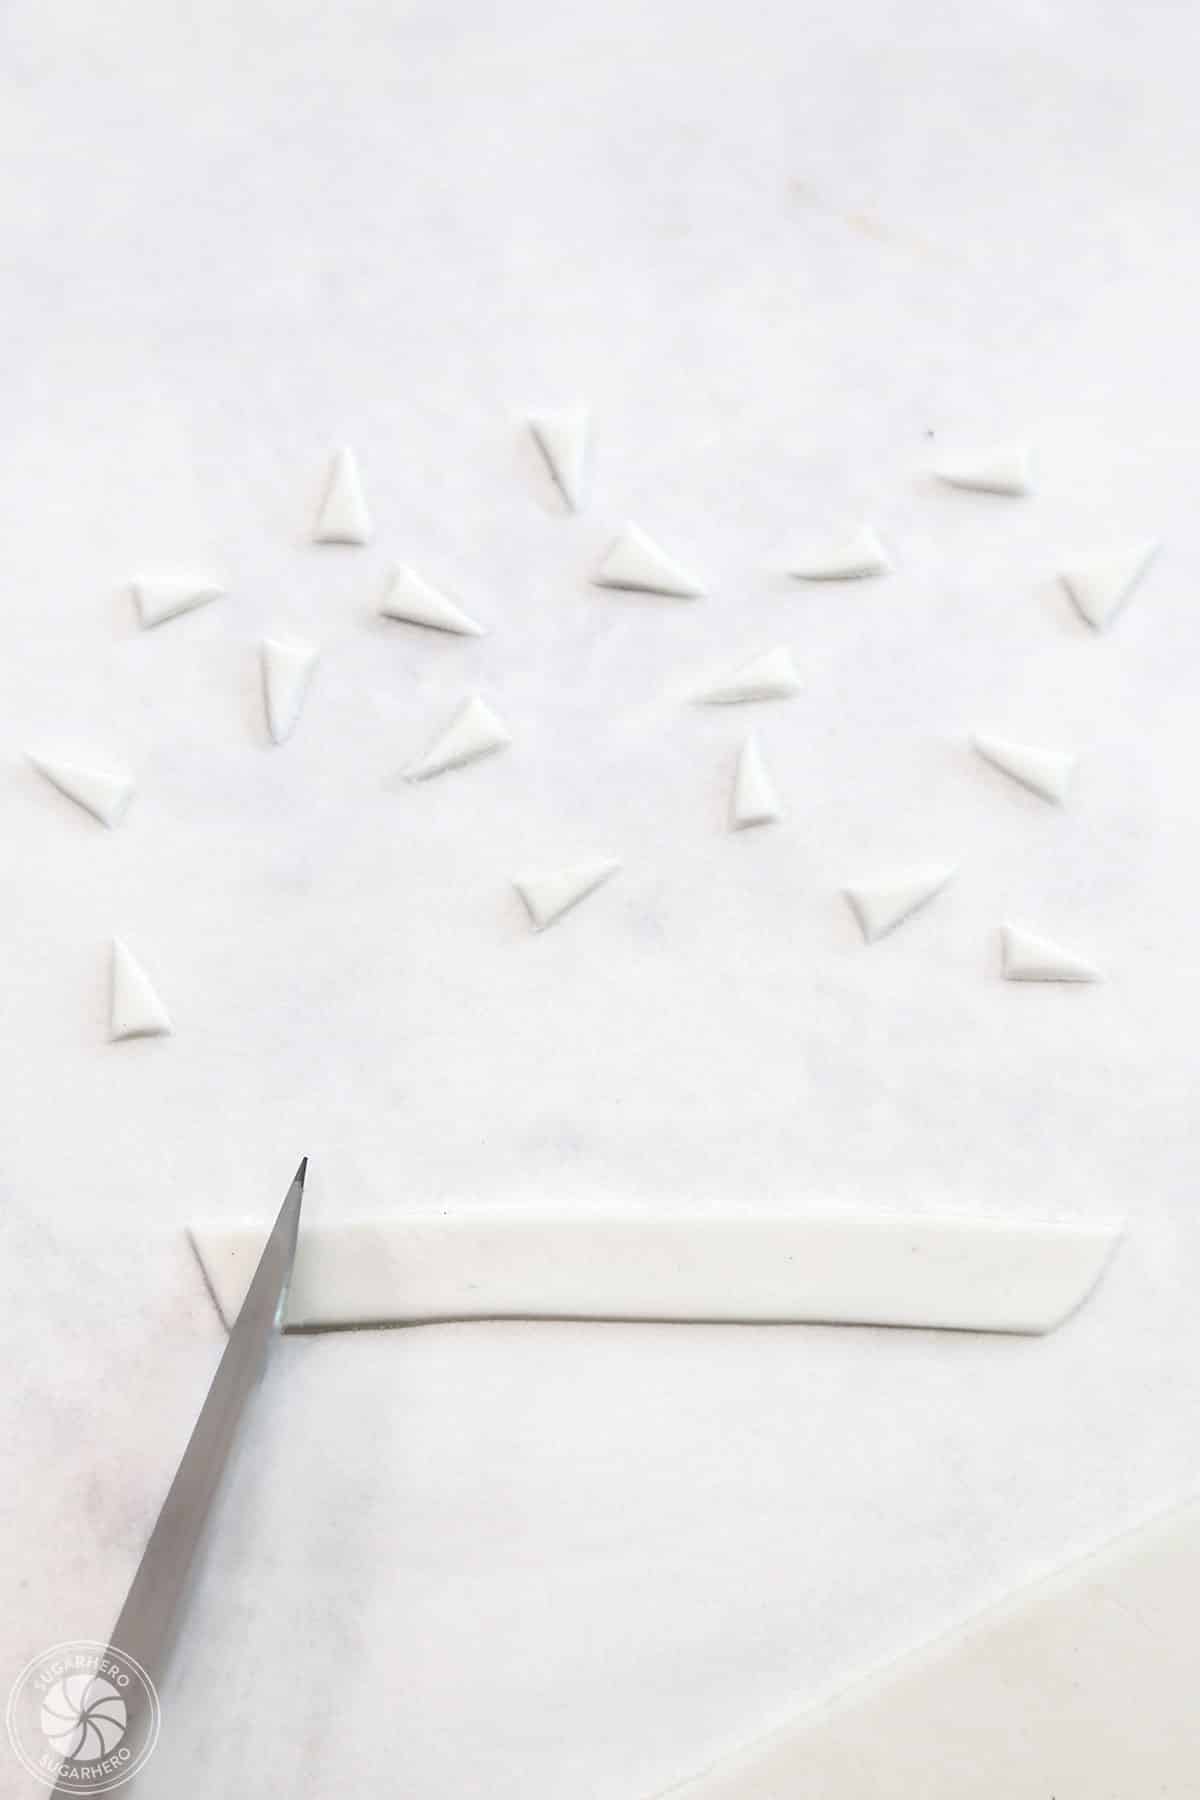
- Cut a white fondant strip. Roll out the white fondant until it’s about 1/8-inch thick. Cut the fondant into a 1/2-inch wide strip.
- Cut pointy teeth. Cut in a diagonal line across the width of the white fondant strip to create a pointy white vampire tooth. Continue cutting triangular shapes off of the strip of fondant until you have 48 fondant vampire teeth.
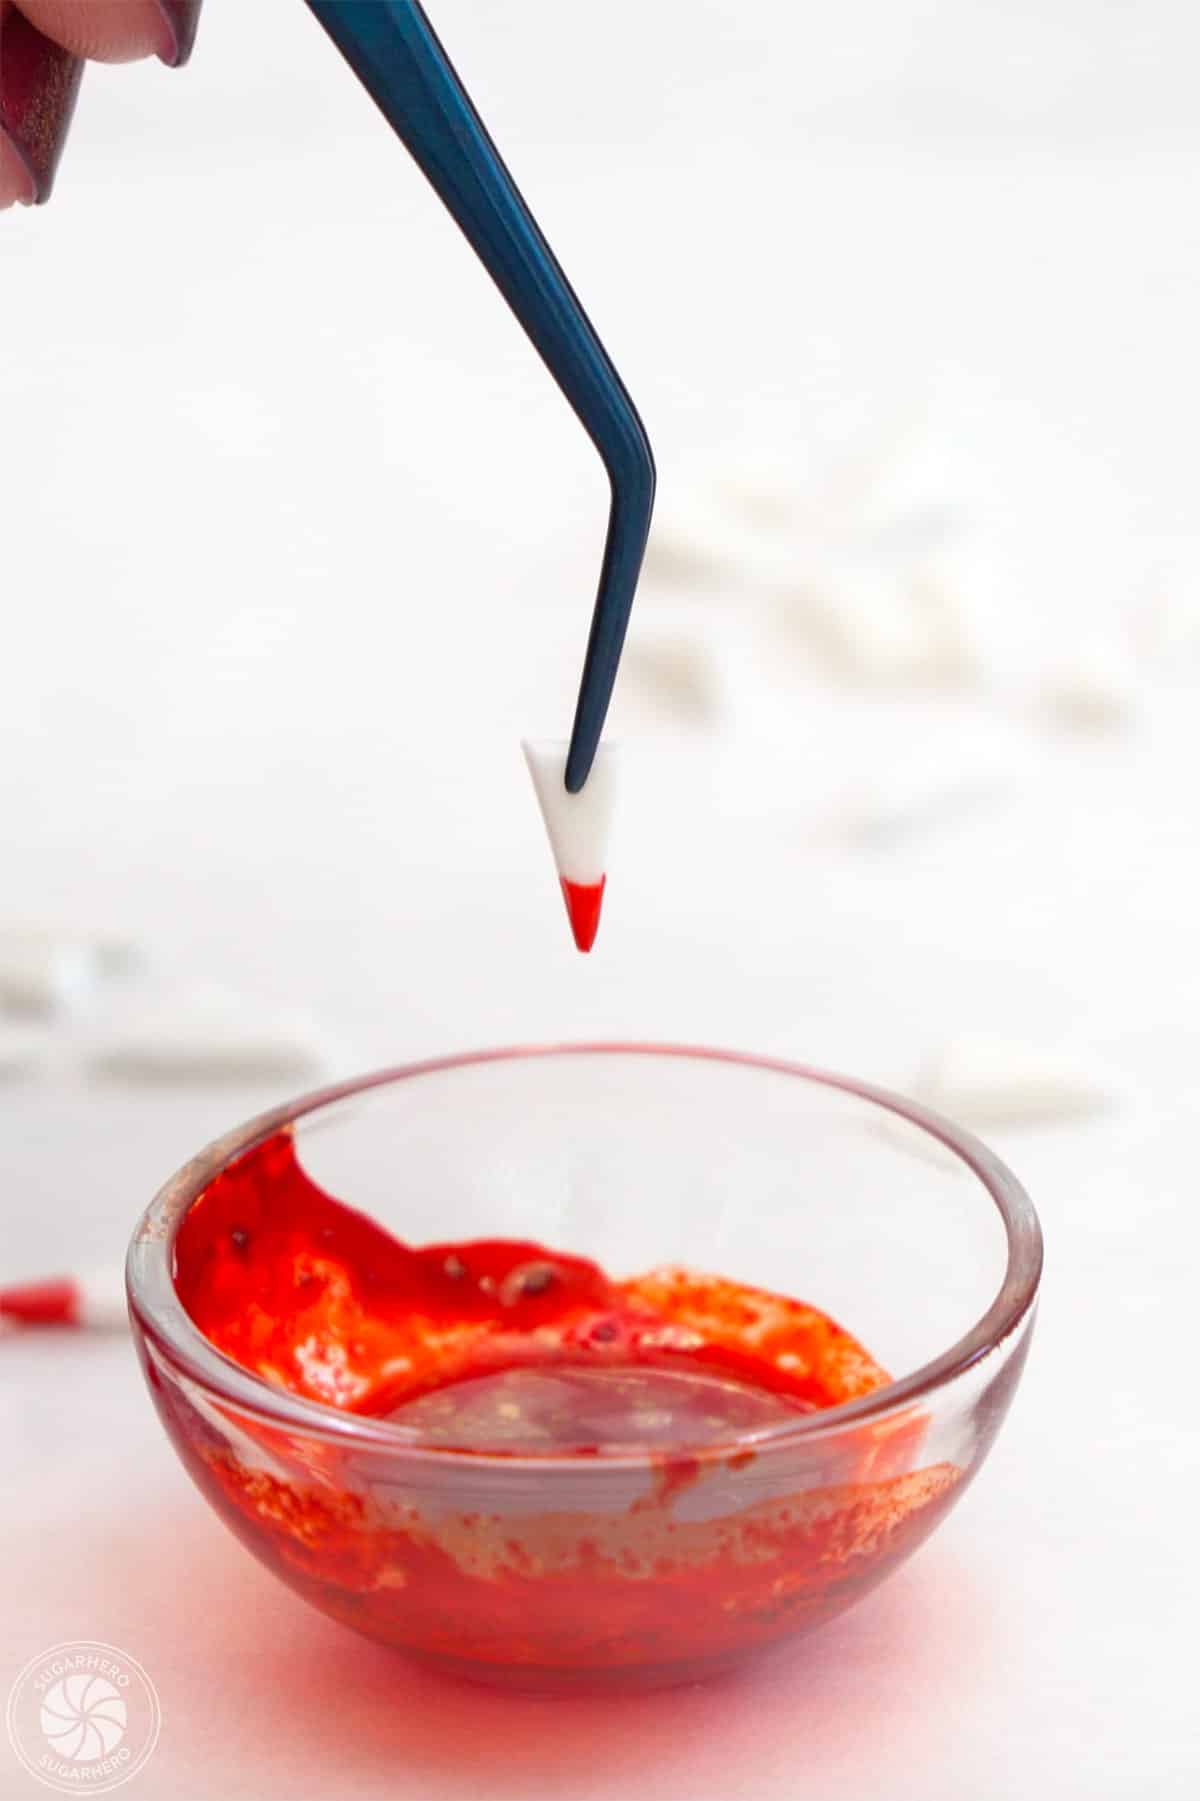
- Color teeth tips red. If you want to make your teeth bloodstained, lay out a piece of parchment paper and fill a small bowl with a few drops of red gel food coloring. Dip the tip of each fondant tooth into the red gel food coloring and set them on the parchment paper to dry. Tip: this step is much easier (and less messy!) if you use tweezers to hold the teeth.
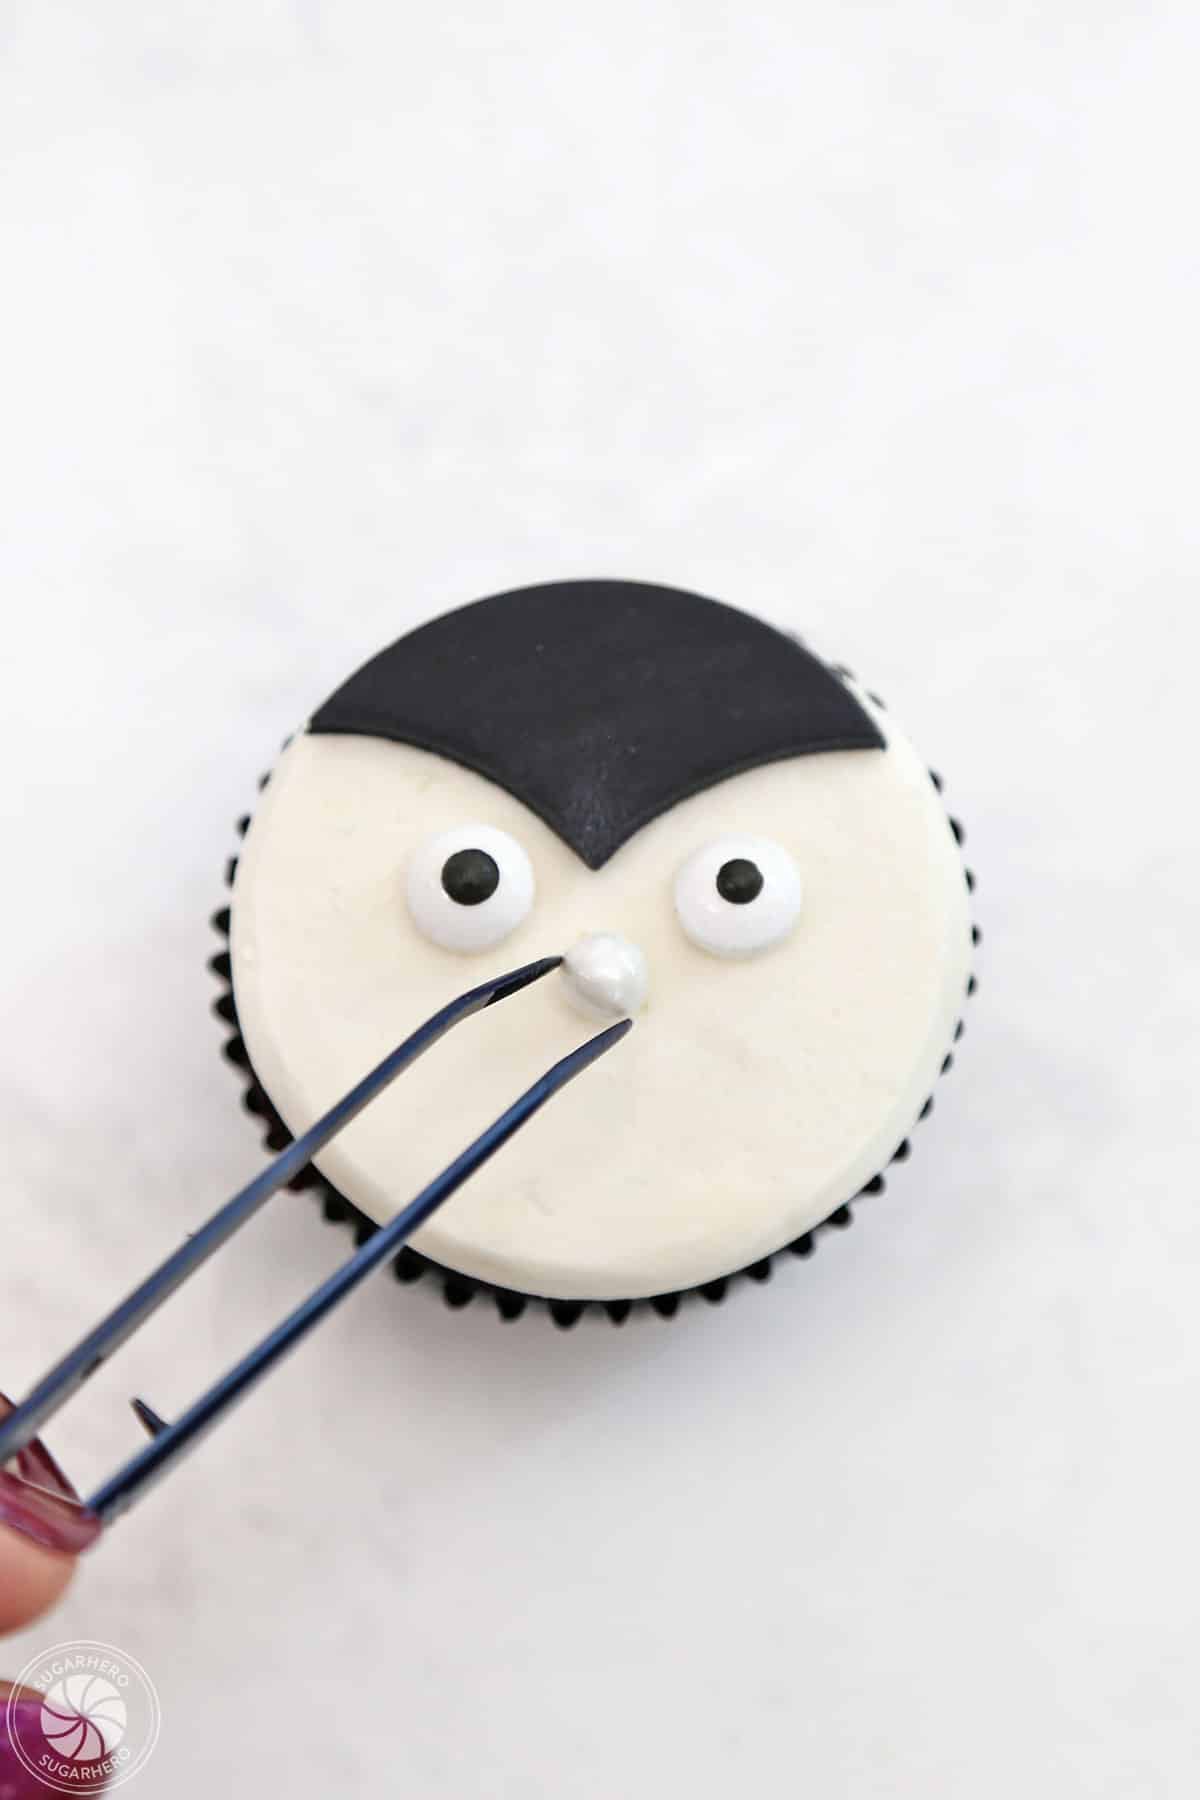
Decorate the Cupcakes
Time to put it all together and decorate!
- Add the hair. Place a piece of black fondant vampire hair on the top of the cupcake. It should stick fine, but if it doesn’t, a thin brushing of corn syrup on the back of the fondant will help.
- Add the eyes and nose. Just below the hairline, press two candy eyes and a candy nose gently into the buttercream.
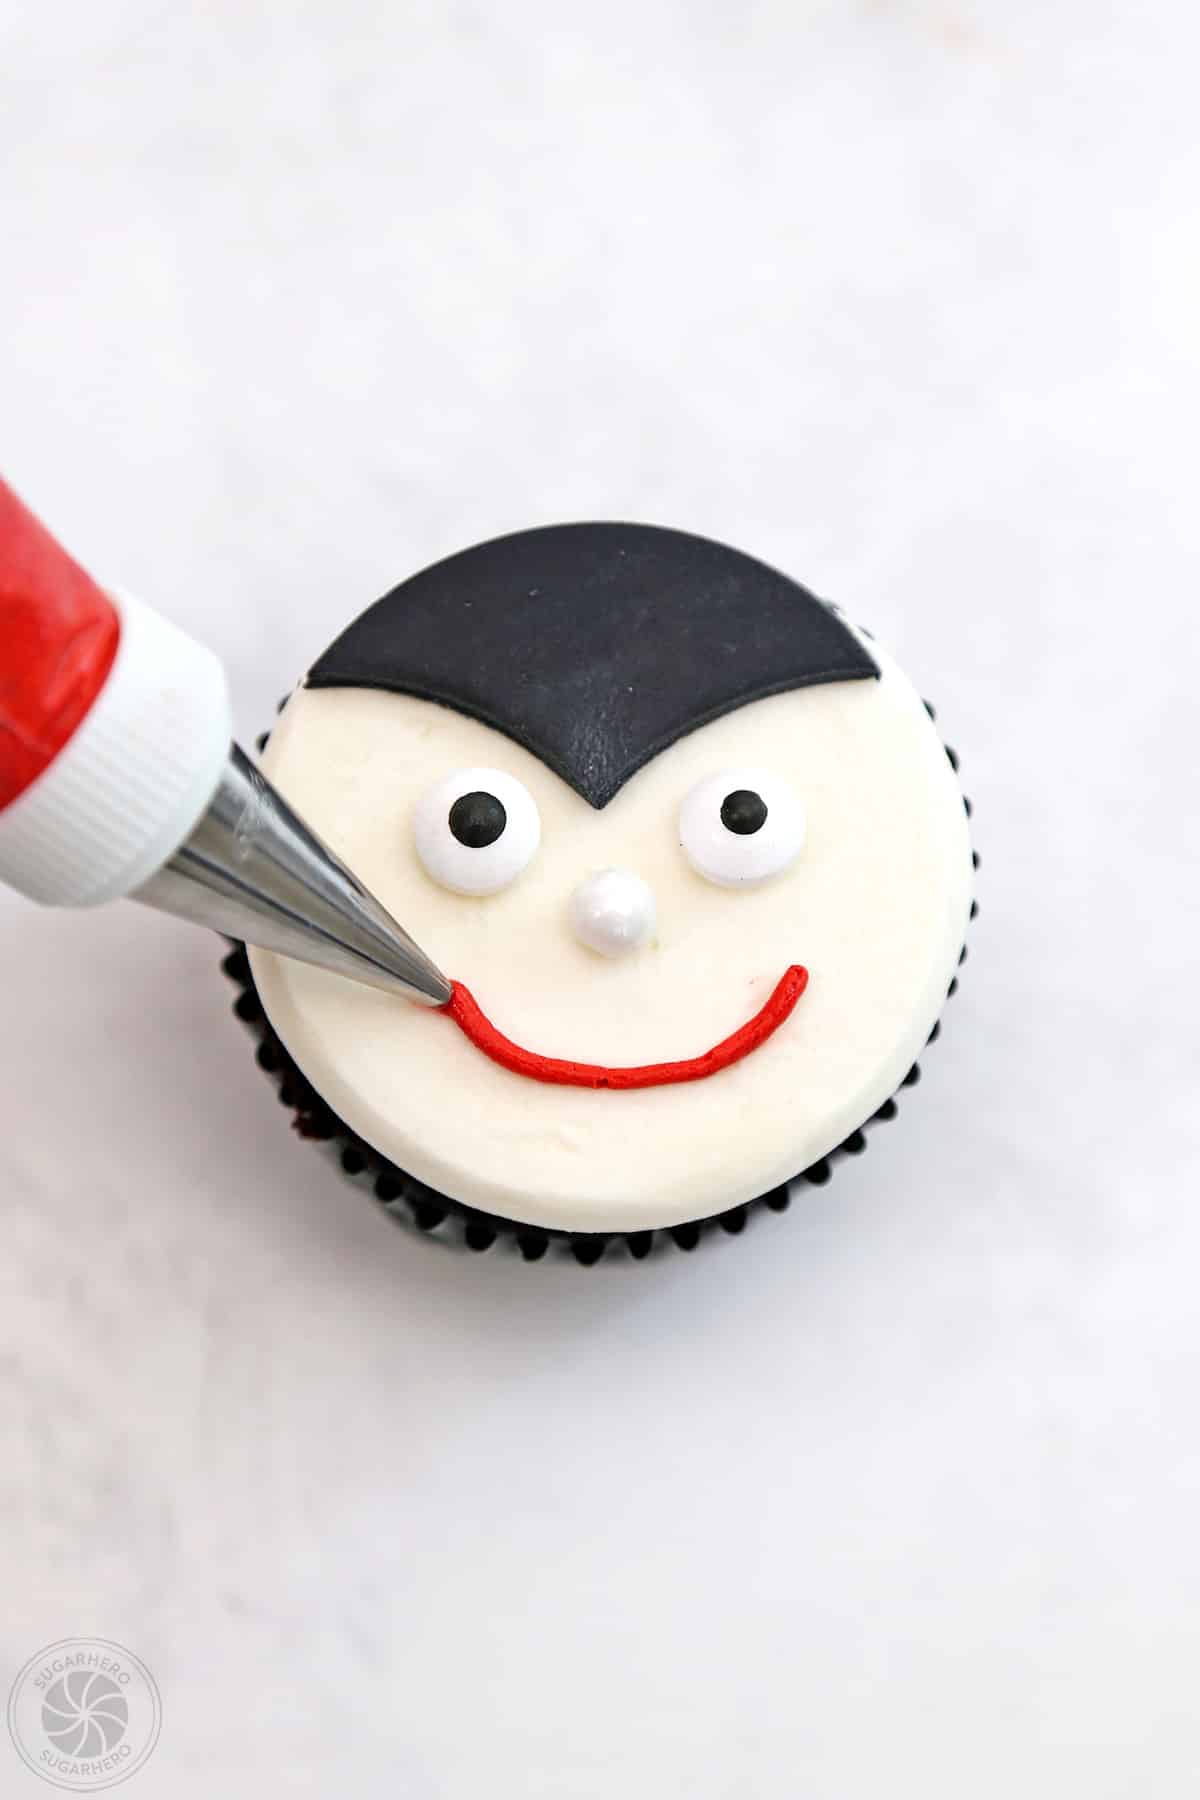
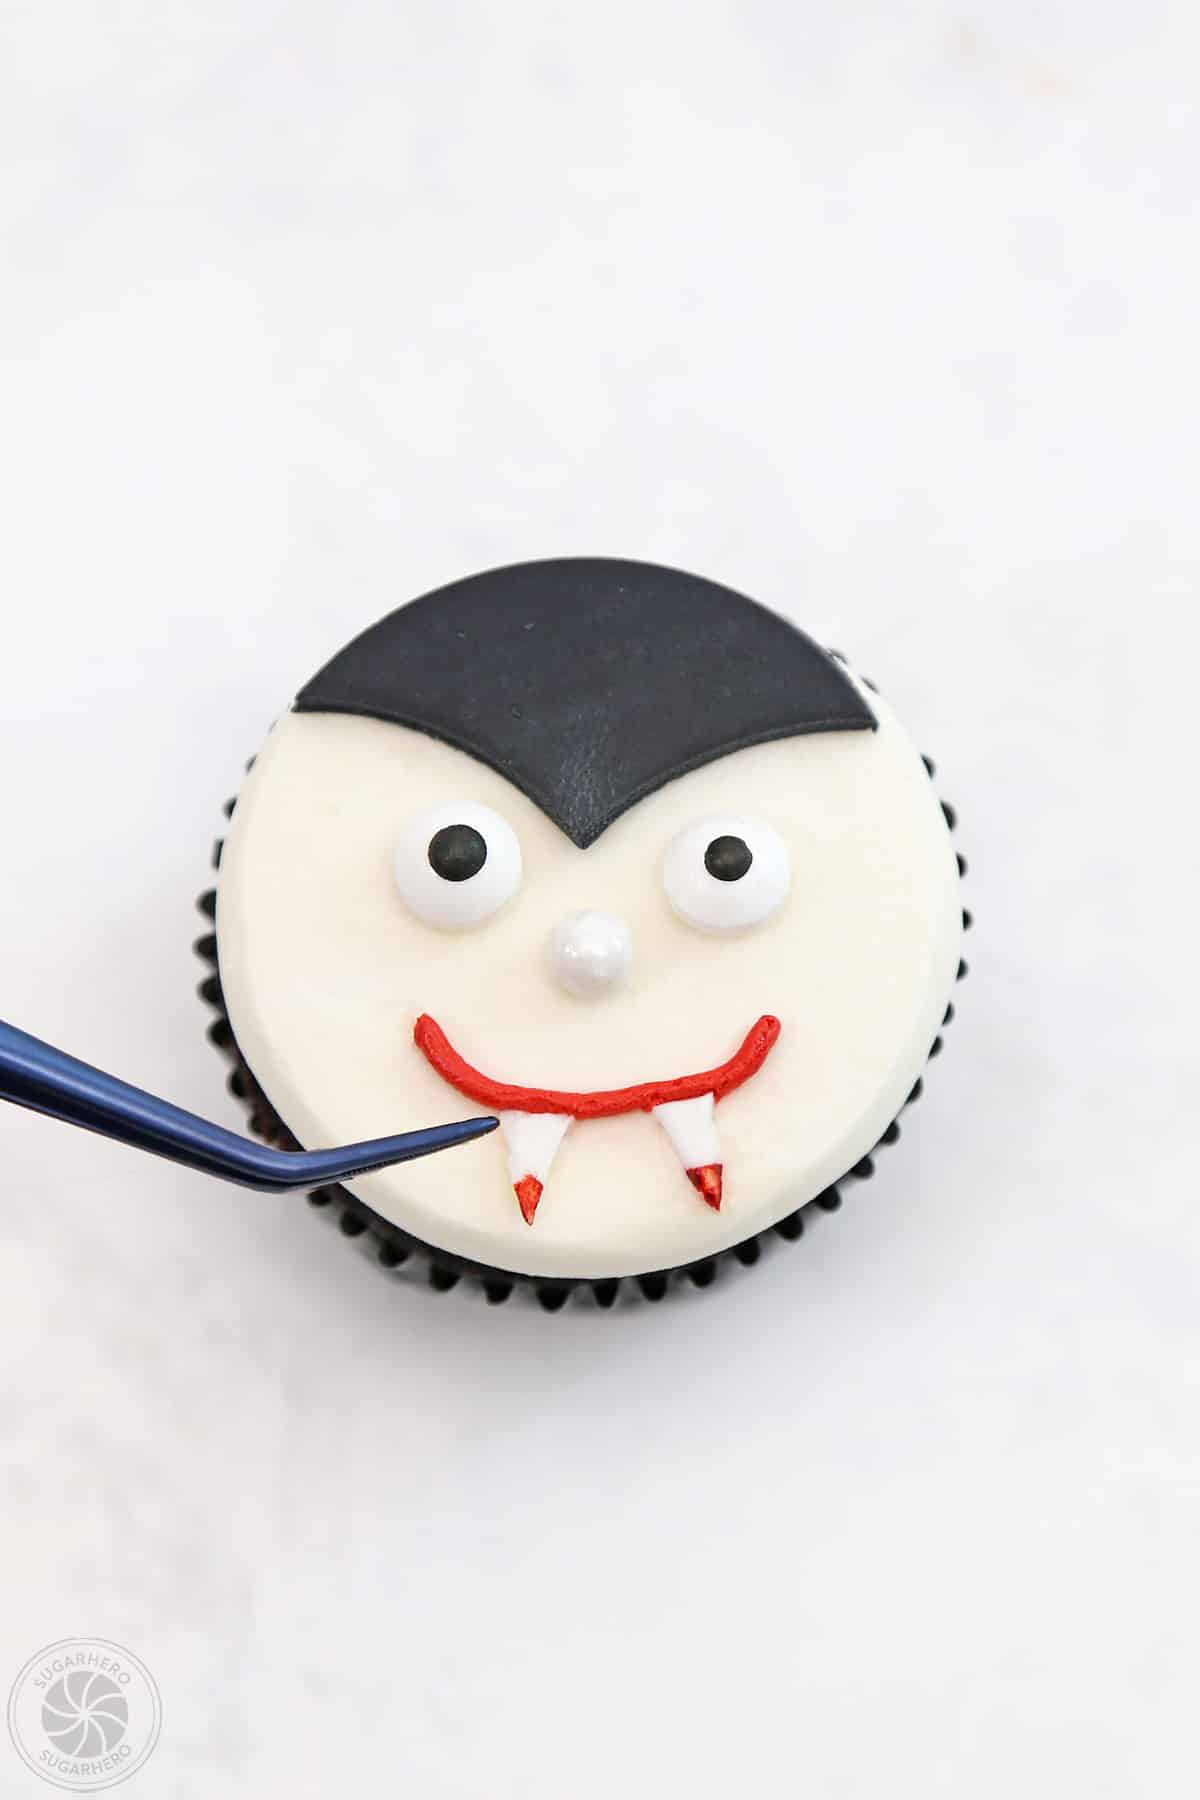
- Make the mouth and add teeth. Pipe a red line for the mouth and place two vampire teeth on top. Press them into the buttercream gently so they stick.
- Finish cupcakes. Repeat the process of making a vampire face on each of your cupcakes. Enjoy!
💡 Tips and FAQs
First time making these cupcakes? Here’s a couple of tips to make sure they turn out well.
Many factors affect frosting texture, including the brand and temperature of the butter, and the temperature of your kitchen. So, don’t be afraid to play around at the end to get a texture you’re happy with. If you want it thinner/looser, add a bit of milk or water. If you want it thicker, add extra powdered sugar bit by bit.
If you don’t have piping bags and tips on hand, you can use Ziplock bags, and cut a small hole in one of the corners to pipe frosting through.
Both components of these cupcakes can be made in advance and used later.
Frosting: The frosting can be made up to a week in advance. Place the frosting in an airtight container and press a layer of cling wrap directly on top of the frosting to prevent a crust from forming. Store the frosting in the refrigerator. When you’re ready to use it, let it come to room temperature on the counter, then whip it on medium speed until it regains its light, creamy texture.
Cupcakes: Baked and cooled cupcakes can be frozen in airtight containers. Let them defrosting in their container on the countertop before decorating.
Store extra cupcakes in an airtight container at room temperature for 2-3 days, or in the refrigerator for up to a week. If they have been chilled, allow them to come to room temperature before serving for the best taste and texture.