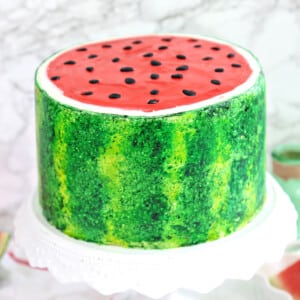
This Watermelon Layer Cake is the ultimate summer cake! Layers of watermelon-flavored cake are studded with mini chocolate chips, and the outside is painted to look just like a watermelon. It’s fun, it’s unexpected, and it’s really delicious—what more could you ask for?

I don’t know how to ease into this gently, so I’m just going to cut to the chase: I made a watermelon cake. As in, it looks like a watermelon. IT TASTES LIKE A WATERMELON. It also involves chocolate chips. It might be one of the most unexpected things I’ve made. Almost everyone who tried it was dubious at first, and gave me ~~skeptical eyebrows~~, but in the end they ended up going back for seconds. It’s a giant weirdo of a dessert, and I love it to pieces.

I’ve been wanting to make a watermelon cake for awhile now—it’s the perfect symbol of summer (my family is going through at least a melon a week around here!) and it’s such a fun and whimsical idea. Plus, as I learned from this Grapefruit Layer Cake, I really love the concept of turning big cakes into realistic pieces of fruit.
However, I also knew that I wanted my watermelon cake to taste like watermelon, and that part was a little trickier. Watermelon flavoring is pretty easy to buy online, but it’s not something that anyone already has in their pantry, and it’s probably not very available at most grocery stores, either. So instead, I opted to use watermelon gelatin (like Jell-O brand) to flavor the cake layers, with the thought that the gelatin is probably easier to come by. This might not be very accessible to international readers (sorrrrrrrry!) but I’m hopeful that it’s an easy find for some people, at least.

The gelatin worked like a charm! The watermelon flavor is pronounced and instantly recognizable, but not too overwhelming or candy-sweet. I kept the frosting a basic vanilla flavor, to balance it out a bit, and the chocolate chips—which were originally added just as a watermelon seed stand-in—were also a really nice addition! I never would have thought to pair watermelon and chocolate like that, but I ended up really liking the way the chocolate broke up the fruit flavor a bit.

So can we talk about the decorations now, or what?! I’ve seen lots of different versions of watermelon cakes, from really elaborate, realistic fondant-covered ones to very simple buttercream designs. I think my version falls in the middle of those extremes. It’s all buttercream, so you don’t have to stress about covering a cake in fondant, but it uses some hand-painting techniques to make that buttercream look FANCY. Plus it’s really fun to do!

I have a video below that shows how the buttercream painting is done, but the concept is simple: chill your cake well, and mix some green gel coloring with a splash of vodka to thin it out. Dip a natural sponge (a natural sea sponge or loofah sponge works great) in the food coloring, then dab it on the sides of the cake in vertical stripes. Do the same thing with yellow coloring, blending the edges of the colors so your stripes become indistinct and the color distribution looks random and organic. I went over the green several times, to make some darker patches, and basically just dabbed at the cake with a sponge until I was happy with it. (It also helped to have a real watermelon nearby for inspiration. It’s amazing how, as soon as you’re trying to paint something, all memories of how it looks go flying out of your head!)
The good news is that in real life, watermelon patterns are really random and imprecise. So as long as you’re getting some green and yellow patches on the sides of your cake, chances are, it’ll look good! And did I mention it’s fun to do? Because it is. If you love to play with your food, this is the baking project for you!
[PS: DEFINITELY wear gloves while you do this, unless you want to creep people out with green fingers for the next few days. You’re welcome.]
Aside from the painted sides, the rest of the decorations consist of a few scattered black fondant seeds on top—but mini chocolate chips are a great substitute for the fondant-averse.
This really was such a surprisingly tasty and fun cake, and I wish I could share a slice with all of you to convince you of how good it is! Check out the video below showing how to make this cake, and PLEASE share pictures with me if you give it a try!
🎂 More Fun Party Cakes
- Circus Animal Cake
- Curious George Cake
- Mini Banana Split Cakes
- Striped Buttercream Balloon Cake
- Unicorn Cakes
- Piñata Cake

Birthday Present Mini Cakes

Striped Buttercream Balloon Cake
Watermelon Layer Cake
Ingredients
For the Watermelon Cake:
- 4 oz unsalted butter, (1/2 cup), at room temperature
- 4 oz vegetable oil, (1/2 cup)
- 14 oz granulated sugar, (2 cups)
- 4.5 oz powdered watermelon gelatin, like Jell-O brand, from 1.5 standard boxes
- 3 large eggs, at room temperature
- 1 tsp vanilla extract
- 13.5 oz all-purpose flour, (3 cups)
- 1 tbsp baking powder
- 2 tsp salt
- 12 fl oz buttermilk, (1 ½ cups)
- Assorted gel food coloring, I used a mix of Americolor brand colors: Super Red, Deep Pink, and Burgundy
- 6 oz miniature chocolate chips, (1 cup)
For the Buttercream:
- 6 fl oz pasteurized liquid egg whites, (3/4 cup)
- 24 oz powdered sugar, (6 cups)
- ½ tsp salt
- 24 oz unsalted butter, (3 cups) at room temperature
- 2 TBSP vanilla extract
- Assorted gel food coloring, I used Americolor brand: Leaf Green, Super Red, Deep Pink, Burgandy and Lemon Yellow
To Assemble and Decorate:
- 2 oz miniature chocolate chips, (1/2 cup)
- 1/3 cup vodka, see Note
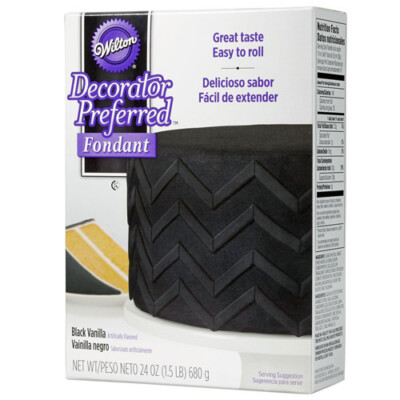
- Black fondant, optional
Instructions
To Make the Watermelon Cake:
- Preheat the oven to 350 F. Line four 8″ round cake pans with parchment paper, and spray the pans with nonstick cooking spray.
- Combine the butter, oil, granulated sugar, and gelatin in the bowl of a large stand mixer. Mix on medium speed with the paddle attachment until light and fluffy. Add the eggs in one at a time, mixing well after each addition, then add the vanilla.
- Sift together the flour, baking powder and salt in a medium bowl.
- With the mixer running on low speed, add a third of the dry ingredients and mix until just a few flour streaks remain, then pour in half of the buttermilk. Continue to alternate adding dry and wet ingredients, ending with the drys. Stop right when the flour is mixed in.
- Finish mixing the batter with a rubber spatula, stirring around the bottom and sides of the bowl to make sure that all of the stray flour is incorporated. Add a few drops of red, pink, and burgundy food coloring, and stir well to incorporate it. Add additional color, as desired, until you get a nice watermelon shade.
- Divide the batter between the prepared pans. If you have a kitchen scale, each pan should get about 14 oz of batter. Sprinkle about ¼ cup miniature chocolate chips on top of each pan, and swirl them into the batter gently. Smooth the top of the batter.
- Bake the cakes at 350 F for about 30 minutes, until they start pulling away from the sides and a toothpick inserted into the center comes out clean. These cakes won’t dome much, so it’s better to use the toothpick test here. Let them cool completely before assembling the cake. They can be made in advance, wrapped well in plastic wrap, and stored in the refrigerator for up to 5 days or in the freezer for up to 4 weeks. If frozen, let them partially defrost before assembling.
To Make the Buttercream:
- Combine the whites, powdered sugar, and salt in the bowl of a large stand mixer fitted with a paddle attachment. Mix everything together on low speed, until the sugar is moistened and no dry patches remain. Turn off the mixer, scrape down the sides and bottom of the bowl with a spatula, then turn the mixer to medium speed. Beat on medium for 5 minutes.
- After 5 minutes, turn the mixer to medium-low and start adding the softened room temperature butter, 1-2 tablespoons at a time. Once all of the butter is incorporated, add the vanilla extract and mix it in. Stop the mixer and scrape down the bottom and sides once more. Turn the speed to medium and beat the buttercream for 10 minutes. At the end, you’ll have a frosting with a wonderfully light and creamy texture.
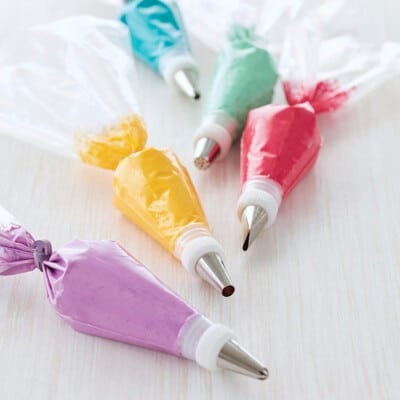
- Divide the buttercream in half. Color half of it with the red, pink, and burgundy colors to get a watermelon shade that matches your cakes. Leave the other half white for now.
To Assemble and Decorate:
- If you want to use black fondant to make seeds for the top of the cake, pinch off a tiny piece of fondant and roll it between your fingers to make it round. Press down to flatten it, then pinch the tip so it forms a seed shape. Repeat until you’ve made about 20 seeds. (If you don’t want to do this, you can substitute chocolate chips or mini chips instead.)
- Place one cake round on an 8” cake cardboard, and put it on a cake turntable. Add about a cup of red buttercream on top, and spread it out to the edges of the cake in an even layer. Scatter some miniature chocolate chips on top of the frosting, and use a spatula to swirl them into the buttercream.
- Place a second cake layer on top of the first, and repeat the frosting/chocolate chip/cake pattern until you’ve stacked all of the cake layers.
- Spread a layer of white buttercream all around the edges of the cake, leaving the top plain. The white will look like the watermelon’s rind when the cake is cut. Add enough buttercream so that the cake edges are completely covered and not peeking through. Refrigerate the cake for about 30 minutes to firm up the frosting. Place about 2/3 cup of white buttercream into a pastry bag fitted with a ½-inch round tip, and set aside.
- Tint the remaining white buttercream with a few drops of yellow and green food coloring, to make a light yellowish-green color.
- Spread this green buttercream in a thin layer over the white buttercream, just enough to cover it smoothly. Take the white buttercream in the piping bag, and pipe a ring of white frosting around the top of the cake, staying close to the edge.
- Put the remaining red buttercream on top of the cake, and spread the red out until it reaches the white frosting circle. Press your black fondant seeds (or chocolate chips) into the red frosting. Chill the cake well, for at least an hour, until the sides are very firm.
- Now for the fun part: painting the sides! I recommend wearing gloves for this step, unless you enjoy having bright green fingers. Mix together a teaspoon of green coloring with a tablespoon of vodka. Take a soft, new natural sponge and get it damp, then dip it into the food coloring. Dab the sponge on the side of the chilled cake in a vertical line, making a thick stripe. Make a second stripe, leaving a little space in between the two. Repeat around the sides of the cake, mixing together more food coloring and vodka if necessary, until you have green stripes all the way around.
- Rinse the sponge, and mix together yellow food coloring and vodka in the same way. Repeat the same procedure, adding yellow stripes in between the green ones. Dab the green and yellow together, to make them blend and make the stripes look more organic and less precise. Work the colors on top of each other, and don’t be afraid to add darker patches of green and yellow—the more random it is, the more natural it will look!
- For the best taste and texture, serve this cake at room temperature.
Video
Recipe Notes
Measuring Tips
Our recipes are developed using weight measurements, and we highly recommend using a kitchen scale for baking whenever possible. However, if you prefer to use cups, volume measurements are provided as well. PLEASE NOTE: the adage “8 oz = 1 cup” is NOT true when speaking about weight, so don’t be concerned if the measurements don’t fit this formula.
Want to learn more about baking measurements and conversion?


Just finished making these as cupcakes (did not use the frosting). I will absolutely say they fluffed up beautifully! Very soft, spongey, and the rise was perfect with smooth tops. There definitely is a strong watermelon flavor. After messing with the batter, I did not add as much salt or vanilla, and decreased the sugar by about a quarter cup. I definitely recommend these!
Thrilled to hear they worked well as cupcakes! Thanks so much for the review, Sarah.
Loved the decorating and assembly tips. The cake was a big hit at our summer-themed party. But I have to echo the person who reported a bad experience with using the powdered gelatin for flavoring. I actually bought Jolly Rancher gelatin at the local market and special ordered Jell-O brand online, as I couldn’t find it anywhere. I taste-tested both with a finger dip, and the Jell-O was a little less jarring. I made up the cake layers and tasted the scraps after leveling. Then I threw them all in the trash. They were rubbery from the gelatin and tasted artificial and terrible. I remade the cake using a standard 1-2-3-4 vanilla cake batter with infinitely better results. The amount of batter in this recipe makes four very shallow layers. I recommend making 1.5x the amount of your favorite batter and filling four standard pans or three tall pans (3″ height). The amount of buttercream in this recipe was just right for decorating the cake without alteration. If you want pics, I posted my results on Reddit at https://www.reddit.com/r/Baking/comments/ntca2r/watermelon_cake_for_a_summer_themed_party/
I made this for my son’s birthday, it looked AMAZING and the texture of both the cake and buttercream was perfect. The watermelon flavor was quite nice. However, the amount of red food coloring required to color the frosting gave the whole cake a bitter taste that was really unpleasant. Just wondering if there’s a workaround that would have helped avoid this? It kind of spoiled the whole thing and no one wants to eat it now.
Hi Larisa, I’m sorry to hear about the food coloring issue. Red coloring can have a strong and bitter taste, depending on the brand and amount used. Some companies even sell what is called “no-taste red” coloring because of this very problem. The workaround is to find a brand/type of coloring that gives a vibrant red color without having to use too much of the coloring. My favorites are Sugar Art Master Elite Red Rose (it’s a powder, and gives a really strong red color without needing too much) or Americolor Super Red gel. Both of these need to be purchased either online or in a local cake/candy supply shop if one is available. Another option is Wilton No-Taste Red gel, which has the benefit of being more readily available at places like Walmart, Hobby Lobby, or Michael’s, but in my opinion is not as great as the other 2 for adding bright red color. Hope this helps!
I have a diabetic grandchild, your recipe says 20 servings and there are 77 carbs per serving. Out of an eight inch cake how did you get 20 servings.
Hi Barbara, this recommendation is based off Wilton’s cake serving guide, which estimates 20 servings from a 8-inch, 4″ high round cake. This cake is actually quite a bit taller than 4″, and quite decadent and rich, so people typically prefer smaller slices of tall, frosting-heavy layer cakes. If you’re serving a group of hungry adults you might only get 14 or 16, but 20 is fairly accurate in my experience, especially with mixed age groups.
Source:
https://blog.wilton.com/cake-baking-serving-guide/
This recipe has very specific instructions for the amateur baker which were extremely helpful. The flavor win rave reviews from the family, as in, “Best birthday cake ever.”
Thank you so much for sharing! I’m thrilled the directions made baking fun and that this could be part of you birthday celebration. All the best!
Thanks for this recipe. If I have watermelon flavor instead of jello, will I need to switch up other ingredients for consistency and texture?
Thanks!
H Katy! Great question. You should be fine to use the watermelon flavor and skip the jello. The amount of jello is very small so it shouldn’t distort the consistency or texture to leave it out. Happy Baking!
What can I substitute for the vodka?
Hi Mary. Ultimately you need something that is alcohol based and not water based. Alcohol evaporates quickly and won’t make the fondant sticky the way water will. You could use lemon extract or any clear flavoring (just know that a little of the flavor will be added to the outside of the cake). Since the time this recipe post was made there are actually a lot of food paints on the market. I don’t have a good recommendation for which ones to try but you could check ratings and see if you can find a product that you like better. I hope that helps to answer your questions. All the best!
Any way to do this without vodka? I’d like to make this for my daughter’a first birthday soooo vodka probably wouldn’t be appropriate
Hi Alyssa. Sounds like a fun cake for a 1st birthday! In order to make the color stick to the fondant you will ultimately need something that is alcohol based and not water based. I like to use vodka because it doesn’t leave an unpleasant taste and it is clear. If you try to use water instead of something alcohol based it will make the fondant sticky. I also want to put your mind at ease about using alcohol; it evaporates quickly so you don’t need to be worried about ingesting the alcohol. It will be long gone before you are ready to serve the cake. If you don’t want to use vodka, you could use lemon extract or any clear flavoring (just know that a little of the flavor will be added to the outside of the cake). And, since the time this recipe post was made there are actually a lot of food paints on the market. I don’t have a good recommendation for which ones to try, but you could check ratings and see if you can find a product that you like better. I hope that helps to answer your questions. All the best!
Hi – Question – what kind of food safe sponge do you use?
Thank you,
Sandra
Hi Sandra! Elizabeth likes to use a natural sea sponge or loofa for painting the sides of the cake. Here’s a good sponge you could try: https://amzn.to/3UALJvk
Happy baking!