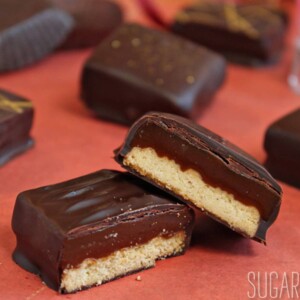
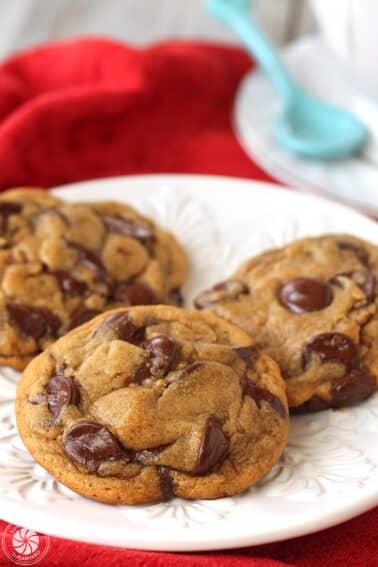
These Caramel Shortbread Squares are the perfect 2-bite dessert. They have a crisp center covered in soft chewy caramel and the whole thing is coated in semi-sweet chocolate for superb richness!

I’m not much for storebought candy bars, but when I do have my choice of the prepackaged stuff, I usually go for a Twix. I like the shortbread/caramel/chocolate combination (and let’s petition for a dark chocolate-only policy, thankyouverymuch) and I like how light and crispy the bar is, as opposed to some of its heftier cousins.
I’ve made my own Twix before, but the process can be tricky. The shortbread base often crumbles when you cut it, so even though they taste good, the bars often look a little lopsided and messy. Not very satisfying for a perfectionist like yours truly.

Fortunately for you and me that nitpicking devil on my shoulder, I recently had the best brainstorm ever. I realized that if I used prepackaged shortbread cookies, I could create Twix-like squares with minimal mess and effort. It’s faster, easier, AND much neater? That’s like an OCD hat trick right there.
 Look at this genius right here
The secret is to pour the caramel into a pan, and when it’s partially set, press square shortbread cookies on top. Once the caramel sets completely, you can cut the cookies apart, and you’re left with beautiful, nearly even squares that, when dunked in chocolate, make the perfect 2- or 3-bite dessert.
Time-Saving Variation
I used a homemade caramel recipe and tempered real chocolate for the coating. Both of these steps make the recipe more time-consuming. I think it’s worth it to have a final product that tastes great, but if you’re looking for something even easier, I’ve included a few notes down below the recipe for using store-bought caramels and chocolate candy coating, both of which will make the process of assembling these squares even faster.

I was planning on decorating all of the squares with a ripple effect, which is dead simple but looks moderately fancy. (New band name: Moderately Fancy. Yes or no?) However, once I saw how beautifully these dipped cookies were turning out, I knew they deserved a little something extra.

Some of the cookies got dusted with gold disco dust, and some got decorated with gold-patterned chocolate transfer sheets. (See here for a quick rundown on transfer sheets.) Both of these methods are really easy, but make your desserts look like a million bucks.

And how do they taste? As good as they look! The shortbread is crisp, the caramel is soft and chewy, and the semi-sweet chocolate coating adds richness. The cookie portion and the serving size make them not quite a candy, but the caramel and chocolate coating make them not quite a cookie. They’re a gorgeous candy-cookie hybrid (cankie? coody? I’ll work on it) that make a lovely holiday gift.

🍫More Candy and Cookie Recipes

Champagne White Chocolate Truffles

Disco Truffles
Caramel Shortbread Squares
Ingredients
- 3/4 cup heavy cream
- 2 oz unsalted butter, (4 tbsp), divided use
- 1/2 cup light corn syrup
- 1 cup granulated sugar
- 1/2 tsp salt
- 1 tsp vanilla extract
- 25 shortbread cookies, small square cookies like Lorna Doone brand, see Note below
- 1 lb semi-sweet chocolate
Special equipment:
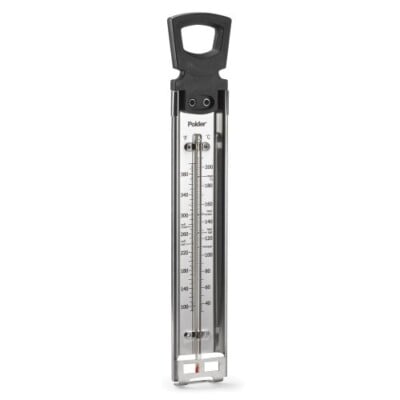
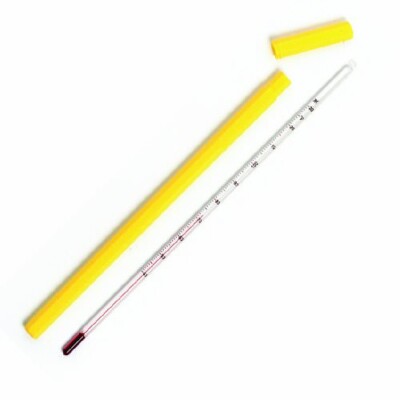
- Chocolate thermometer
- Candy Thermometer, Should go up to 400F
Instructions
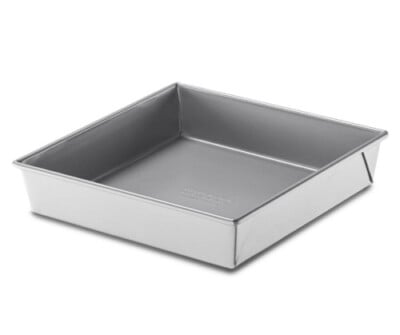
- Spray a 9×9 pan with a light coating of nonstick cooking spray, and press a layer of cling wrap into the pan, extending up the sides. (The spray will help the plastic wrap to stick.) Spritz the plastic wrap with a light layer of nonstick spray, then set aside for now.
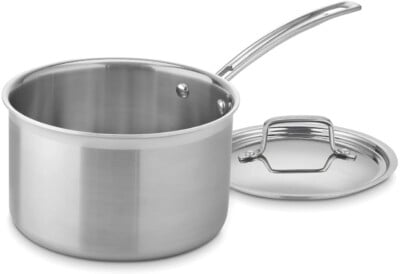
- Make the caramel first: in a small saucepan, combine the heavy cream and 1 ounce (2 tbsp) of the butter. Place the pan over medium heat and bring the mixture to a low boil. As soon as it boils remove the pan from the heat and cover it with a tight-fitting lid to keep it warm. Set it aside for now.
- Combine the corn syrup and sugar in a medium saucepan and place the pan over medium-high heat. Stir until the sugar dissolves and the mixture comes to a boil. Cover the pan with a lid and let it boil for 4 minutes, so the condensation will wash the sugar crystals from the side of the pan.
- Remove the lid and insert a candy thermometer. Continue to cook the sugar, without stirring, until it reaches 300° Fahrenheit (149°C) on the candy thermometer. Once at 300°F, carefully pour the warm cream into the hot sugar syrup and whisk them together. The mixture will bubble and splatter a great deal, and the temperature will drop.
- Cook the caramel, stirring frequently, until it reaches 250°F. Once at 250, remove the pan from the heat, and stir in the salt, vanilla, and remaining 2 tablespoons of butter. Pour the caramel into the prepared pan and let it set at room temperature, until it is still warm and malleable, but no longer liquid. The caramel should be set enough to allow you to press cookies into the back of it, but it should not be hard or overly sticky.
- Once the caramel is the right texture, press the square shortbread cookies right next to each other on top of the caramel. If you are using Lorna Doone brand, you will be able to get five rows of five cookies each in a 9×9 pan. Let the caramel set completely at room temperature or in the refrigerator.
- Once set, use a large sharp knife to cut the squares apart, trimming an uneven edges if necessary. Don’t cut them until you’re ready to dip them. The caramel is fairly firm, but still might gradually soften and lose its neat shape if cut pieces sit at room temperature for hours.
- To temper the chocolate, chop about three-quarters of the chocolate, or 12 oz, into small pieces. Leave the remaining quarter of chocolate in one whole chunk. Place the chopped chocolate in a microwave-safe bowl and microwave in 30-second increments until melted, stirring after every 30 seconds. Microwave until the chocolate reaches 115 F on the chocolate thermometer.
- Once at 115, add the unchopped chocolate and stir it in. Continue to stir the chocolate frequently with a rubber spatula. As you stir, the unchopped chocolate will gradually melt and help temper the remaining chocolate. Stir occasionally until the chocolate temperature drops to 90F. At this point, start testing it for temper: smear a small amount of chocolate on a piece of parchment and let it sit for a few minutes at room temperature. If it starts to set around the edges and look glossy and hard, it’s tempered! If it remains wet and shiny after five minutes, it’s not in temper yet. Continue to stir the chocolate until it drops a few more degrees, then test it again.
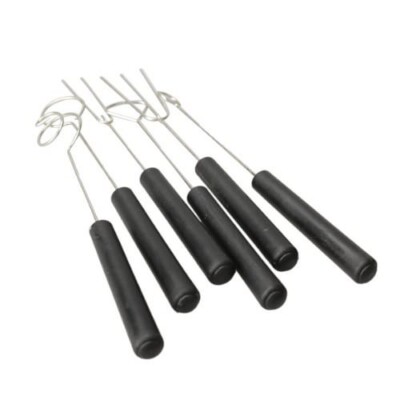
- Once the chocolate is in temper, use dipping tools or a fork to dip each caramel shortbread square into the chocolate. Let excess drip back into the bowl, then set the dipped candy on parchment paper. To make ripples, lightly touch the top of the square with the tines of a fork or dipping tool while it’s still wet.
Recipe Notes
Measuring Tips
Our recipes are developed using weight measurements, and we highly recommend using a kitchen scale for baking whenever possible. However, if you prefer to use cups, volume measurements are provided as well. PLEASE NOTE: the adage “8 oz = 1 cup” is NOT true when speaking about weight, so don’t be concerned if the measurements don’t fit this formula.
Want to learn more about baking measurements and conversion?


These are gorgeous! I’m not particularly familiar with making shortbread, but could you also roll out dough and cut it into squares before baking? Just in case you don’t want to use store-bought cookies. Not that there’s anything wrong with a shortcut! 🙂
Yes, I think that would work well! It was a little more work than I was willing to do, but as long as you could cut shortbread to neatly fit into a square pan, it seems like a good idea. 🙂
These look fanfreakingtastic! I love the shortbread cookie layer…must be heavenly with caramel and chocolate coating.
Wow have I been missing out! So glad I finally joined the Sugar following! You are sooo entertaining! But how DO you stay so slim? Running? I know chasing after a little one helps!
Hi Charmon! Yay, join the sugar party! Sadly I’m not running too much these days…except, yes, running after the little one. I’m trying to take down my sugar intake to compensate, but that’s definitely easier said than done. 🙂 What about you?
These looks perfect! So cute! Can you say which disco dust do you use? I’ve seen a few products on amazon, but it’s not clear which are edible and which aren’t…
Thanks! I used disco dust by CK Products, which is actually not technically edible. (It’s non-toxic, but not labelled edible.) As far as I know, there aren’t any disco dusts that are edible. Some luster dusts and pearl dusts are edible, and there’s a product called Magic Sparkles that’s edible, but that looks more like shiny flakes than glitter. My personal philosophy is to not worry about it too much when it’s such a tiny pinch on baked goods, but I know other folks might see it differently, so I don’t usually use it when I’m making desserts for other people.
Thank you so much for the quick response!
I’ve since thought of two more questions 🙂
1. How long do these keep? And how should they be kept? (room temp in airtight container/fridge/something else?)
2. Is there a way to make parts in advance? I’m thinking of making them for guests at my wedding, and I’m trying to figure out of the most efficient way to do it to avoid stress the day before the wedding..
Sorry to be bugging you again, but any chance you could just tell me how long these would keep in fridge/freezer Thank you so much!
Hmm.. another question. The recipe says 4tsbp butter but I only see 2tbsp being used. Am I missing something?
Hi S, I’m so sorry! I know I typed up a whole response to your earlier questions a week or two ago, but I don’t know what happened to it or why it isn’t showing up. [And in the future, feel free to email me {elizabeth at sugarhero.com} if you need a faster response.]
Regarding the butter, that’s a mistake and I’ve changed the recipe now. The remaining 2 tbsp are added along with the salt and vanilla once it’s pulled off the heat. Thanks for catching it!
As for making them in advance, I have made them up to 3 weeks in advance. I, personally, would feel okay making them 4 weeks in advance if they were stored in a refrigerated place. Any longer, and I would just worry about the dairy going off. If you’re only keeping them for a week or two, cool room temperature is fine.
I haven’t tried freezing them but my guess is that it would be okay. (Maybe up to 3 months or so? Not sure about that.) I would only worry that the chocolate would get weird and splotchy from fridge or freezer condensation. If you’re going to brush them with luster dust or do other decorations that might cover up the chocolate, you’ll probably be fine.
Regarding make-ahead options, you can make the caramel ahead of time and then when you’re ready to use it, melt it in the microwave until it’s pouring consistency and proceed with the rest of the recipe. I think the most time-consuming part is probably tempering the chocolate and then keeping it in temper. One way to speed up that process would be to use chocolate coating instead of real chocolate. The taste isn’t as good, but it’s much faster, since you only have to melt it, and the results are pretty predictable. Hope that helps, and let me know if you have other questions. Congrats on the wedding!
Wow, thank you for the detailed reply! Your’e awesome!
I tried making them two days ago and things went wrong, but it was totally my fault – I put my candy thermometer in the caramel, except it only goes to 130 and it broke and the contents started smoking. I had about an hour and a half of panic that I was going to die of mercury poisoning before I realized the thermometer was non-mercurial. Anyway, I will try these again with a proper thermometer 🙂
Thanks again!
Anytime, happy to help!
Sorry to hear about your thermometer! I broke a chocolate thermometer in the sink once and was pretty sure I was going to die too, until I did some googling. Even though it wasn’t mercury, it sure did smell bad and freak me out, though.
Just so we’re on the same page: you’re using Fahrenheit measures, right? I only ask because candy thermometers typically go to 400F so I wanted to make sure we weren’t having a C/F conversion miscommunication. 🙂
Yup, it went to 130 Fahrenheit. It’s actually the same thermometer you link to in your post:) I guess it goes high enough for chocolate, but not caramel..
I replaced it with this one that indeed goes to 400F: http://www.amazon.com/gp/product/B000OV5MCG/ref=oh_details_o01_s01_i02?ie=UTF8&psc=1
Oh no, I see what you mean. Candy thermometers and chocolate thermometers are actually different, and the recipe wasn’t entirely clear on that. 🙁 You need a candy/deep fry thermometer for the caramel portion, and a chocolate thermometer for the chocolate portion. I’m so sorry to not be clearer. Please let me know if anything else seems unclear or if you have other questions!