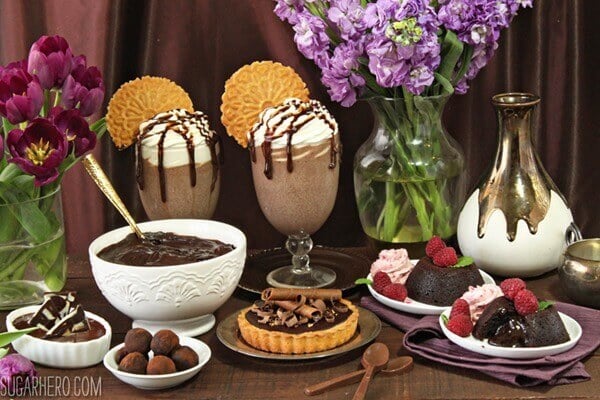
Forget truffle and glazes! This list of Four Fantastic Ways to Use Ganache will show you how to make tarts, mousse, lava cakes, and milkshakes out of ganache!
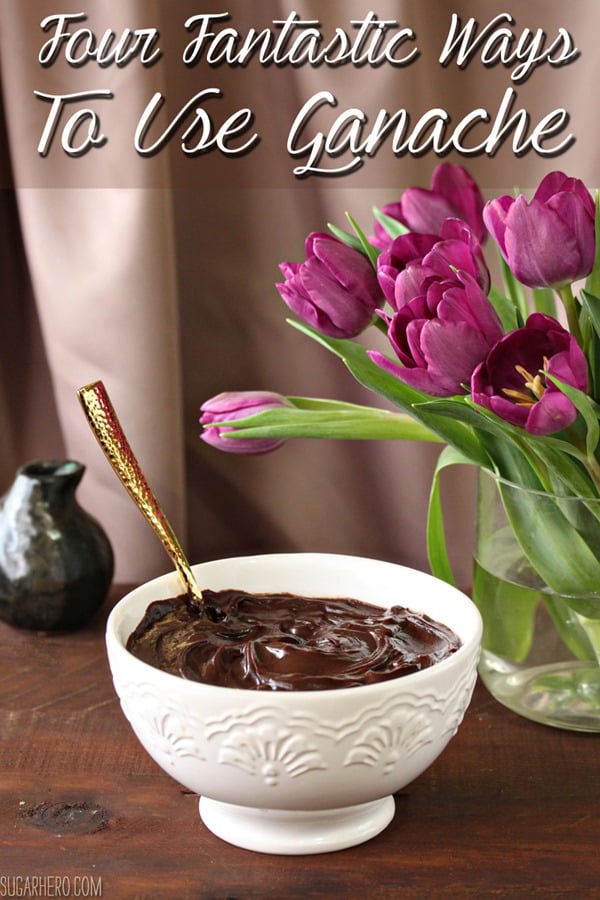
Today’s an extra-special day here at SugarHero HQ. For one thing, it’s Friday (yesssssssss!) and for another, today I get to share not one, but four (actually, FIVE!) chocolate recipes with you. Stellar, right? So let’s gorge ourselves on chocolate loveliness before collapsing slack-jawed in front of Netflix with a cozy blanket, because that’s how this party animal does Friday nights. Be jealous!
If you’ve done much baking or dessert blog reading, you’re probably familiar with ganache (pronounced guh-NOSH, because it’s just so noshable.) At its most basic, it’s a mix of chocolate and cream melted together to form a smooth, silky mixture. It’s so versatile! It’s the base of many chocolate truffle recipes, and it’s an excellent all-purpose cake glaze. I’ve used it to cover my Chocolate Raspberry Mousse Cake, Chocolate-Covered Strawberry Cakes, and many others. So, to recap: love ganache, make it all the time, use it for everything, would eat it by the bowlful if it were socially acceptable.
However, this blog isn’t about giving you the same old recipes that you could find anywhere else. I want to delight you, I want to inspire you, I want to make you buy pants in a larger size. (Sorry not sorry.)
So, inspired by the versatility ganache, I’m sharing four ways to use this magical sauce, beyond the basic truffles and chocolate glaze. And in the spirit of kitchen hacks, I also tried to keep the recipes fairly fast and simple. I want these to be secret weapons you can keep in your back pocket and whip out when you need an easy dessert with that “wow” factor.
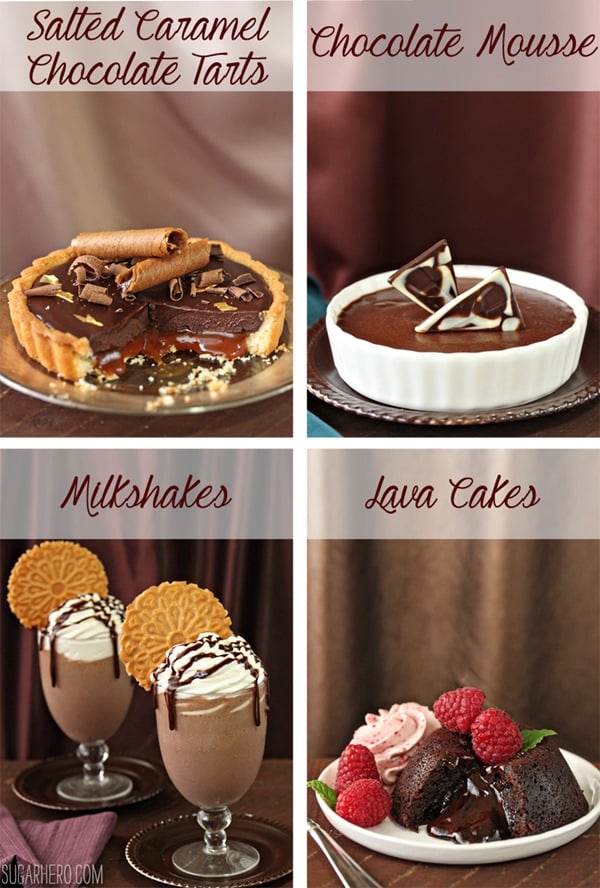
First up, Salted Caramel Chocolate Tarts!
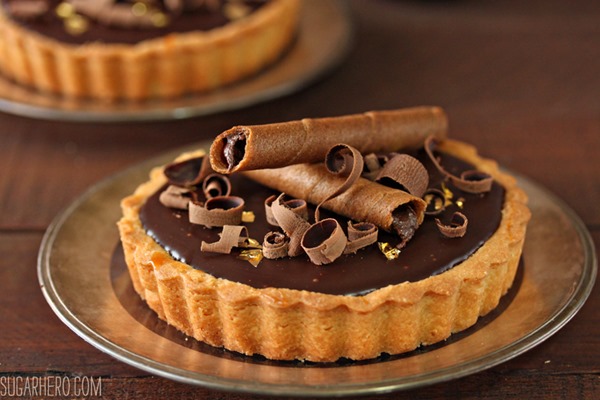
These are probably the most time-consuming recipe I’m sharing, just because you’ll need to make and bake the tart shells. But if you buy pre-made shells, or decide to use a graham cracker crust instead, they can be made in just a few minutes! And for those minutes’ worth of work, what do you get? A crispy, buttery shell, filled with gooey salted caramel and rich, luscious chocolate ganache. Need to see that sexy caramel in action? Yeah, I thought so:
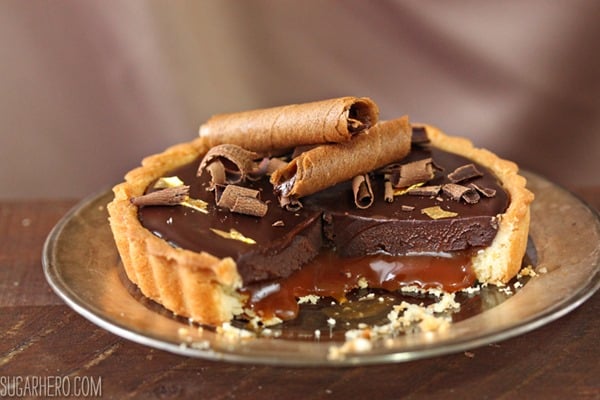
I never know when enough is enough, so I topped my tarts with gold leaf, chocolate curls, and broken bits of pirouline cookies. They would also be great with whipped cream! They’re screaming to be served at a fancy-pants dinner party, so go ahead and invite the boss over, then whip up a batch of ganache and wait for that raise offer to come. You’re welcome.
Next up: Chocolate Mousse!
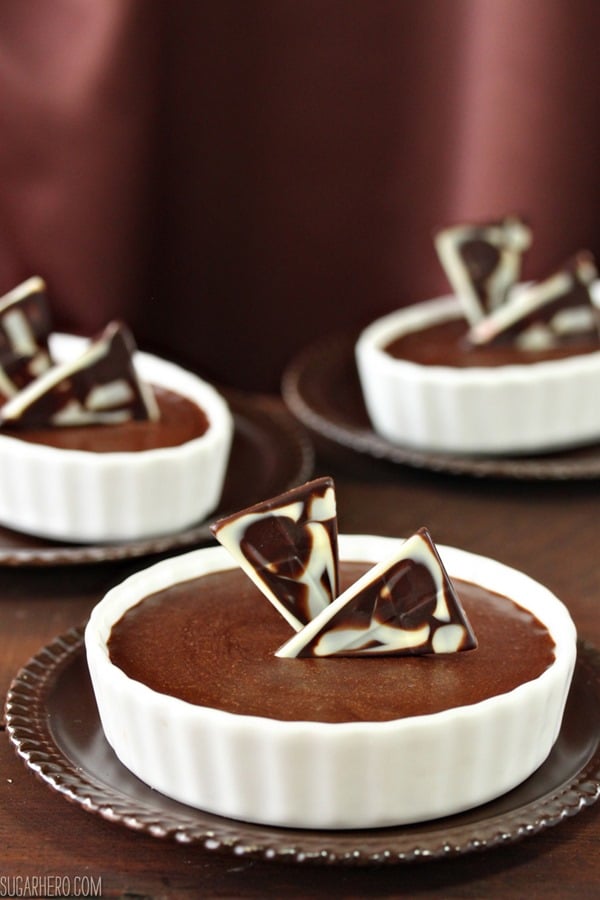
Chocolate mousse isn’t exactly a revolutionary dessert, but I’ve never made it with a ganache base before. Usually, it requires separating eggs, whipping yolks, whites, and cream separately, and a lot of fiddly folding together. Thumbs DOWN to that. This recipe is just 4 ingredients (yolks, sugar, cream, ganache) and, aside from chilling time, takes about 10-15 minutes. I feel that!
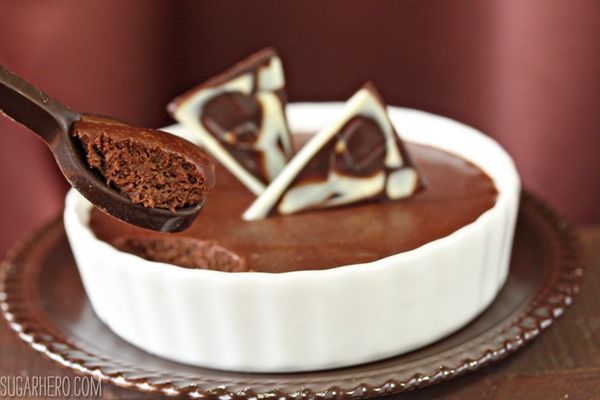
The best part is the texture: it’s creamy and dense–lighter than a pudding, but more substantial than some mousses that are nothing more than glorified whipped cream. I kept things simple and topped mine with some chocolate decorations, but I think a tart berry sauce to cut some of the chocolate flavor would also be exceptional.
Ready for your third chocolate dessert? Drumroll please….Easy Lava Cakes!
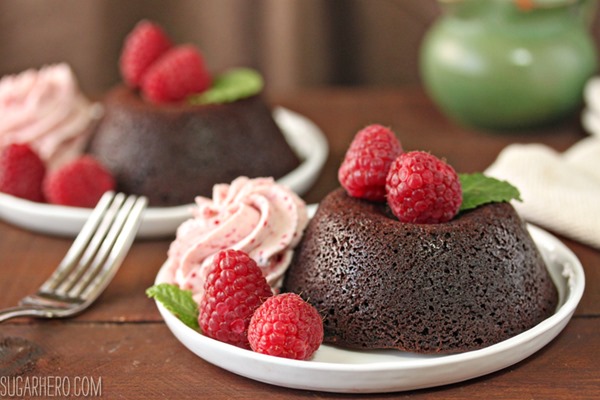
Lava cakes are the best kind of magic. Who cares about being able to pull a rabbit out of a hat? REAL magic is baking a cake with a molten chocolate filling inside that stays soft and liquidy. I’ll take that over your dumb bunny trick any day. This recipe, again, has very few components (eggs, ganache, and brownie mix), and for about 15 minutes of work, you can have cute petite single-serving cakes, just waiting to erupt with chocolatey goodness. I mean, will you please look at this:
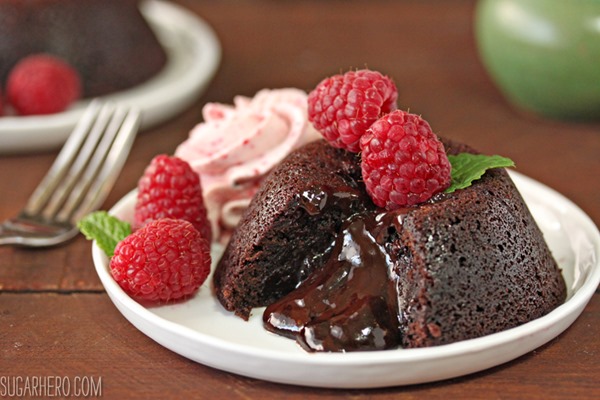
The center is a combination of undercooked cake and a melted chocolate truffle. It is, needless to say, total chocolate overload, and totally awesome. It is also RICH like Scrooge McDuck, so you’ll definitely want to serve this with something to cut through all that. I paired mine with raspberries and raspberry whipped cream (just whipped cream mixed with crushed freeze-dried raspberries) but ice cream is always a good idea, especially since the cakes will be warm. Warm cake, cold ice cream….*Homer Simpson drool*
Finally, for our last recipe: Chocolate Milkshakes!
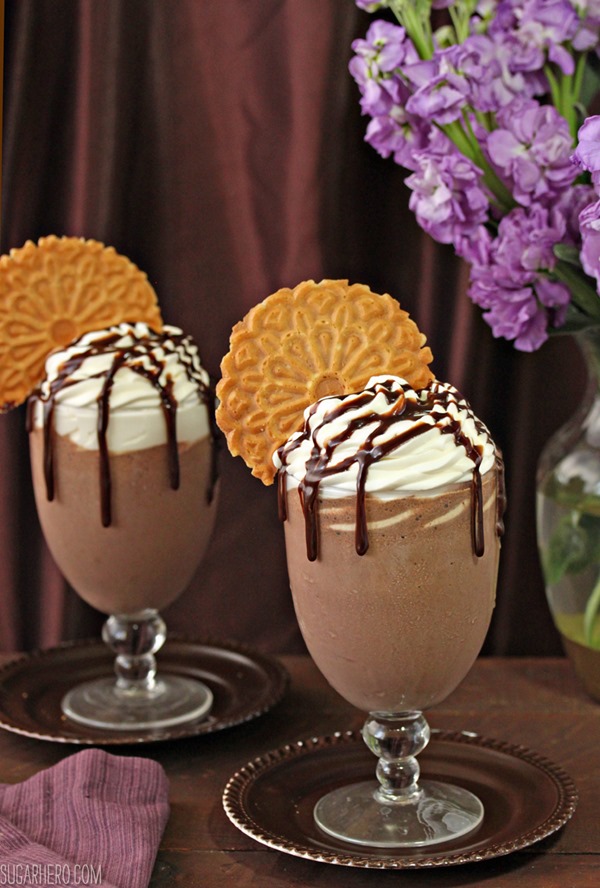
You probably know how to make chocolate milkshakes. But did you know you can make them 67.35% better by tossing some ganache in there before you blend? Fact! I tasted a lot of milkshakes to bring you that scientific figure. #sugarhero
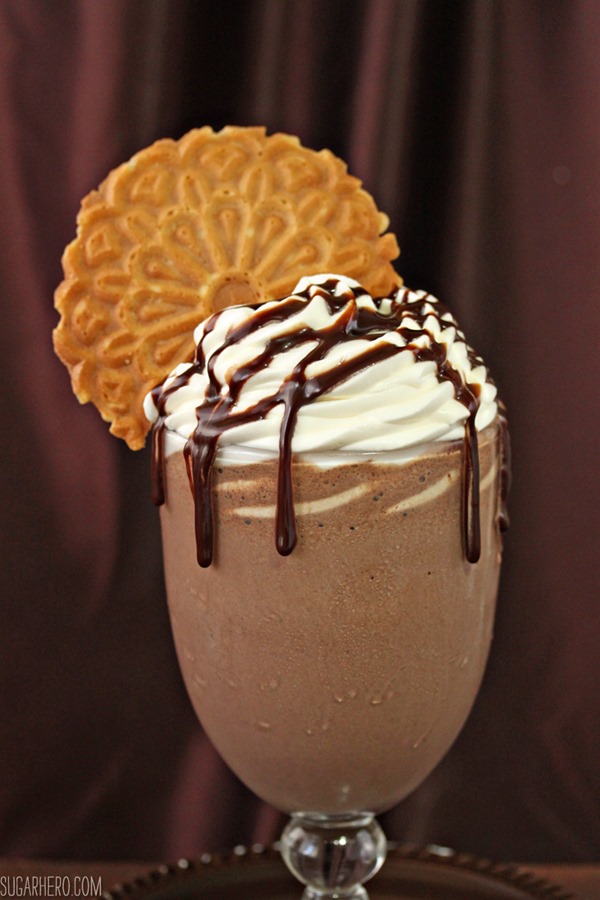
And of course, what milkshake would be complete without a big cloud of whipped cream and an artful drizzle of ganache on top? Beautiful pizelle cookie garnishes are optional but oh so fun.
And there you have it! One basic recipe for ganache, four different and outrageous desserts you can whip up. Happy Friday to us!
💖More Sauces and Syrups You’ll Love
- Dark Chocolate Fondue
- Lavender Simple Syrup
- Strawberry Sauce
- Blueberry Sauce (Blueberry Topping)
- Cinnamon Syrup
- Cookie Dough Filling
- Lick-The-Knife-Clean Chocolate Spread
Chocolate Feathers
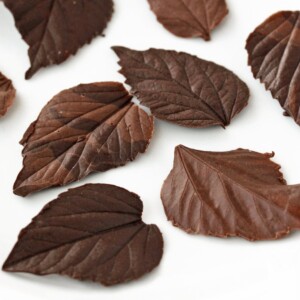
Chocolate Leaves
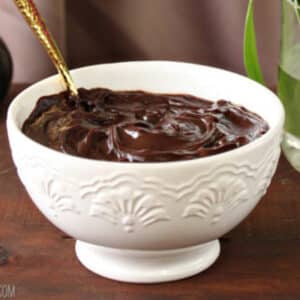
Chocolate Ganache
Ingredients
- 12 oz dark chocolate, finely chopped, I prefer using 60-65% cocoa
- 8 oz heavy cream, (1 cup)
- .75 oz light corn syrup, (1 tbsp)
- 1 oz unsalted butter, (2 tbsp), at room temperature
Instructions
- Place the chopped dark chocolate in a medium bowl. Pour the heavy cream and corn syrup into a small saucepan and place the pan over medium heat. Bring the cream to a simmer, and once small bubbles appear all along the sides of the pan, pour it over the chopped chocolate in the bowl.
- Let the hot cream soften the chocolate for one minute, then gently whisk them together, until all of the chocolate is melted and your ganache is smooth and shiny.
- Add the room temperature butter and whisk it into the ganache until incorporated. Press a layer of cling wrap directly on top of the ganache and let it sit until it reaches room temperature. Once at room temperature, it can be refrigerated for later use. The ganache will keep in the refrigerator for up to two weeks.
Recipe Notes
Measuring Tips
Our recipes are developed using weight measurements, and we highly recommend using a kitchen scale for baking whenever possible. However, if you prefer to use cups, volume measurements are provided as well. PLEASE NOTE: the adage “8 oz = 1 cup” is NOT true when speaking about weight, so don’t be concerned if the measurements don’t fit this formula.
Want to learn more about baking measurements and conversion?
Nutrition
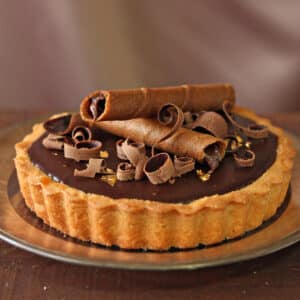
Salted Caramel Chocolate Tarts
Ingredients
For the Tart Dough:
- 6.33 oz all-purpose flour, (1 1/2 cups)
- 2 oz powdered sugar, (1/2 cup)
- 1/4 tsp salt
- 5 oz unsalted butter, cold
- 1 large egg yolk
For the Filling:
- 10 oz thick salted caramel sauce, (about 1 cup), thick
- 15 oz chocolate ganache, (a scant 2 cups)
- Assorted toppings , cookies, chocolate curls, etc
Instructions
To Make the Tart Dough:
- Place the flour, sugar, and salt in the bowl of a food processor, and pulse briefly until everything is well-blended. Add the cold cubed butter and pulse until it is in small pea-sized pieces. Add the egg yolk and pulse in long 5-second bursts until the dough starts clumping together.
- Turn the dough out of the food processor and knead it lightly several times to incorporate any extra flour. At this point, the dough can be wrapped and refrigerated for several days. If you’re ready to use it now, spray five 6-inch tart pans with removable bottoms with nonstick cooking spray.
- Press the dough in an even layer into the bottom and sides of the pans. Freeze the shells for 30 minutes, and while they’re in the freezer, preheat the oven to 375 degrees F. Spray the tops of the tart dough with nonstick spray, then press sheets of foil onto the shells, shiny side down, and fill the foil with dry beans, rice, or pie weights.
- Bake the tart shells for about 15 minutes, until the sides start to take on a little color and the center no longer looks raw, then carefully remove the foil and weights. Bake for an additional 6-8 minutes, until the shells are golden brown. Let them cool completely before filling.
To Assemble:
- Spoon a layer of salted caramel sauce into the bottom of each baked and cooled tart shell. Refrigerate the shells for 20 minutes to chill the caramel sauce.
- Heat the ganache in short 15-second increments, whisking gently after every 15 seconds so it doesn’t overheat. Warm it up until it flows freely—it doesn’t need to be hot, just liquid enough to pour easily. Pour the warm ganache on top of the caramel in the tart shells, and tap the tarts against the countertop a few times to smooth out the tops. Refrigerate the tarts for at least an hour, to set the ganache. Before serving, top the tarts with decorations like cookies, chocolate curls, or gold leaf. Let them sit at room temperature for 15 minutes before serving, for the best taste and texture.
Recipe Notes
Measuring Tips
Our recipes are developed using weight measurements, and we highly recommend using a kitchen scale for baking whenever possible. However, if you prefer to use cups, volume measurements are provided as well. PLEASE NOTE: the adage “8 oz = 1 cup” is NOT true when speaking about weight, so don’t be concerned if the measurements don’t fit this formula.
Want to learn more about baking measurements and conversion?
Nutrition
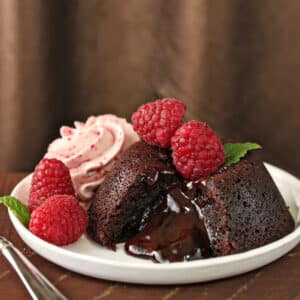
Easy Lava Cakes
Ingredients
- 12 oz chocolate ganache, (1 1/2 cups), chilled
- 3 large eggs
- 3 large egg yolks
- 1 box brownie mix, (approx 18 oz), I used Ghirardelli's
Instructions
- Preheat the oven to 350 F. Scoop 8 balls of chilled ganache into truffle shapes, and place them on a plate in the refrigerator. Soften the remaining ganache in the microwave in short 20-second increments, stirring after every heating period. The ganache doesn’t have to be liquid—shoot for a spreadable consistency (like peanut butter) and you’ll be fine.
- Combine the brownie mix, remaining 1 cup of ganache, 3 eggs, and 3 yolks in a mixing bowl, and beat on medium-low speed with a paddle attachment until well-blended. Stop mixing when all of the dry streaks have disappeared, and finish stirring by hand, scraping the bottom and sides of the bowl with a spatula.
- Spray 8 3/4-cup ramekins with nonstick cooking spray, and fill them with about 1/2 cup of lava cake batter. Press a truffle down into the center of each cake, and spread some of the surrounding batter over the top, so that the truffle is covered with batter.
- Place the ramekins on a baking sheet, and bake them for 18-20 minutes, rotating halfway through. The edges should be puffed and dry, but it should still look shiny, jiggly, and underbaked in the center. Let the cakes cool for a few minutes, then gently unmold them. Hold a ramekin in one oven-mitt clad hand, and gently pull the edges of the cake away from the ramekin. Press a plate on top of the ramekin, then flip the whole thing over so the cake releases onto the plate. Repeat until all of the cakes are unmolded.
- For the best taste and texture, serve these lava cakes while still warm, so the chocolate centers flow out. Top with ice cream, whipped cream, or fresh berries. The lava cakes can be made in advance and reheated in the microwave for 15-25 seconds, until warm throughout.
Recipe Notes
Measuring Tips
Our recipes are developed using weight measurements, and we highly recommend using a kitchen scale for baking whenever possible. However, if you prefer to use cups, volume measurements are provided as well. PLEASE NOTE: the adage “8 oz = 1 cup” is NOT true when speaking about weight, so don’t be concerned if the measurements don’t fit this formula.
Want to learn more about baking measurements and conversion?
Nutrition
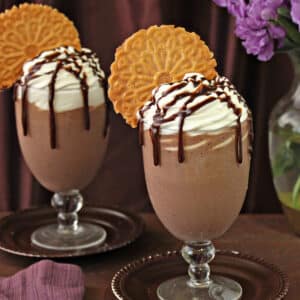
Chocolate Ganache Milkshakes
Ingredients
- 1 cup milk
- 4-5 chocolate ice cream, generous scoops
- 8 oz chocolate ganache, (1 cup), plus additional for drizzling
- 2 cups heavy cream, freshly whipped
Instructions
- Combine the milk, ice cream, and 1 cup ganache in a blender, and blend together until smooth and creamy. Pour into glasses and top with whipped cream, a drizzle of ganache, and anything else you can dream up! Serve immediately.
Measuring Tips
Our recipes are developed using weight measurements, and we highly recommend using a kitchen scale for baking whenever possible. However, if you prefer to use cups, volume measurements are provided as well. PLEASE NOTE: the adage “8 oz = 1 cup” is NOT true when speaking about weight, so don’t be concerned if the measurements don’t fit this formula.
Want to learn more about baking measurements and conversion?
Nutrition
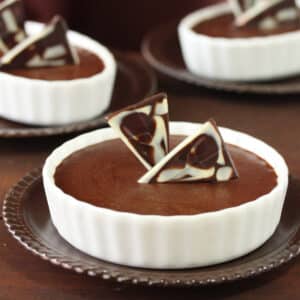
Chocolate Ganache Mousse
Ingredients
- 8 large egg yolks
- 3.5 oz granulated sugar, (1/2 cup)
- 16 oz heavy cream, (2 cups)
- 12 oz ganache, (1 1/2 cups), at room temperature
Instructions
- 1. Combine the egg yolks and granulated sugar in a mixing bowl, and mix them on medium-high speed using the paddle attachment for 5 minutes, until they are very thick ad a ale yellow color. When you lift the paddle from the yolks, the yolks should drop back down into the bowl in a slow ribbon.
- 2. Place the cream in a medium saucepan over medium heat, and bring it to a simmer. Once simmering, whisk the egg yolks while you drizzle in hot cream. This tempers the eggs, and makes it so they gradually heat up without cooking or curdling. Once you have drizzled in about half of the hot cream, start whisking the cream in the saucepan while you drizzle the eggs back into the pan.
- 3. Return the egg-cream mixture tot he heat and cook, whisking constantly, until it comes back to a simmer. Don’t let it boil!
- 4. Once simmering, pour the hot custard over the ganache and whisk well, until everything is shiny and smooth. Pour the mousse into six 6-oz ramekins, and chill for at least 4 hours, or overnight, until the mousse is firm. Top with whipped cream, a berry sauce, fresh fruit, or chocolate decorations.
Recipe Notes
Measuring Tips
Our recipes are developed using weight measurements, and we highly recommend using a kitchen scale for baking whenever possible. However, if you prefer to use cups, volume measurements are provided as well. PLEASE NOTE: the adage “8 oz = 1 cup” is NOT true when speaking about weight, so don’t be concerned if the measurements don’t fit this formula.
Want to learn more about baking measurements and conversion?



I’m gonna be honest – that first photo with the bowl and the spoon? I didn’t need to read any further. 😉 But then I saw the Salted Caramel Chocolate Tarts and changed my mind. Can I have both? I might need both.