


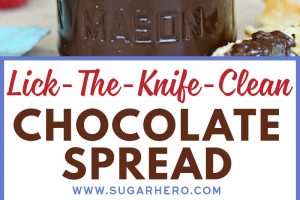
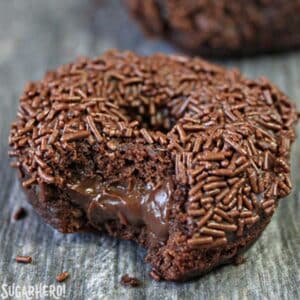
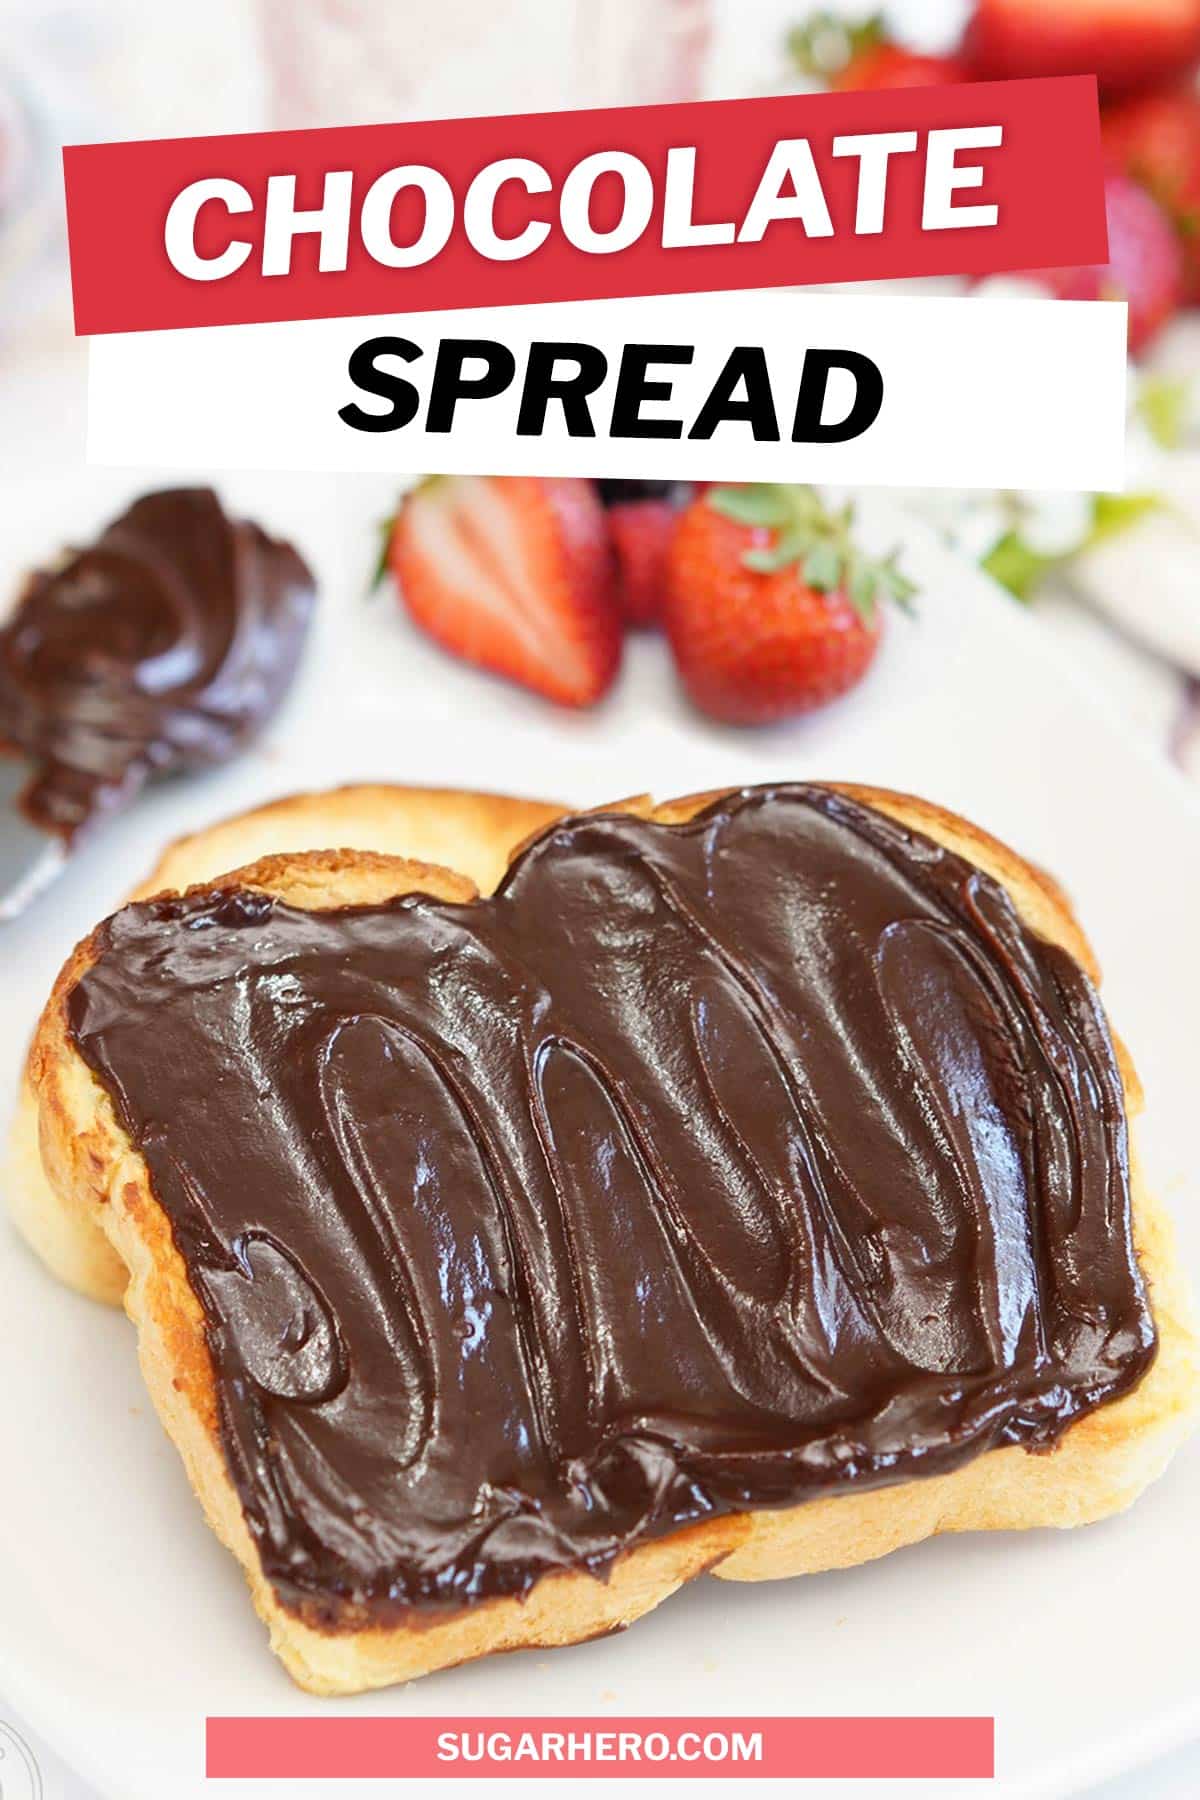
This Chocolate Spread is so good, you’ll want to lick the knife clean! It’s easy to make, nut-free, and tastes great on everything from toast to waffles to apple slices! This recipe is a longtime fan favorite, and it’s now been updated with new troubleshooting tips and step-by-step photos, to make sure yours turns out perfectly every time.
🍫 The Best Nut-Free Chocolate Spread
This recipe came about because a reader asked a simple question: could I help her make a tasty chocolate spread at home? The requirements: no nuts, no complicated equipment, no unfamiliar ingredients, and no long list of steps.
It took a few attempts, but I finally nailed a recipe that hit all the right notes: it has a deep chocolate flavor and a lush, silky texture. The ingredients are all things you probably have at home already, and it comes together in just 5 minutes.
This recipe is built on two of my favorite ingredients: chocolate and butter. It has a small amount of vanilla, and a pinch of salt, but it’s really all chocolate, all the time. If you’re looking for a nut-free alternative to peanut butter or Nutella, this is the recipe for you!
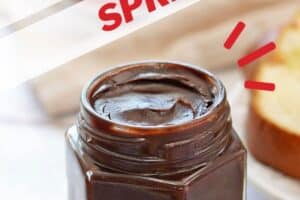
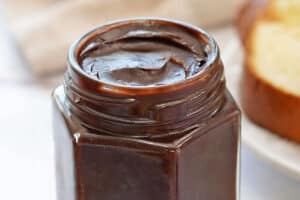
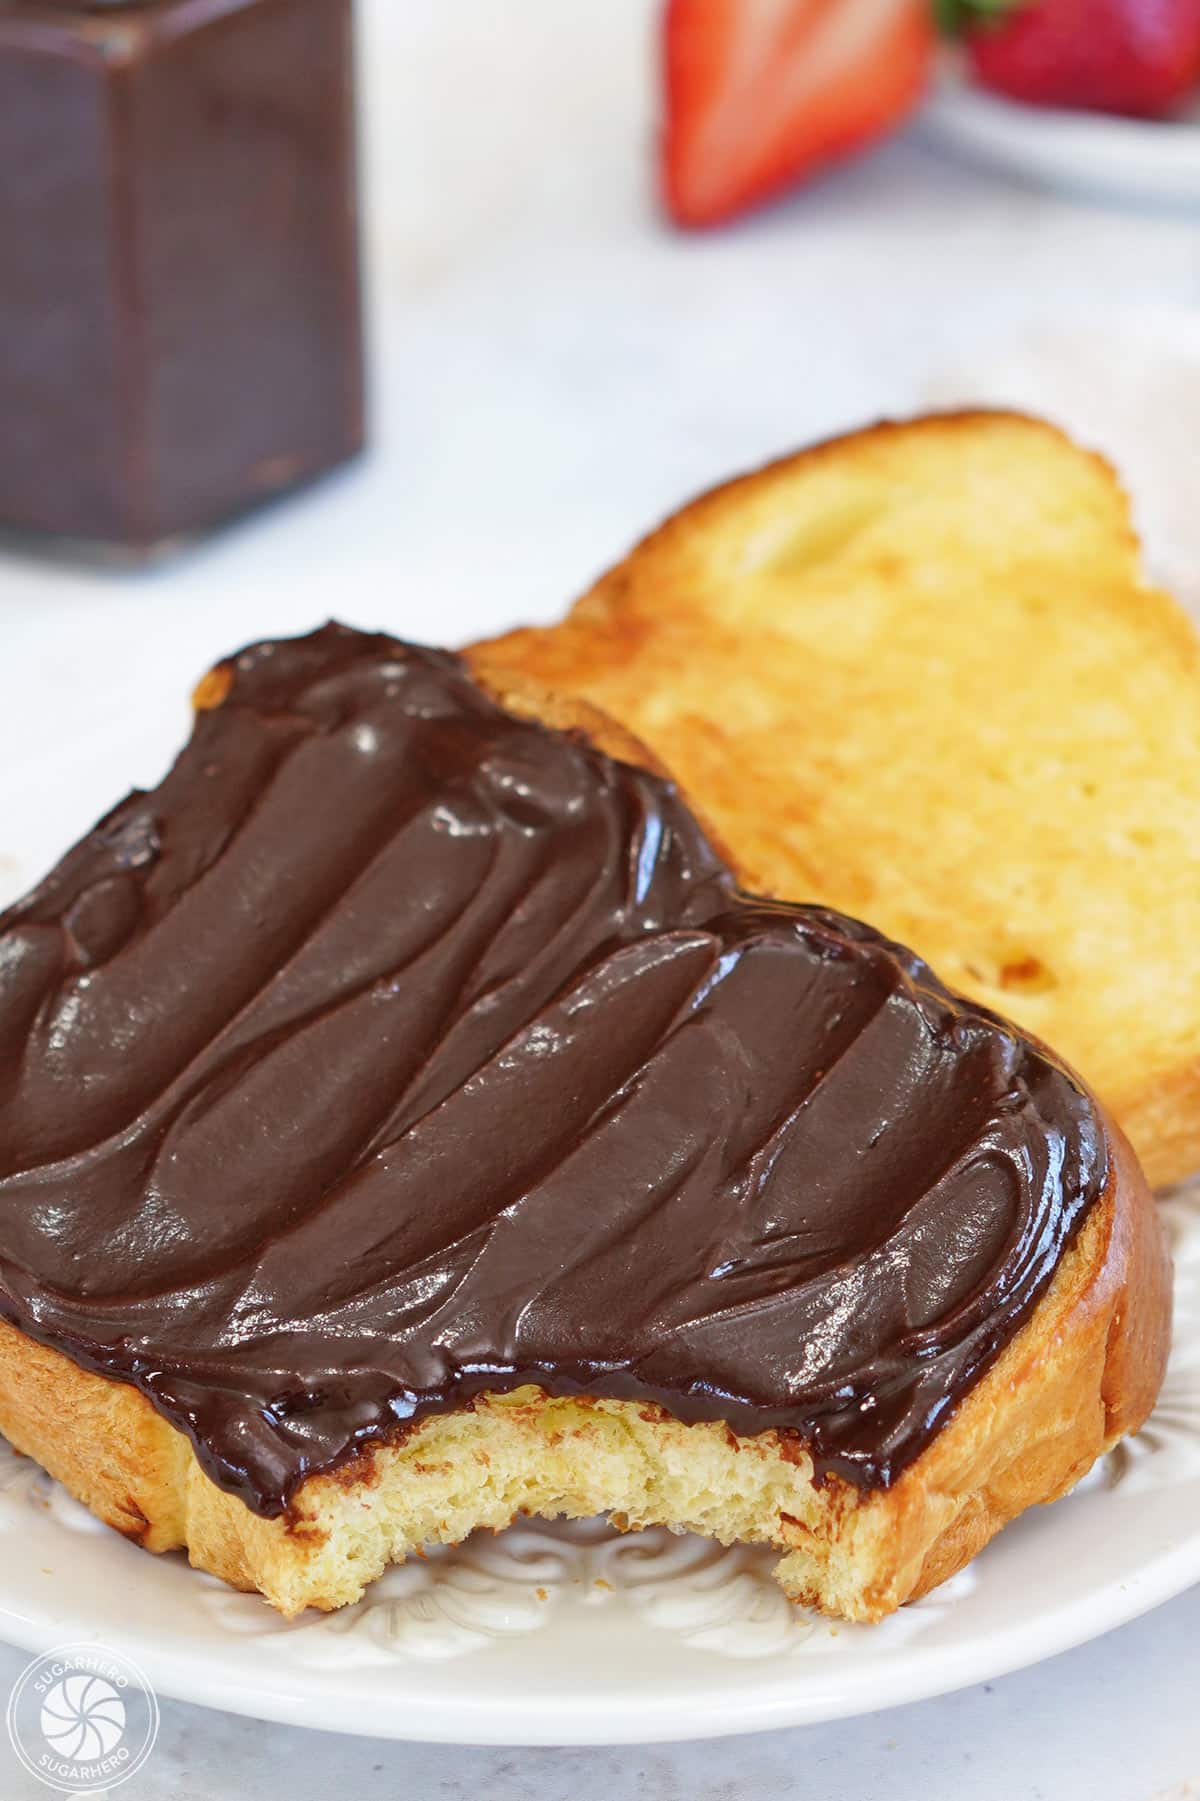
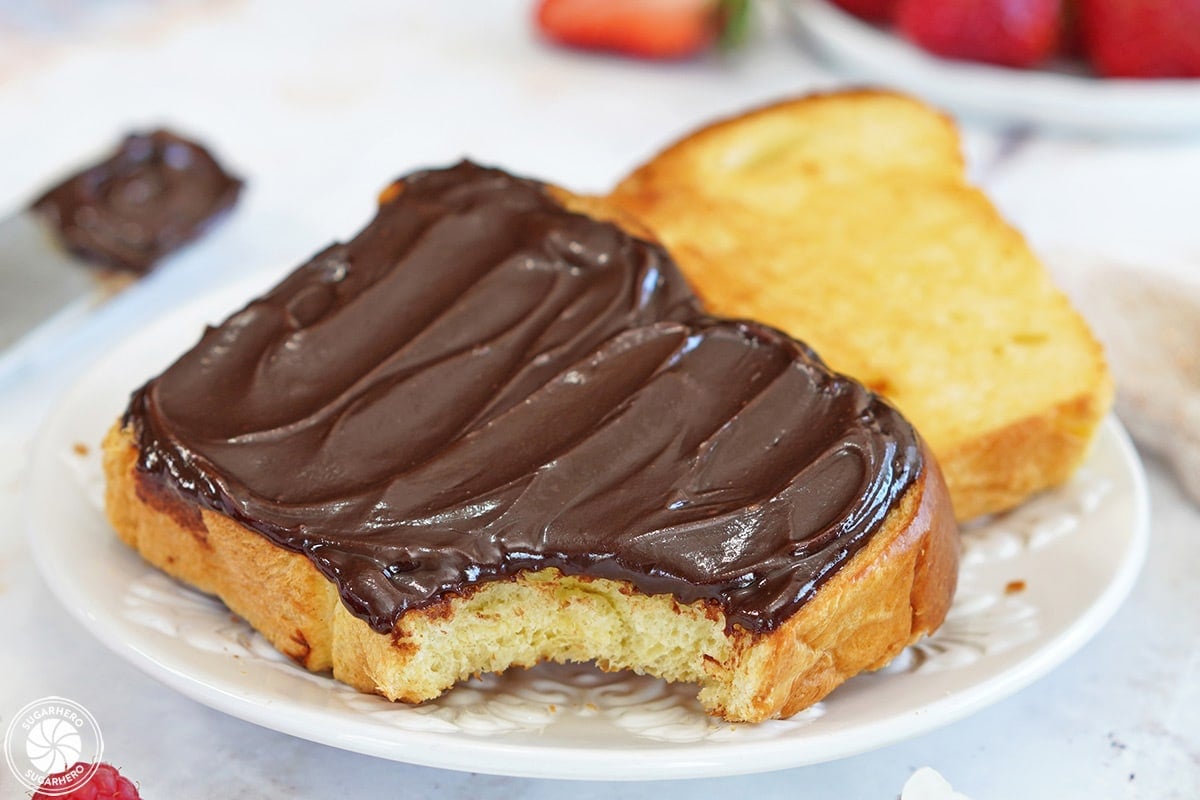
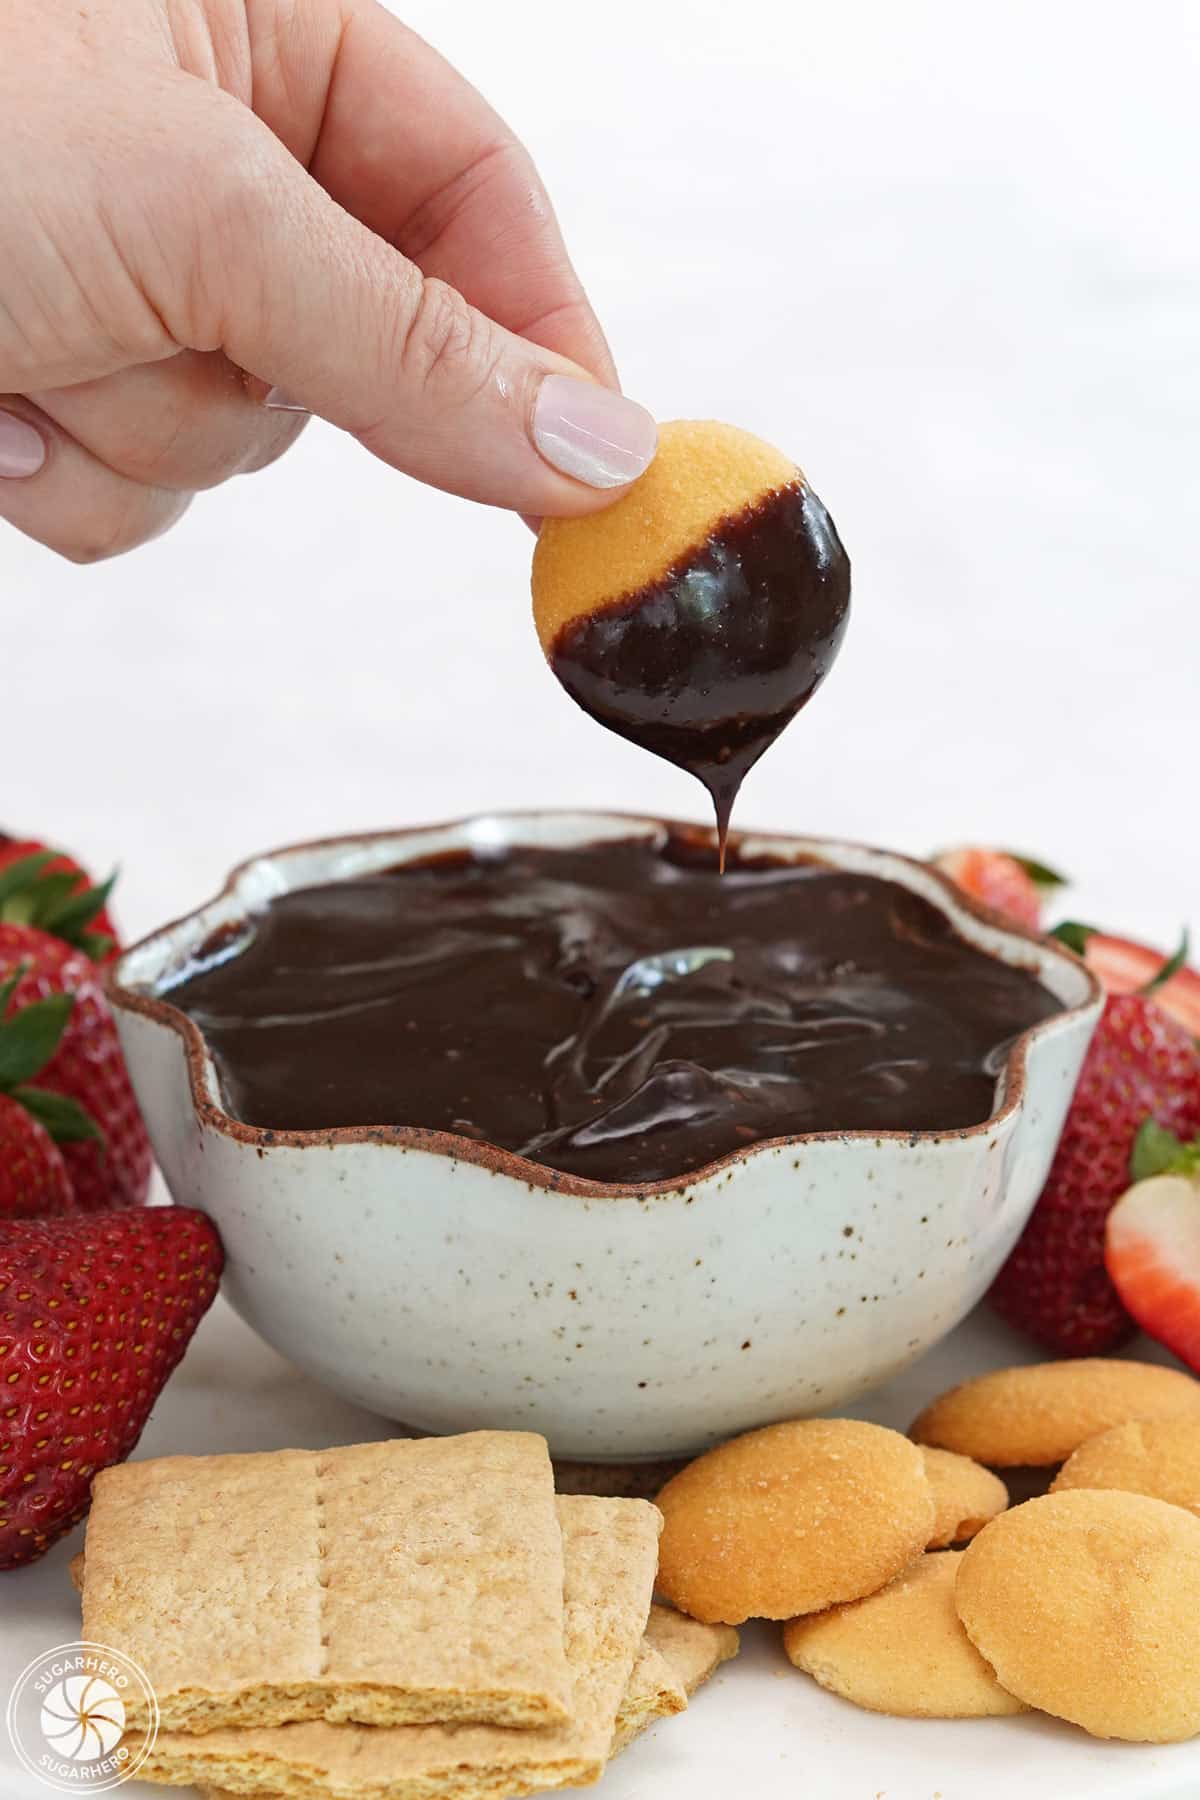
When it’s first made it has the texture of hot fudge sauce (and I won’t stop you if you want to pour it all over ice cream, cake, your hands, etc…), but once it’s chilled, it’s gorgeously creamy and smooth, with a consistency that’s perfect for spreading on toast or using as a dip for fresh fruit.

❤️ Why You’ll Love This Spread
This delicious dark chocolate spread was first published back in 2012, and it quickly became a favorite with readers (and my own family!) It’s easy to see why people love it:
- simple list of easy-to-find ingredients
- no complicated methods or equipment
- nut-free!
- only 5 minutes to make it
- can be kept for weeks
- good for snacking, or dessert
- makes a great gift
Table of Contents
🧾 What You’ll Need
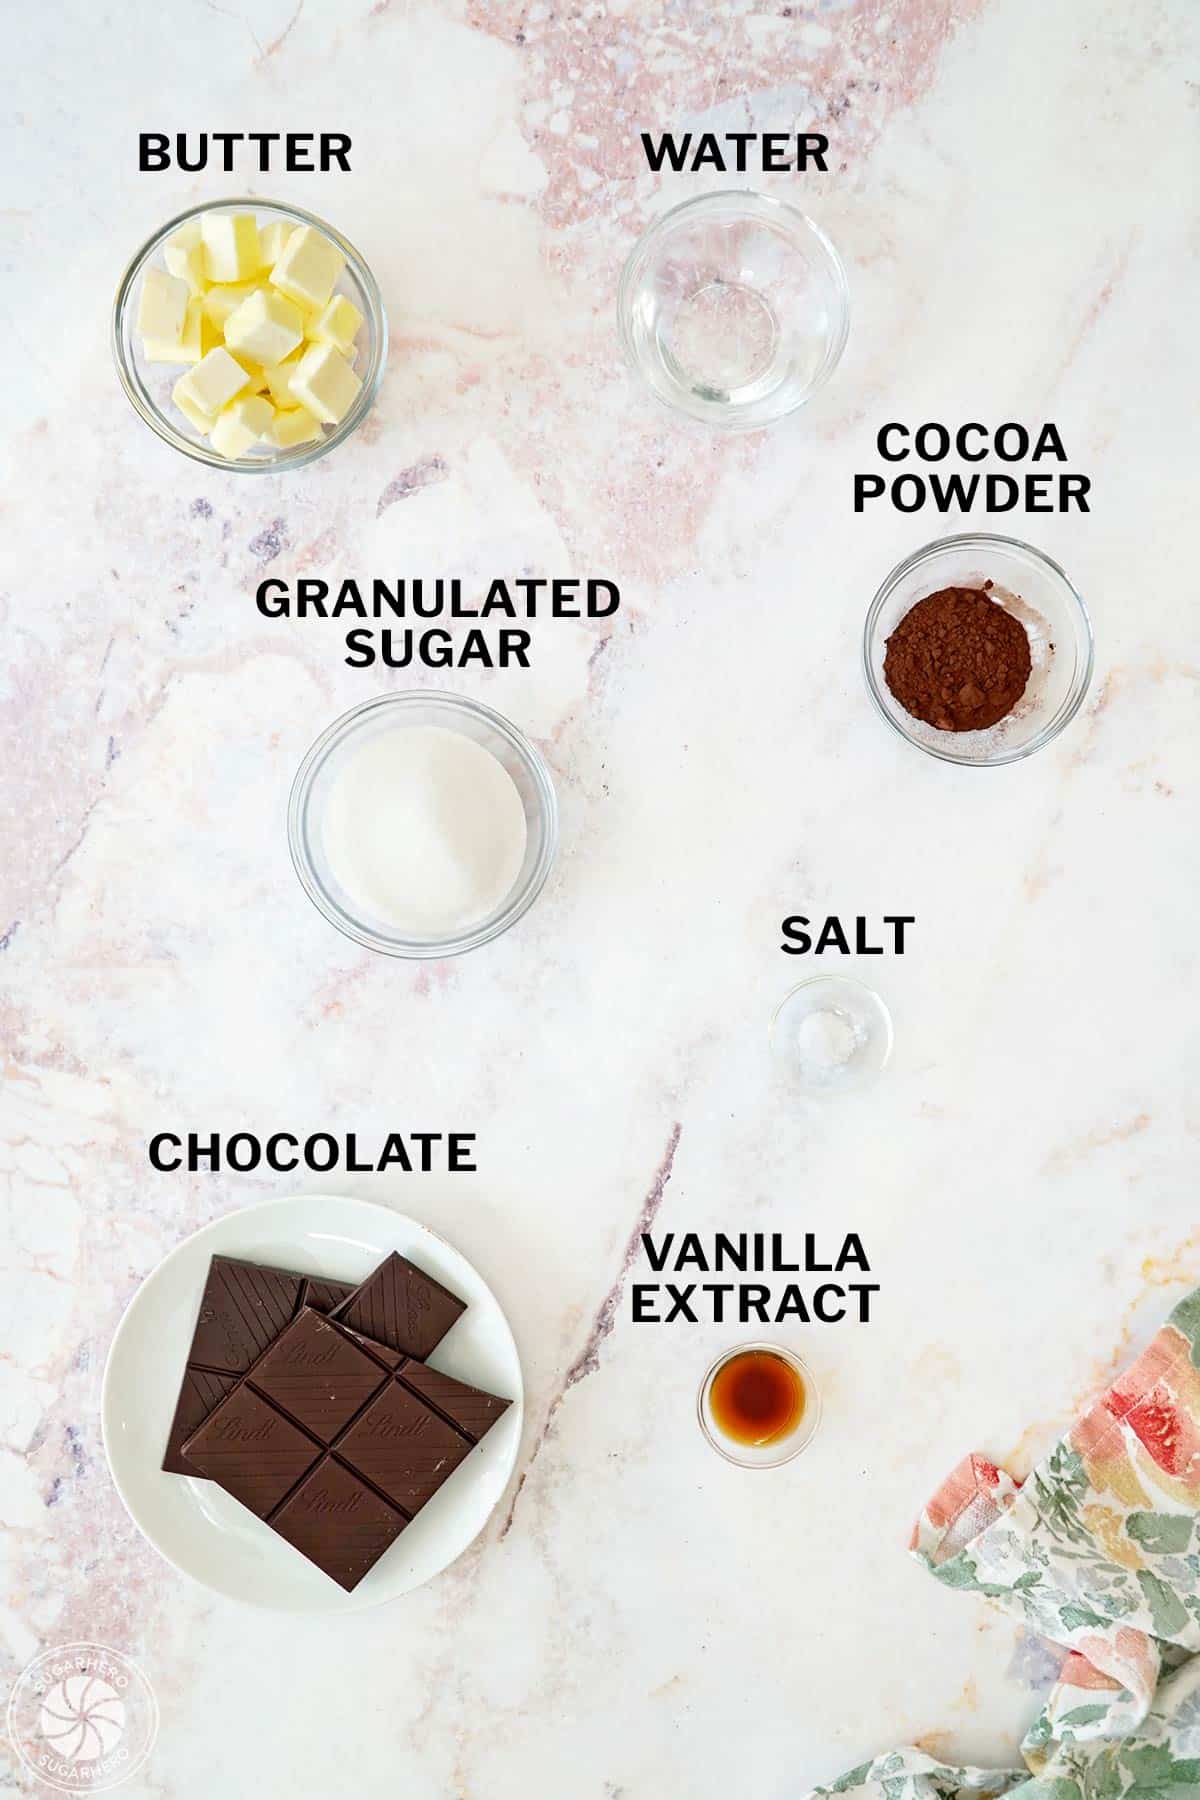
Ingredients
You won’t need much to make this rich and smooth Chocolate Spread. Here’s a few ingredient tips to help you gather your ingredients. Full ingredient amounts can be found in the recipe card. (Links are affiliate links and I earn a small commission from qualifying purchases.)
- Dark chocolate: Dark chocolate gives the spread a super boost of chocolate flavor. This is where most of the flavor comes from, so don’t use cheap chocolate chips here: make sure you use flavorful chocolate that you enjoy eating.
- Water: To dissolve the other ingredients and get the right consistency.
- Granulated sugar: Use a little granulated sugar (aka white sugar or regular sugar) for sweetness.
- Unsweetened cocoa powder: For rich, chocolately flavor, use a high quality unsweetened cocoa powder.
- Unsalted butter: Butter gives the spread its lush, creamy texture. I like to use unsalted butter and add salt separately, but you can use salted butter and omit the extra salt. Make sure your butter is cubed and at room temperature, so it incorporates easily into the spread.
- Vanilla extract and salt: These round out and balance the chocolate flavor.
Equipment
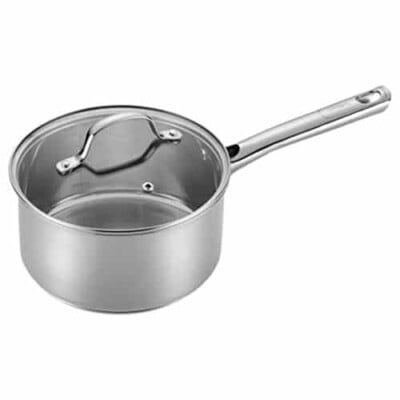
- Saucepan: You’ll need a small saucepan to heat the ingredients on the stovetop.
- Whisk: You’ll also need a whisk to combine the ingredients and stir them while simmering.
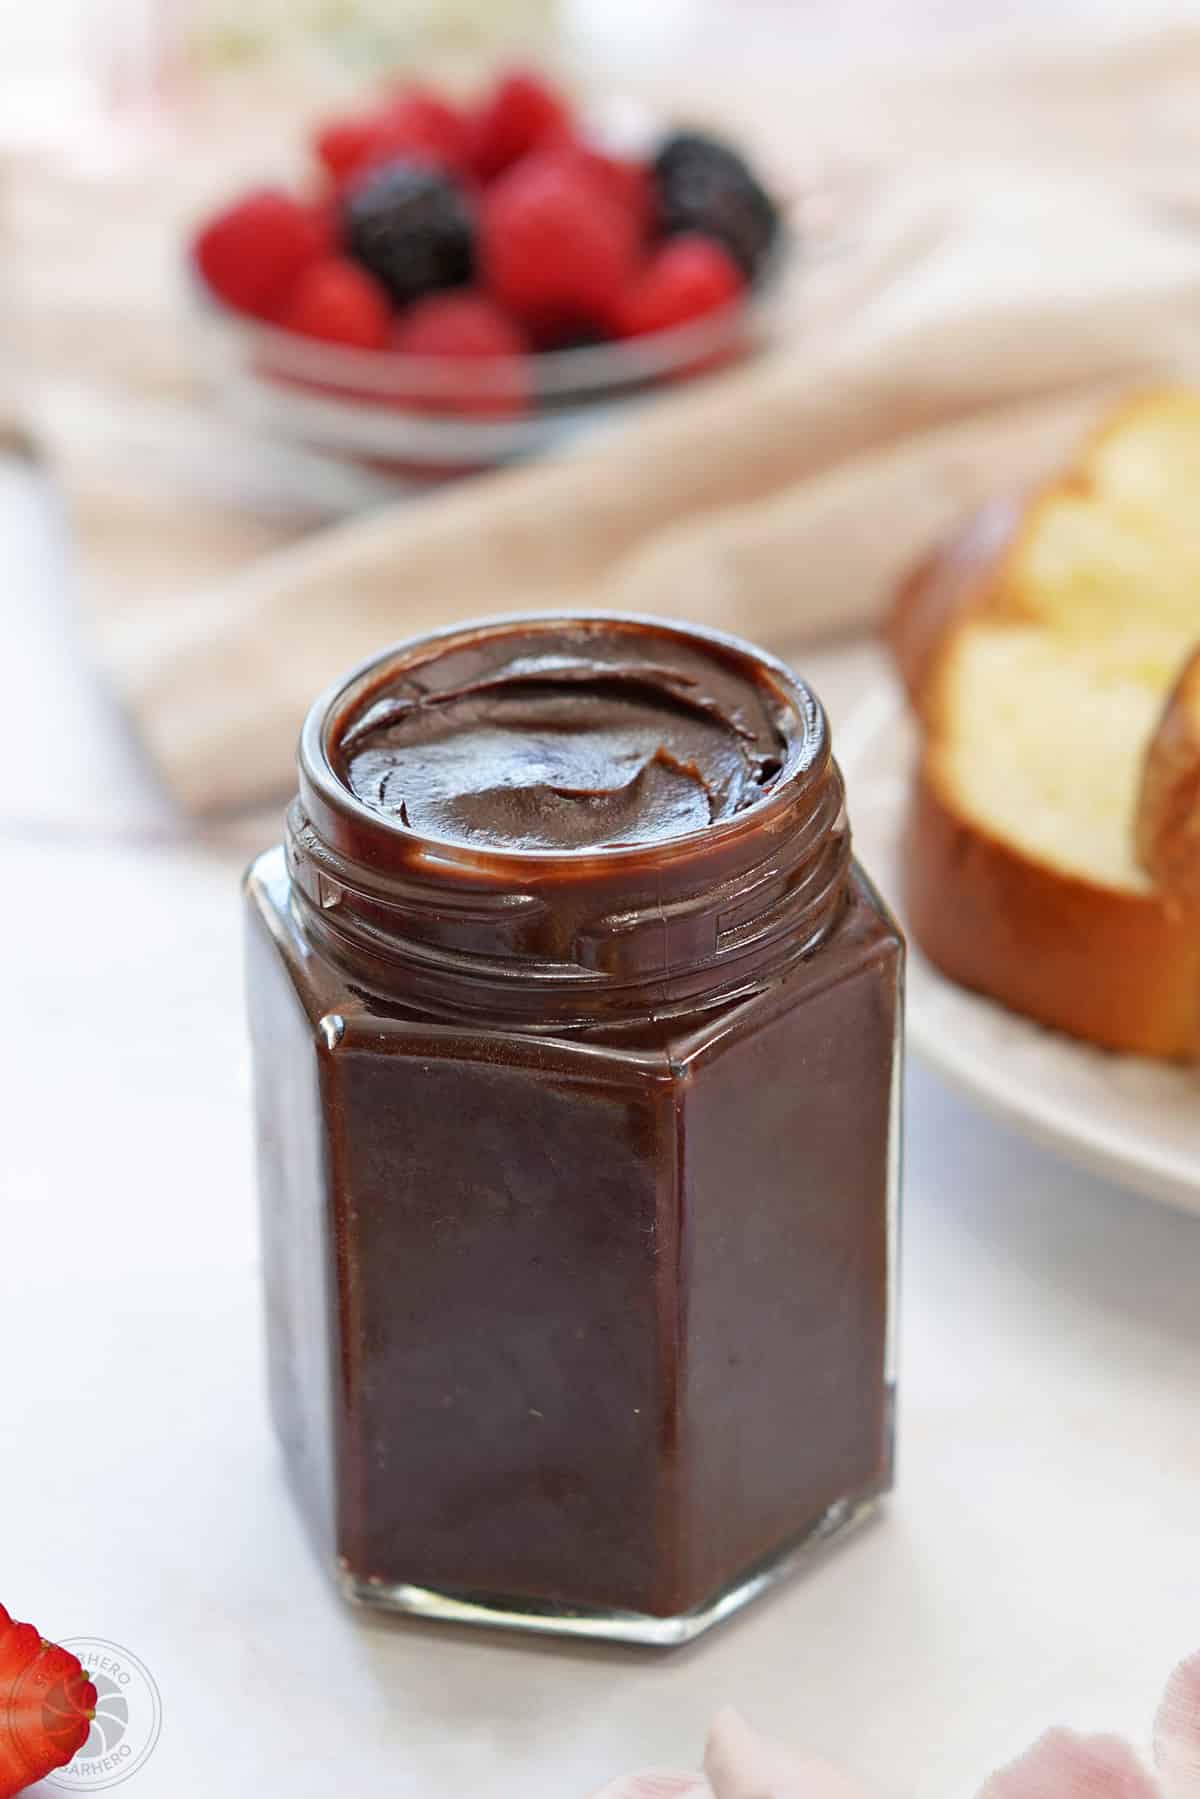
- Jar: You’ll need some type of container to store your spread in. The container should hold at least 12 ounces. My preference is to use mason jars.
- Plastic wrap: As the spread cools down, its important to cover it with plastic wrap to avoid having a thick skin form on the top of the spread.
❤️ More Dessert Sauces

Leave a Review!
If you make this recipe, let us know! Leave a ⭐️⭐️⭐️⭐️⭐️ rating on the recipe below, and leave a comment, take a photo and tag me on Instagram @elabau, or use #sugarhero on IG!

Lick-The-Knife-Clean Chocolate Spread
Ingredients
- 4 oz dark chocolate, (about 2/3 cup when chopped)
- 2 fl oz water, (1/4 cup)
- 3.5 oz granulated sugar, (1/2 cup)
- 1 TBSP unsweetened cocoa powder
- 1/8 tsp salt
- 1 tsp vanilla extract
- 4 oz unsalted butter, (1 stick or 1/2cup), cubed and at room temperature
Instructions
- Finely chop the dark chocolate and set it aside for a moment.
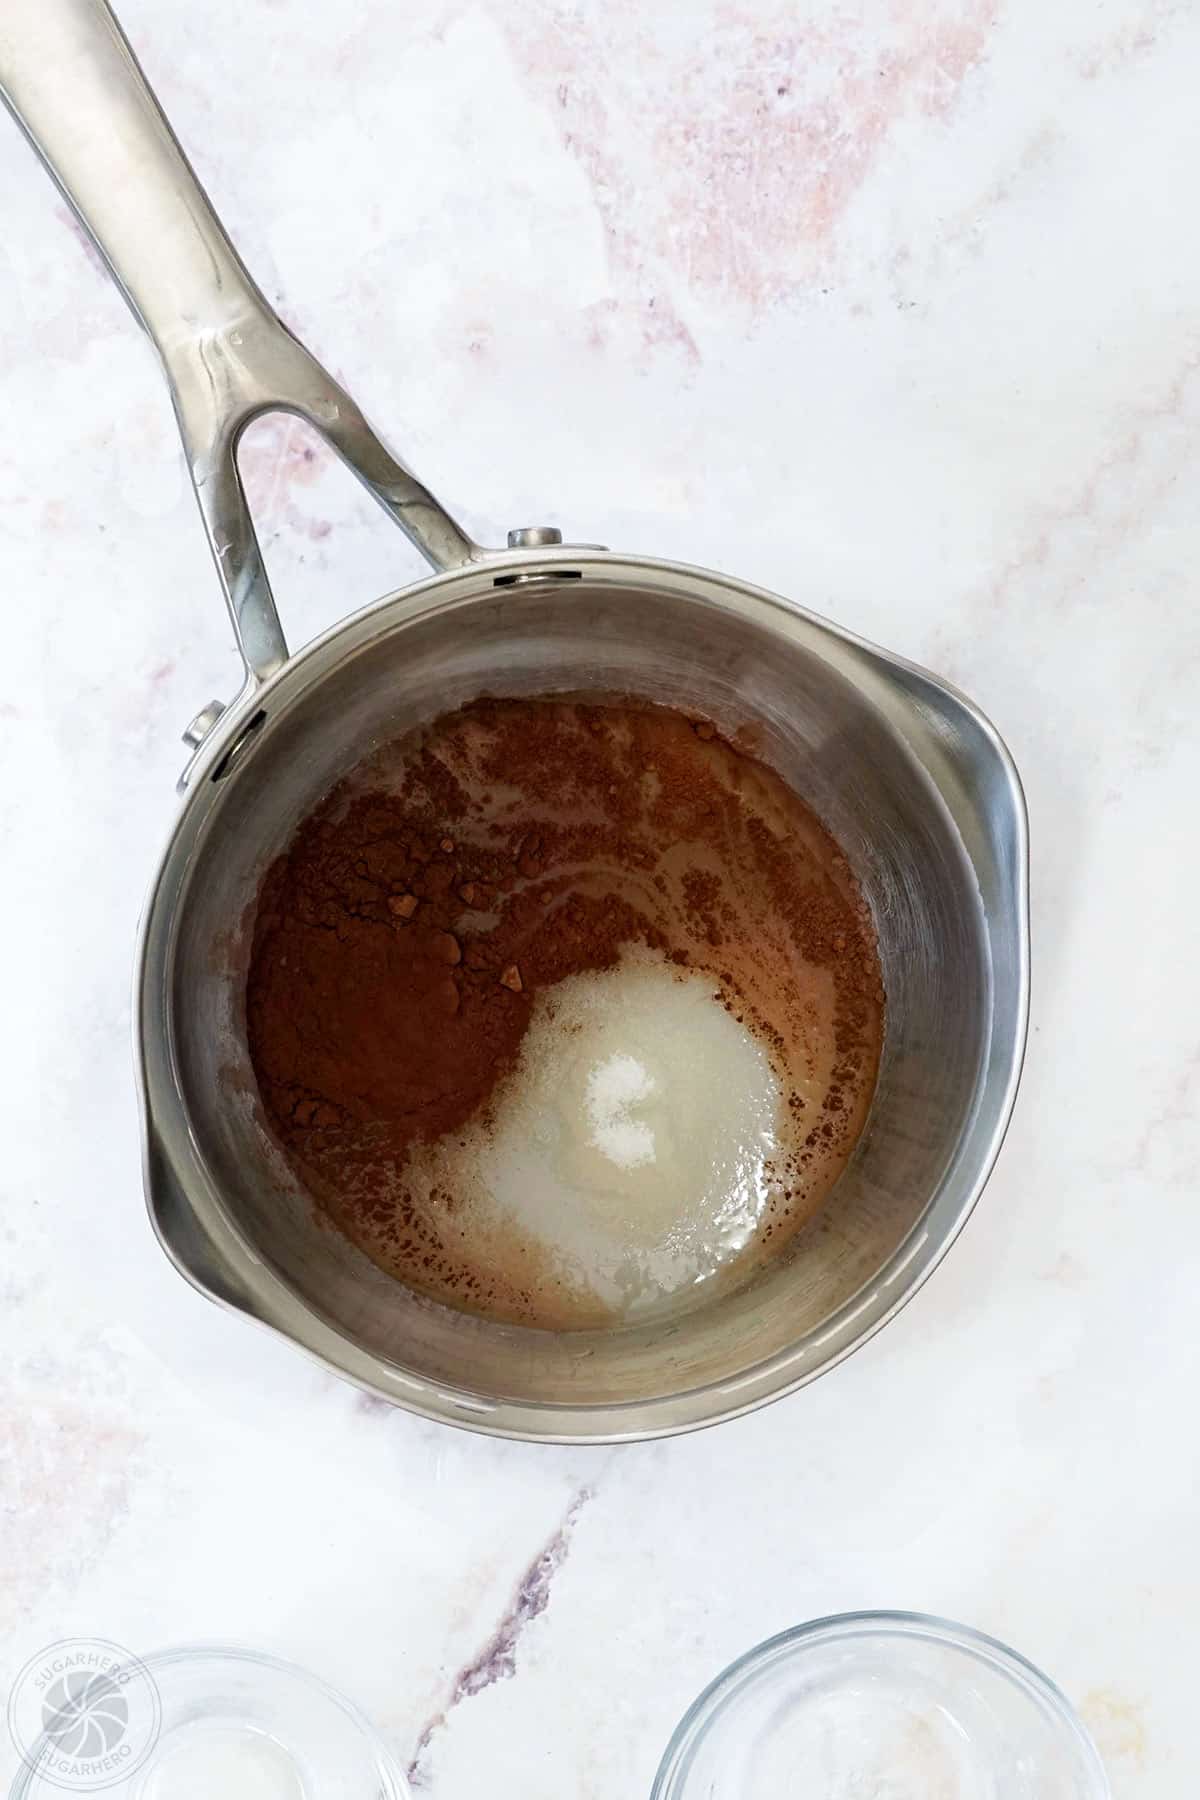
- In a small saucepan, combine the water, granulated sugar, unsweetened cocoa powder, and salt.
- Place the pan over medium heat and stir until the sugar and cocoa powder dissolve. Continue to heat the pan, stirring frequently, until bubbles appear around the sides of the pan and it starts to simmer.
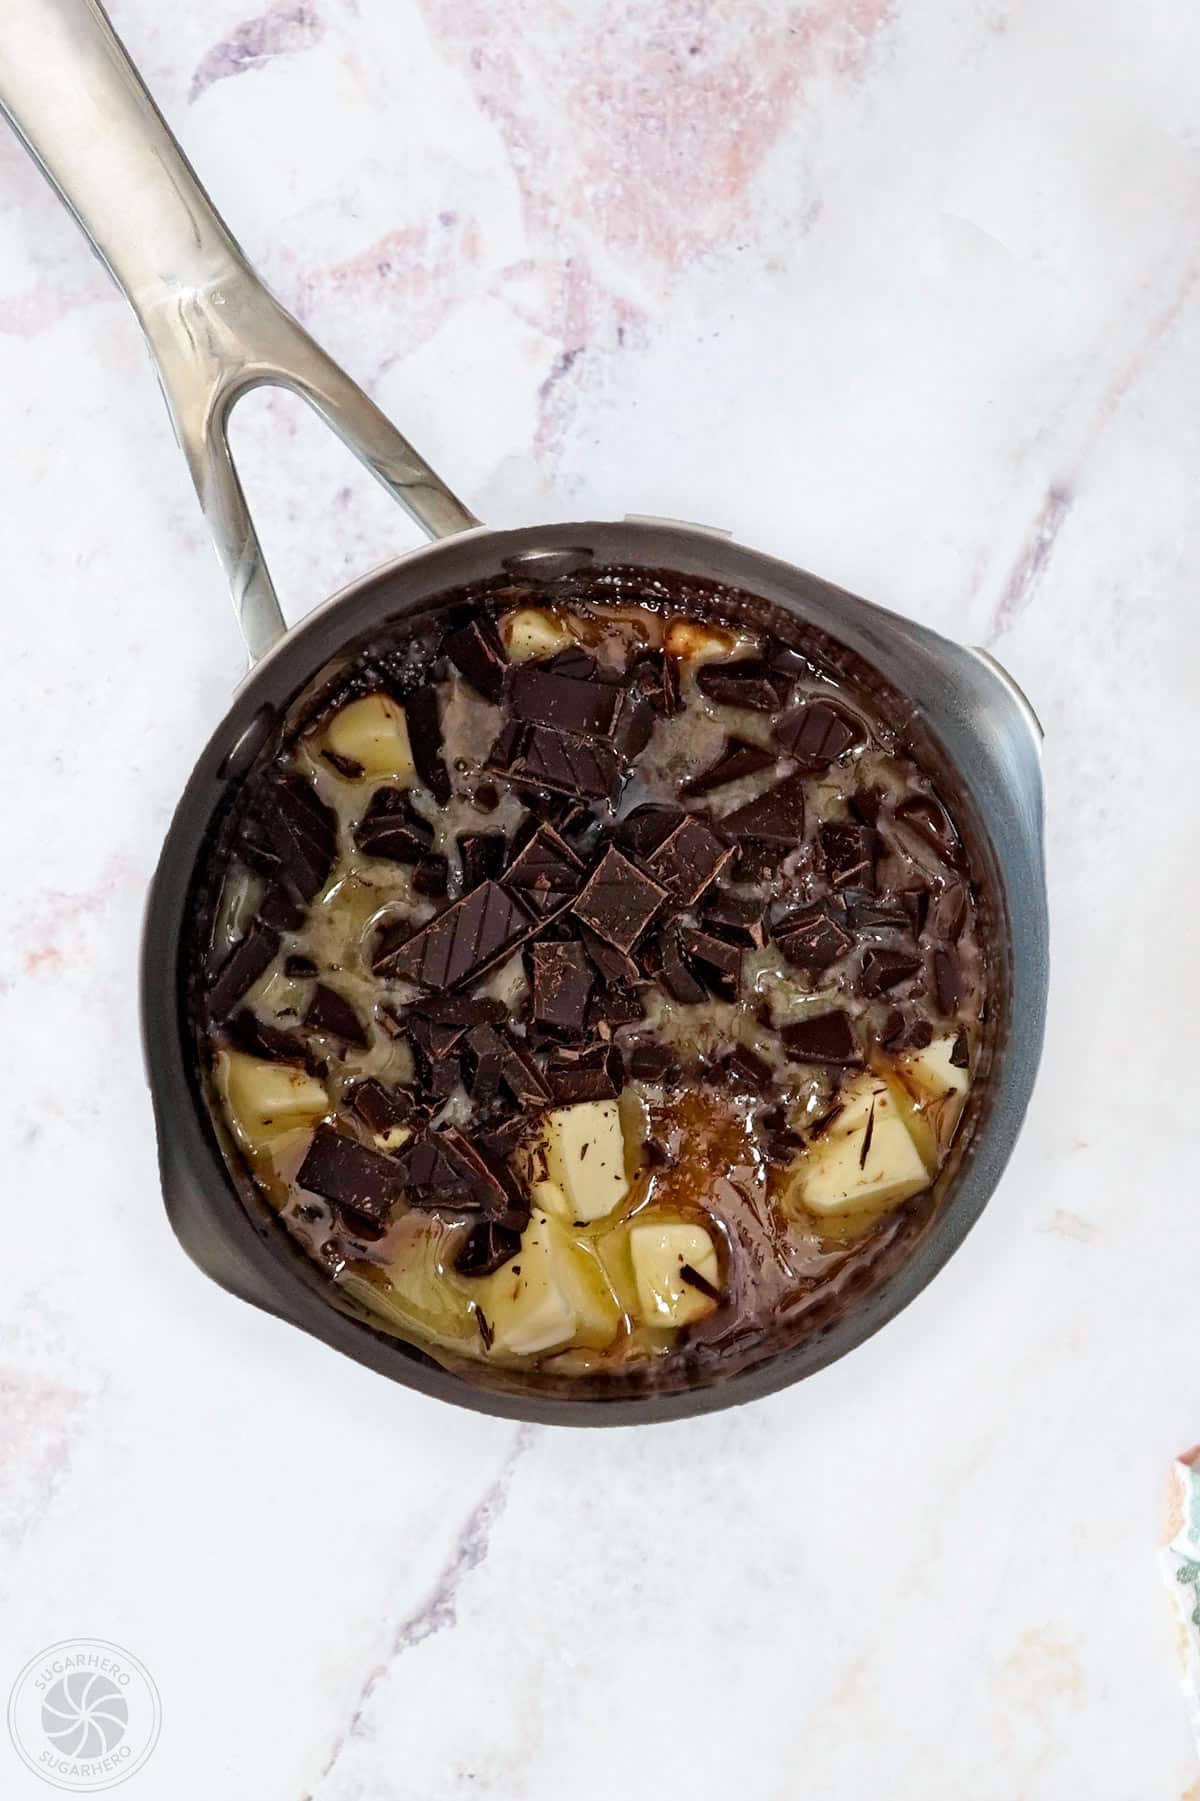
- Once simmering, remove the pan from the heat and add the vanilla extract, chopped chocolate, and cubed butter.
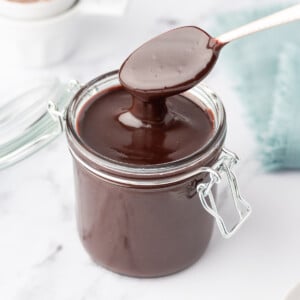
- Whisk until the chocolate and butter melt and the mixture is completely smooth. When it is freshly made, this spread will have the consistency of hot fudge sauce.
- Pour the spread into a jar or other container with a lid. Press a layer of plastic wrap on top of the chocolate to prevent a skin from forming, place the lid on, and refrigerate it for at least an hour, until cooled.
- If it is too cold to spread easily, let the chocolate spread sit at room temperature for a short while before serving.
- This chocolate spread can be stored in the refrigerator for up to a month.
Video

Recipe Notes
Variations
- To make it dairy-free: substitute the butter for an equal amount of coconut oil – no need to melt it first. Add it in when you would add the butter. Note that your spread will probably have a light coconut-chocolate flavor, unless you’re using refined coconut oil.
- To make it sugar-free: substitute a 1:1 sugar replacement for the granulated sugar in the recipe, and use a sugar-free chocolate, like Lily’s brand. We have tested it with both Swerve and Splenda, and both work fine. Make sure you are using a 1:1 product, and measure by volume, not weight.
Tips
- If your spread becomes grainy: heat it in the microwave in 30-second increments, whisking well and checking it for sugar crystals after each interval. To check, rub a bit of the chocolate spread between your fingers to see if you feel any sugar crystals. When the spread is warm and you can find no trace of sugar crystals, pour it back into a container.
- If your spread becomes oily: heat it in the microwave in 30-second intervals, whisking after each time, until it is warm and fluid. Place an immersion blender in the bowl and blend it until the oil mixes back into the chocolate. It might take a minute, but you should see your mixture transform into a glossy chocolate with a pudding-like texture.
Measuring Tips
Our recipes are developed using weight measurements, and we highly recommend using a kitchen scale for baking whenever possible. However, if you prefer to use cups, volume measurements are provided as well. PLEASE NOTE: the adage “8 oz = 1 cup” is NOT true when speaking about weight, so don’t be concerned if the measurements don’t fit this formula.
Want to learn more about baking measurements and conversion?
Nutrition
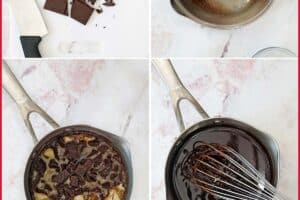
📸 Photo Tutorial: How to Make Chocolate Spread
Follow this photo tutorial to see how easy it is to make this Chocolate Spread. Full instructions are included in the recipe card above.
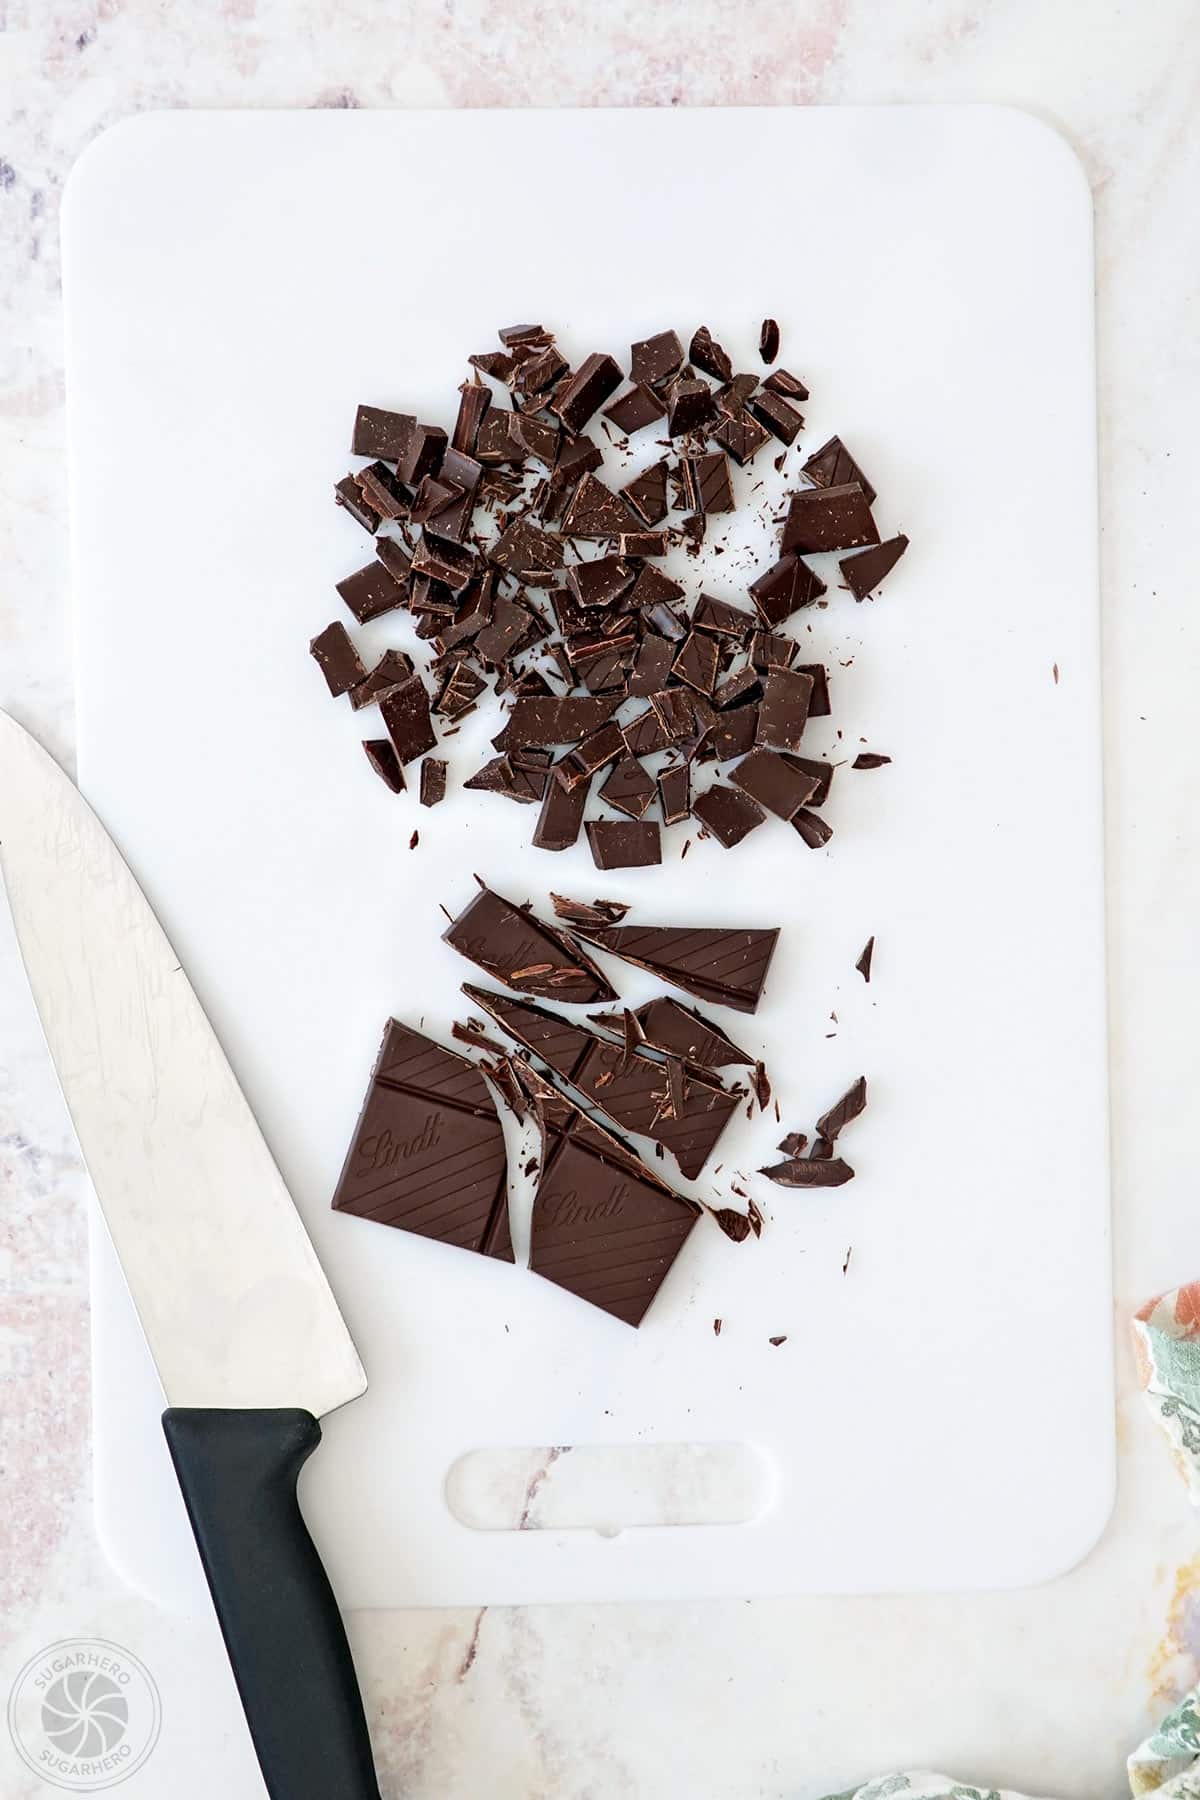
- Chop chocolate: Finely chop 4 oz dark chocolate.
- Combine water, sugar, cocoa powder and salt: In a small saucepan, combine 2 fl oz (1/4 cup) water, 3.5 oz (1/2 cup) granulated sugar, 1 TBSP unsweetened cocoa powder, and a pinch of salt.
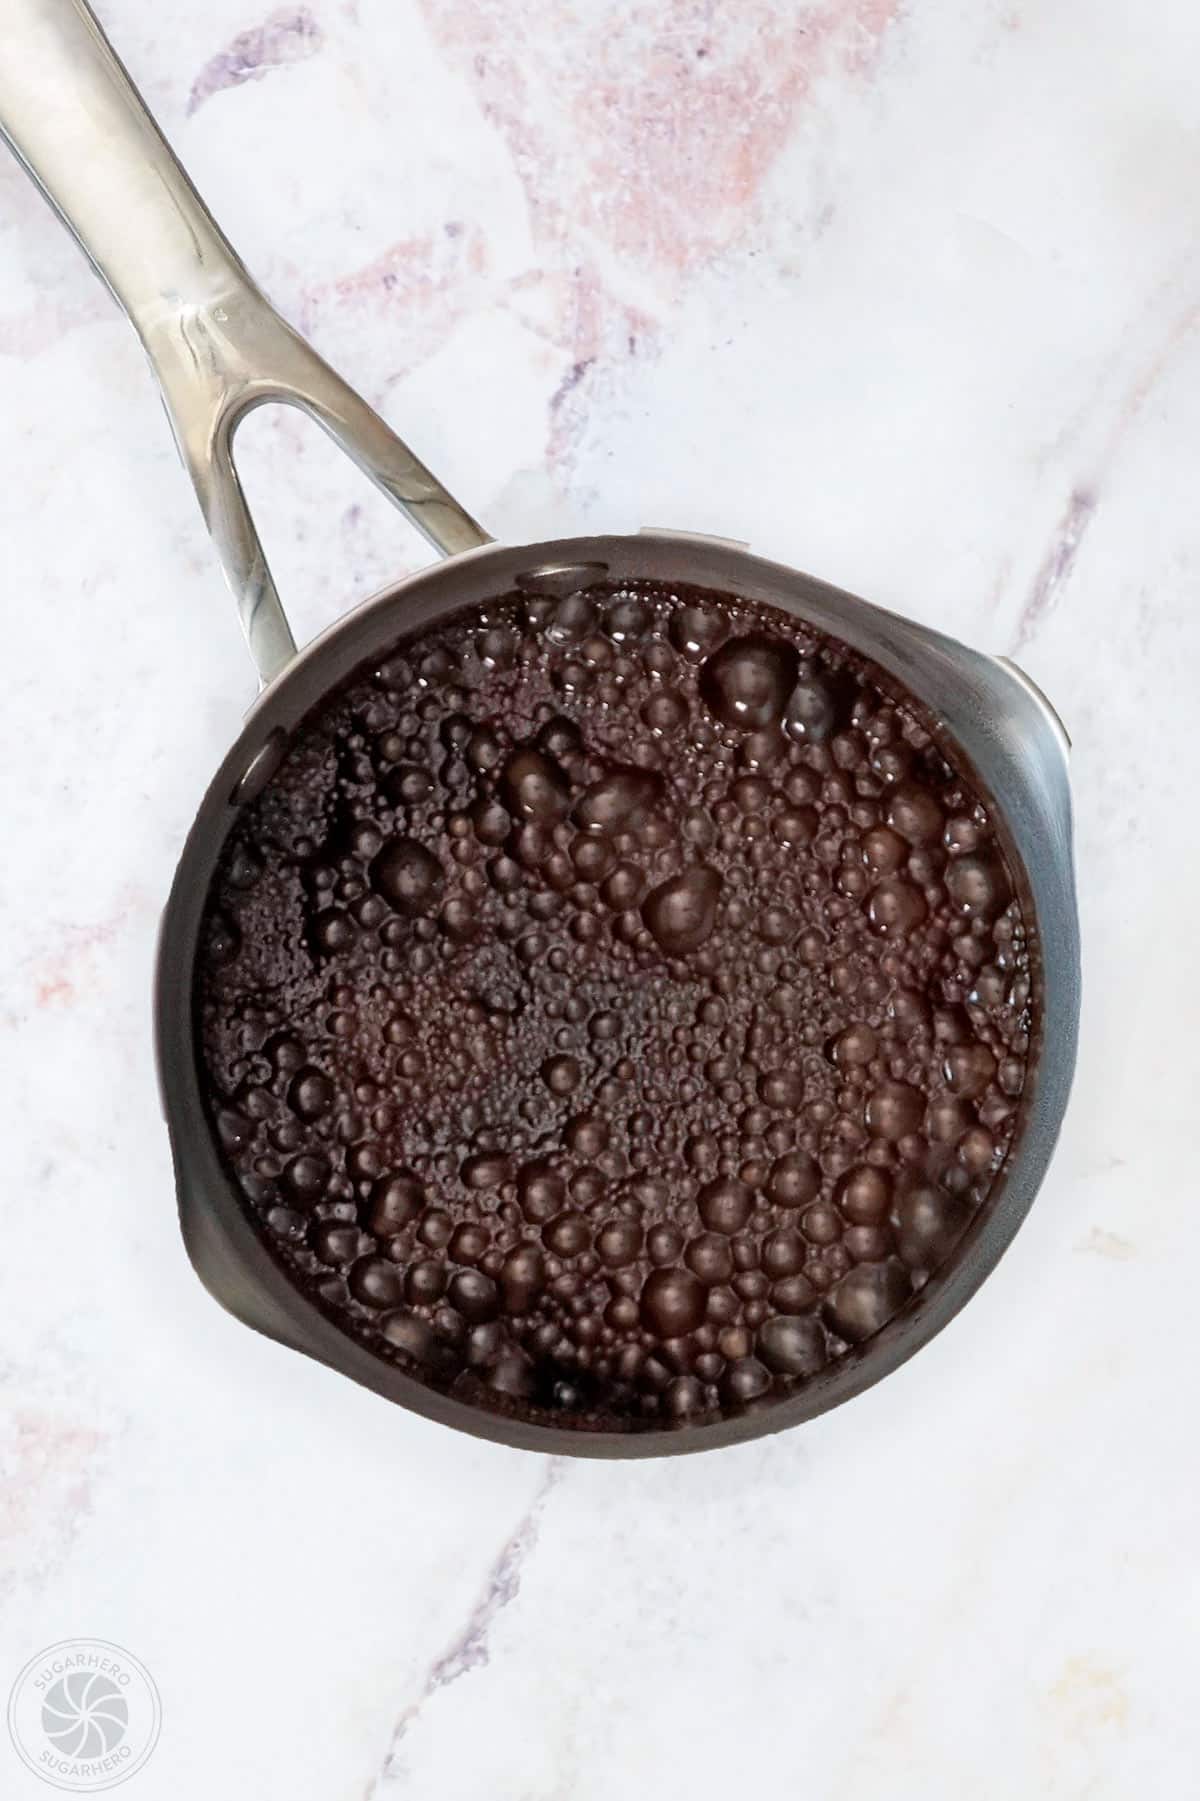
- Stir and simmer: Place the pan over medium heat and stir until the sugar and cocoa powder dissolve. Continue to heat the pan, stirring frequently, until it reaches a simmer.
- Add vanilla, chopped chocolate and butter: Once simmering, remove the pan from the heat and add 1 tsp vanilla extract, previously chopped chocolate, and 4 oz cubed butter.
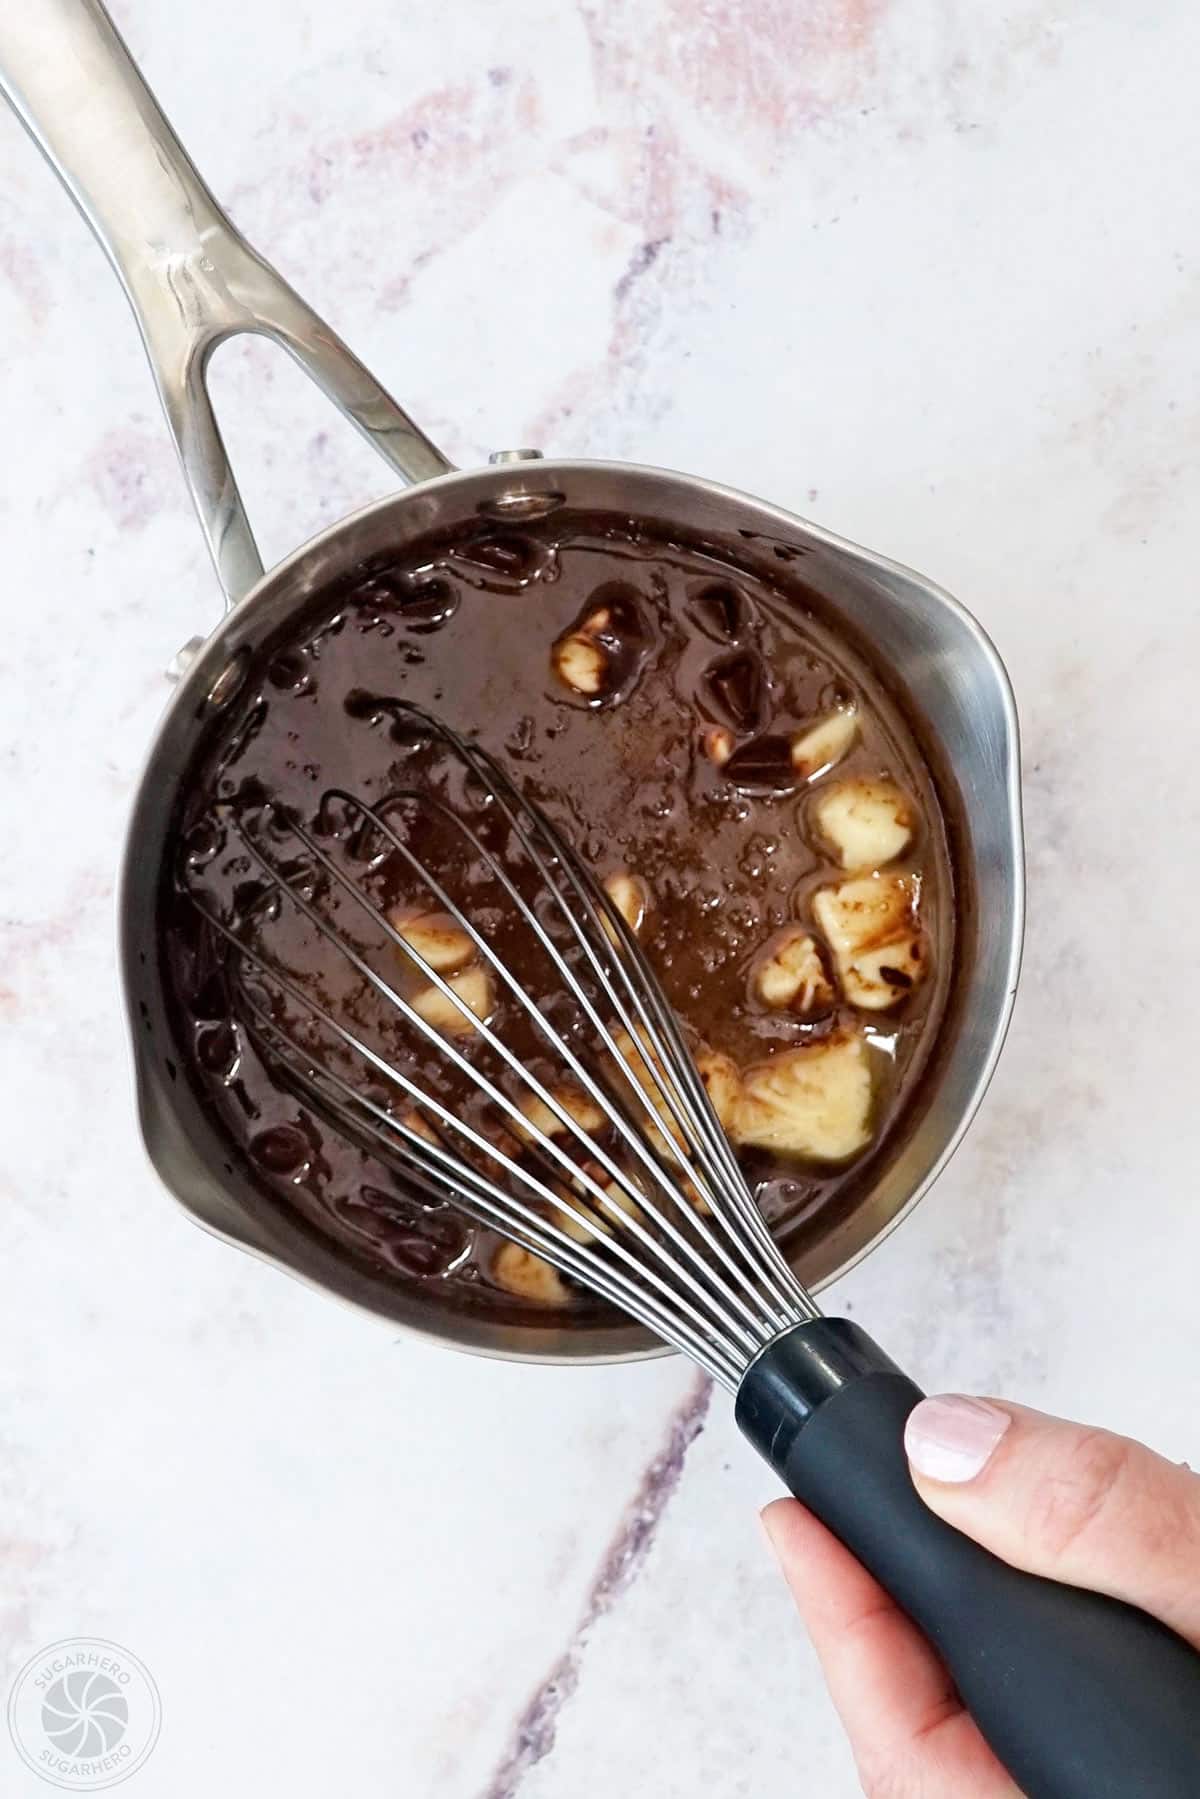
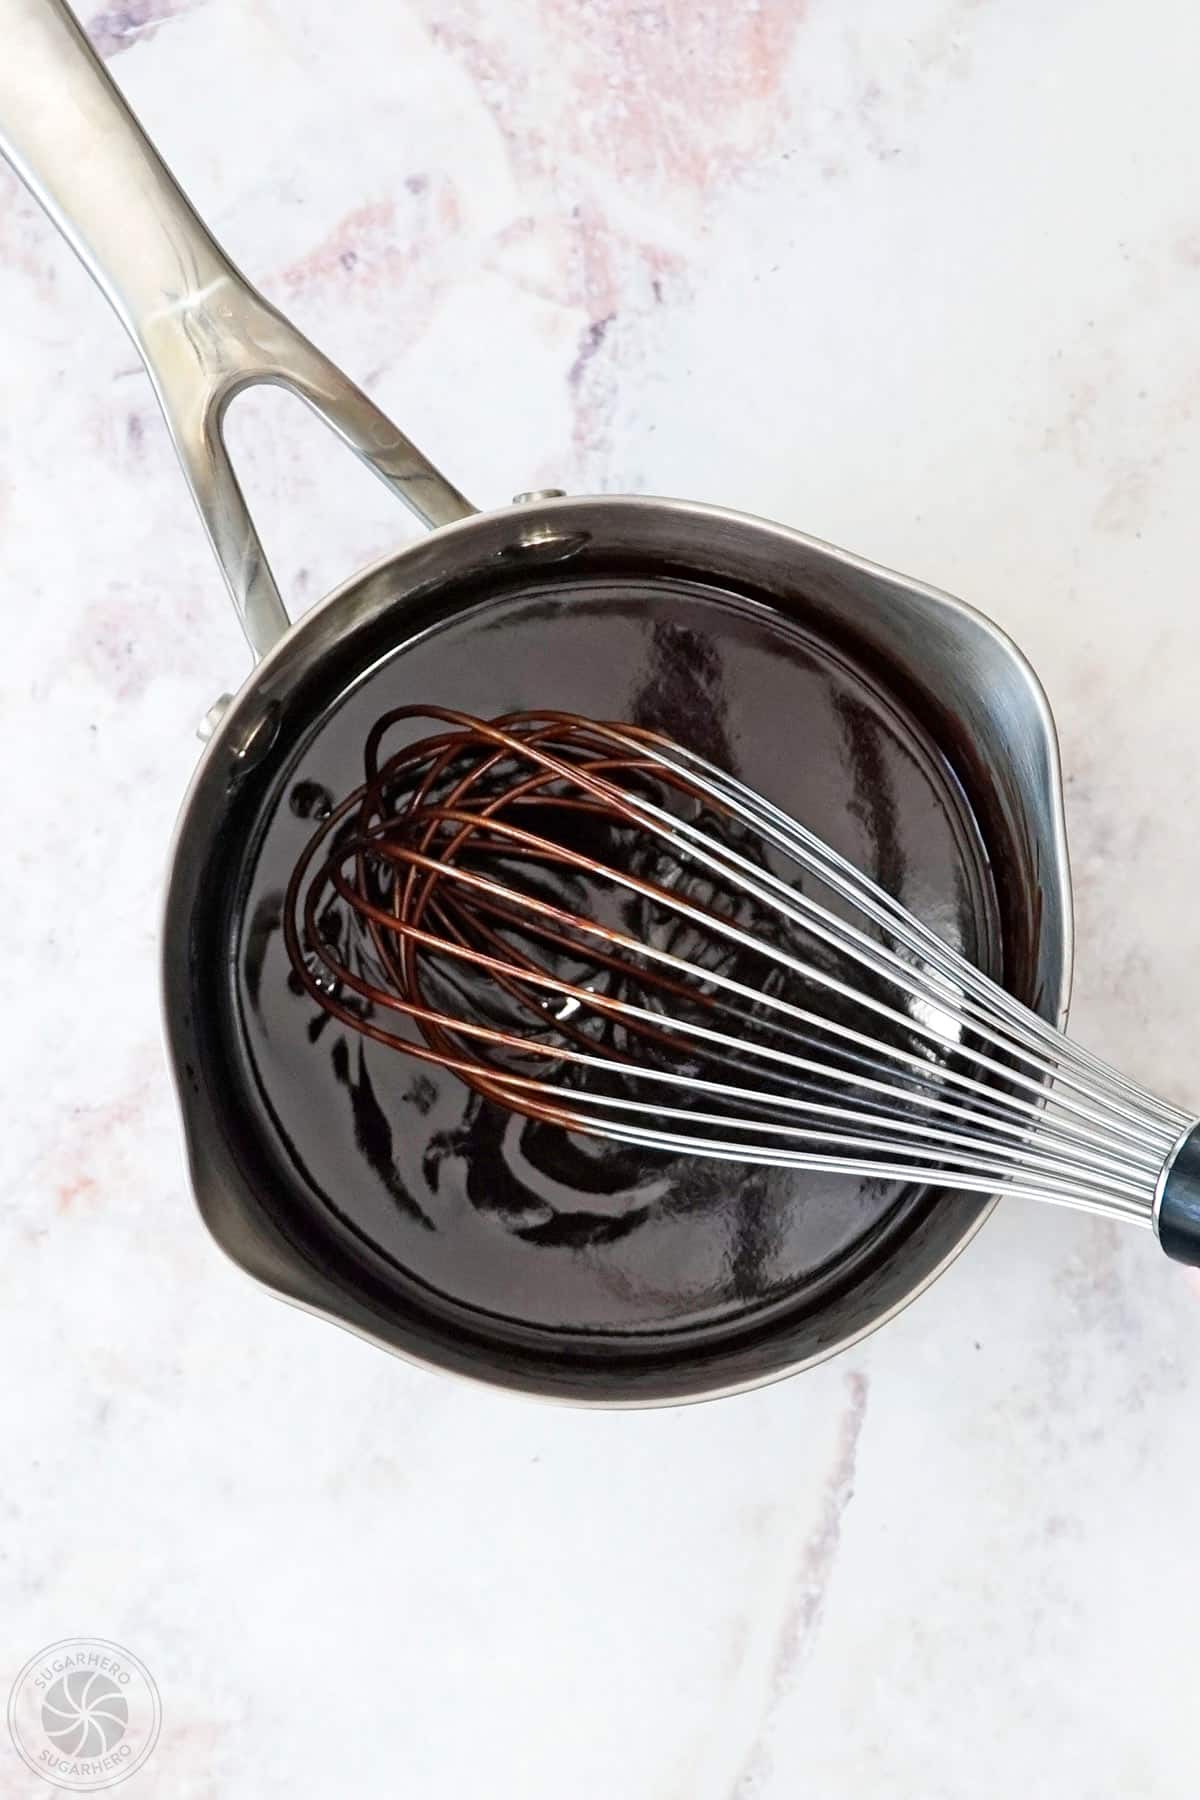
- Whisk until smooth: Whisk until the chocolate and butter melt and the mixture is completely smooth.
- When it is freshly made, this spread will have the consistency of hot fudge sauce.
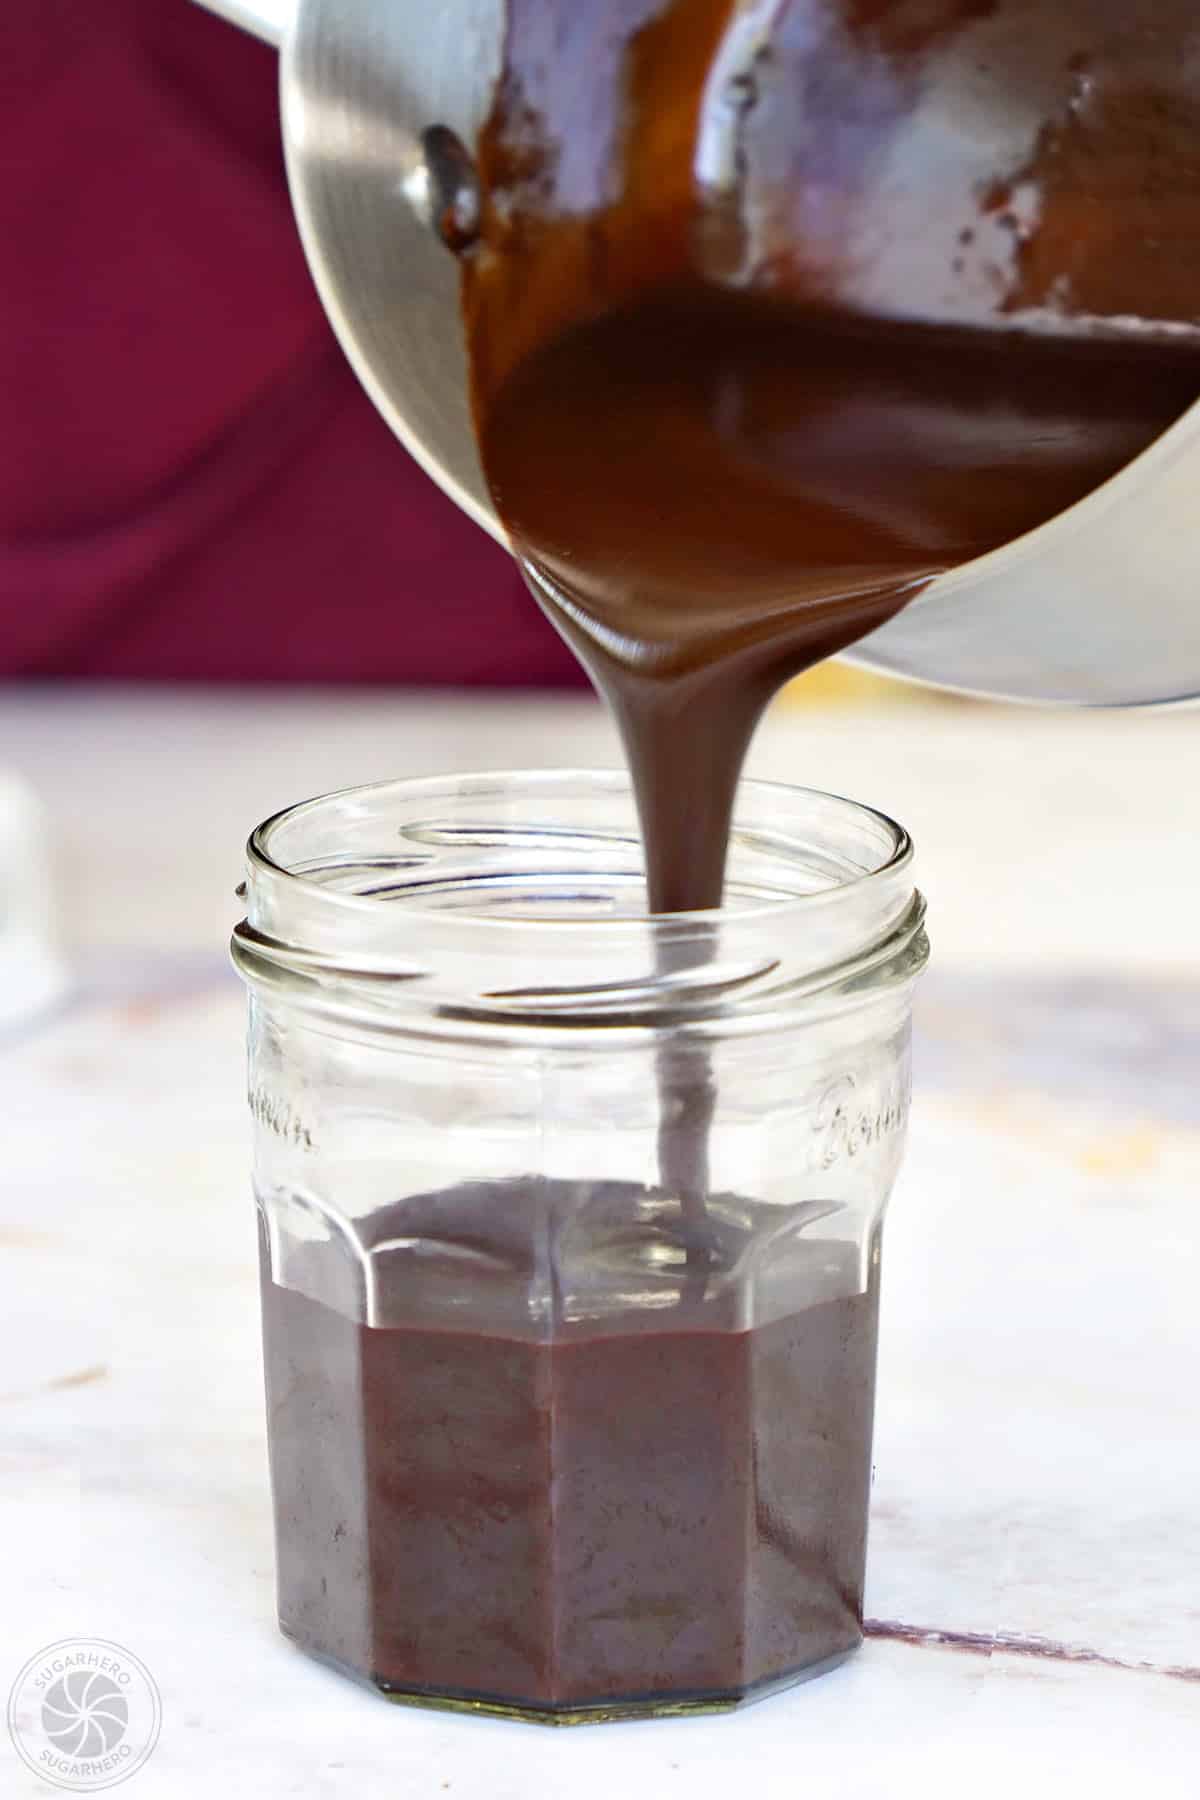
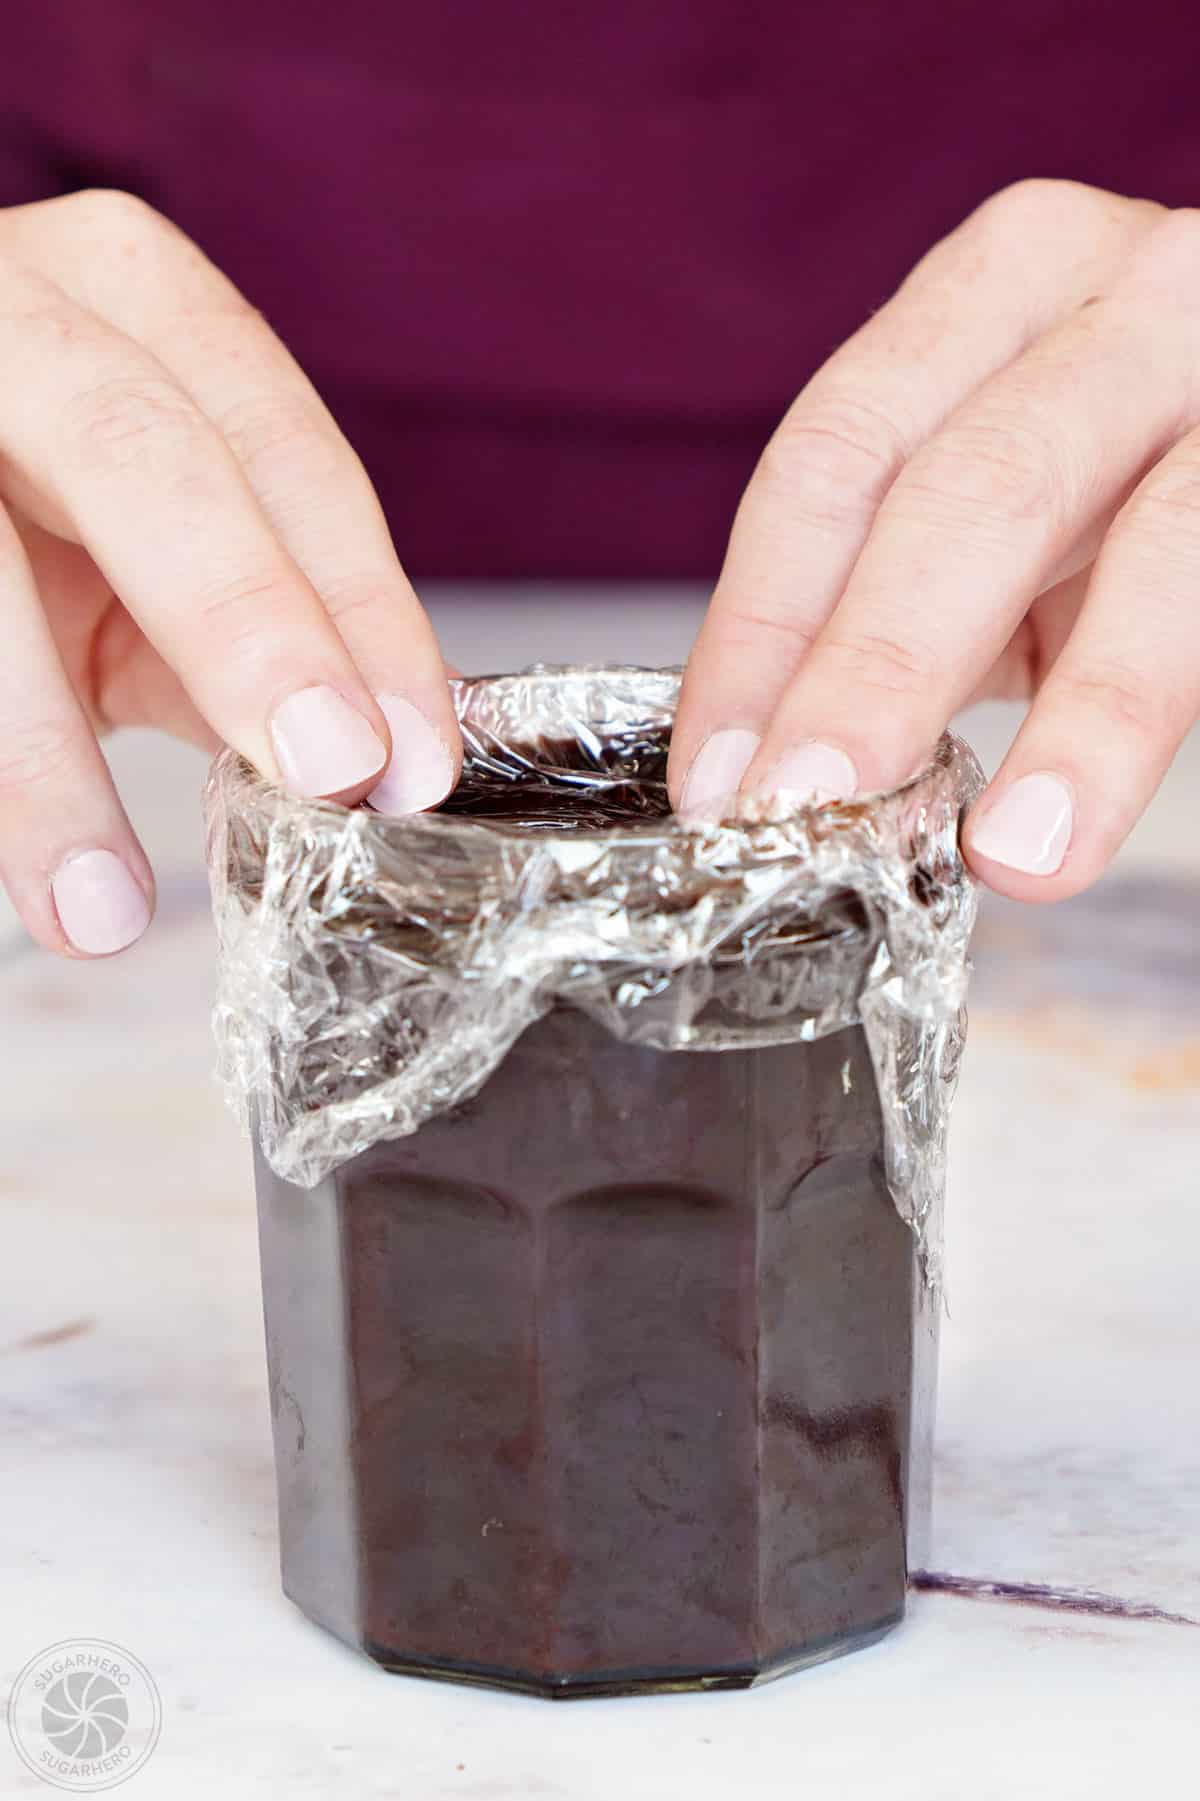
- Cover and refrigerate: Pour the spread into a jar or other container with a lid. Press a layer of plastic wrap on top of the chocolate to prevent a skin from forming, add the lid, and refrigerate it for at least an hour, until it cools.
- Enjoy or store: If it is too cold to spread easily, let it sit at room temperature for a short while before serving. Store it in the refrigerator for up to a month.
🥣 Making it Dairy-Free or Sugar-Free
This recipe is flexible and can be adapted to many different dietary needs.
- To make it dairy-free: substitute the butter for an equal amount of coconut oil – no need to melt it first. Add it in when you would add the butter. Note that your spread will probably have a light coconut-chocolate flavor, unless you’re using refined coconut oil.
- To make it sugar-free: substitute a 1:1 sugar replacement for the granulated sugar in the recipe, and use a sugar-free chocolate, like Lily’s brand. We haven’t tested it with every sugar replacer, but we have tested it with both Swerve and Splenda, and both work fine. Make sure you are using a 1:1 product, and measure by volume, not weight.
💡 FAQs
Rarely, the spread can develop a grainy texture over time. This happens if the sugar has not been completely melted and dissolved during the heating step. Even just a few stray sugar crystals can make it so that the rest of the sugar slowly crystallizes, leading it to have a grainy texture.
You might not notice it when it is freshly made, but over time you’ll see and taste the spread becoming more granulated. It’s still perfectly safe to eat, but most people don’t enjoy the crunchy texture. Fortunately, it’s easy to fix the grainy texture.
Transfer the chocolate spread to a bowl and heat it in the microwave in 30-second increments, whisking well and checking it for sugar crystals after each interval. To check, rub a bit of the chocolate spread between your fingers to see if you feel any sugar crystals. When the spread is warm and you can find no trace of sugar crystals, pour it back into a clean container, place plastic wrap on top, and let it cool completely.
If you notice your chocolate spread developing a clear oily layer on top, this means the fat in the spread has “separated.” This is rare, but it does happen sometimes.
It usually occurs because the butter and chocolate weren’t mixed well enough into the spread. Maybe the butter was too cold when it was added, or the chocolate was in large pieces so it didn’t incorporate well. It can also happen if the spread goes through multiple heating and cooling phases. (See below for a longer explanation.) It’s still completely edible, but it doesn’t look very appetizing, so here’s how you fix your oily chocolate spread.
First transfer it to a bowl and heat it in the microwave in 30-second intervals, whisking after each time, until it is warm and fluid. Next, place an immersion blender in the bowl and blend it until the oil mixes back into the chocolate. As you blend, move the blender around, including the sides and bottom of the bowl, so all of it gets well mixed. It might take a minute, but you should see your mixture transform into a glossy chocolate with a pudding-like texture.
Don’t have an immersion blender? A regular blender can also be used, but it’s my second choice since it can be a pain to clean, and doesn’t work as well for smaller quantities. You can also try just using a whisk after reheating, but if you do that, be sure to keep whisking until you see the texture change. This could take several minutes.
Bonus nerdy section on why the spread sometimes separates: the spread is an emulsion, meaning it has fat particles from butter and chocolate suspended in the water and sugar base. Not mixing it enough, or heating and cooling it frequently, can both result in the fat dropping out of the suspension and coming to the surface of the spread.
The spread will have the texture of hot fudge sauce when it is first made, but after chilling it, it will become spreadable. Hot weather and hot kitchens can cause it to soften again. If your kitchen is quite warm, you’ll find that it becomes soft again when it is left out on the counter for long periods. Simply refrigerate it briefly until it firms up again.
This chocolate spread should be stored in a jar or container with tight-fitting lid. It can kept in the refrigerator for at least a month – but anecdotally, I’ve had it last longer and be completely fine.
It will be pretty firm when it comes out of the refrigerator, so you can either stir it until it becomes more spreadable, or let it sit at room temperature for 10-15 minutes until it softens a bit.


I seriously want to lick my computer screen right now! (Little voice in my head says: Go right ahead, no one in the office is looking!)
So glad I got this recipe, because, for once, I’ve got ALL the ingredients at home right now. And I don’t have to use nuts. I don’t have a problem with nuts, but here in South Africa they are SO expensive, you basically need to sell off an organ to afford them.
You surely are my Hero, my Sugar Hero!
PS. Off with Nutella’s hydrogenated- palm-oil-and-expensive-pricetag’s head!!!! Let the revolution begin.
I’ve just made this, it took 15 minutes, TOPS, and am waiting impatiently for it to cool enough in the fridge so I can eat a delicious breakfast! I did scrape the pot clean and ate that though, don’t judge me!
I did some tweaks to the recipe because of necessecity and preference; I only used around half the butter, because I had everything else in the house and only just enough butter for the recipe, and since I’m on a strict weekly budget, I can’t buy more, so I only used half so we can use the rest for bread and such.
And then I added a cup of slightly roasted hazelnuts (which were obv. less than a cup when they were blended), because I actually love love love Nutella, but it’s so damn expensive! And this cost me zero dollars since I had everything already. So it’s going to probably be a little bit grainy in texture, since I blended it into a crumble and threw it in once the sugar and cocoa had dissolved.
Also; does this freeze well? Butter where I live has shelf life of like at least a month, so it’s probably not a problem for me to eat it all in time, but I’ve frozen butter before when buying it in bulk and that’s worked out fine, so I’m thinking it would be okay? Unless of course the chocolate doesn’t freeze well?
Ummmmmm adding roasted hazelnuts sounds AMAZING! I hope you’ll come back and tell me how it turns out. 🙂 If I’m being entirely truthful I’ve never had enough left over to freeze (hah) but my guess is that it’ll freeze well, with maybe a slight degradation of the smooth texture–but since you’ve added nuts, I’m guessing that won’t be a problem!
Do you need the chocolate for this recipe, will the recipe work without the chocolate or do you know any substitutes.
Hi Ali! The chocolate is definitely necessary in this recipe. 🙂 Maybe search a nut butter spread if you’re not into the chocolate thing!
Hi elizabeth i have a question how long it will last?
I’d say about to weeks in the fridge to be safe, but you could probably push it a little.
Wow! I made this great chocolat spread….thank you so much…it is perfect. IT IS FOR A GIFT……but i have a little bit left for me. It will make many other gifts…for christmas…..so happy!
Great!! That’s so good to hear! I’m glad it worked out for you! Gift away!
Great! I love hearing that! So glad you liked it. Gift away!
i made my easy own recipe. i used to semisweet choco chips and a little bit to pour a milk.. it looks like a creamy choco.. my parents and friends are they like my own choco spread.. you must try and cheap to buy a ingredients.. never buy an expensive to me.. 🙂 🙂
That sounds delicious! Your friends and family are lucky to have a source of chocolate spread. 🙂
Hi insted of water. Milk or fresh cream can be use ?
Hi! I haven’t tried, but my guess is that milk would work just fine. (I’d probably try milk over cream, just because the fat content of cream could change the texture). Please let me know how it goes if you give it a try!
Looks delicious!! I’m thinking it would be great for dipping churros 😉
Thank you so much! Dipping churros sounds delicious!
Hi! It looks delicious but unfortunately I am lactose intolerant.
What could i use instead of butter?
Thanks 🙂
Hi Juia, I haven’t tried it with Earth Balance, but my guess is that it would actually be a pretty good substitute. Please let me know how it goes if you give it a try!
The title tells it all. Delicious and easy to make. We did a dairy free version with coconut oil and it came out perfect.
Hey Marina, I am so glad to hear it worked out for you! That sounds delicious. Thanks so much for you feedback!
Thank you Elizabeth for sharing this amazing recipe. I love it. This recipe is so simple and I am extremely happy to make my own chocolate spread at home. Lots of love
Hi Nidhi, I am thrilled to hear you enjoyed it so much! This is one of my favorites, and I love hearing other people love it as well. Thank you so much for your response! It looks amazing!
i used a dairy free butter and it worked brillantly xxx
Thanks for letting us know, Zara!
Hey guys, mine turned out watery do you know why? please help
Hi Geit, I am sorry to hear it didn’t turn out that is disappointing. To be honest I haven’t encountered this problem. I would love to help you troubleshoot, however it is hard to know exactly what went wrong without more details about the ingredients and procedure. One of my first questions is, is it completely chilled when you are trying it? It will tend to have a more sauce like texture if it isn’t fully chilled. Secondly what way are you measuring your ingredients? Is it with the scale, or with cups? From the sound of it, I am curious if perhaps there has been a miss measurement. Lastly which is kind of a long shot, some brands of butter will have a higher water content then others, however I would be a bit surprised if that could change the texture so much seeing as there isn’t a crazy amount of butter used to begin with. Feel free to email me, and I would love to troubleshoot further with you!
You might do well with ghee. I’m very sensitive to the casein in dairy, but don’t react to ghee, which I buy by the case! (Organic Valley brand is superb.) I’ll be trying this recipe with ghee and with coconut oil, but less than the recipe calls for because butter has a fair amount of water in it and it might get too oily with the full amount.
Wow! Thanks for this recipe I will no longer worry If I run out of nutella HAHAHA. I tried using dark chocolate with mint and it tasted good!
So glad you loved, ooh that sounds amazing. Thanks!