
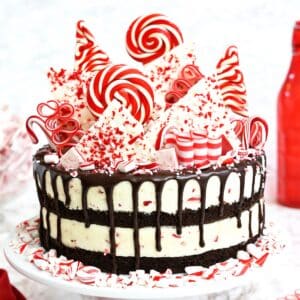
This Candy Cane Chocolate Cake will definitely get you in the Christmas mood! Moist devil’s food cake is paired with candy cane buttercream, and decorated with a cute red and white striped design.

Is there such a thing as too many peppermint desserts this time of year? If you said yes, show yourself to the door. Peace out. For the rest of us, let’s get this red and white party started! I bring you the reddest, whitest, stripiest, Christmassy-est cake I could make. Santa, eat your heart out.

This cheerful cake is made from deep, dark devil’s food cake and filled with peppermint candy cane frosting. Because I’m a super literal thinker, I had to decorate it with red fondant stripes like a giant candy cane. (I also like to judge books by their covers.) To top it all off, it’s finished with a big pile of crushed candy canes and these super cute candy cane lollipops from Hammond’s Candy. (I found mine at Target).


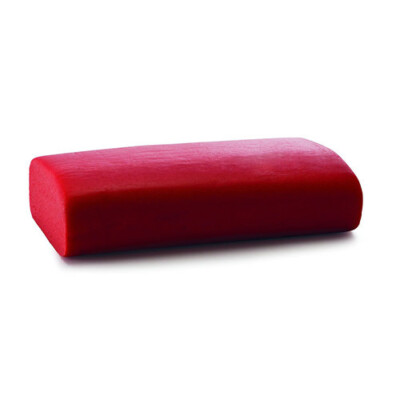
I tried something a little different this time, and only partially covered the cake in fondant. The red stripes are fondant (I like to buy my red fondant pre-made, because it’s hard to get a true red at home without using gallons of food coloring), but the white is actually just buttercream. It’s an interesting effect, and it was nice to have the graphic red+white pattern without having to peel off a thick double layer of fondant from every cake slice.

The frosting inside has a double dose of mint flavor: the whole batch is flavored with peppermint extract, and then the inner layers have crushed candy canes added to the mix. The candy canes soften as they are exposed to the frosting, so rather than adding a crunch, they provide little pockets of extra-minty freshness, plus cute specks of pink and red color throughout.

This is the perfect cake for all the chocolate + mint lovers in your life, of which there are probably many. And if it turns out you’re surrounded by losers who don’t appreciate this classic flavor combo, call me and I’ll come over and help you eat any extras.
💖More Christmas Desserts
- Chocolate Peppermint Kiss Cookies
- Candy Cane Hearts
- Peppermint Lava Cakes
- Candy Cane Cookies
- Peppermint Affogato
- Red Velvet Trifle with Peppermint Cream Cheese Frosting
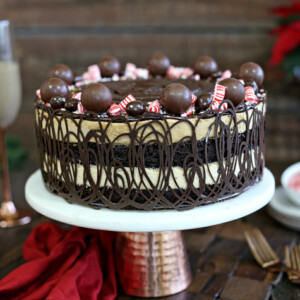
Candy Cane Mousse Cake
Peppermint Mocha Mousse Cake

Candy Cane Chocolate Cake
Ingredients
For the Chocolate Cake:
- 12 oz all-purpose flour, (2⅔ cup)
- 4 1/2 oz unsweetened cocoa powder, (1 1/2 cups), dutch-processed
- 1¾ tsp baking powder
- ¾ tsp baking soda
- 1½ tsp salt
- 24½ oz granulated sugar, (3½ cups)
- 1¼ cups coffee , or water, at room temperature
- 1¼ cups buttermilk, at room temperature
- ¾ cup vegetable oil
- 2 large eggs, at room temperature
- 2 large egg yolks, at room temperature
- 1 tbsp vanilla extract
For the Buttercream and Assembly:
- 9 large egg whites
- 14 oz granulated sugar, (2 cups)
- 1 lb unsalted butter, soft but still cool
- 2 tsp peppermint extract, or more to taste
- 1/4 tsp salt
- 4 oz miniature candy canes, (about 25)
- 8 oz red fondant
- Candy canes , for decorating, optional
Instructions
To Make the Chocolate Cake:
- Preheat the oven to 325 F. Line two 9x-3-inch round baking pans with parchment paper, and spray the paper with nonstick cooking spray. (Alternately, you can use four 9x-2-inch pans, or bake the cakes in batches.)
- In a large bowl, sift together the flour, cocoa powder, the baking powder, baking soda, and salt.
- In the bowl of a large stand mixer, combine the sugar, coffee or water, buttermilk, oil, eggs, yolks, and vanilla. Beat with a paddle attachment on low speed until well-mixed. Stop the mixer and add the dry ingredients to the mixing bowl. Beat on low speed until the flour is moistened. Raise the speed to medium and beat for about 4 minutes, scraping the sides of the bowl occasionally, until the batter is smooth. It will be very thin.
- Divide the batter evenly between the two pans. If you have a kitchen scale handy, each pan should get 36 oz of batter.
- Bake the cakes at 325 F for about 50 minutes, until a toothpick inserted into the center comes out with just a few moist crumbs attached. Cool the cakes in the pans, then turn them out onto a wire rack. Once cool, wrap them in plastic wrap and place them in the freezer until semi-firm—these cakes are much easier to work with when they’re partially frozen. The cakes can be made in advance and kept in the freezer for several weeks. When you are ready to assemble the cake, allow the rounds to partially defrost before assembly.
To Make the Buttercream:
- Combine the egg whites and the granulated sugar in the bowl of a large stand mixer, and whisk them together. Choose a small saucepan that lets you fit the base of the stand mixer snugly into the top of the saucepan—this is your makeshift hot water bath. (Alternately, you can use a different bowl or an actual bain marie and then transfer the mixture to a mixing bowl once it’s heated.) Add an inch of water to the bottom of the saucepan, and bring the water to a simmer.
- Place the mixing bowl on top of the saucepan, making sure that the bottom isn’t in contact with the water, and heat the egg white mixture. Whisk frequently so that the egg whites don’t cook. Continue to heat the whites until they are hot to the touch, and when you rub a bit between your fingers, you don’t feel any grittiness from the sugar. Once the whites are hot, transfer the mixing bowl to your mixer and fit it with a whisk attachment.
- Beat the whites on medium-high speed until they are a shiny, stiff, voluminous meringue, and are no longer warm to the touch—feel the outside of the bowl, and make sure that it is around room temperature. Depending on your mixer and the temperature of your environment, this may take 15-20 minutes, or more. Reduce the speed to medium-low and switch to a paddle attachment.
- Add the softened but cool butter in small chunks, a tablespoon at a time, making sure to wait in between additions. It may separate or look a little gloopy at this point—fear not. Once all of the butter is added, increase the speed again and whip until it comes together and is light and fluffy. If, after 5 minutes, it hasn’t come together, refrigerate the mixing bowl for 5-7 minutes, to cool the mixture down, and whip it again until it has thickened and is smooth and silky.
- Add the peppermint extract and salt, and mix them in.
- The buttercream can be made in advance and kept at room temperature if you’re going to use it the same day, or refrigerated. If it has been chilled, let it sit at room temperature until completely soft, then re-whip it to get the smooth texture back before you use it.
To Assemble:
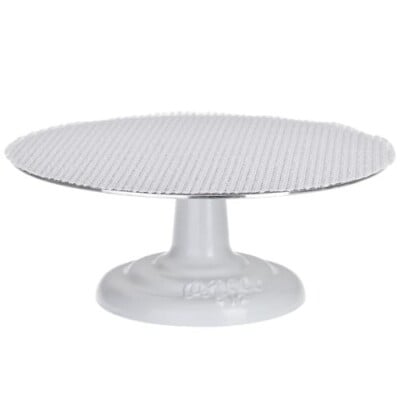
- To assemble the cake, place the partially frozen cake rounds on cake cardboards. Using a cake turntable, if you have one available, cut each round in half with a long, sharp serrated knife, so you have 4 cake rounds.
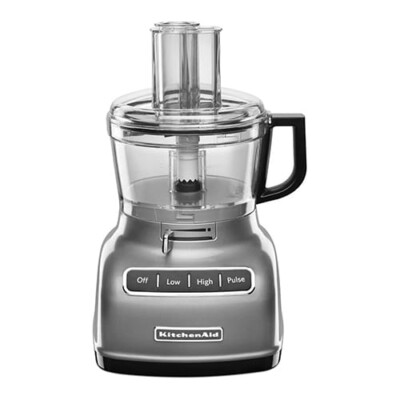
- Place the mini candy canes in a food processor and pulse them until they’re in fine pieces, or put them in a zip-top bag and crush them with a rolling pin. Stir together the crushed candy canes and 3 cups of buttercream.
- Put a cake round on the turntable and spread a third of the candy cane buttercream on top of the cake, smoothing it all the way out to the sides, and top it with a second cake round. Spread half of the remaining candy cane frosting on top, smooth it into an even layer, and continue in this way until all 4 cake layers are assembled with candy cane frosting in the center. Spread a very thin layer of buttercream over the sides and top of the cake, just to trap in the crumbs, and refrigerate for 30 minutes until the frosting is firm.
- Spread the frosting over the top and sides of the cake in a thick layer. My trick for getting smooth frosting is to do the best I can with an offset spatula. Then, when I think I’ve gotten it as smooth as possible, I dip the spatula in very, very hot water, and lightly run it around the sides and top of the cake, wiping it off and dipping it in the water periodically. The heat of the spatula will melt the buttercream a bit, and will smooth out the surface nicely. Refrigerate the cake again to make the buttercream VERY FIRM before adding the fondant decorations.
- To add the fondant stripes, press a layer of parchment paper against the sides and top of the cake and draw a template of the shape you want. I drew a wavy shape, tapering at the top, to mimic candy cane stripes. Dust your work surface with powdered sugar and roll out the red fondant into a thin layer. Press your template on top of the fondant and use a razor blade or very sharp knife to cut the shapes out of the fondant. Press them directly into the cake—since the buttercream doesn’t crust, it should stick without any trouble, but if for some reason the fondant isn’t sticking well, brush the back side with a very thin layer of corn syrup to get it to stick.
- After I did my large stripes around the sides, I cut the template in half to make a thinner strip, and added thinner stripes of red fondant in between the bigger ones.
- Top the cake with crushed candy canes or other candy decorations. This cake is best enjoyed at room temperature .The candy canes on top will get sticky if exposed to moisture and air for long periods, so it’s best to add them right before serving.
Recipe Notes
Measuring Tips
Our recipes are developed using weight measurements, and we highly recommend using a kitchen scale for baking whenever possible. However, if you prefer to use cups, volume measurements are provided as well. PLEASE NOTE: the adage “8 oz = 1 cup” is NOT true when speaking about weight, so don’t be concerned if the measurements don’t fit this formula.
Want to learn more about baking measurements and conversion?


Wowwwww, this is stunning!! And I am loving the combination of cake and mousse cake! Oh, how I love mint chocolate and Christmas!
Hey MasterRusk, I am right there with ya! Perfect for this time of year! Thanks so much!!