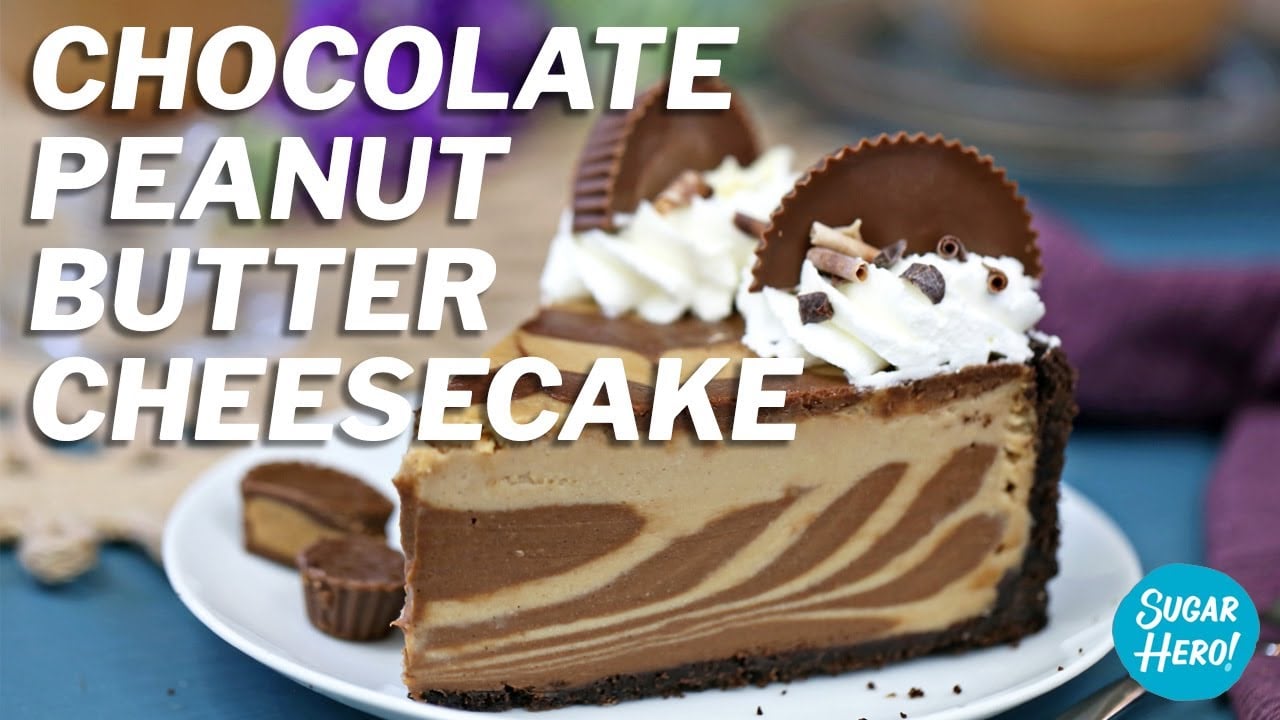
This Chocolate Peanut Butter Cheesecake is the ultimate dessert for chocolate and peanut butter lovers! It features a chocolate cookie crust and rich stripes of luscious chocolate and peanut butter cheesecake. Top it with whipped cream and peanut butter cups for maximum indulgence!

A Big, Beautiful Cheesecake
If you look up the definition of “Comfort Food” in the dictionary, I’m pretty sure you’ll find a picture of this cheesecake. Sorry, mac & cheese, you’ve been bumped from top comfort food spot in favor of this Chocolate Peanut Butter Cheesecake–this big, beautiful, bountiful slice of heaven.
I’ve talked before about how I don’t make cheesecakes very often, because my husband doesn’t like them, and my son thinks they’re “good for a few bites, and then they turn gross.” (Thank you, child, for keeping it real and keeping mama humble.) I don’t want to be the only one in charge of cheesecake consumption around the house–although to be honest I think it’s a job I’m really, really good at–so I usually stick to desserts the whole family will eat.
But right now, with the weather turning, the cool bite in the morning air, and the first few days of fall rain, I’m craving comforting desserts in a major way, and only this cheesecake will do. Now if you can’t commit to this specific cheesecake, check out this amazing 10-flavor cheesecake sampler! You won’t be disappointed.

Table of Contents
Chocolate Cookie Crust
This cheesecake starts with a crunchy chocolate base–I used chocolate graham crackers, but you could also use regular graham crackers, chocolate wafers or sandwich cookies like Oreos.

Chocolate Peanut Butter Filling
The cheesecake filling is made with lots of cream cheese and peanut butter (of course!). Then, the filling is divided in half. One half of the filling gets melted semi-sweet chocolate folded in, to make a rich chocolate cheesecake.

How To Make the Cheesecake Designs
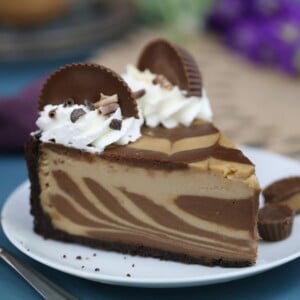
You could layer the two flavors on top of each other, or do a casual swirl, but I wanted to get a more precise striped effect on the inside, so I placed alternating scoops of batter on top of each other, which produces the pretty zebra pattern you see inside the cheesecake.
As for the design on top, I made that by piping thin lines of chocolate batter on top of the peanut butter, then dragging a toothpick through it in opposing directions. Totally easy, totally gorgeous!
And OF COURSE, I needed to use lots of peanut butter cups as decorations. I could lie and say it’s for aesthetic reasons, but that’s about 10% of the truth. We all know that it’s really because I want to snack on the extras while filming. Sorry not sorry, those suckers are delicious!

💡Tips and FAQs
Because cheesecakes can be tricky, here are a few tips to getting the perfect cheesecake, every time:
- Use a water bath. I know they’re a pain, but they really will improve the texture of your cheesecake. To avoid soggy bottoms, I bought foil that’s 18 inches wide (found it at Costco!) and since I’ve started using it, have had no issues with water leaking in. Tall silicone cake pans are also great for this!
- Choose full-fat cream cheese. To get the right texture and flavor full-fat crream cheese is a must, and make sure it is TOTALLY at room temperature. I’m very loyal to Philadelphia brand–I’ve been burned by sketchy store brands too many times.
- Turn the oven off when the cheesecake is still jiggly. The inclination is to look for it to be fully set, but if you wait for it to set in the oven, it will be overcooked and stiff. It will continue to cook/set after you turn the oven off, and as it chills overnight. As long as it’s set around the edges, some movement in the middle is fine.
- Let it rest in a cooling oven before taking it out. This continues to cook the cake (see above) and also avoids an abrupt temperature shift that might cause the cheesecake to crack.
- Stir in the eggs last, by hand. SPEAKING of cheesecake cracks, here’s a great tip I learned from Jen at Baked by an Introvert! Stir in the eggs last, by hand, instead of beating them into the cream cheese. Beating them in in the beginning = more air whipped into the batter = a cheesecake that rises higher while baking = more likely the cake will collapse and crack as it cools. Stirring the eggs in by hand at the end avoids adding excess air to the cheesecake and reduces the chances of cracks. Ever since I tried this method I’ve had zero cracks in my cheesecakes!
To Refrigerate: Leftover baked cheesecake will last for up to 1 week in the fridge. Wrap well with plastic wrap or place in an airtight container.
To Freeze: Cheesecake can be frozen for up to 3 months. To freeze the cheesecake, wrap it in plastic wrap followed by foil and store it in the freezer. If you are going to freeze it for a long time, you might also consider putting it in an a freezer-safe container after wrapping it. It will need some time to thaw, so place it in the fridge the day before you need it, and let it thaw overnight.

Bon appetit, my cheesecake-loving friends!
🍰More Cheesecake Recipes
- Candy Cane Cheesecake
- Gingerbread Cheesecake
- Pumpkin Spice Cheesecake
- 10-Flavor Cheesecake Sampler
- Candy Bar Cheesecake
- Chocolate Cheesecake
New York Style Cheesecake
Deep Fried Cheesecake
Leave a Review!
If you make this recipe, let us know! Leave a ⭐️⭐️⭐️⭐️⭐️ rating on the recipe below, and leave a comment, take a photo and tag me on Instagram @elabau, or use #sugarhero on IG!
Chocolate Peanut Butter Cheesecake
Ingredients
Chocolate Crust
- 12 oz chocolate graham crackers, (23 crackers, to yield about 2 1/3 cups crumbs)
- 2.5 oz unsalted butter, (5 TBSP)
Cheesecake Batter
- 2 lbs cream cheese, at room temperature – do not use whipped or light variety (32 oz or 4 bricks)
- 9.37 oz brown sugar, (1 ¼ cups)
- 9.5 oz creamy peanut butter, (1 cup), do not use natural variety
- 1 TBSP vanilla extract
- ½ tsp salt
- 8 fl oz heavy cream, (1 cup), or heavy whipping cream
- 4 large eggs, at room temperature and lightly beaten
- 5 oz semi-sweet chocolate, finely chopped
Whipped Cream and Toppings
- 6 fl oz heavy cream, (3/4 cup), cold
- 1 oz powdered sugar, (1/4 cup)
- Assorted sizes peanut butter cups, for decorating
- Chocolate shavings, for decorating
Instructions
Make the Crust
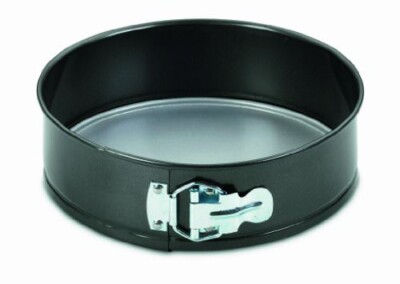
- Preheat the oven to 325 F. Spray a deep 9-inch springform pan with nonstick cooking spray. Wrap aluminum foil tightly around the outside of the pan, coming up to the top edge. I like to use heavy-duty 18-inch foil, to prevent any water from leaking into the cheesecake, but if you don’t have 18-inch foil, consider doing 2 overlapping layers of foil to make it more waterproof. Put water on to boil for a water bath.
- Place the chocolate graham crackers in a food processor and process them until they’re fine crumbs. (Alternately, you can put them in a plastic bag and crush them with a rolling pin until they’re crumbs.) Melt the butter in the microwave, and stir the butter and crumbs together until the crumbs are the texture of wet sand.
- Firmly press the chocolate crumbs into the bottom and up the sides of the springform pan, then refrigerate the pan while you prepare the filling.
Make the Filling
- Place the room temperature cream cheese in the bowl of a large stand mixer fitted with a paddle attachment. (A hand mixer can also be used.) Beat the cream cheese on medium speed until it is fluffy and free of lumps. Add the brown sugar and mix it in, then scrape down the bottom and sides of the bowl well.
- Mix in the peanut butter, vanilla, and salt, and mix on medium-low speed until well-incorporated. With the mixer running on low, slowly stream in the 8 oz (1 cup) of heavy cream.
- Finally, stop the mixer and add the lightly beaten eggs. Stir these in by hand with a spatula. At first the mixture will look separated, but keep stirring and it will all come together in a smooth, silky batter.
- Melt the semi-sweet chocolate in the microwave. Divide the peanut butter cheesecake batter in half, and add the melted chocolate to one half, stirring until smooth and homogenous. Separate out 4.5 oz of chocolate batter (about 1 cup) and place it in a piping bag.
Create Striped Interior Effect
- Take a large ice cream scoop or 1/2 cup measuring cup and place two scoops of peanut butter cheesecake in the center of the prepared pan. Place two scoops of chocolate cheesecake right on top of it—this will push down on the peanut butter cheesecake and cause it to spread out.
- Continue this layering, making concentric circles with the two batters, until you’ve used all the chocolate cheesecake and have only a little peanut butter cheesecake remaining. Spread the remaining peanut butter cheesecake on top and smooth it into an even layer.
- Use your previously prepared piping bag of chocolate cheesecake filling to pipe lines across the top of the peanut butter cheesecake. Take a toothpick and drag it through the lines, from top to bottom, then move over about half an inch and drag it in the opposite direction, from bottom to top. Continue this pattern across the whole cheesecake.
Prepare Water Bath and Bake
- Place the springform pan inside a larger cake pan or roasting dish. Carefully pour the boiling water in the larger pan, coming halfway up the sides of the cheesecake pan.
- Bake at 325 F for 90 – 100 minutes. After an hour, I like to cover the top with very loosely tented foil so that it doesn’t get too dark. The cheesecake should appear set around the edges but still jiggle in the middle when the pan is tapped—it will firm up as it sits in the oven and rests in the refrigerator overnight. If it does not move when you tap it, it is overbaked.
Cool Cheesecake
- Once done, turn the oven off but keep the cheesecake in the cooling oven for 1 hour. After an hour, carefully remove it from the water bath, peel off the foil, and refrigerate the cheesecake for at least 4 hours. (Overnight is good, too!)
Decorate
- Release the sides of the pan, and run a thin metal spatula under the crust to remove it from the bottom. Slide the cheesecake onto a serving plate.
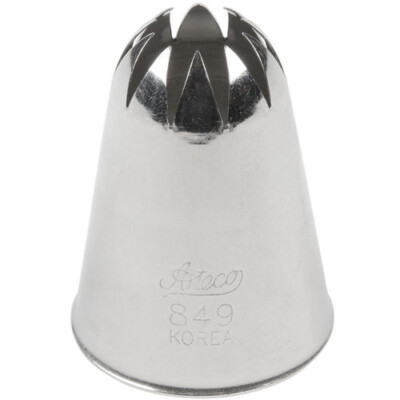
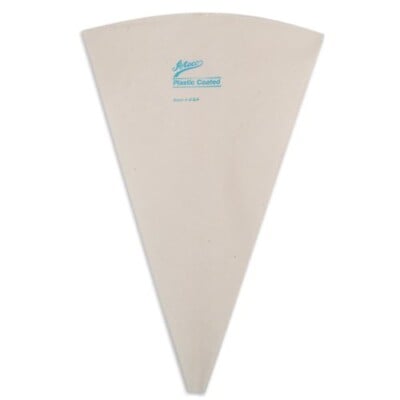
- Combine 6 fl oz (¾ cup) heavy cream with 1 oz (¼ cup) powdered sugar and whip to firm peaks. Transfer to a piping bag fitted with a large star tip, and pipe rosettes of whipped cream all along the outside edge of the cheesecake. Decorate the whipped cream with chocolate shavings and peanut butter cups.
Serve and Store
- For the cleanest cuts, cut the cake when it is still cool, and wipe the knife off between cuts. Store the Chocolate Peanut Butter Cheesecake in the refrigerator for up to a week, and for the best taste and texture, let it sit at room temperature for 10-15 minutes before serving so it loses some of the refrigerator chill.
- To store, wrap the cheesecake well with plastic wrap or place it in an airtight container. If you plan to freeze it, add an extra layer of foil over the plastic wrap. Can be kept in the fridge for up to 1 week or frozen for up to 3 months.
Video
Recipe Notes
Measuring Tips
Our recipes are developed using weight measurements, and we highly recommend using a kitchen scale for baking whenever possible. However, if you prefer to use cups, volume measurements are provided as well. PLEASE NOTE: the adage “8 oz = 1 cup” is NOT true when speaking about weight, so don’t be concerned if the measurements don’t fit this formula.
Want to learn more about baking measurements and conversion?


It just needed to cook a little longer. I always leave my cheesecake for an hour in the oven after turning it off. It will continue to cook and firm up. Make sure the cake is cooled completely also before refrigeration
Smart! I hadn’t thought of leaving it in the oven. Agreed, thanks!
Hi…can you tell me where I can find the video on how to make this? I need a little assistance with your design, primarily the top. I’ve never seen a cheesecake so cool!
I love your cakes and all the help you provide us at home new bakers. And to top things off, you give measurements in METRIC…You’re awesome!!
Thank you!
Hi, can you tell me why we shouldn’t use natural peanut butter? I have trader joes organic natural peanut butter and would love to use it up. Thanks!
Hi, first of all: Wow! That cheesecake looks truly amazing!
But I was wondering what I can use as a substitute for the International Delight REESE’S Peanut Butter Cups Creamer. I live in the Netherlands and unfortunately who don’t have that here. Thank you in advance for your reply!
Hey Jenske, thanks so much! I would suggest to just use whipping cream.
Hi quick question I just made this cheesecake but by accident I used table cream instead of heavy cream. Do you think it will work or will I need to make another one it’s in the oven right now baking
Hey Steph, honestly I think it would work just fine. Hope you loved it! Thank you!!
Can you half this recipe?
Fun story…I just put this in the oven and realized that I missed the whippig cream step in the batter. Hopefully it comes out ok! What do you think??
Oh no!! How did it turn out?? Hopefully it still had a great flavor even if the texture was a bit different!
I love this recipe. It always turns out delicious! Question: do you have a variation of it with no peanut butter?
By far the best cheesecake ive ever had, whether homemade, store bought or at a restaurant. Thanks for the great recipe!
Hey Dawn, I am so happy to hear that! Thank you so much for your feedback!
Confused: in one answer you said “An equal amount of half and half or heavy cream should work just fine!!
” but in another you said “Store bought whipped cream is totally fine for the top! I just would not recommend using it in the actual cake!” — Which way is it.. please?
Hey Nicodemus, Those are both in response to different parts of the recipe. You can use the half and half or heavy cream in the actual cheesecake for that step. As for the top of the cake using store bought whipped cream would work on the outside of the cake as an option. Hope that helps! Thanks so much!
Whoever made this obviously has no idea what they’re doing. I have read this recipe, reread the recipe, went to the store twice, read all instructions before I started and read the instructions as I was going threw the process. This recipe turned out absolutely awful. It taste awful, it looks awful and it baked like a loaf of bread. It raised in the oven and cracked. It needed longer than 90-100 minutes to fully cook and by that point it was burnt on the top. I have never been so disappointed at any recipe I have followed. On top of that, the cost to get everything I needed only for this to happen really makes it even worse. I love to cook and bake, I do so all the time. I try new recipes every week. Since I’ve been cooking, this has been the worst recipe I have ever tried. Will definitely never follow another recipe by this “baker” or SugarHero. Pathetic
Celena, I’m sorry the cheesecake recipe didn’t work out for you. I’ve made it numerous times, including several times for the filming of the accompanying video, and each time followed the instructions as written in the recipe, so I feel comfortable saying that the recipe does work–and the user reviews on the recipe would agree with that. Re the burnt top, in the recipe I do suggest covering the cheesecake with foil past the 60 minute mark to prevent the top from over-browning, and also give tips in the recipe for handling the beaten eggs with care and using a water bath to prevent the cheesecake from rising and cracking. It’s hard to troubleshoot specific problems without watching the assembly process, but if you’d like to send me an email I’d be happy to help you troubleshoot.