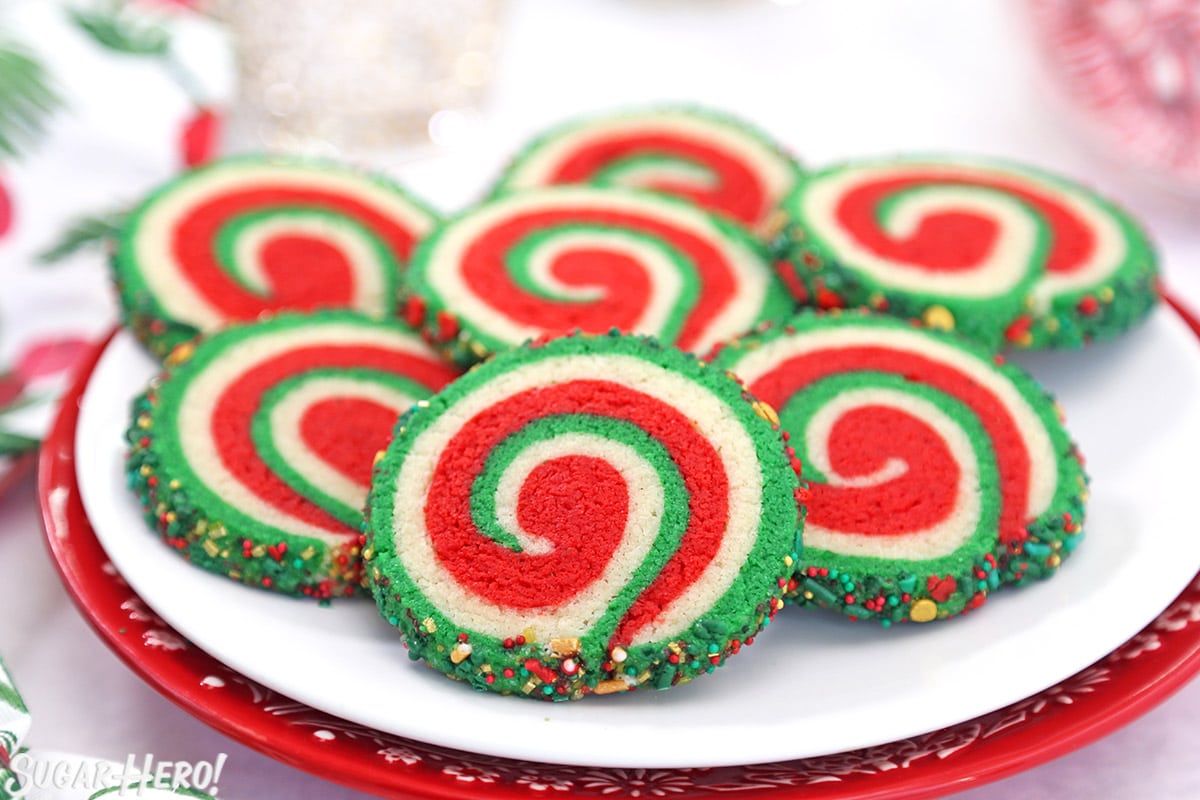
These festive Pinwheel Sugar Cookies might be the best Christmas cookie recipe ever! They’re made with a simple sugar cookie dough formed into a beautiful red, white, and green spiral design.
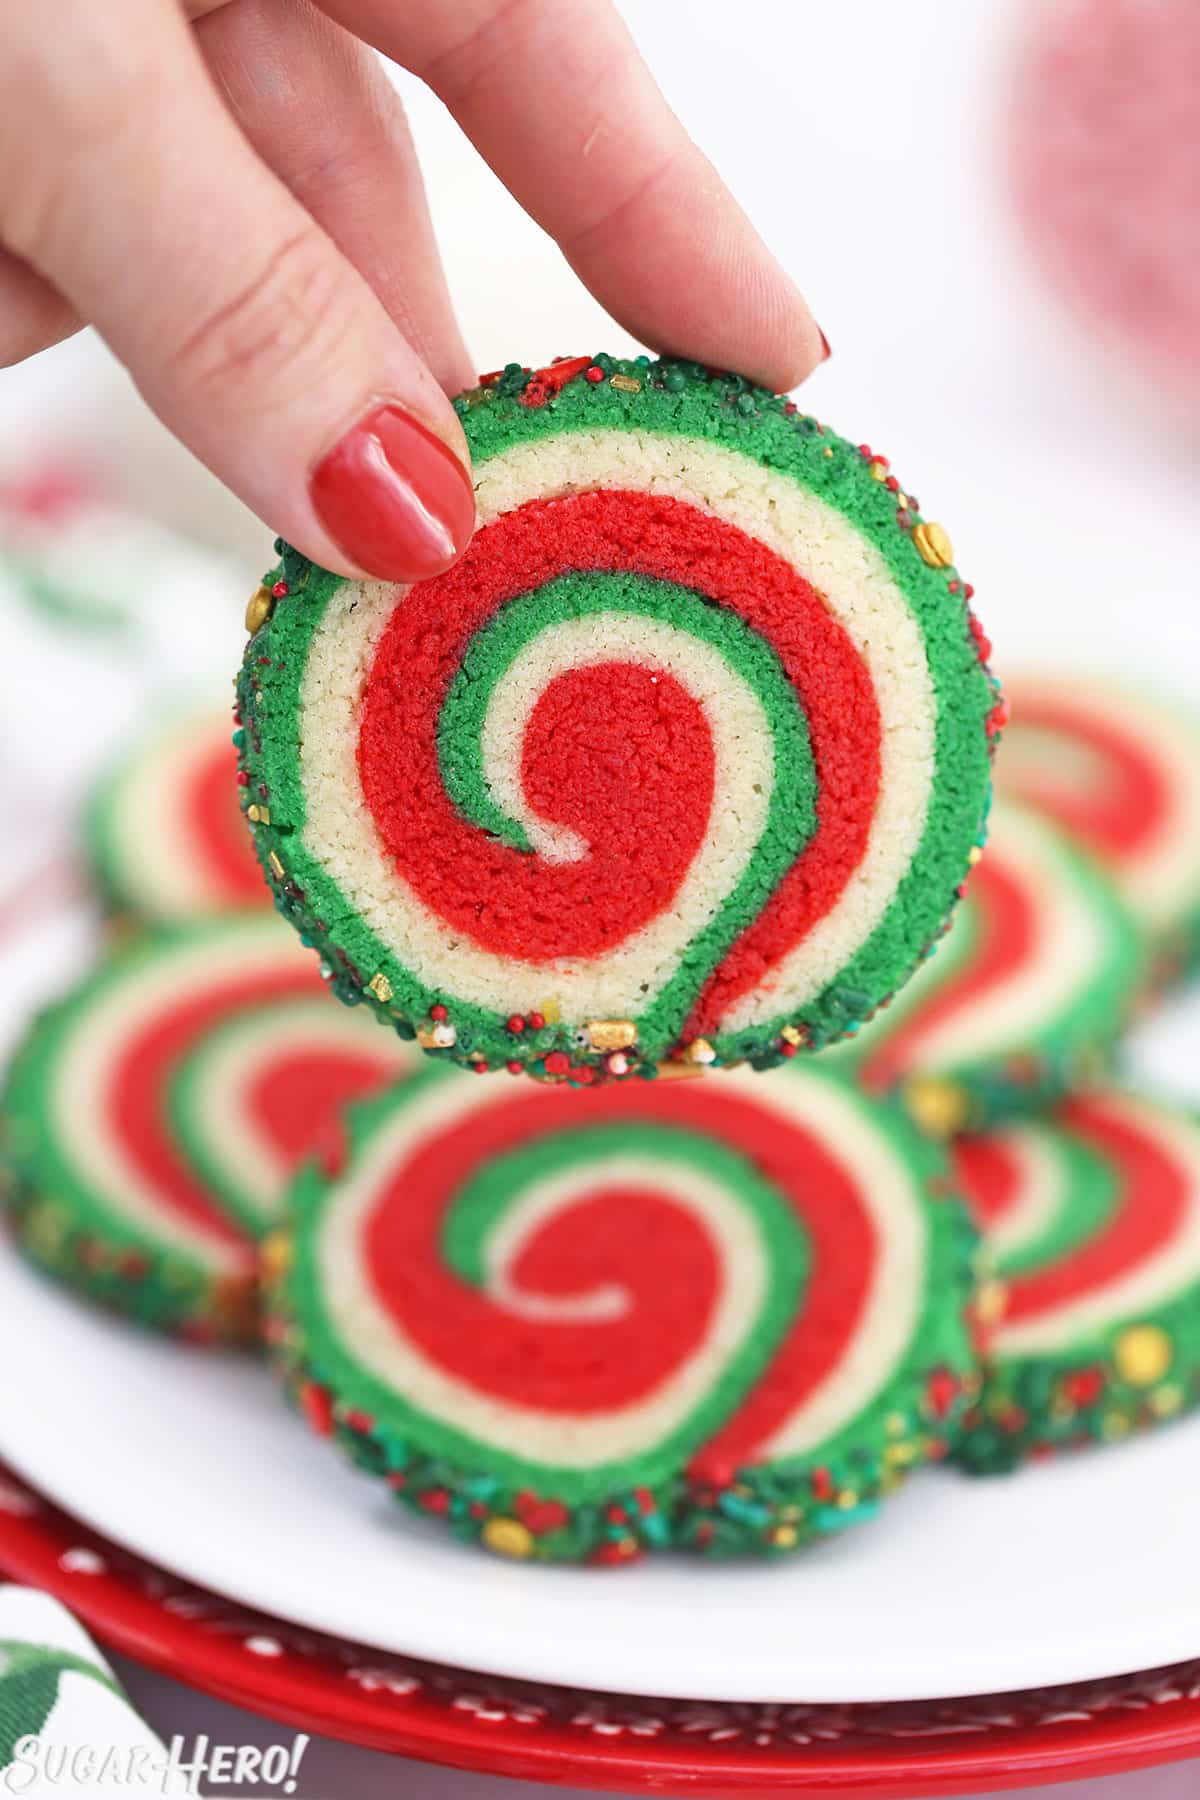
🎄 The Surprisingly Easy Christmas Cookie!
I’m so excited to share this recipe for pinwheel sugar cookies with you, because they are guaranteed to make you feel like a dessert magician. I hope you’re ready to sit back and let the compliments roll in, because these cookies will make you the most popular person at the holiday potluck.
Don’t let the gorgeous red, white, and green swirls fool you–these cookies are basically a sugar cookie wearing a fancier outfit. They start with a simple 5-minute cookie dough, and from there you roll a little here, cut a little there, abracadabra, and voila–you have beautiful swirled cookies!
Need a few more easy Christmas cookie ideas for a platter or cookie swap? Try some of my other favorites like Oreo Cookie Christmas Ornaments, Chocolate Peppermint Kiss Cookies or Black Sesame Shortbread Cookies!
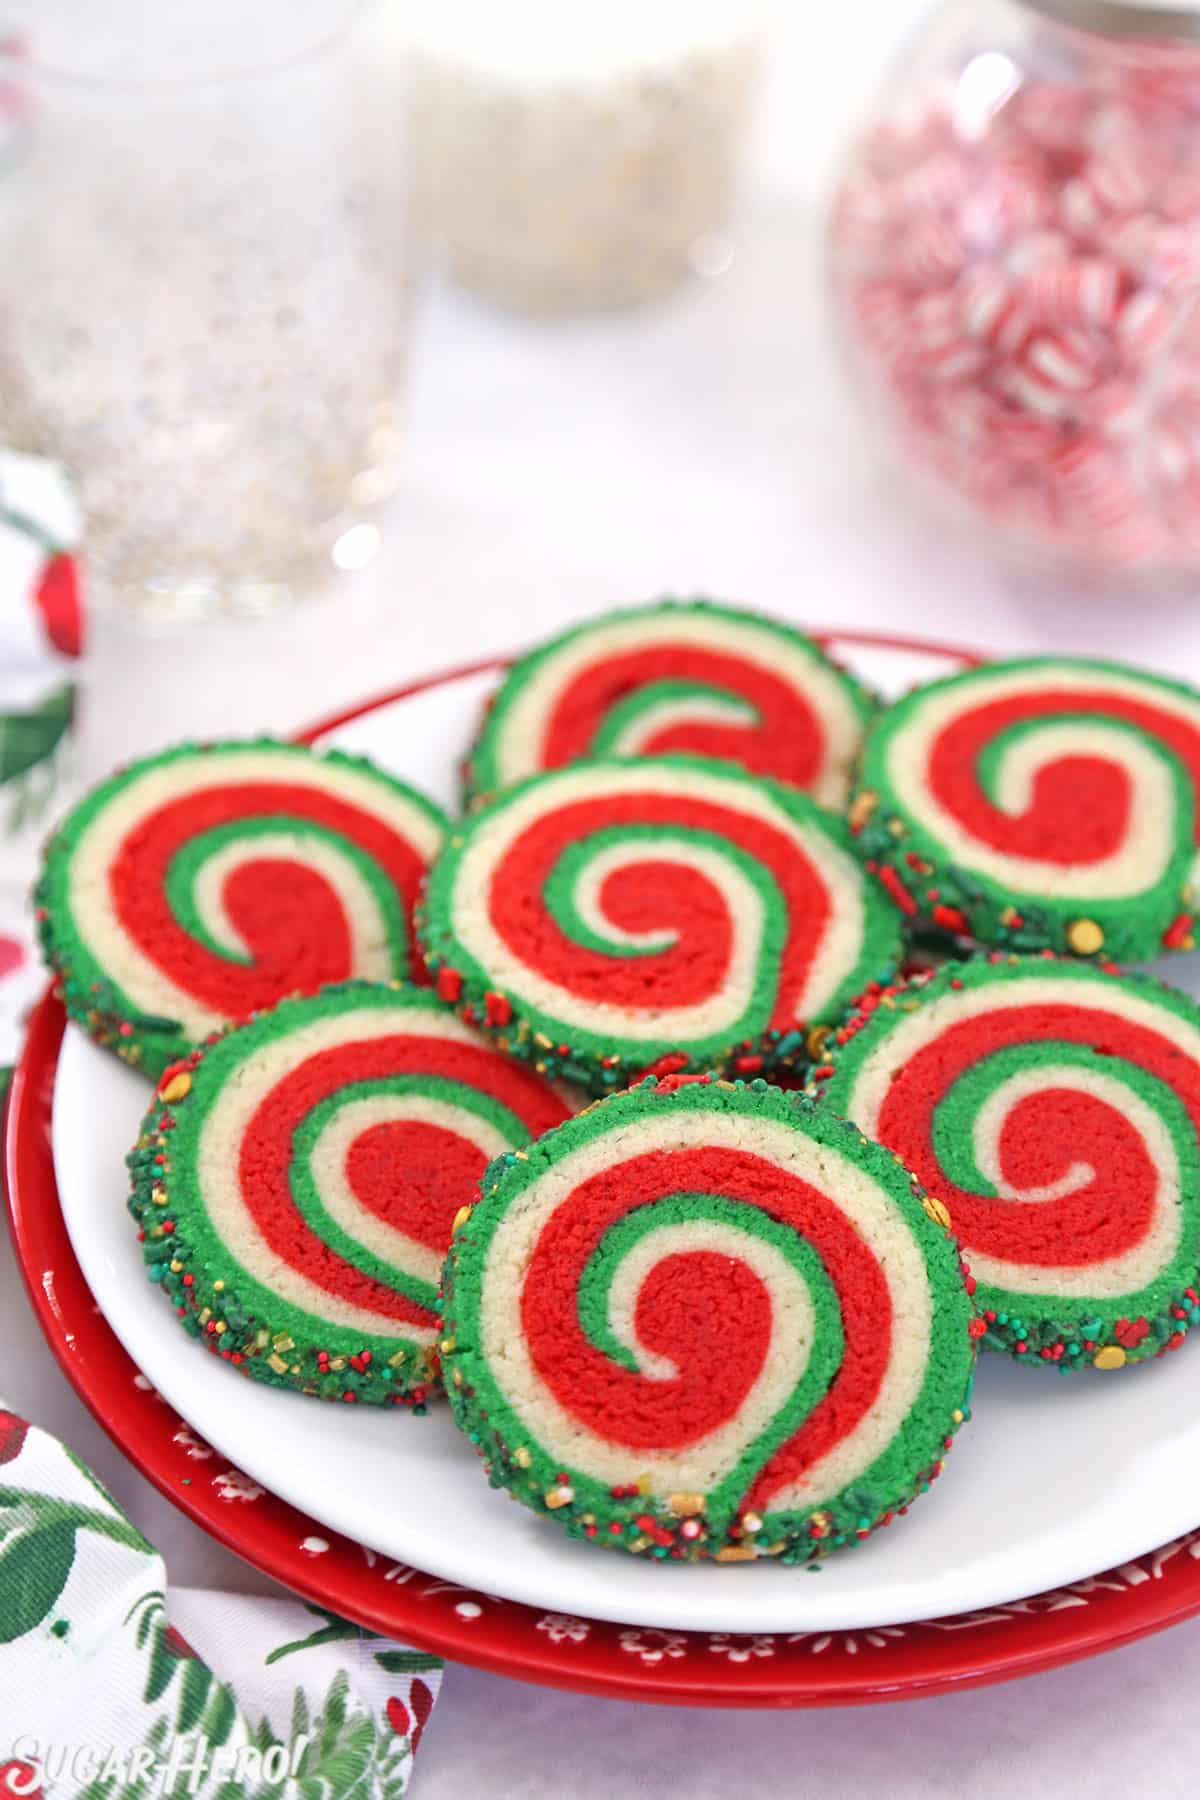
🌀 Pinwheel Cookies: Not Just for Christmas
The best part is, these are not just a Christmas dessert! Once you get the hang of making them, you can make endless varieties of pinwheel cookies, with other color schemes, sprinkles, and flavoring variations. You could even add some chocolate to make chocolate-swirled pinwheel cookies.
Ready to make these? I’m going to show you how to make pinwheel sugar cookies from start to finish, with step-by-step photos and all the info you need to make them right on your first try!
If you’re on a cookie roll after making these (get it??) you’ll love my other cookie recipes, like Big Soft Sugar Cookies, Cinnamon Roll Sugar Cookies, and Watercolor Rose Sugar Cookies. Or get playful and make some Sugar Cookie French Fries!
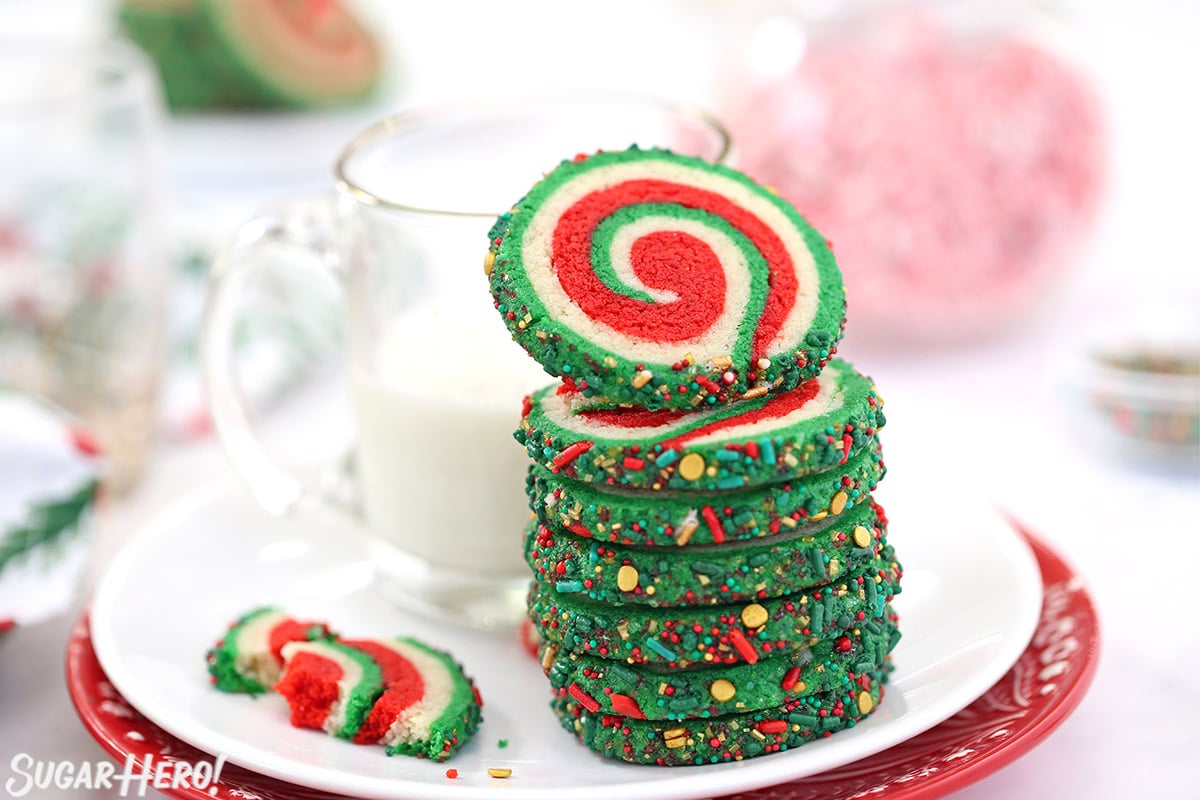
Table of Contents
🧾 What You’ll Need
Ingredients
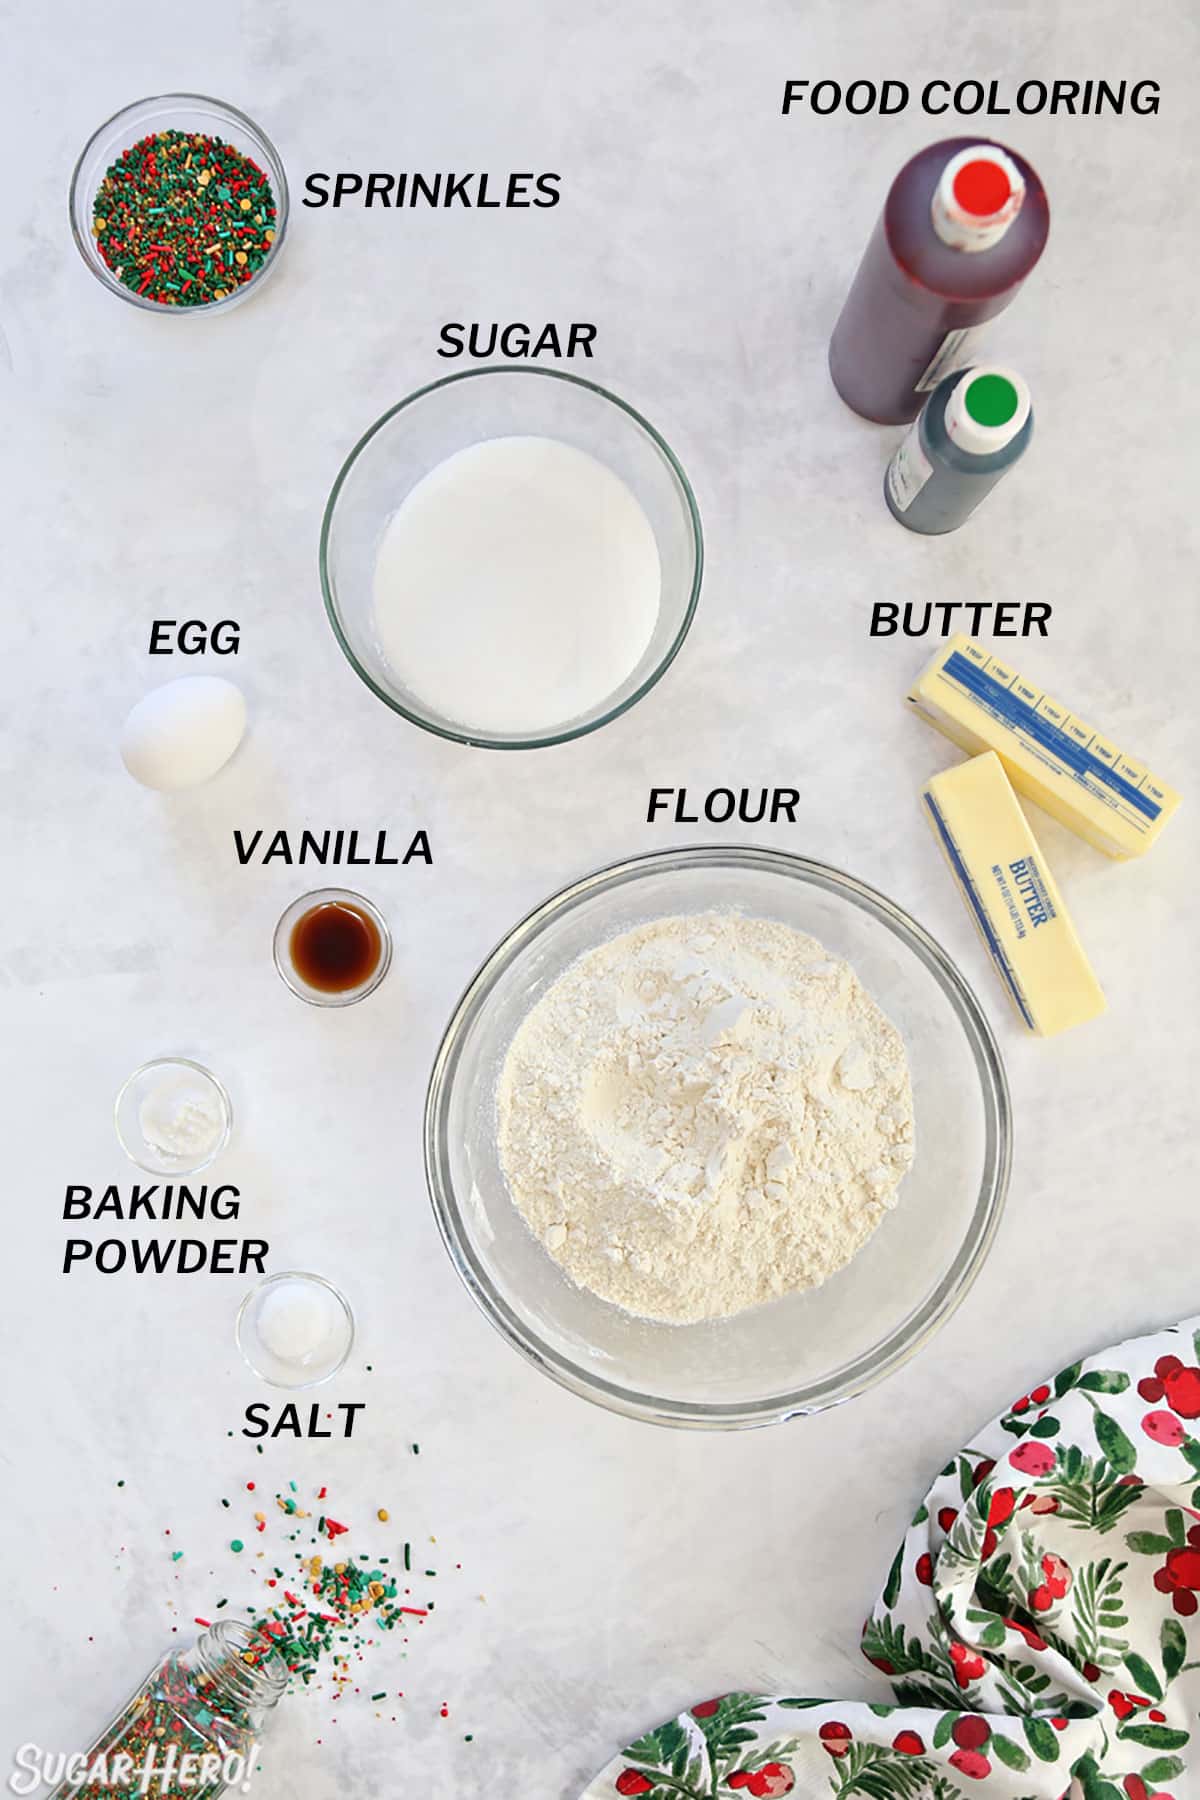
The best part of these pinwheels (aside from the taste, texture, and appearance…) is the short and simple ingredient list! Like many cookie recipes, they require just a handful of pantry staples, most of which you probably have on hand already. Here are a few tips to keep in mind when assembling the ingredients. (Links are affiliate links and I earn a small commission from qualifying purchases.)
- Butter: Your butter should be at room temperature to make these cookies. This means it’s pliable but cool–you don’t want it to be greasy and melty. I always recommend unsalted butter in baking, so you can control the precise amount of salt. If you only have salted butter, use that but omit the additional salt in the recipe.
- Egg: The egg you use should be large size, and at room temperature. Tip: if you need to warm up an egg quickly, place it in a bowl of hot water for 5 minutes. This won’t cook the egg, but will bring it to room temperature so it’s perfect for baking.
- Vanilla extract: Vanilla is the classic sugar cookie flavor, but you can experiment and add other extracts in addition to or instead of vanilla. Try almond, orange, or lemon!
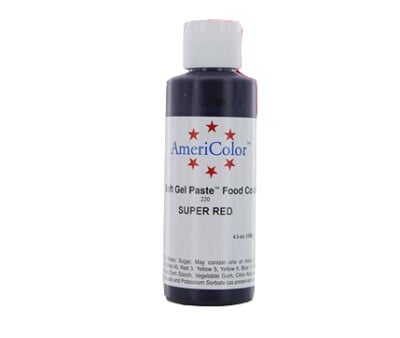
- Food coloring: For the best results, you will want to use gel food coloring. It is more concentrated than typical water-based colorings, so you don’t have to use as much coloring to get strong, vibrant shades. I use and recommend Americolor gel coloring. For this recipe, I used Americolor Super Red and Americolor Leaf Green shades.
- Sprinkles: Most sprinkles will work in this recipe. Jimmies, nonpareils, and sparkling sugar are all great choices. Avoid any chocolate pieces (like Sixlets), crushed hard candies (like candy cane pieces), or sprinkle mixes with royal icing decorations. I mixed up my own sprinkle blend for these cookies, but it is very similar to these sprinkle blends: Christmas Past, Elfin Around, and Christmas Magic.
Equipment
Great news, sugar heroes — no special equipment required for these babies! All you need are some common cookie tools to make your life easier. (Links are affiliate links and I earn a small commission from qualifying purchases.)
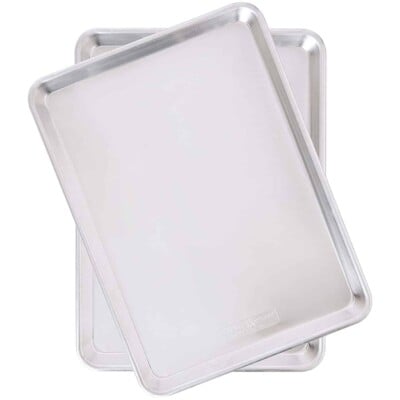
- Baking sheets: Heavy-duty baking sheets will keep the bottoms of the cookies from burning and help cookies bake evenly.
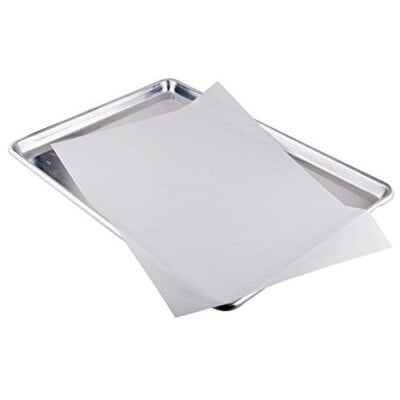
- Parchment paper: I never bake directly on my baking sheets–it’s all about the parchment, baby! Save time and cleanup by using silicone liners or parchment paper when baking cookies.
- Mixer:a stand mixer or a hand mixer will both work in this recipe.
Leave a Review!
If you make this recipe, let us know! Leave a ⭐️⭐️⭐️⭐️⭐️ rating on the recipe below, and leave a comment, take a photo and tag me on Instagram @elabau, or use #sugarhero on IG!

Christmas Pinwheel Cookies
Ingredients
- 12.75 oz all-purpose flour, (3 cups)
- 1 tsp baking powder
- ½ tsp salt
- 8 oz unsalted butter, (1 cup), at room temperature
- 8.75 oz granulated sugar, (1.25 cups)
- 1 large egg, at room temperature
- 2 tsp vanilla extract
- Red and green food coloring, I used Americolor gel colors
- 6.75 oz sprinkles, (1 cup)
Instructions
- Whisk together the flour, baking powder, and salt in a medium bowl, and set aside temporarily.
- Combine the butter and granulated sugar in the bowl of a large stand mixer fitted with a paddle attachment. Mix the butter and sugar together at medium speed for 2-3 minutes until light and fluffy.
- Turn the mixer to low, add the egg and vanilla extract, and mix until well-incorporated.
- With the mixer stil on low speed, slowly add the flour and mix until just a few streaks of flour remain. Stop the mixer, and finish scraping down the bottom and sides of the bowl with a rubber spatula. The dough should be soft and supple but not sticky.
- Divide the dough into 3 equal parts. If you have a kitchen scale, each portion should be approximately 10 ounces.
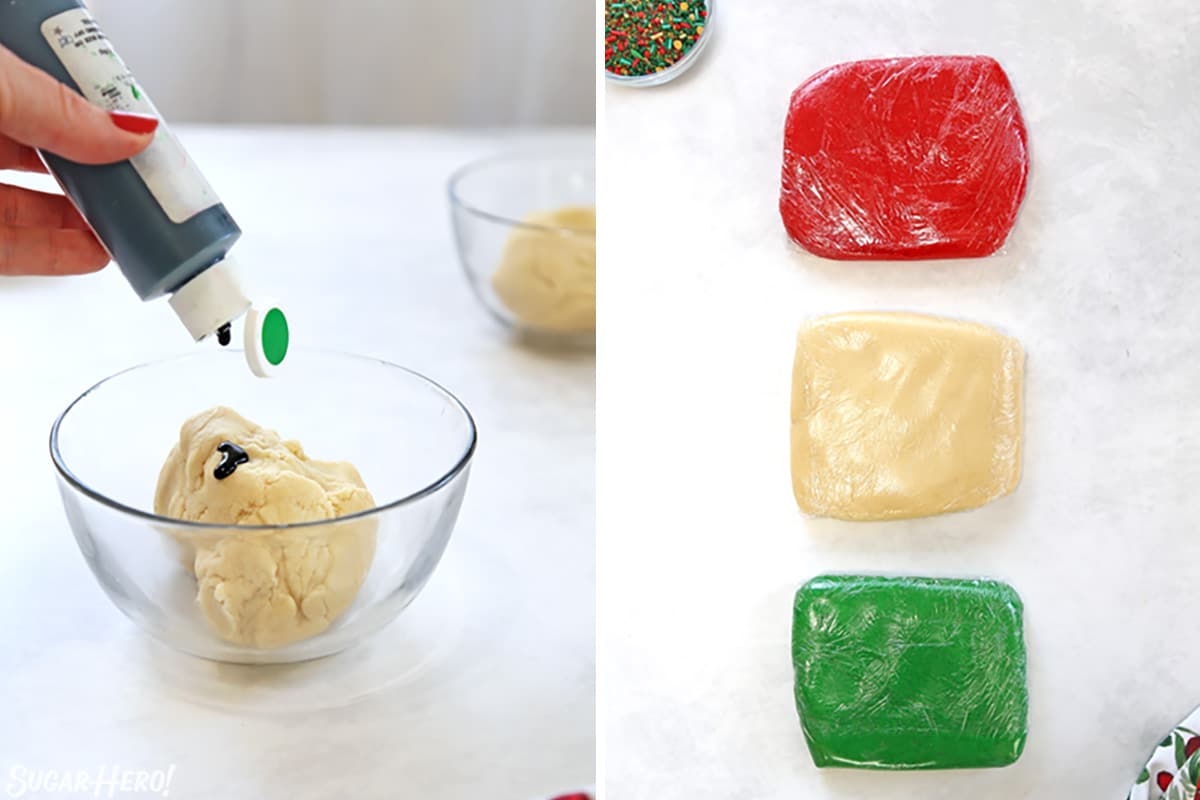
- Leave one portion uncolored, and use gel food coloring to color the other two portions red and green. You can stir the food coloring in by hand, knead it in like bread dough, or mix it in using the mixer. (If you use the mixer, keep a close eye on the dough and run it for a short time so the dough doesn’t get overmixed and tough.)
- Form each color into a disc and wrap them tightly in plastic wrap. Refrigerate for at least 45 minutes, until firm.
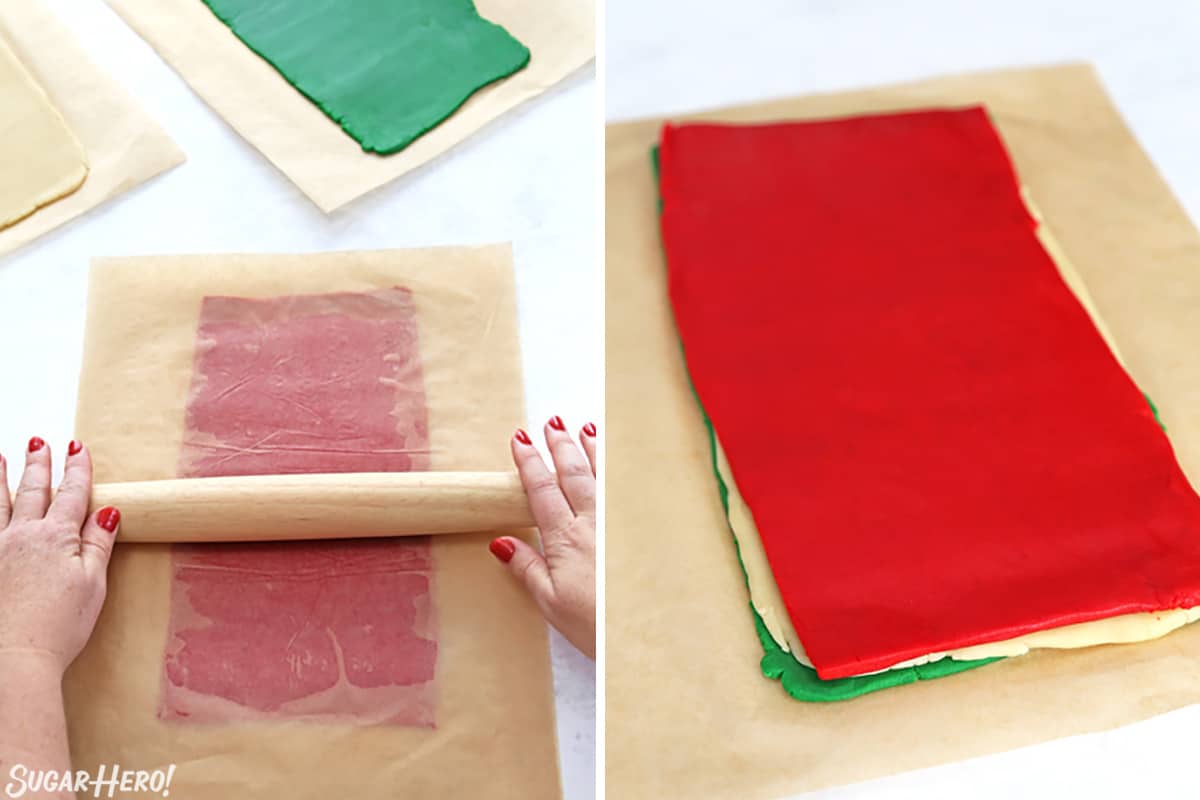
- Roll each color out between two sheets of parchment to a long rectangle, approximately 6 x 13” long. Try to avoid adding additional flour at this step, or else the cookies might be tough. If the dough starts to feel too soft to work with at any point in the rolling/stacking process, chill it again in the refrigerator until you can work with it easily.
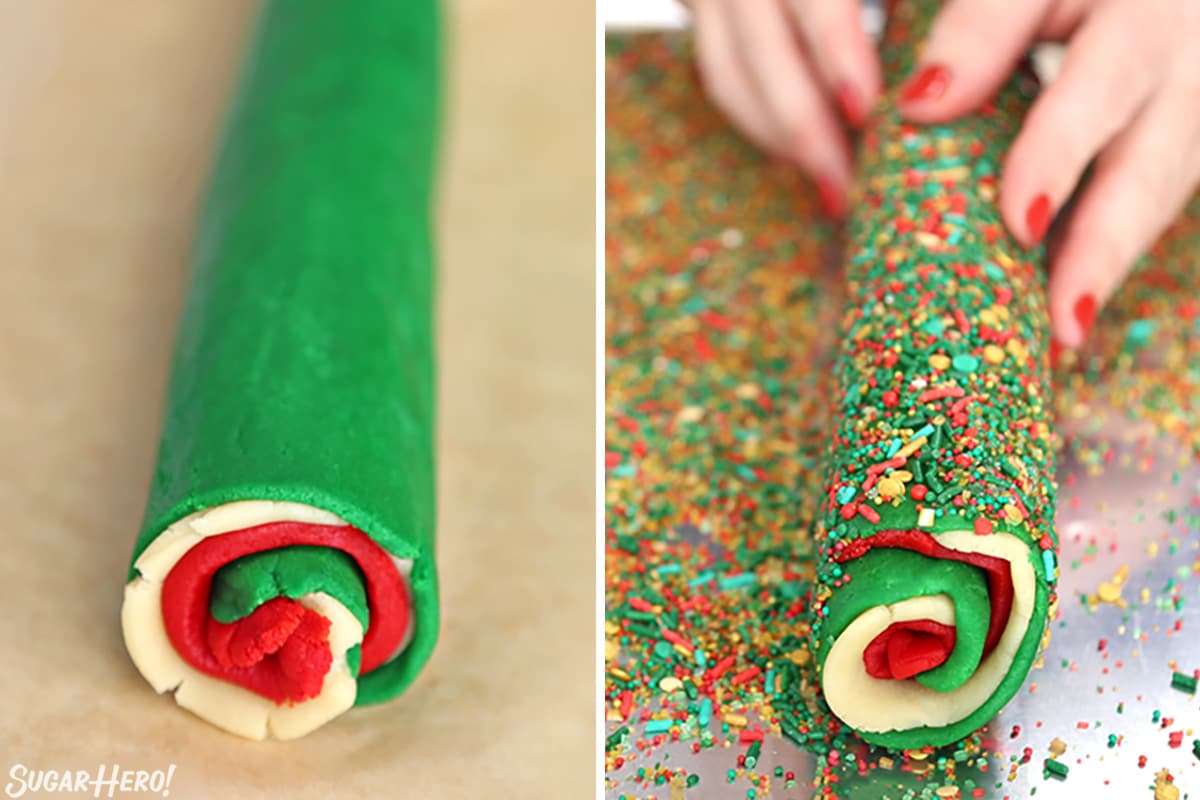
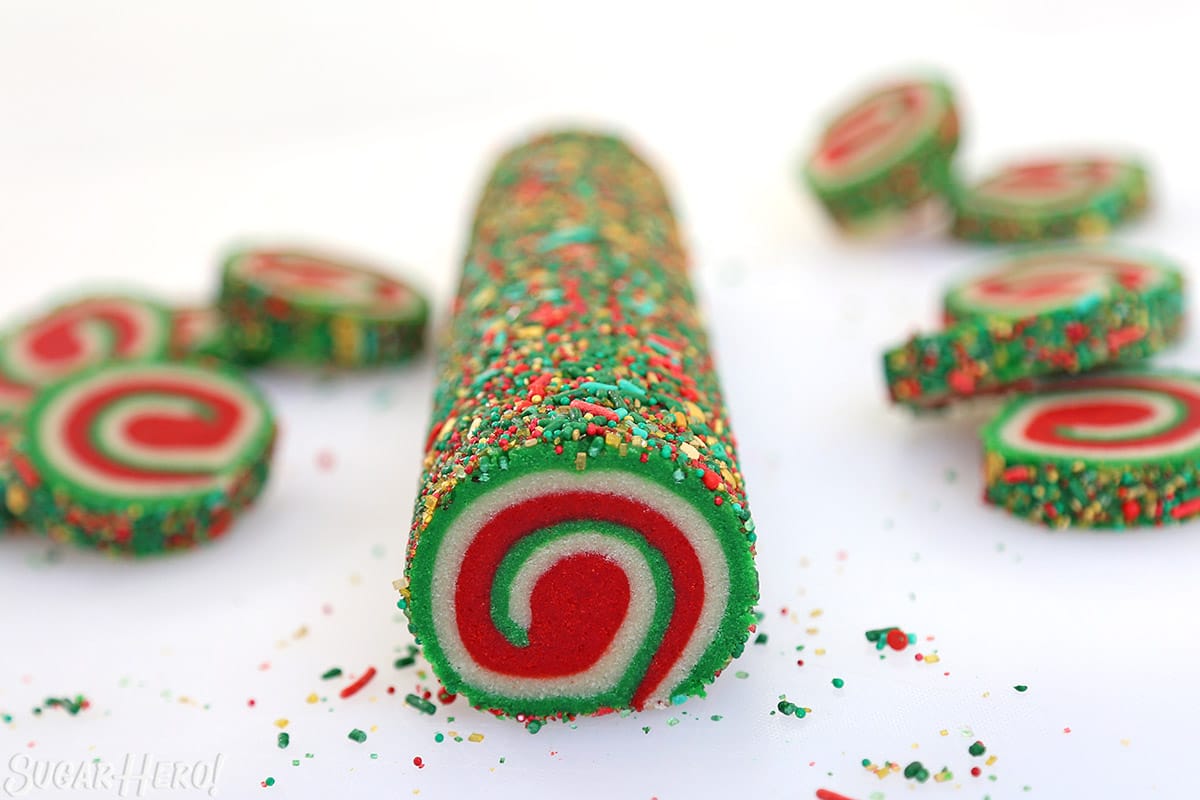
- Stack the dough rectangles on top of each other in this order: green, white, then red on top. Roll the dough up into a long, tight spiral.
- To roll the edges in sprinkles, brush the outside of the dough log with a very thin layer of corn syrup – you just want enough to make the sprinkles stick. Scatter the sprinkles on a baking sheet, and roll the log around the sprinkles, pressing it into the sprinkles so they adhere and it is completely covered. You can also skip this step and leave the edges plain.
- Wrap the dough log in plastic wrap, and refrigerate for at least 45 minutes, or until firm.
- Preheat the oven to 350 F, and cover 2 baking sheets with parchment.
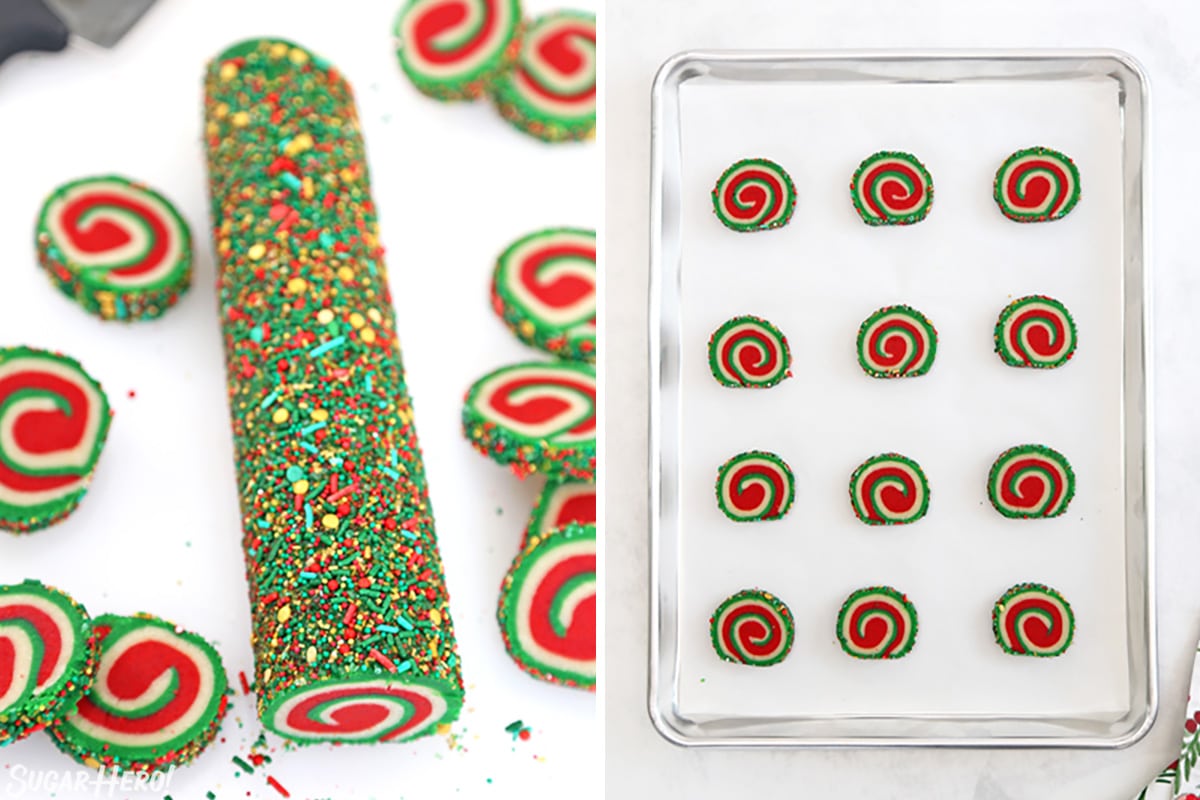
- Use a large, sharp chef’s knife to slice the log into rounds a little under ½” thick. (You can do thinner, ¼” rounds for a larger yield.) Place them on the baking sheets with a few inches between each cookie.
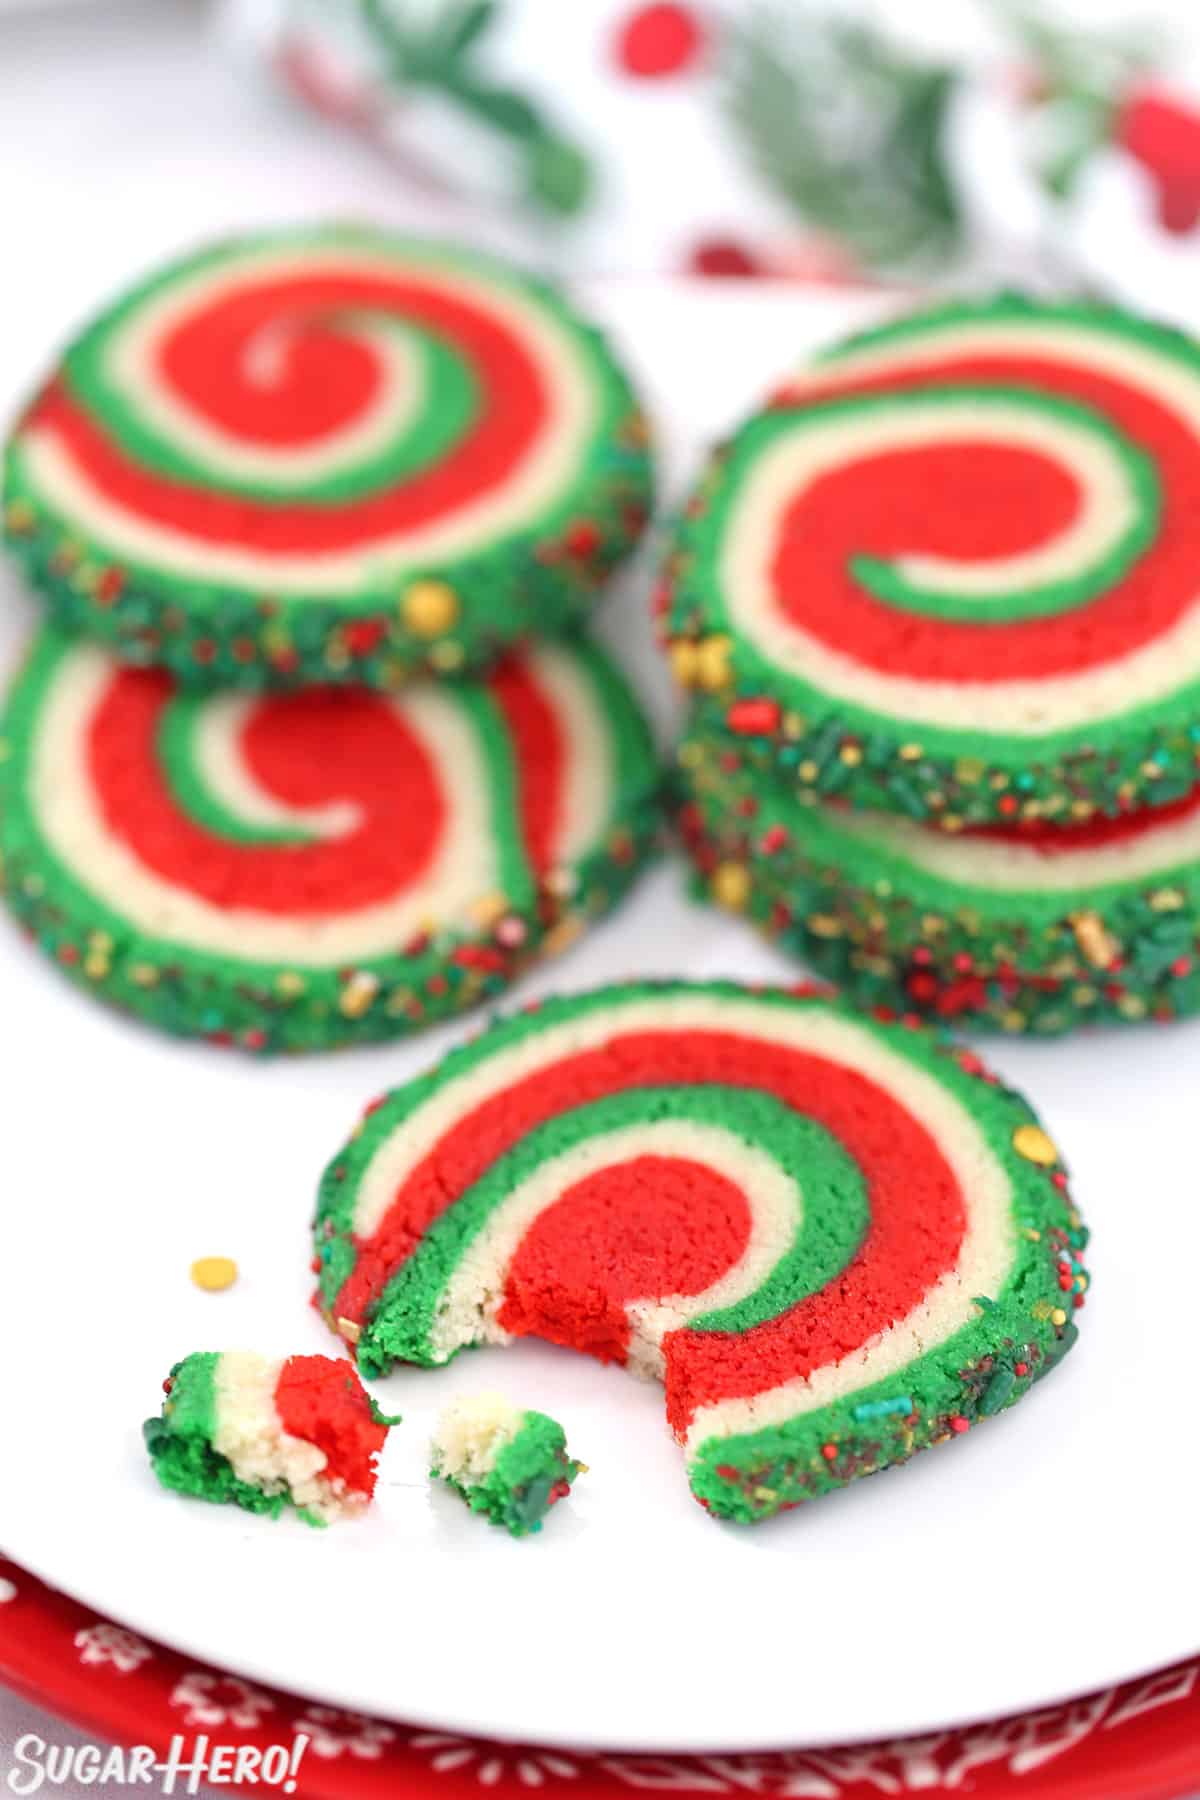
- Bake the cookies for 13-15 minutes, until they have spread and puffed, and no longer have a raw shine in the center. They will continue to cook for a few minutes after they’re out of the oven, so don’t wait until they feel firm in the center or they will be overcooked. The perfect pinwheel cookie is crunchy around the edges and soft and tender on the inside!
- Once cool, remove from the baking sheets and enjoy! Pinwheel cookies can be stored in an airtight container at room temperature and should be enjoyed within 4-5 days for maximum freshness. Unbaked cookies can be frozen, well-wrapped, for up to 3 months.
Video
Measuring Tips
Our recipes are developed using weight measurements, and we highly recommend using a kitchen scale for baking whenever possible. However, if you prefer to use cups, volume measurements are provided as well. PLEASE NOTE: the adage “8 oz = 1 cup” is NOT true when speaking about weight, so don’t be concerned if the measurements don’t fit this formula.
Want to learn more about baking measurements and conversion?
Nutrition
Don’t miss the step-by-step tutorial showing how to make Pinwheel Cookies – check out the web story here!
📋 Instructions
Here’s a quick photo overview showing how to make Christmas Pinwheel Cookies. Grab the full printable instructions in the recipe card down below!
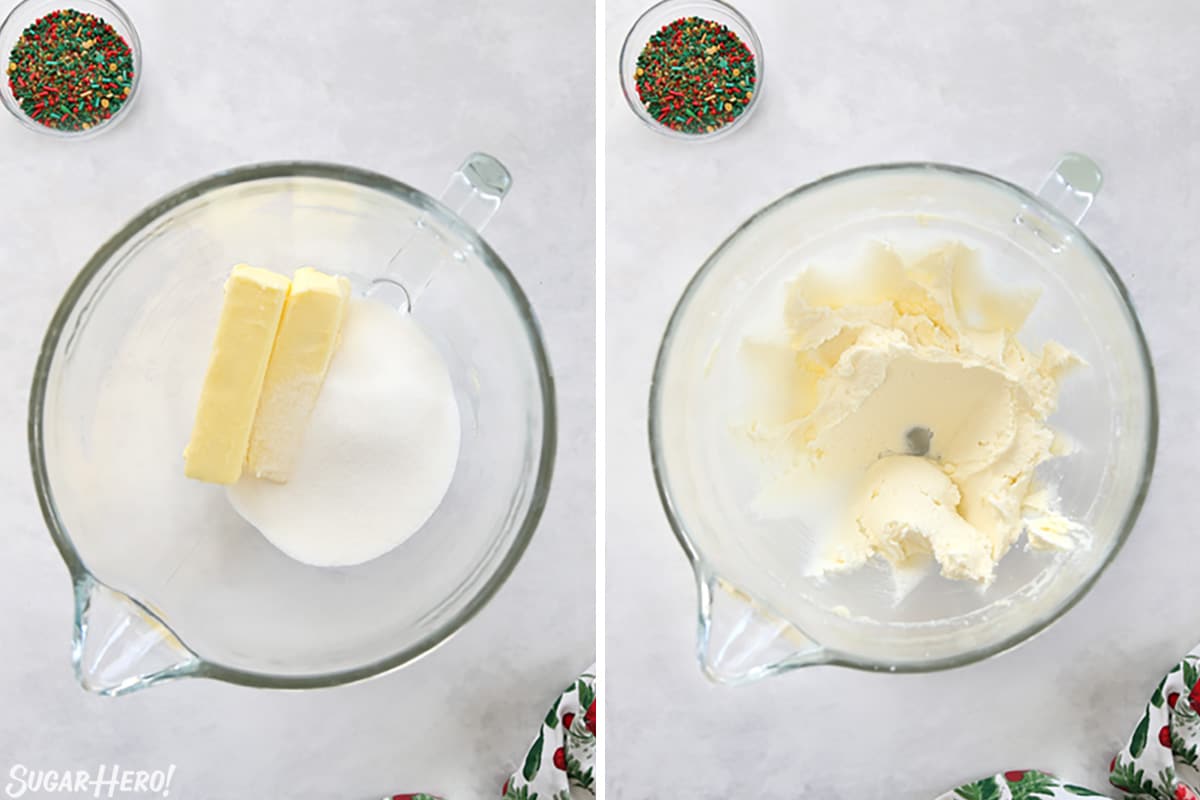
Make the sugar cookie dough
- Combine the room temperature butter and sugar in the bowl of a large stand mixer, or use a hand mixer and a large mixing bowl.
- Beat the butter and sugar together with a paddle attachment at medium speed for 2-3 minutes, until light and fluffy.
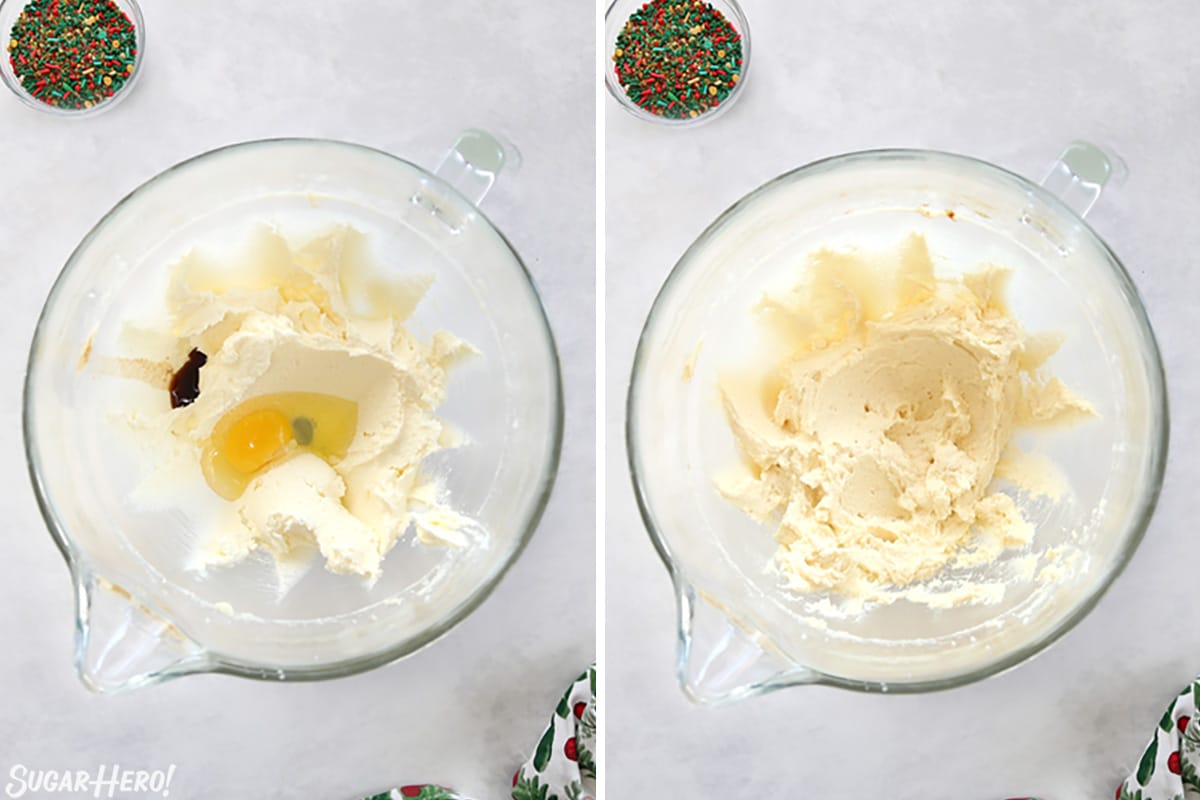
- Add a large egg and vanilla extract (or other flavoring) to the mixing bowl.
- Mix on medium-low speed until the egg is completely incorporated.
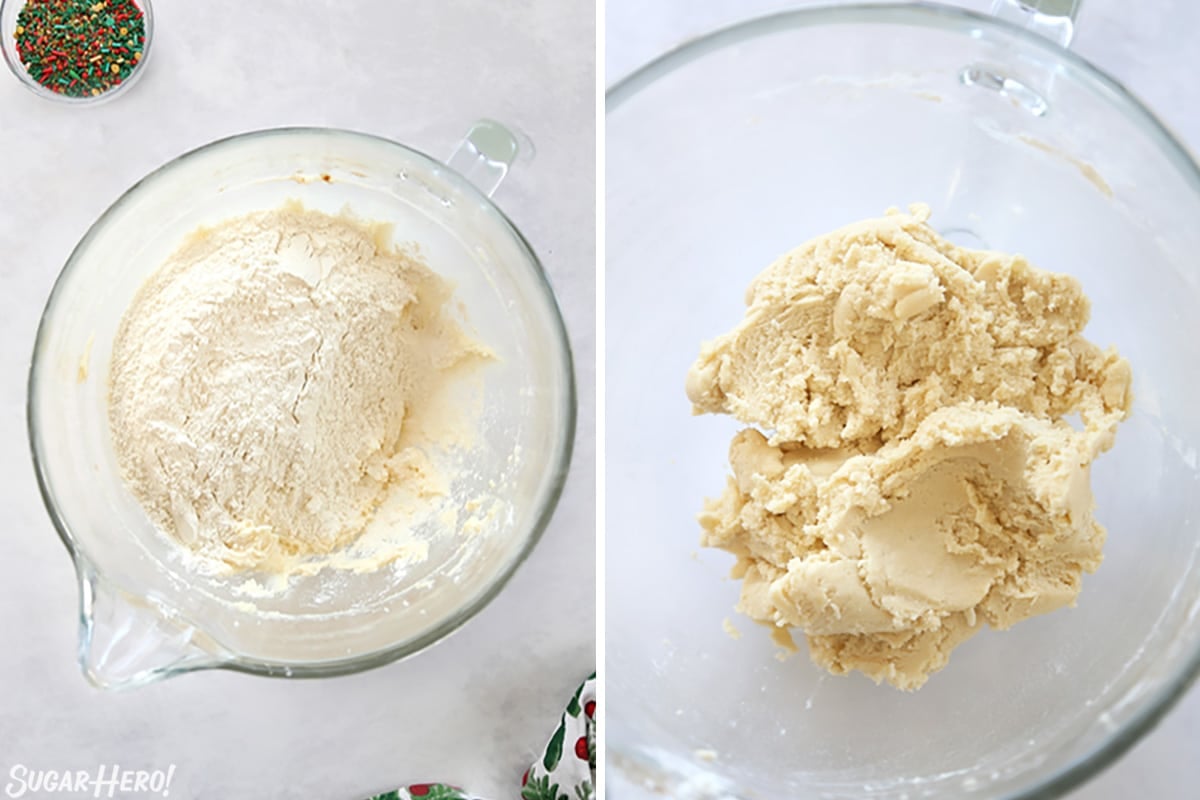
- Add flour, baking powder, and salt to the mixing bowl.
- Mix on low speed until just a few streaks of flour remain. At this point, stop the mixer and finish by hand, using a spatula to scrape the bottom and sides of the bowl.
Divide and color the cookie dough
- Divide the dough evenly into three portions. If you have a kitchen scale, each portion should be about 10 oz. Leave one part of dough plain, and color the remaining parts red and green. You can do this by hand, either stirring the food coloring in or kneading it in. You can also use a mixer, but if you do, only mix for a short period of time so the dough doesn’t become over-mixed and tough.
- Form each portion of dough into a disc and wrap well with plastic wrap. Refrigerate for at least 45 minutes, until cool and firm.
Roll out and stack the pinwheel cookie dough
- Roll out each color of dough between two sheets of parchment paper. Try to avoid using extra flour in this step, because too much flour can make the cookies tough. Roll each piece into a rectangle approximately 6.5″ x 13″.
- Stack the rectangles on top of each other in this order: green on bottom, then white, then red on top.
Roll and sprinkle the pinwheel dough
- Roll the dough up tightly into a long, spiral log. You can use the parchment underneath to help roll the cookie dough around itself.
- The sprinkle coating is optional (but gorgeous!). If you want to add sprinkles, brush the outside of the dough lightly with watered-down corn syrup–just enough to help the sprinkles stick.
- Scatter sprinkles on a baking sheet, and roll the dough log over the sprinkles until the outside is completely covered.
- Wrap the log in plastic wrap, and refrigerate again for at least 45 minutes, until firm.
Slice and bake the cookies
- Use a large sharp knife to cut rounds out of the cookie dough log. I like making my cookies just under 1/2″ thick, which results in about 30 3-inch wide cookies. If you cut thinner rounds, you’ll get a larger yield, and your cookies will be a bit smaller. You might also want to adjust the baking time since they’ll probably be done sooner.
- Place the cookies on parchment-covered baking sheets, and bake at 350 F for 13-15 minutes. They’re done when the cookies are puffed and have spread, and have lost the raw shine in the center.
- Let them cool, then enjoy!
💭 Variations
Christmas-themed pinwheel cookies are just the beginning! Mix it up and try one of these ideas:
- Change up the colors you use–consider a simple black-and-white swirl for Halloween, or a vibrant 5-color rainbow swirl for St. Patrick’s Day or Pride month.
- Instead of sprinkles, roll the cookies in finely chopped nuts or toasted coconut. You can also bake them without rolling the edges in anything!
- Mix up the flavorings–add some almond in addition to the vanilla (start with 1/2 tsp and add more to taste), or swap in coconut instead. Or, add some lemon or orange zest and extract to make citrus pinwheels.
- Make a chocolate variation: follow this recipe to add a chocolate swirl to your cookies.
- Feeling ambitious? Embed shapes in your cookies like in this Stars and Stripes Sugar Cookies.
💡 Tips for Pinwheel Cookies
Here are some of the most common questions people have had when making pinwheel cookies:
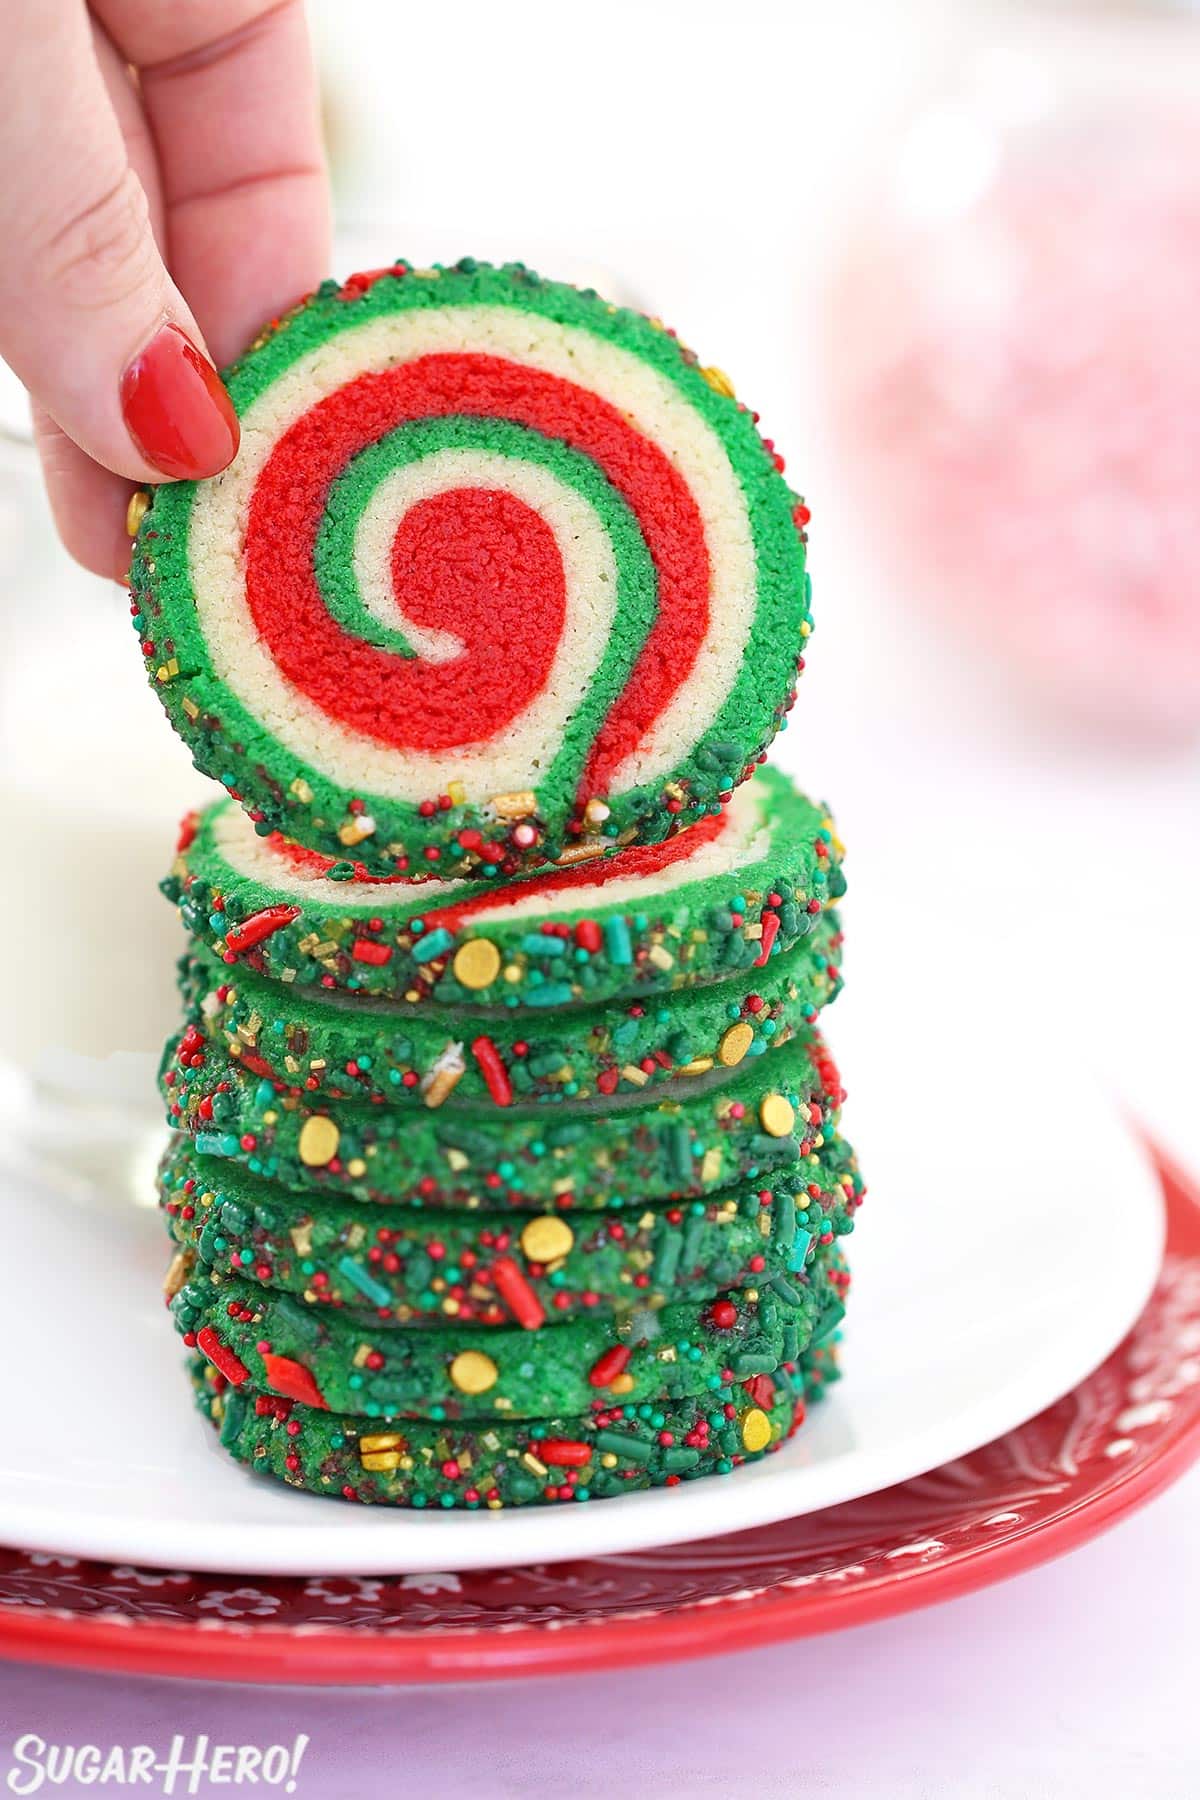
Many common sprinkle types will work for pinwheel cookies. You can use just 1 type of sprinkle, or a mix of multiple types–I like to make my own mixes by combining different sprinkles I own, so that my cookies have a variety of colors, shapes, and textures around the edges.
Sprinkles that work well include: jimmies, nonpareils, sparkling sugar, sanding sugar, sequins, confetti/quins, and edible metallic glitter shapes. Sprinkles to avoid include: anything with chocolate (like Sixlets), anything made of hard candy (like candy cane pieces), anything too large (like some sugar pearls), or any royal icing pieces. If you aren’t sure if your sprinkles will work, you can always bake a test cookie using some dough scraps and see how they do!
Yes! As long as you stick to the sprinkle types mentioned above, you should be fine. Some of them will probably bleed or melt a little, but you’ll still get the sparkling sprinkle effect. (This is also why I like using sprinkle mixes, because even if some melt, others will most likely be fine.) And of course, you can always skip the sprinkles entirely!
Here are my top tips for making sure the cookies look round when you bake them.
1. After wrapping the cookie dough log in plastic wrap, roll it until it seems nice and round before putting it in the fridge to chill.
2. If the cookie log develops a flat spot after removing it from the fridge, you can also do a little more rolling before cutting it.
3. Make sure that the cookie log is quite cold when you start to slice it. If it isn’t well chilled the pressure of cutting with a knife can warp the shape of the cookies.
4. And, if despite your best efforts you still have a few wonky cookies, you can always do a little last minute shaping by hand. Just gently press them into a round shape as you place them on the cookie sheet.
I can’t guarantee it will work with your favorite recipe, but I can tell you that it is pretty flexible and forgiving! If you have a sugar/rolled cookie recipe that’s medium textured–meaning not too dry/stiff, and not extremely soft/sticky, then odds are good you can use this technique. If you do try other recipes, please come back and let us know how it goes!
Pinwheel cookies can be stored in an airtight container at room temperature and should be enjoyed within 4-5 days for maximum freshness.
If you want to make the dough in advance, you have a few options. You can freeze the whole rolled cookie log, wrapped well, for up to 3 months. I recommend letting it defrost in the refrigerator overnight, then adding the sprinkle layer, slicing, and baking as directed.
You can also freeze individual unbaked cookie slices. I don’t recommend adding sprinkles if you are planning on freezing unbaked cookies, since many sprinkles will bleed color due to condensation. Freeze the sliced cookies in single layers in an airtight container or freezer zip-top bags for up to 3 months. To bake, let the frozen cookies sit at room temperature while the oven preheats, then add a few extra minutes to the baking time to make sure they’re baked all the way through.
Finally, you can freeze baked cookies to eat later. Make sure to wrap them tightly and place them in a freezer safe container/storage bag to prevent freezer burn. For the best taste, thaw at room temperature, and enjoy the cookies within 3 months of their freeze date.
❤️ Must-Make Christmas Cookies
- Big Soft Sugar Cookies
- Candy Cane Cookies
- Gingerbread Cookie Mug Toppers
- Chocolate Truffle Peppermint Crunch Cookies
- Soft Chocolate Gingerbread Cookies
- Gingerbread Chocolate Chip Cookies
- Edible Christmas Cookie Boxes
- Pecan Snowball Cookies



















I’m so excited to try these pinwheel cookies! I can’t find the one I used last year, but that’s probably for the best, it was such a mess. Thanks for sharing, my grandkids are going to love these!!!
Hi, making these today. Are these soft & chewy? If not, can you give me a tip on how to make them soft & chewy? Sensitive teeth lol
Hello Nat! The interior of these cookies is soft, but they do get crunchy around the edges. To help with tooth sensitivity, I’d recommend omitting the sprinkles. Those are the crunchiest part! Start checking for doneness 2-3 minutes earlier than the recipe recommends. And, you might want to make a test batch with 1-2 cookies on the sheet so that you can figure out the optimal cook time for your baking sheet before making the rest of your cookies. I hope that helps. Good luck!
These turned out beautifully, and tasted just as good as they looked!
Will margarine work in place of butter?
Hi Jody. I’ve never tried making it with margarine, but if you decide to try it, I’d love to know how it turns out. Good luck!
Made this cookie last night. Just need to work on rolling dough to make better rounder. Absolutely delicious. Thank you for sharing. Happy holidays.
Happy Holidays to you Sandy! So glad you go to try them!
Made these for Christmas gifts. And out of all the cookies i baked this was my favorite! So satisfying seeing the colors every slice
Sofia I’m thrilled to hear that you loved the cookies! Thanks for letting us know how they turned out for you. 🙂
Can these be frozen after being baked?
No one answered if these cookies can be frozen after baking. Can they?
Hi Viviane! I’m sorry if we missed your question. You can freeze baked cookies to eat later. Make sure to wrap them tightly and place them in a freezer safe container/storage bag to prevent freezer burn. For the best taste, thaw at room temperature, and enjoy the cookies within 3 months of their freeze date. I hope that helps. All the best.
Love this recipe! Did a trial run because i’m going to make them for my works cookie exchange. They are so yummy! Mine didn’t turn out as round though, do I just need to roll the dough more after I roll all the colors together?
Hi Sydni! After rolling the cookie dough log in plastic wrap, roll it until it seems nice and round before putting it in the fridge. You can also do a little more rolling after pulling it out of the fridge if it has developed a flat spot. It also helps to cut the cookies when they are quite cold. If they aren’t well chilled the pressure of cutting with a knife can warp the shape of the cookies. And, you can always do a little last minute shaping by hand if any of the cookies seem a little wonky. Just gently press them into a round shape as you place them on the cookie sheet. I hope that helps!
Did anyone else find their dough was too sticky? 🙁
Followed the recipe exactly & it was just a sticky mess
I ended up completely changing it after mixing the flour mixture in & doing cookies where the dough had to be dropped from the spoon.
I wonder what I did wrong? Any suggestions?
The photos look amazing & I was excited to bake these with my little boy 🙁
Hi Tammy. I’m sorry your recipe didn’t turn out. That really is a disappointment. Let’s see if we can troubleshoot. Did you measure your flour and butter with a scale or with cup measurements? It sounds to me like you either had too much butter or not enough flour in the dough. Often that happens accidentally when using cup measurements. If you’ve got a scale, I’d highly recommend weighing the ingredients and giving the recipe a 2nd chance. If you did weigh your ingredients the first time, let me know and we can keep troubleshooting. Thanks!
How far in advance could you make these? Couple of days maybe?
I’ve made these before and I know myself well enough to know the chilling time is super important and I never stick to it!!
Hi Catherine. Thanks for reaching out with your questions. You can definitely make these in advace. Here’s what you need to know:
If you want to make the dough in advance, you have a few options. You can freeze the whole rolled cookie log, wrapped well, for up to 3 months. We recommend letting it defrost in the refrigerator overnight, then adding the sprinkle layer, slicing, and baking as directed.
You can also freeze individual unbaked cookie slices. We don’t recommend adding sprinkles if you are planning on freezing unbaked cookies, since many sprinkles will bleed color due to condensation. Freeze the sliced cookies in single layers in an airtight container or freezer zip-top bags for up to 3 months. To bake, let the frozen cookies sit at room temperature while the oven preheats, then add a few extra minutes to the baking time to make sure they’re baked all the way through.
And, if you ever need to access this info in the future, you can also find it in the tip section of the blog post under Make Ahead Information. Happy baking!