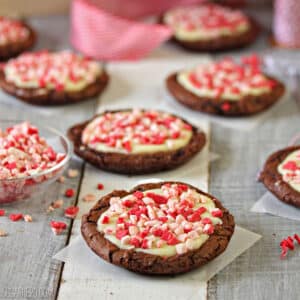
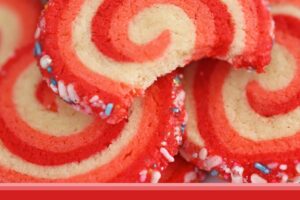


Peppermint Pinwheel Cookies are colorful sugar cookies with a minty twist! Pink and red sugar cookie dough is spiraled together to make beautiful, festive cookies that are perfect for Christmas, Valentine’s Day, or any special occasion.

🍬 Slice and Bake Peppermint Cookies
Are you ready to take your sugar cookie game to the next level? These Peppermint Pinwheel Cookies are guaranteed to make you feel like a kitchen wizard. Don’t let the gorgeous red, pink and white swirls fool you–these cookies are basically a sugar cookie with a festive holiday glow-up that is perfect for Christmas and Valentine’s Day.
These slice and bake pinwheel cookies start with a simple 5-minute cookie dough, and from there you’ll roll, layer, cover in sprinkles and start slicing. Before you know it you’ll be basking in compliments, because these cookies not only look incredibly cool but taste delicious — like a buttery sugar cookie with a light mint flavor–just the way a peppermint pinwheel cookie should!
Table of Contents
🧾What You’ll Need

Ingredients
Ready to get started? Take a look at these ingredient tips as you gather what you’ll need. (Links are affiliate links and I earn a small commission from qualifying purchases.)
- Flour: For the base of the dough, use all-purpose flour. Make sure to measure the flour correctly so that the dough doesn’t become overly dense. If possible, I highly recommend using a kitchen scale.
- Baking powder: Helps the cookies rise and gives them chewy texture.
- Unsalted butter and salt: To prevent overmixing, use softened room temperature butter. It will be so much easier to mix into the other ingredients. I like to use unsalted butter and a little bit of salt, but if you only have salted butter, just leave out the additional salt.
- Sugar: As with the flour, it’s important to measure the granulated sugar properly. Using a kitchen scale will give you the most accurate measurements.
- Egg: Use a large, room temperature egg (not medium or extra large). It’ll need about 30 minutes on to warm up on the counter before getting started.
- Peppermint extract: For the best flavor, use a high quality extract. I love LorAnn’s peppermint extract.
- Gel food coloring: If you want vibrant colored dough, use gel food coloring. You’ll only need a little product to make beautiful shades. I like Americolor gel food coloring, and I used Super Red and Electric Pink.
- Sprinkles: The sprinkles are totally optional but totally fun! Pick a sprinkle mix that matches the holiday or special occasion you are celebrating to make them extra festive.
- Corn syrup: Although not technically an ingredient for the cookies, corn syrup is extremely helpful if you plan to roll the cookie log in sprinkles before slicing and baking.

Equipment
Having the right tools can make all the difference in the world when you’re baking. Here’s what I recommend for making these Peppermint Pinwheel Cookies. (Links are affiliate links and I earn a small commission from qualifying purchases.)
- Mixer: Mixing the cookie dough will be significantly easier in a stand mixer fitted with a paddle attachement. However, you can also use a hand mixer.
- Plastic wrap: After making and coloring the dough, it will need to firm up in the fridge. Use plastic wrap to keep the dough from drying out.
- Rolling pin: Use a rolling pin to roll the dough to the correct thickness and make each layer nice and smooth.
- Parchment paper: I like to place the chilled dough between two pieces of parchment paper when it’s time to roll it out. Using parchment paper prevents the dough from sticking without adding more flour, which could potentially make the cookies dense and dry.
- Baking sheets: Use an aluminum, light-colored, non-insulated baking sheet. Don’t use insulated baking sheets or dark-colored baking sheets.

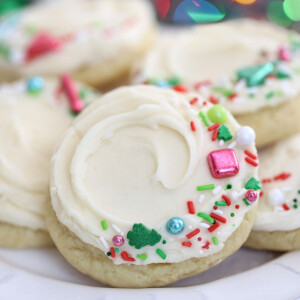
💖More Sugar Cookie Recipes
Although some of these cookies were created for specific holidays, they can be customized for any holiday by changing the colors, shapes and flavorings. Let your creativity go wild!


Leave a Review!
If you make this recipe, let us know! Leave a ⭐️⭐️⭐️⭐️⭐️ rating on the recipe below, and leave a comment, take a photo and tag me on Instagram @elabau, or use #sugarhero on IG!

Peppermint Pinwheel Cookies
Ingredients
- 12.75 oz all-purpose flour, (3 cups)
- 1 tsp baking powder
- ½ tsp salt
- 8 oz unsalted butter, (1 cup), at room temperature
- 8.75 oz granulated sugar, (1.25 cups)
- 1 large egg, at room temperature
- 2 tsp peppermint extract
- Red gel food coloring, I used Americolor gel colors
- Pink gel food coloring
- 6.75 oz sprinkles, (1 cup), optional
- Light corn syrup, for adhering the sprinkles, optional
Instructions
- Whisk together the flour, baking powder, and salt in a medium bowl, and set aside temporarily.
- Combine the butter and granulated sugar in the bowl of a large stand mixer fitted with a paddle attachment. Mix the butter and sugar together at medium speed for 2-3 minutes until light and fluffy.
- Turn the mixer to low, add the egg and peppermint extract, and mix until well-incorporated.
- With the mixer still on low speed, slowly add the flour and mix until just a few streaks of flour remain. Stop the mixer, and finish scraping down the bottom and sides of the bowl with a rubber spatula. The dough should be soft and supple but not sticky.
- Divide the dough into 3 equal parts. If you have a kitchen scale, each portion should be approximately 10 ounces.
- Leave one portion uncolored, and use gel food coloring to color the other two portions red and pink. You can stir the food coloring in by hand, knead it in like bread dough, or mix it in using the mixer. (If you use the mixer, keep a close eye on the dough and run it for a short time so the dough doesn’t get overmixed and tough.)
- Form each color into a disc and wrap them tightly in plastic wrap. Refrigerate for at least 45 minutes, until firm.
- Roll each color out between two sheets of parchment into a long rectangle, approximately 6 x 13” long. Try to avoid adding additional flour at this step, or else the cookies might be tough. If the dough starts to feel too soft to work with at any point in the rolling/stacking process, chill it again in the refrigerator until you can work with it easily.
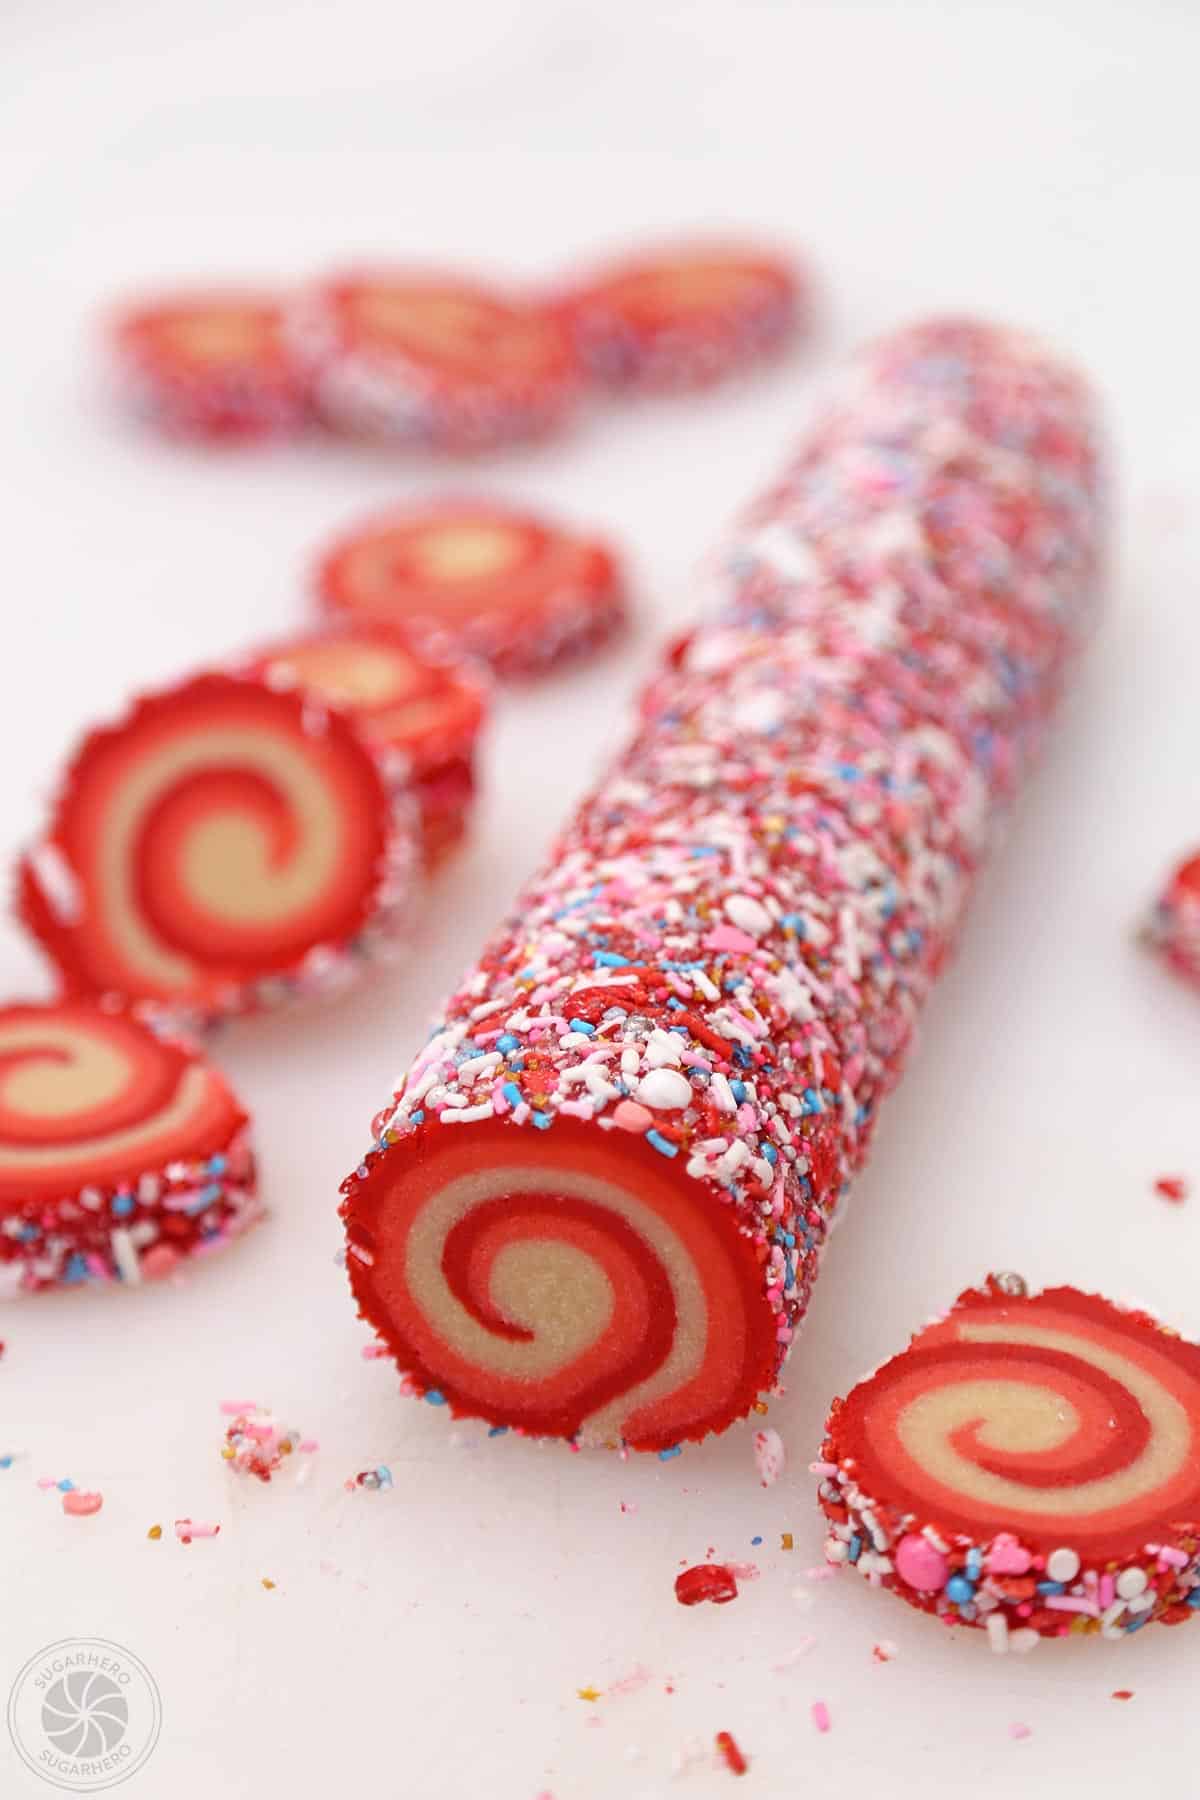
- Stack the dough rectangles on top of each other in this order: pink, white, then red on top. Roll the dough up into a long, tight spiral.
- To roll the edges in sprinkles, brush the outside of the dough log with a very thin layer of corn syrup – you just want enough to make the sprinkles stick. Scatter the sprinkles on a baking sheet, and roll the log around the sprinkles, pressing it into the sprinkles so they adhere and it is completely covered. You can also skip this step and leave the edges plain.
- Wrap the dough log in plastic wrap, and refrigerate for at least 45 minutes, or until firm.
- Preheat the oven to 350°F, and cover 2 baking sheets with parchment.
- Use a large, sharp chef’s knife to slice the log into rounds a little under ½” thick. (You can do thinner, ¼” rounds for a larger yield.) Place them on the baking sheets with a few inches between each cookie.
- Bake the cookies for 13-15 minutes, until they have spread and puffed, and no longer have a raw shine in the center. They will continue to cook for a few minutes after they’re out of the oven, so don’t wait until they feel firm in the center or they will be overcooked. The perfect pinwheel cookie is crunchy around the edges and soft and tender on the inside!
- Once cool, remove from the baking sheets and enjoy! Pinwheel cookies can be stored in an airtight container at room temperature and should be enjoyed within 4-5 days for maximum freshness. Unbaked cookies can be frozen, well-wrapped, for up to 3 months.
Measuring Tips
Our recipes are developed using weight measurements, and we highly recommend using a kitchen scale for baking whenever possible. However, if you prefer to use cups, volume measurements are provided as well. PLEASE NOTE: the adage “8 oz = 1 cup” is NOT true when speaking about weight, so don’t be concerned if the measurements don’t fit this formula.
Want to learn more about baking measurements and conversion?
Nutrition
📸Photo Tutorial: How to Make Peppermint Pinwheel Cookies
Let’s start baking! Check out this photo tutorial to guide you through every step of these slice and bake cookies. Full instructions are included in the recipe card above.


- Combine dry ingredients: Whisk together 3 cups (12.75 oz) flour, 1 teaspoon baking powder, and 1/2 teaspoon salt in a medium bowl, and set aside.
- Cream butter and sugar: In the bowl of a stand mixer, combine 1 cup (8 oz) softened butter and 1 1/4 cups (8.75 oz) granulated sugar. Mix on medium speed until light and fluffy (about 2-3 minutes).


- Add egg and extract. Turn the mixer to low, add the large egg and 2 teaspoons peppermint extract, and mix until well-incorporated.


- Combine wet and dry mixtures: With the mixer still on low speed, slowly add the dry ingredients and mix until just a few streaks of flour remain. Then, stop the mixer, scrape the bottom and sides of the bowl and finish mixing the soft (but not sticky) dough by hand.


- Divide dough: Place 3 equal amounts of dough (about 10 ounces each) into small bowls.
- Color dough: Use gel food coloring to color one portion red and one portion pink. Leave the remaining portion uncolored. For best results, stir the food coloring in by hand or incorporate the coloring by kneading the mixture like bread dough.
- Chill dough: Form each color into a disc and wrap them tightly in plastic wrap. Refrigerate for at least 45 minutes, until firm.
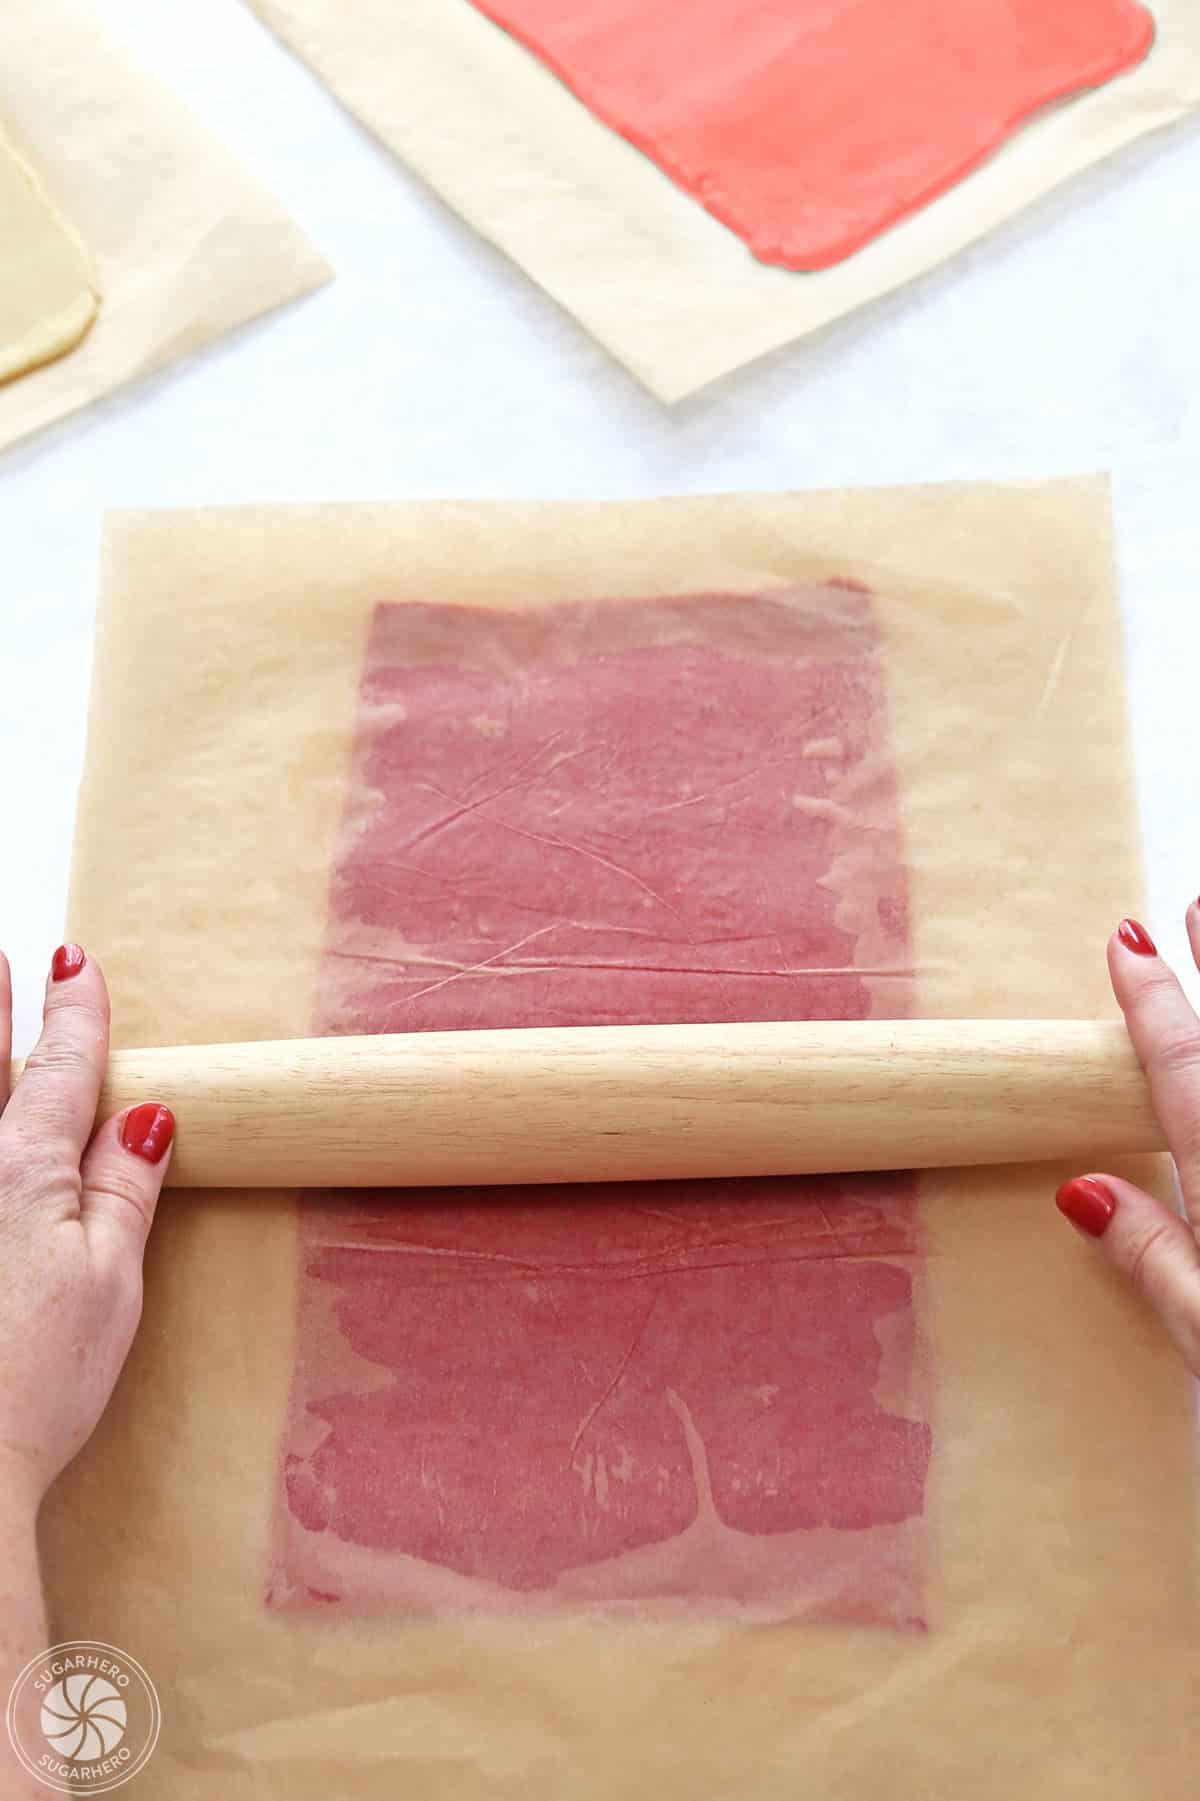

- Roll into rectangles: Place each color of dough between two sheets of parchment paper and roll them into long rectangles, approximately 6 x 13” long each. If the dough gets to soft and starts to stick at any point in the rolling/stacking process, chill it again in the refrigerator until you can work with it easily.


- Stack colored dough: Stack the dough rectangles on top of each other in this order: red, pink, and then white on top. Roll the dough over itself into a long, tight spiral.
- Roll in sprinkles, optional: If desired, scatter the sprinkles on a baking sheet and brush the outside of the dough log with a very thin layer of corn syrup – just enough to make the sprinkles stick. Roll the log in the sprinkles, pressing so the sprinkles stick and the log is fully covered.
- Chill: Wrap the dough log in plastic wrap, and refrigerate for at least 45 minutes, or until firm.

- Prepare to bake: Preheat the oven to 350°F, and cover 2 baking sheets with parchment.
- Slice: Use a large, sharp chef’s knife to slice the log into rounds a little under ½” thick and place them a few inches apart on the baking sheets.
- Bake: Bake until the cookies have spread, puffed, and lost the raw shine in the center (about 13-15 minutes.
- Cool: Remove from the oven and let the cookies cool on the baking sheet and set. Once cool, remove from the baking sheets and enjoy!
💭Variations
Colorful swirled pinwheel cookies are just the beginning! Mix it up and try one of these ideas:
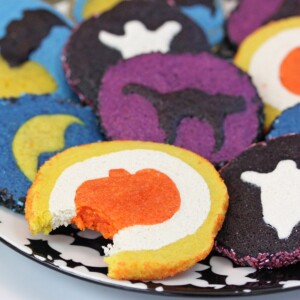
- Feeling ambitious? Embed shapes in your cookies like in this Stars and Stripes Sugar Cookies.
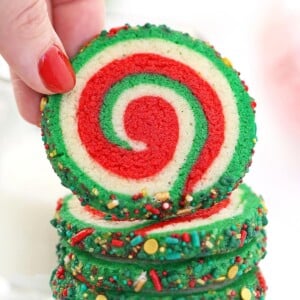
- Change up the colors you use–consider a simple black-and-white swirl for Halloween, or a vibrant 5-color rainbow swirl for St. Patrick’s Day or Pride month.
- Instead of sprinkles, roll the cookies in finely chopped nuts or toasted coconut. You can also bake them without rolling the edges in anything!
- Mix up the flavorings–add some almond in addition to the vanilla (start with 1/2 tsp and add more to taste), or swap in coconut instead. Or, add some lemon or orange zest and extract to make citrus pinwheels.
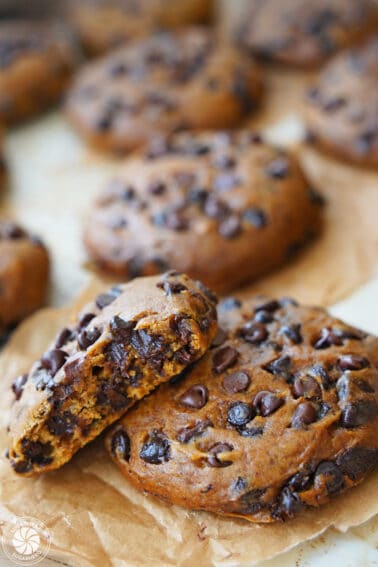
- Make a chocolate variation: follow this recipe to add a chocolate swirl to your cookies.

💡 Tips For Cookie Baking Success
Here are our top baking tips for making the most amazing cookies:
- Follow the recipe exactly. If you make substitutions, or skip steps, or change the method, I can’t guarantee your results. This includes making sure your ingredients are the right temperature, that you’re using the right equipment, and that you’re paying attention to mixing and baking times.
- Don’t overmix the dough. A common mistake when making cookies is overmixing the dough. If you continue mixing after the ingredients are combined, the gluten in the flour will become over-actived, and you’ll end up with tough, dense cookies.
- Measure with precision. Either use a kitchen scale (the best!), or be attentive when using measuring cups and spoons, especially when it comes to flour. Measure your flour by spooning flour into your measuring cup, then use the back of a knife to level off the top of the cup. This method is better and more precise than just dipping your measuring cup in the flour bin to fill it. When you dip your cup in to fill it, the flour gets compacted and you end up with more flour per cup than the recipe calls for. More flour = dry cookies that don’t spread.
- Cream the butter and sugar. There’s more to creaming butter and sugar than simply mixing them together. It will take about 2-3 minutes to fully cream the mixture. You’re looking for visible changes in color and texture; the color should be lighter and the texture should look fluffy. Under-creaming = cookies that don’t spread and have a coarse texture. Over-creaming = cookies that are too flat.
- Use the right baking surface. To bake the cookies, line an aluminum, light-colored, non-insulated baking sheet with parchment paper. Don’t grease the parchment or pan, and don’t use insulated baking sheets or dark-colored baking sheets.
💡Troubleshooting FAQS
If your cookies spread too much and are too flat, the most common reasons are:
– the butter and sugar were creamed together for too long
– your baking soda is old and not as effective
– not enough flour was used
– insulated baking sheet was used
– oven runs cool (temperature not high enough)
Check my equipment recommendations and puffy cookie tips, and also consider chilling the dough before baking for extra insurance.
If your cookies didn’t spread after baking, or have a lumpy or coarse texture, the most common reasons are:
– the butter was too cold
– the butter and sugar weren’t creamed together for long enough
– too much flour was used
– dark baking sheet was used
– oven was too hot
It is important that any refrigerated ingredients be at room temperature before beginning, and that you cream the butter and sugar together for several minutes, until light and fluffy. Under-creaming the butter/sugar can result in a coarse cookie that doesn’t spread properly, and ingredients cream together easier when they are not cold.
Make-ahead: If you want to make the dough in advance, you have a few options. You can freeze the whole rolled cookie log, wrapped well, for up to 3 months. I recommend letting it defrost in the refrigerator overnight, then adding the sprinkle layer, slicing, and baking as directed.
You can also freeze individual unbaked cookie slices. I don’t recommend adding sprinkles if you are planning on freezing unbaked cookies, since many sprinkles will bleed color due to condensation. Freeze the sliced cookies in single layers in an airtight container or freezer zip-top bags for up to 3 months. To bake, let the frozen cookies sit at room temperature while the oven preheats, then add a few extra minutes to the baking time to make sure they’re baked all the way through.
Storage: Pinwheel cookies can be stored in an airtight container at room temperature and should be enjoyed within 4-5 days for maximum freshness. Or, you can freeze baked cookies to eat later. Make sure to wrap them tightly and place them in a freezer safe container/storage bag to prevent freezer burn. For the best taste, thaw at room temperature, and enjoy the cookies within 3 months of their freeze date.
Browse Peppermint Recipes: