
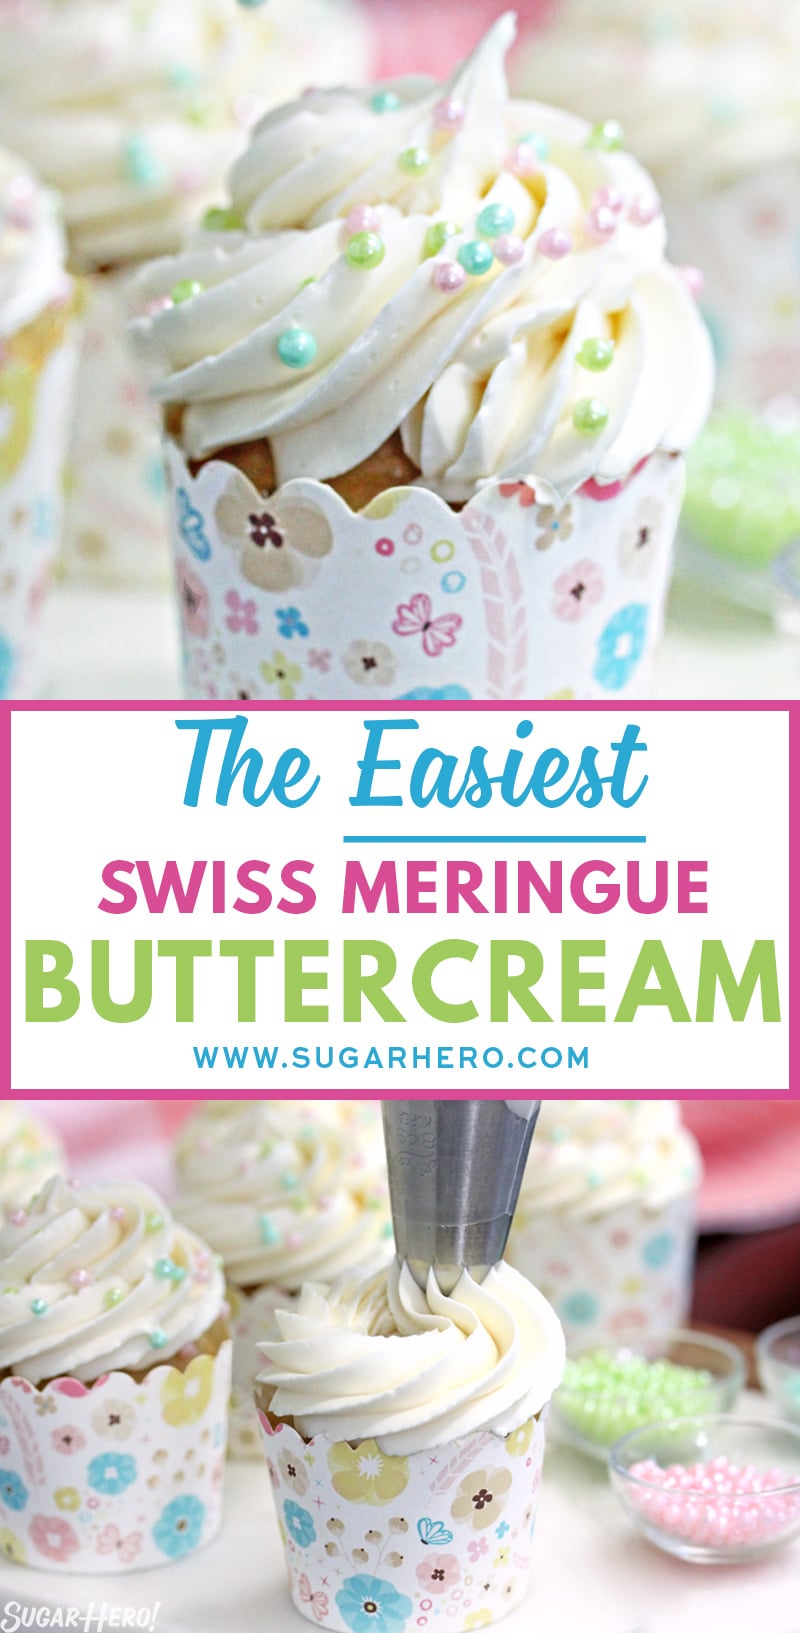
This is the Easiest Swiss Meringue Buttercream recipe you’ll ever make! Once you try it, you’ll want to use it to cover all of your cakes and cupcakes.

The Easiest Swiss Meringue Buttercream
Traditional Swiss Meringue involves heating egg whites, then lots and lots of whipping. This recipe skips the heating step entirely, and still produces a rich, smooth, ultra-creamy buttercream with the characteristic texture and taste of Swiss Meringue. It’s as easy to make as American Buttercream, but it doesn’t crust over and it isn’t teeth-shatteringly sweet. You seriously NEED to try this recipe!
Swiss Meringue Buttercream is my FAVORITE type of frosting—it tastes delicious, is a dream to work with, doesn’t crust, and isn’t overly sweet or greasy. In short, it’s almost perfect!
The only problem? It can be a big pain to make. I won’t go into all the steps—for that, you’ll want to read my post on how to make traditional Swiss Meringue Buttercream. But the point is, the whole Swiss Meringue shebang has been a necessary evil…until now. Introducing your new favorite recipe, The EASIEST Swiss Meringue Buttercream!

First things first: this is based on a frosting recipe by the amazing cake decorator Lauren Kitchens. If you want to see some real talent, check out her site! The frosting is not technically a Swiss Meringue, because the technique is different, but the ingredients and final product are so close, I have no problem calling this a lazy version of SMBC! I did a lot of tweaking and ended up with some very different ingredient quantities than the original recipe, to find the right balance of sugar + butter for my personal taste buds.
Now let’s get down to the business of buttercream.
This frosting will seriously change your decorating life. I used it as a base for almost all of my cakes. It’s easy to work with, tastes great, and doesn’t crust over. That is gold, people.
Ideas for using this buttercream recipe
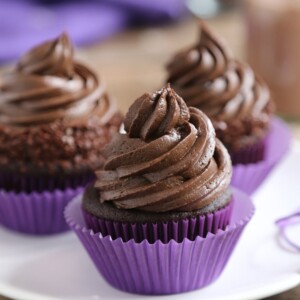
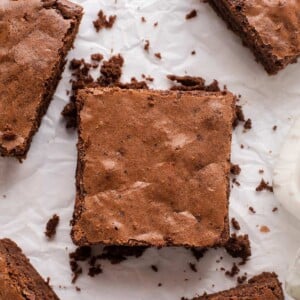
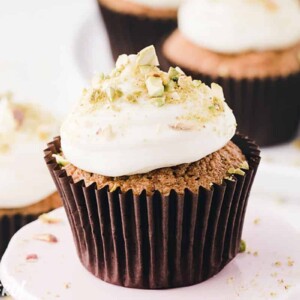
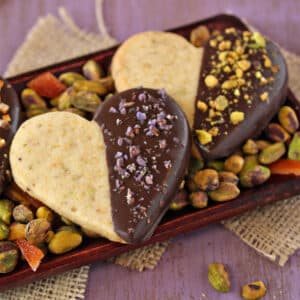
Not sure what to frost with this amazing frosting? It literally goes with almost anything! I especially like using it on cakes and cupcakes. You can make some basic Chocolate Cupcakes or Strawberry Cupcakes, and pipe a big swirl on top. Delish! Or, add a layer to your favorite basic brownies, blondies, cookie bars, or cookies to take them to the next level. And, you can use it to top sweet breads like my favorite Zucchini Bread and Banana Bread.
Table of Contents
🧾 What You’ll Need
Ingredients
This is a simple recipe and only needs a few ingredients. Here are a few ingredient tips. Full amounts can be found in the recipe cared below. (Links are affiliate links and I earn a small commission from qualifying purchases.)
- Pasteurized liquid egg whites: Use pasteurized egg whites in a carton for this recipe. See my egg white tips below to answer commonly asked questions.
- Powdered sugar: It may seem strange, but I am very picky about my powdered sugar. Some brands have too much cornstarch, or are too coarse, leading to a rough, gritty texture in frosting. This is my powdered sugar of choice! It’s made from cane sugar instead of beet sugar, and produces smooth, consistent results.
- Unsalted butter and salt: Your butter should be at room temperature. This means it’s pliable but cool–you don’t want it to be greasy and melty. I always recommend unsalted butter in baking, so you can control the precise amount of salt. If you only have salted butter, use that but omit the additional salt in the recipe.
- Vanilla extract: Nielsen-Massey Bourbon vanilla extract is my absolute FAVORITE vanilla extract! However, feel free to use your favorite vanilla extract you have at home.
Equipment
This frosting recipe requires very little to make and that’s good news for you! You’ll be on your way to enjoying delicious buttercream before you know it! (Links are affiliate links and I earn a small commission from qualifying purchases.)
- Stand mixer: A stand mixer with a paddle attachment is an absolute necessity for making smooth, creamy buttercream.
- Spatula: You’ll want a good spatula to help scrape down the sides of the bowl and ensure all the ingredients are well incorporated.
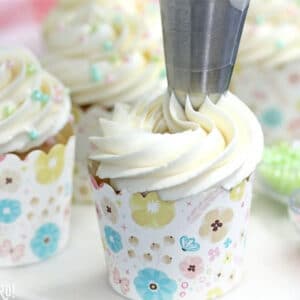
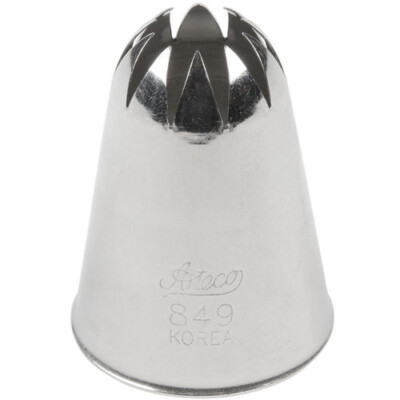
- Piping tip: I’m frequently asked what piping tip I used to make the buttercream swirls on the cupcakes picture in the post. It’s a closed star tip, Ateco #849.

Ready to Make This buttercream?
- Get the recipe below. 👇👇
- Scroll below the recipe card for step-by-step instructions (with a video!)
- Read important tips, egg white FAQs, flavoring and coloring variations, and more!
💗 More Desserts to Frost
Leave a Review!
If you make this recipe, let us know! Leave a ⭐️⭐️⭐️⭐️⭐️ rating on the recipe below, and leave a comment, take a photo and tag me on Instagram @elabau, or use #sugarhero on IG!
The EASIEST Swiss Meringue Buttercream
Ingredients
- 6 fl oz pasteurized liquid egg whites, (3/4 cup), at room temperature
- 24 oz powdered sugar, (6 cups)
- ½ tsp salt
- 24 oz unsalted butter, (3 cups), at room temperature
- 2 TBSP vanilla extract
Instructions
- Mix whites, sugar, and salt. Combine the egg whites, powdered sugar, and salt in the bowl of a large stand mixer fitted with a paddle attachment. Mix everything together on low speed, until the sugar is moistened and no dry patches remain.
- Scrape down sides, mix for 5 minutes. Turn off the mixer, scrape down the sides and bottom of the bowl with a spatula, then turn the mixer to medium speed. Beat on medium for 5 minutes.
- Add butter. After 5 minutes, turn the mixer to medium-low and start adding the softened room temperature butter, 1-2 tablespoons at a time.
- Add flavoring, scrape sides, beat for 10 minutes. Once all of the butter is incorporated, add the vanilla extract and mix it in. Stop the mixer and scrape down the bottom and sides once more. Turn the speed to medium and beat the buttercream for 10 minutes until wonderfully light and creamy.
- Use or store. The buttercream can be used right away. It can also be stored in the refrigerator for up to two weeks or in the freezer for up to two months. If you have chilled the frosting, let it come to room temperature and then beat it for several minutes to smooth it out and restore its texture before using it.
Video
Recipe Notes
Measuring Tips
Our recipes are developed using weight measurements, and we highly recommend using a kitchen scale for baking whenever possible. However, if you prefer to use cups, volume measurements are provided as well. PLEASE NOTE: the adage “8 oz = 1 cup” is NOT true when speaking about weight, so don’t be concerned if the measurements don’t fit this formula.
Want to learn more about baking measurements and conversion?
Nutrition
🥣How to Make The Easiest Swiss Meringue Buttercream
Here’s an overview of how to make The Easiest Swiss Meringue Buttercream! Full instructions are included in the recipe card above.
- Combine egg whites, powdered sugar and salt: Combine 6 fl oz of pasteurized egg whites, 6 cups powdered sugar, and 1/2 teaspoon salt in the bowl of a large stand mixer fitted with a paddle attachment.
- Mix on low speed until combined: Mix everything together on low speed, until the sugar is moistened and no dry patches remain. Turn off the mixer, scrape down the sides and bottom of the bowl with a spatula.
- Mix on medium speed for 5 minutes: Then turn the mixer to medium speed. Beat on medium for 5 minutes.
- Mix on medium-low and add softened butter: After 5 minutes, turn the mixer to medium-low and start adding the softened room temperature butter, 1-2 tablespoons at a time, until all 3 cups have been incorporated.
- Add vanilla: Next, add 2 tablespoons vanilla extract and mix it in. Stop the mixer and scrape down the bottom and sides once more.
- Mix on medium speed for 10 minutes: Turn the speed to medium and beat the buttercream for 10 minutes. At the end, you’ll have a frosting with a wonderfully light and creamy texture.
- Use or store: It can be used right away, or stored in the refrigerator for up to two weeks, or the freezer for up to two months. If you have chilled the frosting, let it come to room temperature and then beat it for several minutes to smooth it out and restore its texture before using it.
💡 Tips for Success
One of the reasons buttercream might not get silky is that too much air is being incorporated into the mix. After making the recipe as directed, my number one recommendation would be to turn the speed on your mixer down to low and mix for an additional 5-10 minutes to release some of the air.
And, here’s another general tip… When making buttercream, you want to use the smallest bowl that will accommodate your mixture. Air bubbles generally start forming when the bowl is too big and the paddle isn’t fully submerged. Sometimes it’s not possible to use a smaller bowl but you could adjust the recipe by 1.5 or 2 times. Then freeze any excess for up to 6 months or keep it in the fridge for up to a month to use with another dessert.
When buttercream gets grainy it usually comes down to ingredients, specifically the powdered sugar. Powdered sugar has cornstarch in it which can start to clump together if its a lower quality brand, older, or has sat on a shelf for too long. One way to avoid this is to make sure you are using high quality powdered sugar. When looking for powdered sugar, look at the ingredients and try to find a brand that uses pure cane rather than brands that use beet sugar. My preferred brands are C&H, or Domino.
It’s hard to diagnose without seeing the buttercream, but here are 2 common reasons you might get lumps in your frosting. First, if it’s not perfectly smooth I would say it needs to be beaten longer. I like to finish mixing for about 10 minutes on low to get out air bubbles and make it really creamy.
Or, your butter might have been too cold. It needs to be soft (room temperature) when you start mixing. If this was the problem, you can take about a cup of the buttercream and microwave it for about 10 seconds (just until melted, NOT long). Then mix it into the rest of the buttercream for a few minutes. Keep repeating this process until the consistency is right and the lumps are gone.
I wouldn’t suggest it because the buttercream relies heavily on the sugar for stability and texture. I have not tried decreasing the sugar but I suspect it will be too soft and would hate to see anyone waste so many ingredients.
For layer cakes: This is kind of a difficult question to answer because so much depends on how the exterior of the cake is decorated, and how much frosting you prefer between layers. I would say on average I estimate about 1 cup between each layer for 8″ or 9″ cakes, and around 2/3 cup between each layer for 6″ cakes. (I do like a generous frosting layer, you may find that you like to use less.) For the exterior, probably 3-4 cups total for 8″ or 9″, and 2-3 cups for 6″–this is likely more than you will need, but it takes into account the fact that it’s helpful to have excess frosting on the top and sides that will be scraped away when smoothing out the finish of the cake.
For cupcakes: If you think you will use the amount of buttercream in the swirl pictured in the blog post, I’d recommend making a full batch of the buttercream to cover 27 cupcakes. If you’ll be using slightly less of a swirl per cupcake, a 3/4 batch would suffice. If you have any leftover buttercream, you can store the unused portion for 2-3 weeks in the fridge or 6 months in the freezer (I usually wrap mine in plastic wrap, but you can also freeze it in a plastic tub or similar). When you are ready to use the frozen buttercream, defrost it overnight, bring it to room temperature, mix well until it has a smooth texture again, and it’s as good as new!
I have a couple thoughts about what might be going on. It could be a problem with your butter. Some brands perform differently and some tend to be much more yellow. I’ve also heard discussion that many companies have changed formulas over the last year as ingredient costs have risen, and have started using more water vs butterfat, meaning both the texture and color might be different. If you find that your buttercream is looser, or cookies spread more, or things just behave differently, I’d consider trying other butter brands to see if that solves things.
The other thought is that it might be temperature related. If you are working with room temperature buttercream, and spreading it on a very cold cake, then scraping, adding more layers, using a hot spatula, working it for awhile, etc., your buttercream is going through a lot of extreme temperature fluctuations in a short amount of time. I’ve noticed buttercream with darker/lighter patches when I do a lot of this. If you are noticing the yellow coming through primarily when working with it on cakes, try adjusting some of those factors: don’t use a hot spatula (if you were), have the cake be a little less cold, don’t work it as long, etc.
Here is a tip for color-correcting. You can add an extremely small amount of purple food coloring to the buttercream and mix until fully incorporated. The purple balances out the yellow and will give the buttercream a white color. Go very slow (start with a drop) because too much will definitely show.
My first guess would be an accidental mis-measurement of one of the ingredients. It happens to everyone occasionally. And, my second guess would be the butter. Sometimes butter can vary in its water content. Occasionally, my regular brand of butter has been softer than usual and handled a little differently. It can be frustrating when that happens.
Don’t despair! There are a few things you can do to save the batch. If it still seems liquidy, you could try adding additional powdered sugar or some shortening. If you use shortening, I’d start with a 1/4 cup to see if that helps. Adding a little extra room temperature butter could help as well.
It holds up pretty well, but if it is going to be in a hot setting for an extended period of time I highly recommend replacing 1/4-1/3 of the butter with shortening to increase stability. When blending shortening and butter, you can substitute up to half of the butter with shortening. However, my personal preference is not to replace more than 1/3.
Also, I’d recommend using a high ratio shortening like Sweetex because it is lighter and less greasy than traditional Crisco. It can be purchased online or in a cake supply store, and you’ll notice that it will help the frosting stay fluffier without the grease.
This buttercream holds up really well for 1-2 days at room temperature. It could possibly even go 3 days at room temperature in a cool, dry room. Heat and humidity will impact how long it can safely sit out, and you’ll need to make your best guess based on your environment. If it’s sitting out in a warm, humid room, err on the side of caution and refrigerate after 24 hours.
Keep in mind that as the meringue buttercream sits, it will become a little spongy. Before using the frosting, make sure to mix it on low for several minutes until it regains its smooth, glossy texture.
💡FAQs About Egg Whites
The carton egg whites can be used right from the fridge! You want the eggs to be closer to room temperature when you add the butter, so if after the 5 minute mixing with powdered sugar you think they are still too cold, let the mixture sit for a minute before adding the butter (you just want to avoid the butter seizing up).
It’s not safe to eat raw egg whites unless they have been pasteurized. Egg whites in a carton are pasteurized which means the whites have been heated to kill bad bacteria and can be consumed raw. If you cannot find pasteurized whites in a carton, look for pasteurized whole eggs, and separate out the whites yourself. For food safety reasons do not use this recipe with fresh (un-pasteurized egg whites).
The biggest difference between fresh egg whites and the store bought carton egg whites is pasteurization. Most people don’t like to eat raw eggs due to the potential for salmonella or other bacterial contamination. My recipe is called the Easiest Swiss Meringue Buttercream because it uses pasteurized (carton) egg whites and allows us to skip the entire step of heating the egg whites.
However, if you don’t want to purchase the carton egg whites or just want to use up fresh eggs, I’d recommend trying my regular recipe for Swiss Meringue Buttercream. This recipe does require heating the egg whites and will make the eggs safe to eat.
You can make this recipe with either meringue powder or powdered egg whites–both work great! For a medium-sized (36 oz) batch of frosting, you’ll need:
3 TBSP powdered egg whites or meringue powder
½ cup warm water
1 lb (16 oz, or 4 cups) powdered sugar
½ tsp salt
2 tsp vanilla extract, to taste
1 lb unsalted butter, at cool room temperature.
Whisk the meringue powder or powdered egg whites and the warm water together in a bowl. Meringue powder will dissolve fairly quickly, the plain powdered egg whites typically take longer. Let it sit for about 10 minutes, whisking occasionally, until all the lumps are gone. Then just follow the recipe procedure as written!
I have noticed that meringue powder has a more tangy flavor, probably due to the citric acid it has. It’s not BAD, but it is noticeable to me. It works best with fruity-flavored buttercreams where the tanginess goes well with the flavor–you might not like it as much with a vanilla buttercream.

💭 Variations In Flavoring
Want to change up the flavor of the buttercream? Here are some of the most requested flavor variations.
- Chocolate: Chop 12 oz unsweetened chocolate, and place it in a microwave-safe bowl. Microwave in 30-second increments, stirring after every 30 seconds to prevent overheating. Once the chocolate is melted, let it cool until it is completely room temperature. Make the frosting as described, and after it is finished, add the melted and cooled chocolate. Mix on low speed until the chocolate is completely incorporated. (Alternately, you can use unsweetened cocoa powder. Make the recipe as directed and then add 3/4 cup cocoa powder. Taste and add a little more if needed, but beware that it can dry out the buttercream and/or make the flavor bitter if you use too much. If the cocoa powder makes the buttercream texture seem too thick, you can add a little milk to thin it out. Mix on low speed until the chocolate is completely incorporated.)
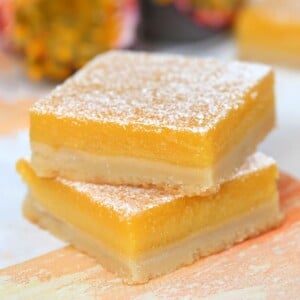
- Citrus: You can make all kinds of citrus flavors like orange, lemon, lime, and grapefruit by using this basic flavoring method. First, zest your citrus fruit of choice (about 1-2 TBSP to start with, or more if desired). I don’t recommend using citrus fruit juice for flavoring because it might waterdown the buttercream. Instead use a citrus oil like the following from LorAnn’s: orange oil, lemon oil, lime oil, grapefruit oil. You can also use a citrus flavoring, but keep in mind you’ll need to use more flavoring than oil to get the same depth of flavor. I also recommend LorAnn’s flavorings and extracts such as: orange bakery emulsion, lemon bakery emulsion, and key lime flavoring. In place of or in addition to the vanilla, add the following to give your buttercream citrus flavor: 1 tsp citrus oil or 2 tsp citrus emulsion/flavoring, 1-2 TBSP citrus zest (add more to taste if needed), and ¼ tsp citric acid, optional. The citric acid is actually the key to really well-flavored citrus buttercreams. It can sometimes be hard to track down in regular stores, so I typically purchase it from Amazon. It’s not very expensive and lasts forever, so it’s worth the purchase if you make citrus desserts a lot. And, just as a word of warning, all oils and flavorings can vary in intensity. Be conservative with how much you add until you are confident with the product you are using.
- Cream cheese: In regards to adding cream cheese, I suggest making the full recipe as written. Then, in a separate bowl, beat 4 oz softened cream cheese until smooth and creamy. Next, add the buttercream to the cream cheese and continue to beat until combined. I don’t recommend adding more than 4 oz for stability purposes. However, if you want more cream cheese flavor, I suggest adding a cream cheese emulsion so that the buttercream will keep its stability. I would recommend LorAnn’s brand. Start with a teaspoon and more until you achieve your desired depth of flavor.
- Freeze-dried fruits: If you love fruit flavored buttercream, I highly recommend using freeze-dried fruits like strawberries, raspberries, and blueberries. Make the buttercream recipe as directed. Then take 2 oz of your fruit of choice and place it in a food processor. Use long burst until the fruit becomes a fine powder. Add it to the buttercream and mix on low speed until the powder is well-mixed into the frosting. Add a few drops of food coloring, if desired, to boost the fruit color. I do not recommend using fresh or frozen fruit because of their water content. It will throw off the texture of the buttercream.
- Peanut butter: I don’t recommend adding peanut butter to this recipe. The peanut butter oils really mess with the texture of the buttercream in an unpleasant way. You could try using powdered peanut butter like PB2 (found at most grocery stores next to the peanut butter). You could start with a tablespoon and add more until you reach the right flavor.
- White chocolate: White chocolate can make the buttercream softer, so I would start slow. Chop 3-4 oz of real white chocolate and go from there. Place it in a microwave-safe bowl. Microwave in 30-second increments, stirring after every 30 seconds to prevent overheating. Once the chocolate is melted, let it cool until it is completely room temperature. Make the frosting as described, and after it is finished, add the melted and cooled chocolate. Mix on low speed until the chocolate is completely incorporated. If you are in a hot environment, you may also consider replacing 1/4-1/3 of the butter with shortening to stabilize.
- Vanilla: The buttercream has a very neutral/mild vanilla flavor. If you want to boost the vanilla flavor you could add a little extra vanilla extract or vanilla bean to taste.
- Other flavorings and extracts: If you want to add another flavoring in addition to or in place of the vanilla, I would recommend starting with a teaspoon and then add more to taste if necessary. Extracts and flavorings vary in intensity so starting slow is key until you are familiar with how much you will need. I love using LorAnn’s brand of baking flavorings, extracts and emulsions. You might try butterscotch flavoring, caramel flavoring, or cinnamon flavoring.
💭 Variations In Coloring
You’ll want to use gel food coloring when attempting to color the frosting. Gel coloring is highly concentrated so you’ll only need a little to get a vibrant color. To achieve the same depth of color with a liquid food coloring would require A LOT of product and might alter the stability of the frosting. Americolor is my favorite brand of gel food coloring. Start with a drop or two of gel coloring, mix and then evaluate the color to see if you need more.
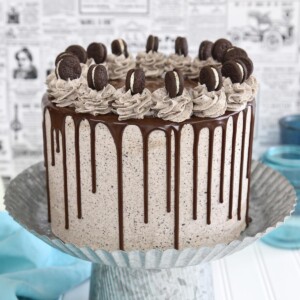
- Extra tips for creating black frosting: First, I highly recommend making the buttercream at least one day before you need it. The color will get darker and set with time. It’s much easier to start with a chocolate buttercream. If you’re planning to use the Easiest Swiss Meringue Buttercream recipe, I’d suggest using black cocoa powder. It’s super dark (think Oreo shade of black). Start by adding 3/4 cup . . . a little more if needed. It can dry out the buttercream and/or make the flavor bitter if you use too much. If the buttercream texture seems too thick, you could add a little milk to thin it out. Then, you’ll want to use a high quality black gel food coloring. I prefer Americolor Super Black Gel Food Coloring. I’d add at least a tablespoon and then go up from there until you reach the right shade. Finally, when you get ready to use the buttercream you might notice inconsistency in the coloring. If that’s the case, I’d suggest warming up a small amount of the buttercream in the microwave. Start with a cup and microwave it for about 10 seconds. Mix the warm buttercream back into the main batch. The warmth helps with the emulsification process and can help even out the color.
🧁More Frosting Recipes
Want to learn to make traditional Swiss Meringue buttercream? I have a Swiss Meringue Buttercream photo tutorial and recipe right here!
- Cinnamon Buttercream
- Red Velvet Fudge Frosting
- Swiss Meringue Buttercream
- Lime Cream Cheese Frosting
- Honey Buttercream
- Coconut Cream Cheese Frosting
- Lick-The-Knife-Clean Chocolate Spread
- Chocolate Sour Cream Frosting
- Butterscotch Frosting
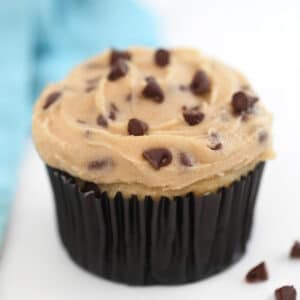
Cookie Dough Frosting
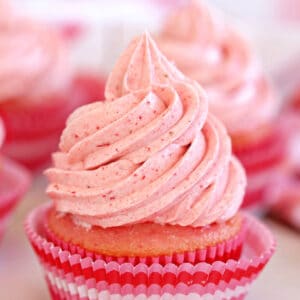
Strawberry Buttercream


I love this frosting and all my family are now hooked too! My mum wants a coffee cake for her birthday using this frosting, do I add straight coffee powder or coffee essence? Thanks x
Hi Candice! So thrilled to hear that you love this frosting! If you have coffee extract or coffee liqueur, you can add that. I would start with 1 tsp extract or 1 TBSP liqueur and add more to taste. If you don’t have those, you can also use instant espresso powder–dissolve a few tsp in a tablespoon of warm water, let it cool completely to room temperature, then add it bit by bit to the frosting, until it’s as strong as you’d like. Hope this helps, and please let me know how it goes!
Hi there! Does this recipe require refrigeration?
Hi Erika, I leave the frosting out up to overnight, but any longer than that I would recommend refrigerating it.
Thank you for sharing this recipe. The taste and texture were wonderful and the method much easier than traditional SMBC.
Thanks Leesha, I’m so glad to hear that you liked it!
I am back again to make this delicious and easy frosting for my son’s birthday! This is my family’s favorite since I started using it for their birthday cakes a couple years ago. They prefer my cakes to store bought cakes now, which says a lot for this simple baker! I use a cheap hand mixer, and it doesn’t look quite as silky as your photos, but it pipes well and takes the color well and is DELICIOUS! Thank you so much! I have no plans to use any other frosting recipe!
Kathryn, I’m so happy to hear that this recipe has become a family favorite! Happy birthday to your son. 🙂
The flavor is great and it’s very easy to make so I love all of that. The amount of butter in this seems like too much and, if I make it again, I’ll reduce it to just 16 ounces to get a lighter result with less butter texture.
Thanks June! I’d love to hear an update on how it goes after you make the adjustments–I know some folks would prefer a version with less butter as well.
Absolutely amazing! It was creamy and light- not too sweet. I used it to make a birthday cake and it turned out delicious and was extremely simple! Definitely would make this again.
So glad to hear it was a hit for you!
Hi! Ok…first time trying this and it came out thick and hard to pipe. Taste was there but consistency was not! What did I do and is there a way to fix it? Thanks!
Hi Karla! You have a couple options: one, beat the heck out of it. Beat it on med-high with a paddle attachment for at least 5 minutes, then run it on low for about 10 to get some of the air bubbles out. The other thing to try is to add a bit of liquid, a little at a time. You can use a flavoring like clear vanilla or a liqueur, or just milk works well too. Add it bit by bit till you get a consistency you’re happy with.
Apparently Swiss meringue hates me. Mine came out looking like cottage cheese I’m gonna stick to my regular flour frosting
Oh no! How long did you beat it for? It is VERY common to have the gross cottage cheese phase, and 99.5% of the time if you keep mixing, it will come together. Mixers are different and the times given are guidelines, but it sounds like yours definitely needed a little extra time. I hope you didn’t toss it, because it can be saved!
This recipe is the easiest and best recipe I’ve ever made for Swiss Meringue Buttercream.
It’s changed my cake products into something people beg for me to make. Plus, it’s very easy to decorate with.
No muss, no fuss, and a great tasting Buttercream!
This recipe looks amazing! I have a question.. if I went to add cream cheese to this buttercream would it still work? Thank you!
Yes, but I actually recommend adding the buttercream to cream cheese! What I do is make the buttercream as normal, following the recipe completely. THEN beat room temperature cream cheese in a mixer until no lumps remain. Add buttercream a few spoonfuls at a time to the cream cheese until it’s all mixed in. For one batch, I’d say ~8 oz cream cheese is probably a good ratio. For some reason it often breaks when I add cream cheese to the frosting, but adding frosting to cream cheese works much better. Let me know how it goes!
This recipe makes delicious frosting. However, it seems a bit soft for piping – my leaves all seem to melt together and don’t stay defined enough. Should I add more powdered sugar or what might the solution be? I may try using less butter next time but need a fix for the batch I just made if possible.
Thanks!
Hi Heather! Sorry to hear the frosting is giving you trouble. It definitely shouldn’t be that soft! What brand of butter did you use? I get this comment sometimes and I was never able to replicate it until I tried using a particular brand of butter (Walmart store brand) and my buttercream was SO soft, almost watery! As you might know, butter is fat solids + water, and different brands behave very differently. So it is possible that you did everything right, but were using a butter with a higher water percentage and that was the culprit. FWIW I most often make this with either Costco brand butter (Kirkland Signature) or Land O’ Lakes, and those both work well for me.
As far as how to save this, I do think you can! Add more powdered sugar and some shortening if you have it. If your shortening is very stiff, mix it a bit first so it won’t add lumps to the frosting. But I’d start with adding another cup of powdered sugar, and maybe 1/2 cup shortening? (Hard to know without seeing the BC). Mix well and check the texture. You might also want to increase the flavoring a bit to compensate for the extra sweetness + fat, but don’t add too much liquid flavoring or you’ll be back where you started! 🙂 Please let me know how it turns out for you!
What might work is looking specifically for a European butter. It has higher fat % and will give you what the author is talking about—less water content.
Absolutely! Some butter brands just have too much water and will make for a very loose frosting.