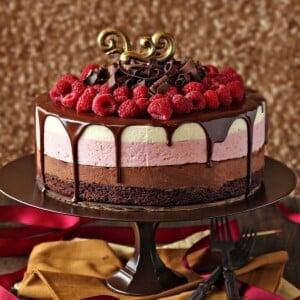
This stunning Chocolate Raspberry Mousse Cake has a moist, fudgy brownie base, three layers of light mousse—chocolate, raspberry, and vanilla, and then a glossy topping of chocolate and a tangle of raspberries and chocolate curls on top. Perfect for any occasion!
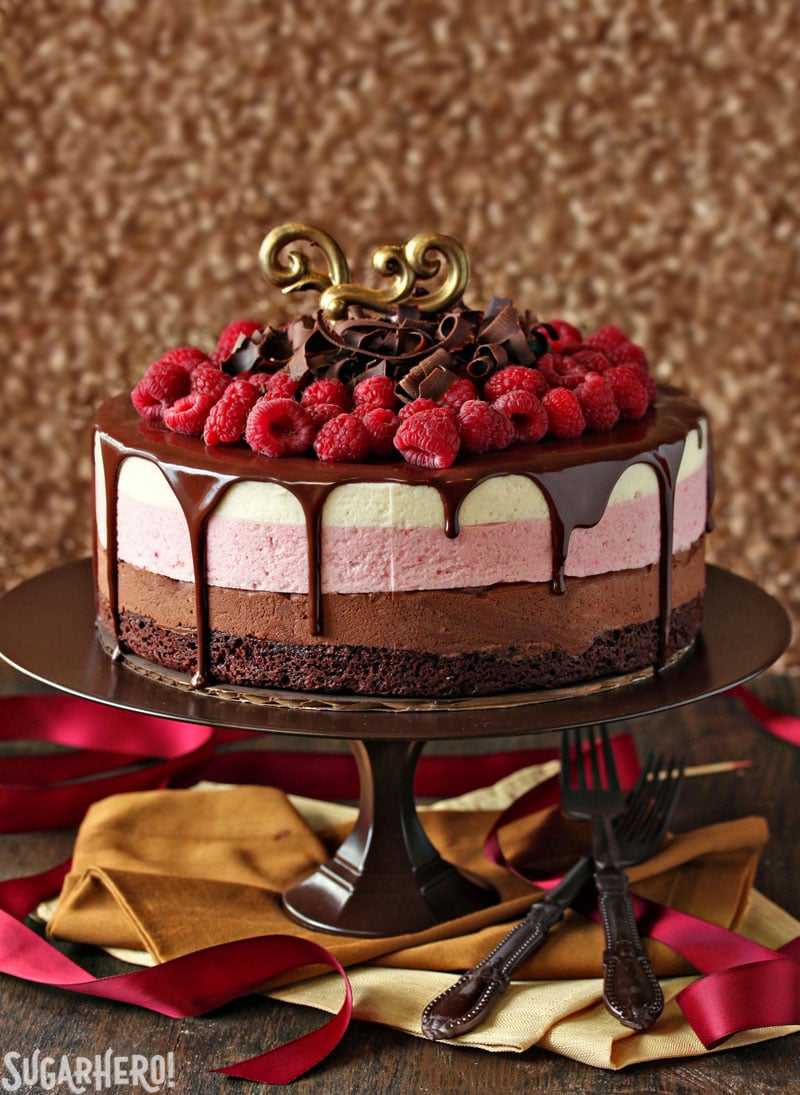
Stunning Chocolate Raspberry Mousse Cake
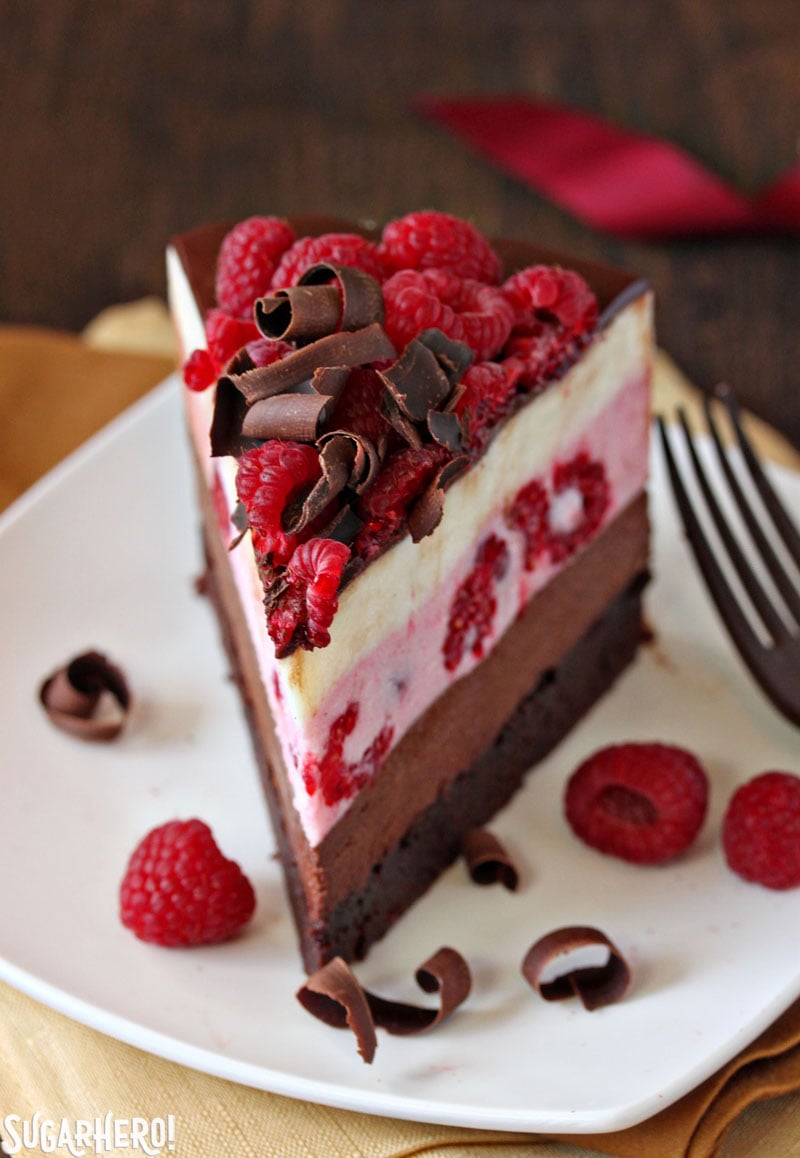
I don’t go around calling things “food porn” on a regular basis, so instead, can we just agree that this cake is, for lack of a better term, a sexy beast? It has a moist, fudgy brownie base, three layers of light mousse—chocolate, raspberry, and vanilla, and then a glossy topping of chocolate and a tangle of raspberries and chocolate curls on top. Oh, behave!
I was so obsessed with the honey mousse I made for these Honey Pots with Honey Mousse, I couldn’t stop thinking of ways to use that quick and easy mousse in other recipes. It turns out it’s easy to adapt that mousse for other flavors, so I made a few tweaks and soon found myself with chocolate, raspberry, and vanilla bean variations. You’ll love it—no separating eggs, no whipping whites or yolks, and no stress.
What kind of pan should I use?
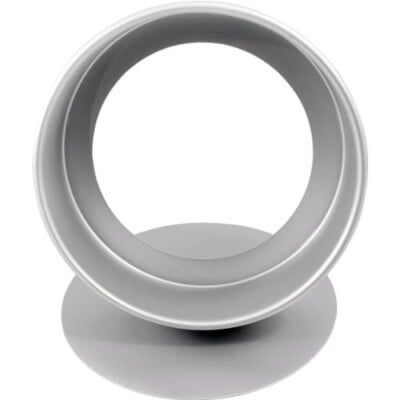
You need a 9-inch pan with sides at least 3-inches tall, and the ability to remove the bottom. Either a cake pan with a removeable bottom or a 9″ springform pan will work.
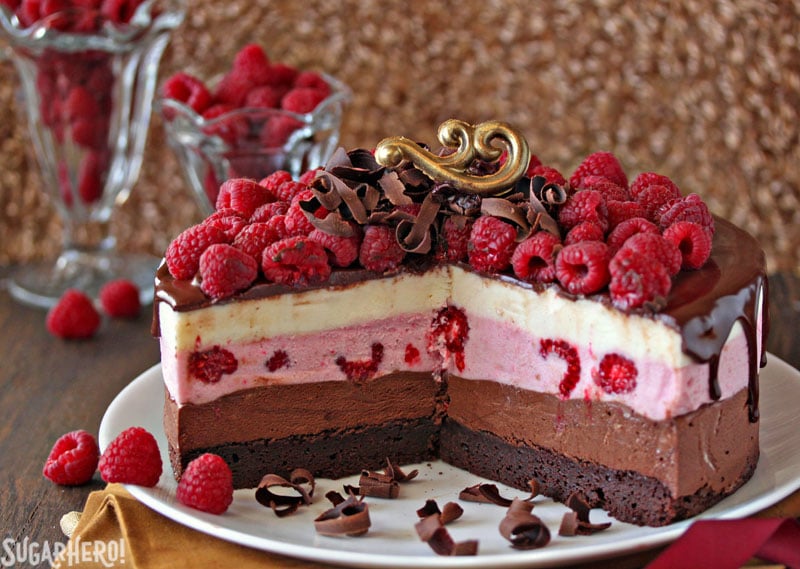
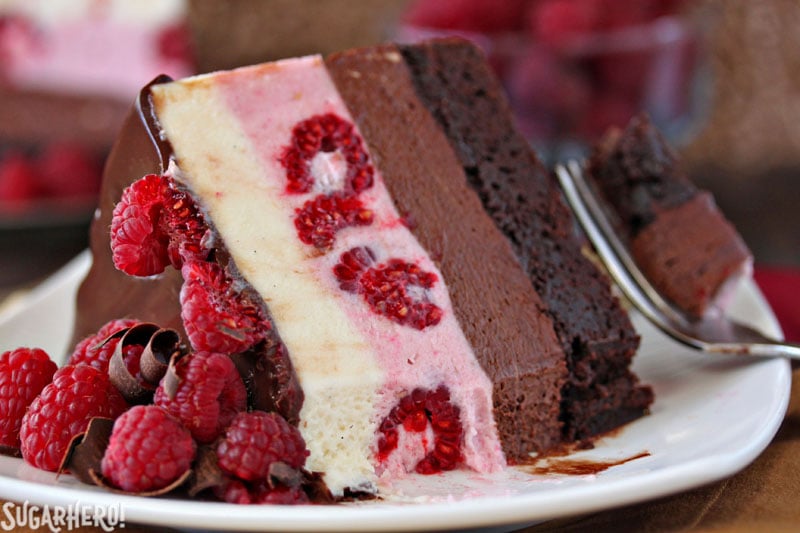
The mousse is firm enough to hold up in layers and cut cleanly when it’s refrigerated, but as it comes to room temperature, it develops the most delicious silky, pillowy texture. It’s the perfect contrast to the chewy, fudgy brownie base, and the juicy berries embedded in the raspberry layer!
How to unmold a mousse cake so it has neat, clean edges:
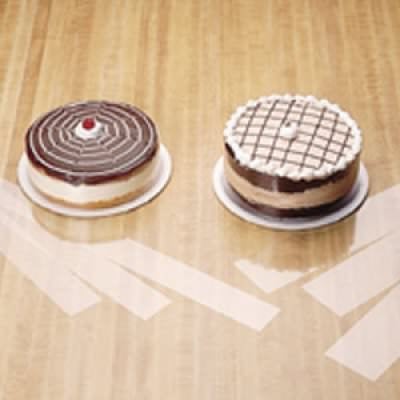
I used acetate cake collars to line the cake pan and get clean lines when unmolding the mousse. They’re inexpensive and very handy for lots of kitchen projects, but if you don’t have them, you can use waxed paper or parchment paper instead. The cake will still unmold, but the outside might not be as neat and clean.
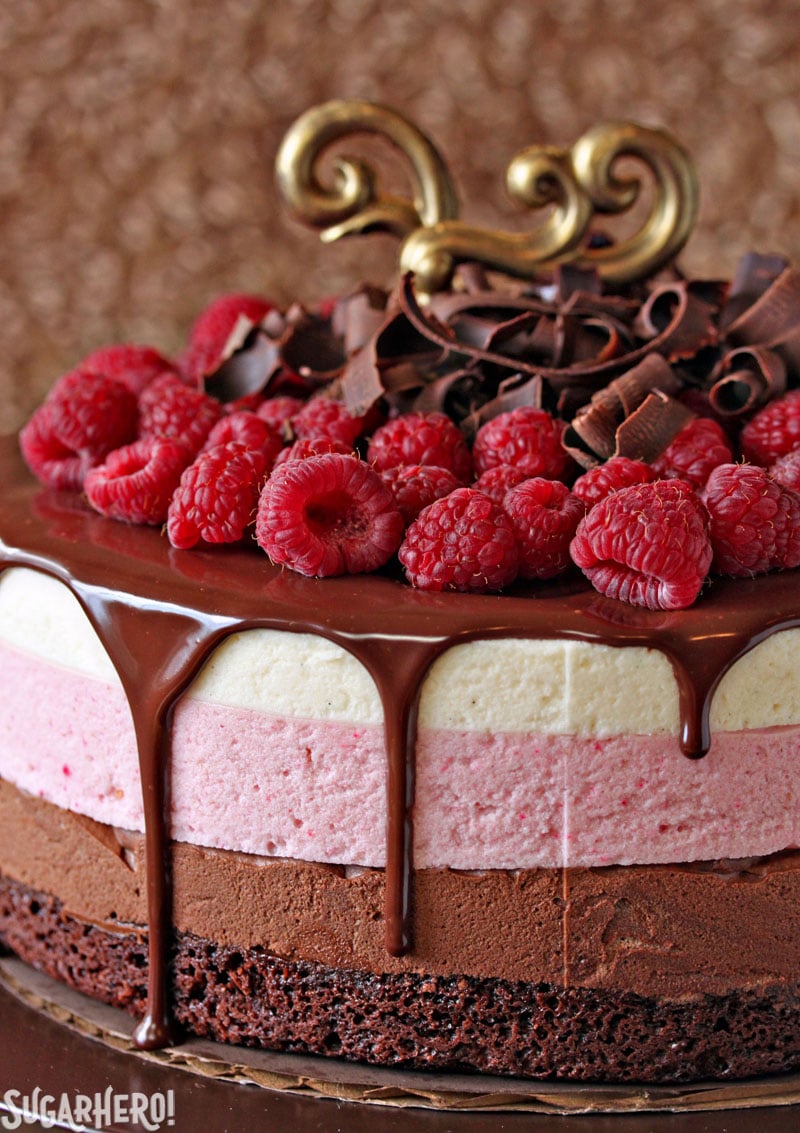
Of course I couldn’t let my tart leave the house naked, so it’s covered in a glossy chocolate ganache that drips just a bit down the sides. You could also cover the sides completely in ganache, so the four layers are a fun surprise when you cut the cake open. I can never resist showing off, so I like to put them on display, but perhaps you are less of a braggart than I am.
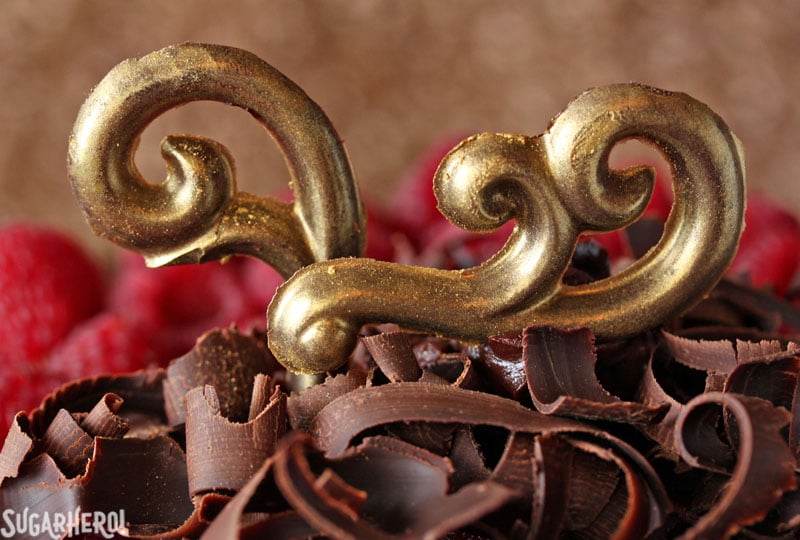
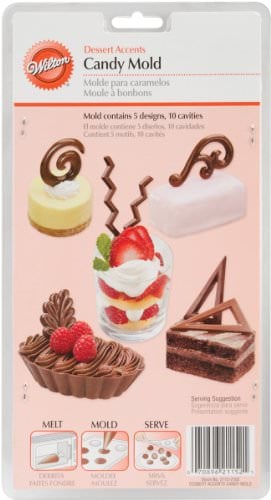
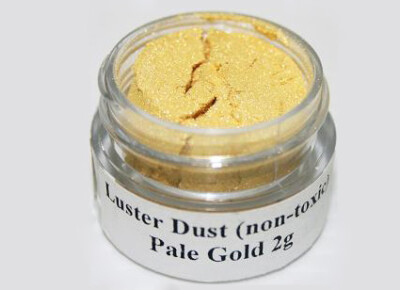
Finish the tart with a big pile of fresh raspberries and chocolate shavings. The gold decoration (or “doodad,” as we call them in the biz) was made using this Wilton chocolate mold and then dry-brushing it with gold luster dust. Totally unnecessary, totally cute. (That should be the tagline of my site, yes?)
Enjoy!
💡FAQs
If you can’t find quality fresh raspberries, you can use frozen berries to make the puree. Don’t use frozen berries in the mousse layer or to decorate on top. They won’t look pretty and will change the texture of the mousse.
Another solution would be to substitute fresh strawberries in place of raspberries.
The most common reason whipped cream collapses is because it has been overworked (whipped for too long). Perfectly whipped cream should have the texture of shaving cream — thick, with a lot of body. It should hold peaks but still have some softness to it. Stop whipping the cream just before stiff peaks start to form. This will give you a little more wiggle room when you start folding the whipped cream into the mousse.
Most likely, the chocolate is a little too cool when you start adding the whipped cream. When the chocolate comes in contact with the cream, it starts setting prematurely. I recommend mixing them together when the chocolate is a bit warmer. The chocolate should be about body temperature, or slightly above, to mix properly with the cream. It’s definitely a balancing act, because you also don’t want the chocolate to be too hot and melt the cream.
You can make your cake 2-3 days in advance. Wrap it well and store it in the fridge. Thankfully the mousse layers won’t collapse since they are made with gelatin. It really helps with stability and longevity. However, with time the mousse will begin to dry out which eventually creates a less appetizing texture.
You can also make the cake several days in advance and freeze it. You’ll need to wrap it well, or cover the pan with a lid, so that it doesn’t dry out. Thaw it overnight in the fridge the day before you plan to eat it.
Whether you store it in the fridge or freezer, I also recommend waiting to dress it with the ganache, whipped cream, and toppings until the day you plan to eat it. Happy Baking!
🍰 More Cake Recipes You’ll Love
Don’t miss our collection of Fun Valentine’s Day Dessert Ideas – see the whole web story here!

Rainbow Mousse Cake

Orange Mousse with Cranberry Sauce
Chocolate Raspberry Mousse Cake
Ingredients
For the Brownie Layer:
- 3.33 oz all-purpose flour, (3/4 cup)
- 2 oz unsweetened cocoa powder, (2/3 cup)
- 1/2 tsp salt
- 1/2 tsp baking powder
- 4 oz unsalted butter
- 7.75 oz granulated sugar, (1 cup +2 tbsp)
- 2 large eggs, large, at room temperature
- 2 tsp vanilla extract
For the Chocolate Mousse:
- 9 oz semi-sweet chocolate, finely chopped
- 1 3/4 cups heavy cream, divided use
- Pinch of salt
- 2 tsp unflavored powdered gelatin
- 2 TBSP water
For the Raspberry Mousse:
- 1 1/2 cups fresh raspberries, see Note below
- 9 oz white chocolate, finely chopped
- 1 1/2 cups heavy cream, divided use
- Pinch of salt
- 2 tsp unflavored powdered gelatin
- 2 TBSP water
- pink gel food coloring, optional
For the Vanilla Mousse:
- 9 oz white chocolate, finely chopped
- 1 1/2 cups heavy cream, divided use
- 4 TBSP honey
- Pinch of salt
- 2 tsp unflavored powdered gelatin
- 2 TBSP water
- 2 tsp vanilla bean paste, can substitute vanilla extract
To Finish:
- 4 oz semi-sweet chocolate, finely chopped
- 4 oz heavy cream
- 1 pint fresh raspberries, see Note below
- Chocolate curls , or other decorations
Instructions
To Make the Brownie Layer:
- Preheat the oven to 350 F. Line a 9-inch cake pan with parchment and spray well with nonstick cooking spray. Whisk together the flour, cocoa powder, salt, and baking powder in a small bowl. Set aside for now.
- Cube the butter and place it in a medium saucepan over medium-low heat. Stir occasionally as the butter melts. Add the sugar and stir it into the melted butter until combined.
- Remove the pan from the heat, and let it cool to lukewarm. Once it has cooled, add the eggs, one at a time, whisking well between each addition. The mixture will start out grainy, but as you add the eggs, it will become shiny and smooth. Whisk the vanilla in. Finally, add the dry ingredients, and stir them in with a spatula.
- Scrape the brownie batter into the prepared pan, and bake it for 22-24 minutes, until a toothpick comes out with just a few moist crumbs attached. Cool the brownie layer completely before proceeding.
To Make the Mousse Layers:
- Prepare your pan. You need a 9-inch pan with sides at least 3 inches tall, and the ability to remove the bottom. Either a cake pan with a removeable bottom or a 9" springform will work. Line the inner wall with an acetate cake collar or strip of aluminum foil, parchment paper, or waxed paper. Make sure the acetate collar or other lining is long enough so that it overlaps itself. Also, if you are using foil/parchment/waxed paper, make sure you cut the strip tall enough to extend at least an inch over the pan’s sides, since the cake is about 4 inches tall.
- Place a cake cardboard in the bottom of the pan, then carefully place the baked brownie on top of the cardboard.
- Prepare the chocolate mousse layer: combine the chocolate, 3/4 cup of cream, and salt in a microwave-safe bowl. Microwave in 30-second increments, stirring every 30 seconds, until the chocolate has melted and the mixture is smooth. Pour it into a large bowl, and let it cool to slightly above room temperature, stirring occasionally.
- While you wait for the chocolate mixture to cool, prepare the gelatin. Whisk together the gelatin and the cold water in a small bowl, and set it aside to let the gelatin absorb the water. When the chocolate is sufficiently cooled, microwave the bowl of gelatin for 15 seconds, until it is melted. Then whisk the melted gelatin and chocolate together.
- Whip the remaining 1 cup heavy whipping cream to just before firm peaks form (see FAQ for more tips). Fold half of the whipped cream into the warm chocolate. Once it’s incorporated, gently fold in the remaining whipped cream. Scrape the mousse on top of the brownie, and spread it into an even layer. Refrigerate the cake for 25 minutes, until the mouse has started to set and is firm enough that a second layer can be added.
- Prepare the raspberry mousse layer: make a quick puree by blending 1/2 cup fresh raspberries in a blender or food processor. Pour them through a fine mesh strainer to remove the seeds, and measure out 1/4 cup raspberry puree. Extra puree can be saved and used for other purposes.
- Combine the white chocolate, raspberry puree, 1/2 cup heavy whipping cream, and salt in a microwave-safe bowl. Continue to make the raspberry layer the same way you made the chocolate layer, by melting and cooling the chocolate mixture to about 95-100 degrees C, whisking in melted gelatin, and folding in whipped cream. Add a few drops of pink food coloring to boost the pink color, if desired. At the very end, stir in the remaining 1 cup of fresh raspberries and pour the mousse over the chocolate mousse layer. Spread it into an even layer, and refrigerate again for about 25 minutes.
- Prepare the vanilla bean layer: combine the white chocolate, 1/2 cup heavy whipping cream, honey, and salt in a microwave-safe bowl. Continue to make this layer the same way you made the previous two layers by allowing the chocolate mixture to cool, whisking in the gelatin, and folding in the whipped cream. After completing those steps, stir in the vanilla bean paste and pour the vanilla mousse over the raspberry mousse layer. Refrigerate to set the mousse layers very well, at least 4 hours or overnight.
- To finish the cake: push the bottom out from the pan, or unhinge the sides, and unwrap the acetate strip. Transfer the cake to your serving platter. Make a quick chocolate ganache by putting the chopped chocolate in a small bowl and heating the cream to a simmer. Pour the hot cream over the chopped chocolate and whisk gently until the chocolate melts and you have a smooth, shiny mixture.
- Pour the ganache over the top of the cake, and use a spatula to nudge it right to the edge and over in evenly spaced drizzles. Don’t worry if the top is not smooth—it will be covered up! Add the fresh raspberries and chocolate curls on top of the cake. Refrigerate to set the ganache.
- For the cleanest slices, cut the cake when it is well chilled. Use a large sharp knife, and wash it frequently between cuts. For the best taste and texture, allow the cake slices to sit at room temperature for 10-15 minutes before serving.
- Store Chocolate Raspberry Mousse Cake, well-wrapped, in the refrigerator for up to a week.
Recipe Notes
Measuring Tips
Our recipes are developed using weight measurements, and we highly recommend using a kitchen scale for baking whenever possible. However, if you prefer to use cups, volume measurements are provided as well. PLEASE NOTE: the adage “8 oz = 1 cup” is NOT true when speaking about weight, so don’t be concerned if the measurements don’t fit this formula.
Want to learn more about baking measurements and conversion?
Nutrition

THE BEST VALENTINE’S DAY CAKES
Check out our collection of the 27 best Valentine’s Day cake ideas — click here to get all the recipes!




Hi I’ve been wondering… is there any possible way of doing this recipe without gelatine? (as I am not aloud to eat it due to my religion.) And can I just tell you, your mousse cake looks STUNNING cant wait to try it out
Hi Jasmine, The gelatin really helps the cake keep its shape when cut into slices. I haven’t tried making the whole thing without it. My guess is that it would be pretty successful if you kept the cake refrigerated until serving. The white chocolate really helps the mousse to stay stiff when chilled, so if you kept the cake chilled I think it would work pretty well. Maybe try one layer and see how it goes before committing to the whole thing? Please let me know how it goes if you give it a try!
Hy 🙂 In my country we are also using grams and millilitres and i have done the conversions and it seems to me this is quite a big cake. How many kilos does the cake has? I’m planning to make this cake for my boyfried birthday and we dont have a large number of guests ( around 8). Also i’m afraid that if i store the cake for more then 2-3 days the cake will not taste the same ( i don’t want to throw it away).
Hi Maria, I don’t know the weight of the cake, but you’re right, it’s quite large. If you’re only serving 8 people you could easily cut it in half, or consider only making one of the mousse layers instead of all 3.
I just made this for a dinner party for friends and it was a smashing success! I had one friend that can’t eat gluten so before I served hers, I just removed the brownie layer and she was very pleased. I prepared it exactly the way your recipe called for and it turned out just like the picture! Gorgeous! I loved the honey vanilla layer-I was surprised how flavorful it was! How delish that would be over a pecan crust! Even though this was very time consuming, it was worth every minute. It’s fun to dazzle friends and your recipe certainly helped me achieve that! Thank you for a very impressive end to dinner.
Hi Terri, Thank you so much for the comment! I’m thrilled that it worked out so well for you, and that it also worked for your gluten-free friend. And now I’m dreaming of that honey mousse over a pecan crust. 🙂 Thanks for the feedback, and take care!
Terry,
Can you tell me how you melted the sugar?
I am having hard time with it and I would like to make it as soon as I can.
Thanks
Hi, so made the mousse cake on Friday. It is,quite an amount of work I must say. It looks just like the picture. I was quite impressed with myself, the amateur! Everyone loved it, my uncle swore there’s no way it wasn’t store bought! I have a question. The brownie layer becomes dense tough refridgerating so long. Then after leaving the cake out of te brownie like gherardellii brownies. The brownie was just hard to cut. Second the mousse was too dense. Not fluffy creamy. I think less gelatin is best. How would I make these changes?
Hi, You can definitely experiment with reducing the gelatin in this recipe. You would leave all other ingredients the same and just add less gelatin–maybe start with 1 1/2 tsp gelatin, unless you thought it was REALLY too stiff and want to try just 1 tsp. I’m not quite sure what you’re asking about the brownie portion, can you please clarify your question? If you like the taste/texture of Ghirardelli brownie mix, you can definitely use that instead of the homemade recipe, if that helps.
Made this the other day, with just a couple tweaks to make it a little less sweet – came out PERFECT, just like the photos. Very tasty, too!! Saving this recipe as I will definitely be making it again for celebrations!
Sonya, I am so thrilled that you loved it and that it worked out well for you! I’d love it if you would share a picture with me on instagram (@elabau) or on my facebook page: fb.com/sugarhero. I’d love to see how the final product turned out!
Why is gelatin being added? Thank you!
Hi Ana, The gelatin helps stabilize the mousse layers so the cake holds its shape and slices cleanly. It’s technically optional but if you omit it, I would recommend keeping the cake refrigerated until just before serving to minimize the chances of it slumping or losing its shape.
I made this for my dad’s 70th birthday and for my mom for Mother’s Day. It was a hit. Thanks for sharing. http://whatthedogate.blogspot.com/2016/05/raspberry-chocolate-and-vanilla-bean.html
So glad to hear it, Donna! Thanks for sharing!
Hi, Katarina from Sweden .Made this for my friends birthday, and It was gorgeous!!! We loved it!
Thank you so much, Katarina! So glad that you loved it!!
Tried it, looks amazing but way, way, way too sweet!
Cannot eat more than a thin slice.
And the brownie was too dry
Sorry it wasn’t to your taste, Tamas.
Hi! This cake looks amazing! I will be making it soon. Just one question. Can I melt the chocolate over a pan with simmering water?
I dont like to use the microwave!
Yes, definitely! The microwave is just my personal preference–using a water bath is fine too!