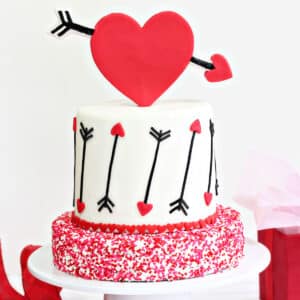
Nothing says “love” like this Red Velvet Valentine’s Day Cake! The uniquely sized tiers give it a modern look, and the graphic red, black, and white heart-and-arrow pattern is striking. You’ll swoon over this romantic red velvet cake!

Happy Valentine’s Day! I haven’t made a big, all-out cake in a while, so I thought it only fitting to ring in the day of looooove by going back to my one true love: over-the-top cakes! (Apologies to my husband, but he’s always known there’s a special place in my heart for cake beasts like this.)

For this Valentine’s Day cake, I wanted to do something a little different and ply around with proportions, so I made the top cake tier extra- tall, with 6 layers of cake, and the bottom tier extra-short, with just 2 layers. I always think it’s fun to switch up perspective—I also really love it when multi-tiered wedding cakes do the same thing, with a really really tall layer stuck right in the middle of shorter layers. It’s just a nice change from the usual uniformity of fancy cakes. Why not play around with expectations a little bit??
(Now that I’m out of the wedding cake game I don’t really have the opportunity to make cakes larger than 2 tiers usually, but maybe I should just for fun! Stay tuned…)

In addition to the slightly unusual cake sizing, I also went jumbo with the fondant heart topper. Yes, this bad boy is aaaaallll fondant, and he pretty much made my son’s dreams come true. (Don’t worry, I didn’t let him take more than a bite or two!) If you wanted something a little more delicious, you could instead make a heart out of rice crispy treats and cover that with fondant decorations. Rice crispy treats are a great way to make large, lightweight toppers that are more pleasant to eat than just plain fondant.

Speaking of fondant…the mini arrow decorations on the top tier are fondant as well! (I was just thinking that I’ve already typed the word “fondant” way too much in this post, but in looking through my archives I realized I rarely share fondant cake recipes with you, so I guess I’m making up for it today!)
The arrows are made out of little red hearts and strips of perfectly imperfect black fondant. You could also use black food coloring or black food markers to make the arrows (in the same way I used food coloring to paint the black on the heart topper) but I really loved the sweet, slightly homespun look of all those arrow segments. It just seemed to fit the aesthetic of the cake.

The bottom tier is also covered with fond–just kidding! I gave us all a fondant break on the bottom and covered the last tier with sweet little Valentine’s Day heart sprinkles. You can use whatever sprinkles/nonpareils/jimmies you’d like, or even leave it plain, but I think the chaos of the sprinkles is fun in contrast to the super-stark red, black, and white upper layers. 
And how does it look when you cut into it? Pretty cool, if I do say so myself!

This cake is a typical red velvet, meaning it’s a light cocoa cake that mostly tastes like a buttermilk cake. Because it’s oil-based instead of butter-based, it tends to keep very well and will stay moist for days. It’s a lovely celebration cake, and of course, you can switch up the colors if you’d like.
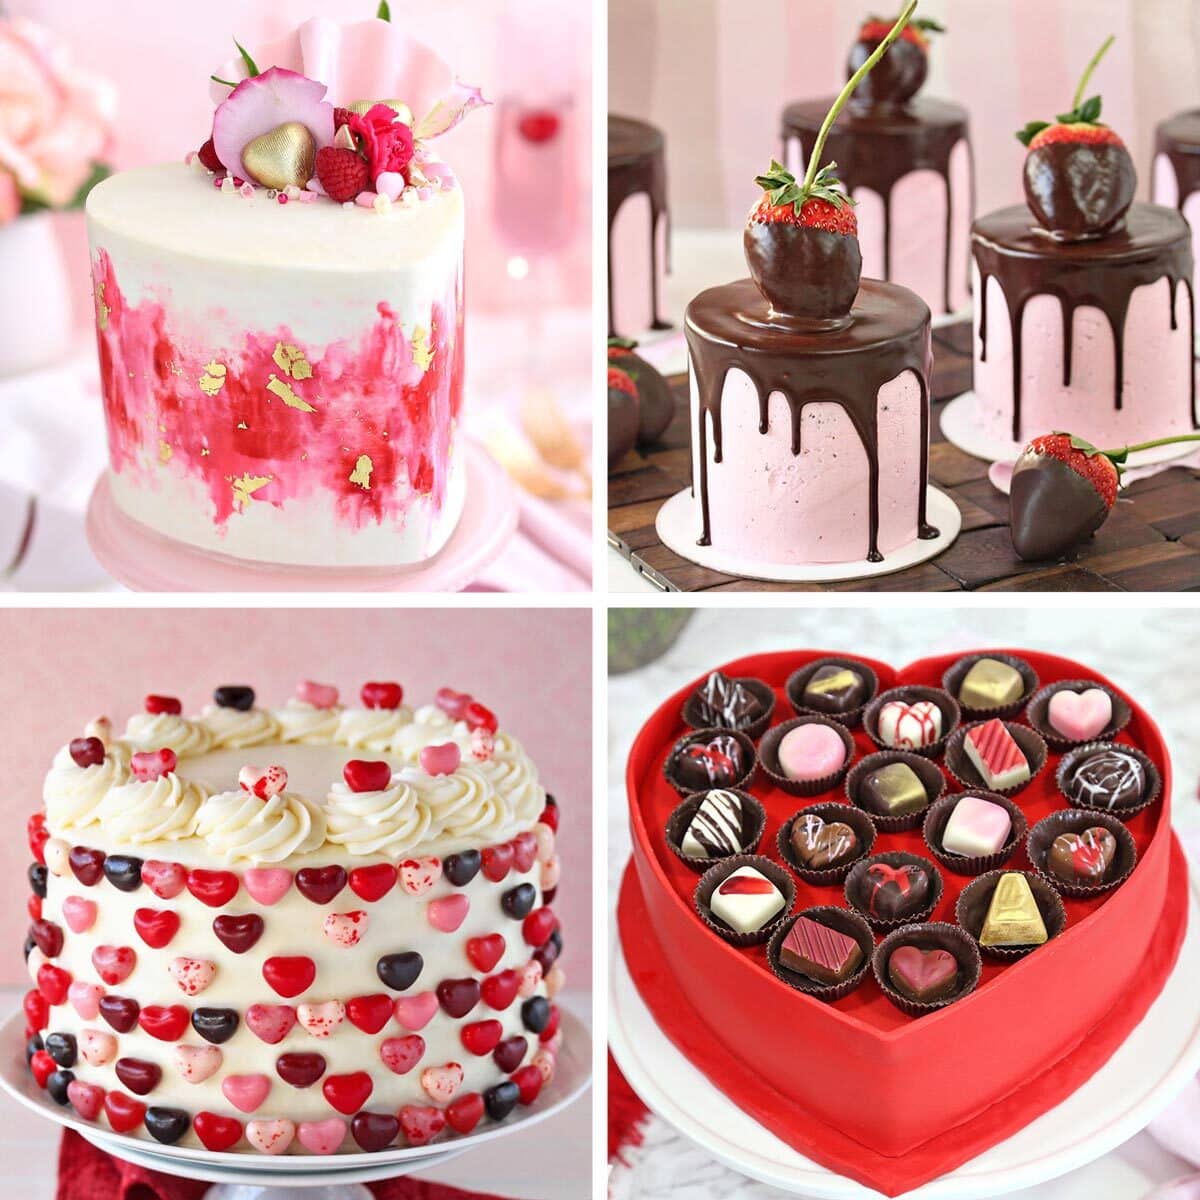
More romantic cake recipes Strawberries and Cream Layer Cake, Sky-High Pink and Red Velvet Cake, Giant Rose Cake, Chocolate-Covered Strawberry Cakes and Raspberry-Rose Cake Recipe.

Wishing you a lovely Valentine’s Day full of love, hearts, and lots and lots of cake!
Equipment You Will Need:
Cake turntable
6” cake cardboards
9” cake cardboards
Metal offset spatula
Cake dowels
Small paint brush
Fondant rolling pin
Small heart-shaped cookie cutter
❤️ MORE HEART DESSERTS YOU’LL LOVE
Don’t miss our collection of the 10 Best Valentine’s Day Cakes – see the whole web story here!
Pink and Red Velvet Valentine’s Day Cake
Ingredients
For the Pink and Red Velvet Cake:
- 17 oz all-purpose flour, (3 ¾ cups)
- 15.75 oz granulated sugar, (2 ¼ cups)
- 1.5 tsp baking soda
- 1.5 tsp salt
- 1 TBSP unsweetened cocoa powder
- 12 fl oz vegetable oil, (1 ½ cups)
- 18 fl oz buttermilk, (2 ¼ cups), at room temperature
- 3 large eggs, at room temperature
- 1.5 tsp white vinegar
- 1.5 tsp vanilla extract
- 2 TBSP red gel food coloring
- 2 TBSP pink gel food coloring
For the Buttercream Frosting:
- 8 fl oz pasteurized liquid egg whites, (1 cup)
- 32 oz powdered sugar, (8 cups)
- 1 tsp salt
- 32 oz unsalted butter, (4 cups), at room temperature
- 2 TBSP vanilla extract
For the Decorations:
Instructions
To Make the Cake:
- Preheat the oven to 350 Line two 6×3-inch cake pans, and two 9×2-inch cake pans, with parchment paper rounds and spray the rounds with nonstick cooking spray.
- In a large bowl, sift together the flour, sugar, baking soda, salt, and cocoa powder.
- In the bowl of a large stand mixer fitted with a paddle attachment, combine the vegetable oil, buttermilk, eggs, vinegar, and vanilla extract. Mix on medium-low speed until well-combined.
- Add the dry ingredients and mix on low speed until combined. Scrape down the bottom and sides of the pan with a spatula, then mix on medium speed until the cake batter is smooth and all the lumps of flour have disappeared.
- Pour out half of the batter into a separate bowl. Stir the red food coloring into one portion of the batter, and the pink coloring into the second portion.
- Divide the batter into the prepared pans, making one 6-inch and one 9-inch cake of each color. (If you want to use a kitchen scale, the tall 6-inch cakes should each have 23 oz of batter, and the shorter 9-inch cakes should each have 12 oz of batter.)
- Bake the 9-inch cakes for 15-18 minutes, and the 6-inch cakes for 45-50 minutes. The tops should spring back when lightly pressed with a finger, and a toothpick inserted into the center should come out clean. Cool the cakes completely before proceeding.
To Make the Frosting:
- Combine the whites, powdered sugar, and salt in the bowl of a large stand mixer fitted with a paddle attachment. Mix everything together on low speed, until the sugar is moistened and no dry patches remain. Turn off the mixer, scrape down the sides and bottom of the bowl with a spatula, then turn the mixer to medium speed. Beat on medium for 5 minutes.
- After 5 minutes, turn the mixer to medium-low and start adding the softened room temperature butter, 1-2 tablespoons at a time. Once all of the butter is incorporated, add the vanilla extract and mix it in. Stop the mixer and scrape down the bottom and sides once more. Turn the speed to medium and beat the buttercream for 10 minutes. At the end, you’ll have a frosting with a wonderfully light and creamy texture. It can be used right away, or stored in the refrigerator for up to two weeks, or the freezer for up to two months. If you have chilled the frosting, let it come to room temperature and then beat it for several minutes to smooth it out and restore its texture before using it.
To Make the Heart Topper:
- (Note that the heart should be made at least 24 hours in advance, to give it time to harden before assembly!)
- Dust your work surface lightly with powdered sugar, and roll out the red fondant until it is about ½-inch thick. If you have an extra-large heart-shaped cookie cutter, you can use that to cut a heart shape that’s about 6-inches wide. Otherwise, draw a 6-inch heart on paper to use as a template, and trace around it with a paring knife to cut out your fondant heart. Cut out a second, smaller heart that is 1-inch wide to use as the tip of the arrow.
- Cover a baking sheet with parchment lightly dusted with powdered sugar, and set the large heart on the parchment.
- Push a wooden skewer into the bottom of the heart, making sure to keep it in the middle of the fondant so it doesn’t poke up out of either side, and push it up until it is firmly embedded and secure.
- Roll out some white fondant so it is a similar ½-inch width, and cut out the front and back of the arrow shapes. Push a long toothpick into the top of the heart where the back of the arrow should go, to make a hole, then take it out. Push the toothpick halfway into the back of the arrow, brush it lightly with corn syrup, then push the toothpick into the hole you made previously, joining the heart and arrow together so they touch. The corn syrup will help the two fondant pieces fuse together as the arrow dries.
- Repeat the process with the front of the arrow, using 2 toothpicks this time: one to affix the heart on the arrow tip, and one to join the arrow to the large heart. (Trim the white fondant if necessary so it fits the curves of the arrows.) Make sure you add a touch of corn syrup to each fondant piece so they fuse together.
- Take a thin paint brush, dip it in black gel food coloring, and paint an arrow design on the white fondant. (Alternately, you can use a black food marker if you prefer). Let the heart sit for at least 24 hours before placing it on the cake. It should feel firm to the touch and stable once you lift it from the baking sheet.
To Assemble and Decorate:
- Set a 9-inch cake round on a 9-inch cardboard circle, and place it on a cake turntable, if you have one. Dollop a generous cup of frosting on top, and use an offset spatula to spread it in an even layer out to the edge of the cake. Top with the second 9-inch cake round, and cover the top and sides of the cake with more frosting.
- Pour the Valentine’s Day sprinkles in a small bowl. Hold the cake in one hand over a rimmed baking sheet, and with the other, grab a handful of sprinkles and press them against the sides of the cake. Repeat with more sprinkles, going around the whole cake and covering the top, until all of the buttercream is covered with sprinkles. Hopefully, the rimmed baking sheet caught any falling sprinkles, so pour the extras from the baking sheet into a plastic bag and reserve for a later use.
- Since the top tier is so much heavier than the bottom, we’ll want to add a few dowels to the bottom layer to add support. You can use “real” cake dowels, lollipop sticks, or even extra-large straws (like boba tea straws.) Place a 6-inch cake cardboard on top of the 9-inch cake in the center, to give you an idea of where the top tier will be situated, and then remove it and push 4 dowels or straws into the cake in a rough square shape, underneath where the top tier will be. Leave a few inches between each dowel to help distribute the weight. Using a marker, make a mark on each dowel to show where the top of the cake hits, pull it out of the cake slightly, then cut the dowel with scissor right where your mark is. Push it back down into the cake—it should be flush with the top of the cake, not sticking out.
- Refrigerate the bottom layer while you prepare the top layer. Cut each 6-inch cake into 3 layers, so that you have 6 layers total. Assemble them like you did the bottom layer, alternating pink and red colors and filling each layer with a generous scoop of buttercream. Once the cake is assembled, frost the top and sides with buttercream, trying to get your frosting smooth and level, and the corners sharp. Refrigerate the layer for at least 45 minutes, so the buttercream is firm before adding the fondant.
- When you’re ready to cover the cake with fondant, dust your work surface with powdered sugar, and roll out the white fondant until it is a round a little less than ¼-inch thick. Roll the fondant back over the rolling pin, then life the pin over the cake and drape the fondant over the cake so the sides are as even as possible. Use a fondant-smoothing tool, if you have one, and start pressing the fondant on top of the cake, going outward with even pressure, then press it down and against the sides of the cake. If you are unfamiliar with covering a cake with fondant, there are many excellent video tutorials to demonstrate this step. Trim the excess fondant from the bottom.
- Put a generous dollop of buttercream in the center of the 9-inch cake, in the middle of the dowels, and carefully set the 6-inch cake on top. (The buttercream will help the cake stay firmly on the bottom layer.) Pipe a very thin layer of buttercream along the bottom edge of the 6-inch cake, and press the large heart sprinkles into the buttercream to make a border along the bottom.
- Roll out the black fondant into a very thin layer (about 1/8-inch thick). Use a sharp knife or a pizza cutter to cut thin strips of fondant, about 1/8-inch thick. You’ll want approximately 14 strips that are about 4 inches long (for the arrow bodieand then 56 small segments about ½-inch long for the arrow quills.
- Roll out a bit of red fondant until it is very thin, and cut out 14 small (about ½-inchearts for the arrow tips.
- Use a thin paint brush to paint the backs of the black strips with corn syrup, and affix them in a diagonal pattern around the 6” cake in even intervals. Add the red fondant hearts to one end of each arrow, and add the 4 quills on the other end of each arrow.
- Finally, take the fondant heart cake topper and embed the skewer firmly in the 6” cake. Your cake is now ready to display and serve!
Recipe Notes
Measuring Tips
Our recipes are developed using weight measurements, and we highly recommend using a kitchen scale for baking whenever possible. However, if you prefer to use cups, volume measurements are provided as well. PLEASE NOTE: the adage “8 oz = 1 cup” is NOT true when speaking about weight, so don’t be concerned if the measurements don’t fit this formula.
Want to learn more about baking measurements and conversion?
Nutrition
THE BEST VALENTINE’S DAY CAKES
Check out our collection of the 27 best Valentine’s Day cake ideas — click here to get all the recipes!


See!! This is why you are my Sugar Hero! This is what I’m talking about. Good recipes with such great instructions on how we, your fans can do the same at home! My favorite cake is Red Velvet!!
Thank you <3
Jeanette
Holy cow this Valentine’s Day cake is INCREDIBLE! It’s so gorgeous, I don’t know if I could eat it – haha! Seriously, beautiful work!
Wow! Now that is an impressive cake. I love the bold colors you used and two cake design is so fun and interesting. I’m thinking your husband is willing to share your love so long as you let him have some cake. 🙂
This cake is simply gorgeous. I wish I had the patience to bake and decorate cakes like this, but alas, I don’t have it in me. It looks delicious and I’m sure it was a huge hit with the kiddos! Happy Valentine’s Day!
Beautiful cake and you are an amazing baker, Your descriptions are so perfect a person reading the recipe can make it their own. I need to do Red velvet cake I am not doing because my son has allergy. But I can help you with few slice if you give me.
Wow, this is such a gorgeous cake! I love the rice krispy topper idea.
Now this is my kind of Valentines day cake. Love the katywampus cake proportions and all that fondant. It’s reminding me that I really need to start playing with fondant more often. But I don’t think I will be taking big bites out of it any time soon. . .I’ll leave that to your son ; -).
I LOVE this cake!!!
I always look forward to your Valentine’s Day creations. This is gorgeous!
I’ve never made this cake before, but it look so good! i’ll definitely give it try for sure <3
Hey Marie, I am so excited for you to give it a try! I would love to hear how that goes, thanks so much for your comment!