
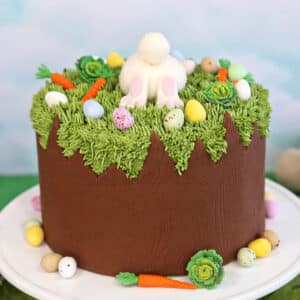
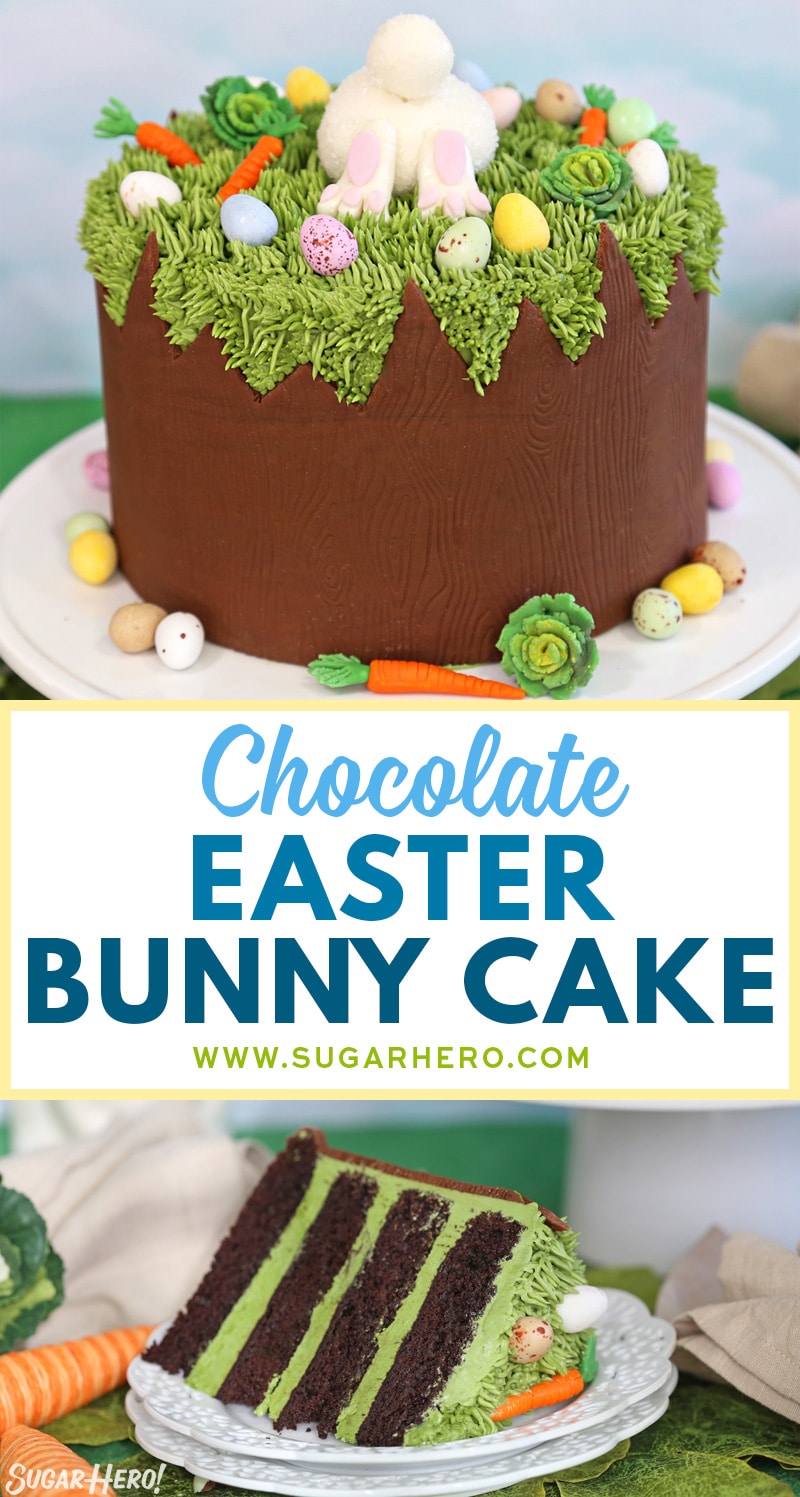
Cute cake alert! It just wouldn’t be Easter without at least one adorable bunny-themed treat, and this Chocolate Easter Bunny Cake delivers! Moist chocolate cake, smooth buttercream, and lots of mini fondant decorations on top make this bunny cake a favorite the whole family will love.

Cute Bunny Cake for Easter
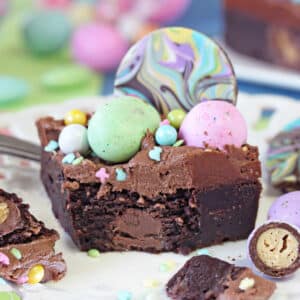
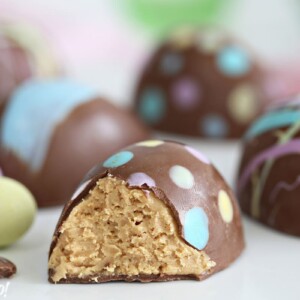
What’s your Easter dessert style? Some folks like to go classy, and serve individual Strawberry Rose Tarts or beautiful Hydrangea Cakes. Others like to have fun with their desserts, and go for a bit of whimsy, like an Easter Nest Cake, or a cake that looks like a giant Sugar Easter Egg! Some people even try to go healthy(ish?) with fruit covered Coconut Macaroon Tart or Easter Fruit Pizza. And, don’t forget the smaller desserts like cupcakes, cookies and candy! You won’t want to miss my Easter Bunny Cupcakes, Easter Egg Sugar Cookies, Frosted Easter Brownies (with Malted Milk Eggs), Coconut Macaroons and Peanut Butter Easter Eggs!
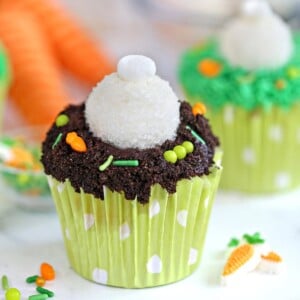
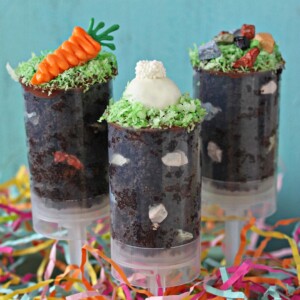
Since having kids, I tend to keep things a little less serious and a little more playful these days. My son loves to help me in the kitchen, so I’m always looking for fun recipes that I know he’ll enjoy making with me. These Easter Basket cupcakes and Easter Push-Up Pops are some of his favorites!
This Easter Bunny Cake, with the cute design of a bunny digging in a fenced-in garden, is definitely kid (and mom) approved! Plus, what kid wouldn’t love playing with the fondant and shaping the bunny and different vegetables? If you don’t want to bother with fondant, you can also pick up some cute store-bought candies and use those to decorate the top instead.

Components of an Easter Bunny Cake
Here’s what goes into making this cake:
- Four layers of rich chocolate cake
- A smooth and silky Swiss meringue buttercream
- A partial fondant covering around the cake to represent the “wooden fence”
- Buttercream grass on top and around the sides
- Fondant carrots and cabbages
- Chocolate eggs
- A cute fondant bunny butt!
Stay tuned while I break down how to make the individual components, and you can find the full recipe at the bottom of the post.

Making the Wooden Fondant Wrapper
The cake is encircled by a piece of brown fondant that’s decorated to look like a wooden fence. To make this, you’ll need a wood grain impression mat. The one in the picture is intended for chocolate, and I used it because I already owned it. Fortunately, it worked really well to make a wood grain pattern on fondant! But if you’re in the market for a silicone wood grain mat made especially for fondant, this one looks to be a great choice.
Step 1: Color your fondant brown
It’s easiest to start with brown fondant, but if you are starting with white fondant, knead in brown gel food coloring to produce a brown color. (Wear gloves so you don’t also dye your hands!) You can also knead in about 4 oz of melted, cooled chocolate if you want chocolate-flavored fondant.

Step 2: Roll it out
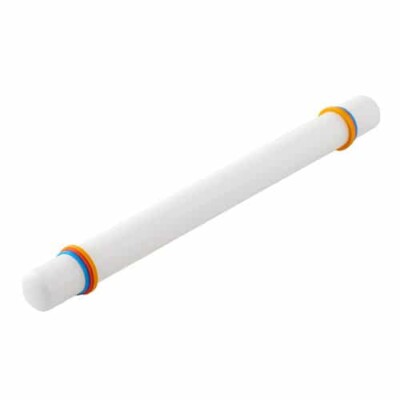
Dust your work surface with cocoa powder, and roll out your fondant, using a fondant rolling pin, until the fondant is less than 1/4-inch thick, and approximately 28″ long and 6″ wide. Dust the top of the fondant with a little more cocoa powder. Set the impression mat on top, and gently roll it over the fondant to impress the wood pattern on the fondant.

Step 3: Cut it out
You can freehand this part, but since I am a Nervous Nelly, I made a quick paper pattern from poster board first! I measured around the outside of my frosted cake to get the circumference, then measured the height of my cake. With these measurements in mind, I cut out a spiky fence-type shape from a spare poster. Then I used this as a pattern to cut my fondant strip.
Once your fondant is cut, start at one end and roll it up over itself into a tube.

Step 4: Unroll around the sides of the cake
Make sure your cake is well-chilled. Take your tube of fondant, and press one end against the side of the cake. Carefully and gently unroll the fondant around the cake, taking care to keep it pressed against the side as you go. Once you make it around the cake, trim any excess fondant. Take a wet paintbrush and brush one fondant edge with water, then press the two edges together to seal them.

Decorating a Chocolate Easter Bunny Cake
Decorating this cake is definitely the most fun part, and you have a lot of options for making this cake your own! If you want a garden theme, cover the top with of the cake with crushed chocolate cookies to make edible “dirt.”
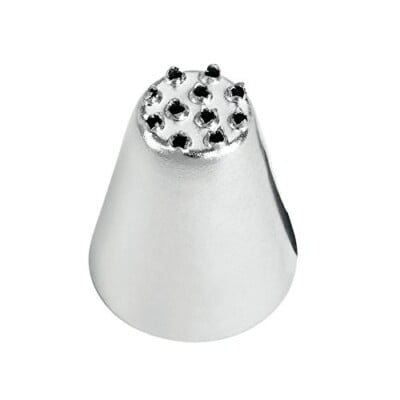
I decided to go with green grass, so I used a grass piping tip to cover the top and sides with long strands of green buttercream.

Let’s talk fondant decorations! As mentioned above, you can definitely buy store-bought candies for the top if you want to go that route.
But if you already have fondant ready to go, and want to craft some fondant decorations for the top (and maybe a few extras for the base of the cake stand), then here are a few quick guides to get you going!
How to Make Fondant Carrots for an Easter Bunny Cake
- Pinch off an almond-sized ball of orange fondant, and roll it until it is a tube about an inch and a half long that tapers at one end.
- Take a sharp knife or razor, and score lines in the top of the tube.
- Take a toothpick and poke a hole in the top of the tube.
- Take a small piece of green fondant and pinch one end into a point. Flatten out the other end and use a knife to feather it.
- Insert the point of the green fondant into the carrot.

How to Make Fondant Cabbages for an Easter Bunny Cake
- Note: be sure the color of your green fondant is different than your green buttercream! (Don’t be like me and have them blend in to each other!)
- Roll a strip of green fondant out, about 1-inch wide and 5-6 inches long. Trim 1 end if you’d like, but leave 1 edge raggedy.
- Roll the strip of fondant up, raggedy edge on top. Let the raggedy part naturally curl outward into a cabbage shape.
- If you have yellow or lime green petal dust, brush the inside of the fondant cabbage with a bit of that! You can also use a bit of powdered sugar to give it a light white dusting.

How to Make a Fondant Bunny Butt
- Make 4 balls of white fondant: 1 large (for the body), 1 medium (for the tail), and 2 small (for the feet)
- Flatten out the 2 small balls into an elongated foot shape, and use a knife to trim them and make 3 toes
- Brush a very light layer of water on the large ball of fondant, and press white sparkling sugar all over the surface.
- Skewer the medium ball on a toothpick, lightly wet the medium ball, and roll it in sparkling sugar as well. Attach the medium ball to the large ball. (You can omit the toothpick if you think children will eat the bunny butt!)
- Make small pads of pink fondant to go on the bottoms of the bunny feet, and attach them with a bit of water.
- You can either attach the feet to the body with water if you’re making it a day in advance, or wait to attach it on top of the cake if you’re assembling it right away.

Once all the fondant decorations are made, the last thing to do is put everything together! Place your bunny, cabbages, carrots, and any chocolate eggs or other candies you want to use on top of the cake. You can also scatter them around the base of the cake if you’d like.

This is just one of many fun Easter recipes we’re sharing this year–be sure to check out our full list of Easter desserts!
🐰More Chocolatey Easter Treats
Bunny Butt Cupcakes
Easter Push-Up Pops

If you make this Chocolate Easter Bunny Cake, be sure to share a picture in the comments or in our Facebook group!
Chocolate Easter Bunny Cake
Ingredients
For the Cake:
- 6 oz unsalted butter, at room temperature
- 4.75 oz granulated sugar, (⅔ cup)
- 5 oz brown sugar, (⅔ cup), packed
- 2 large eggs, at room temperature
- 2 tsp vanilla extract
- 8 oz buttermilk, (1 cup), at room temperature
- 4 oz sour cream, (1/2 cup), at room temperature
- 2 TBSP water , or coffee
- 7.8 oz all-purpose flour, (1¾ cups)
- 3 oz unsweetened cocoa powder, (1 cup)
- 1½ tsp baking soda
- ½ tsp salt
For the Frosting:
- 6 fl oz pasteurized liquid egg whites, (¾ cup, see Note below)
- 24 oz powdered sugar, (6 cups)
- 1/2 tsp salt
- 24 oz unsalted butter, (6 sticks), at room temperature
- 2 TBSP vanilla extract
For the Decorations:
- 1 lb white fondant
- Assorted gel food coloring, I used Americolor Brown, Leaf Green, Avocado Green, Orange, and Soft Pink
- White sparkling sugar
- Yellow petal dust, optional
- Chocolate eggs
Instructions
To Make the Cake:
- Line four 8-inch cake pans with parchment, and spray them with nonstick cooking spray. Preheat the oven to 350 F.
- Add the butter and both sugars to the bowl of a large stand mixer fitted with a paddle attachment. Beat them together on medium-high speed, until light and fluffy, about 5 minutes. Add the eggs one at a time, beating well after each addition. Add the vanilla extract and mix it in.
- In a separate bowl, whisk together the buttermilk, sour cream, and water (or coffee, if using). In a different bowl, sift together the flour, cocoa powder, baking soda, and salt. With the mixer running on low, add a quarter of the sifted flour mixture. When the flour streaks have almost all disappeared, add a third of the liquid to the mixing bowl. When that’s incorporated, continue to add the drys and wets in an alternating pattern, ending with the dry ingredients.
- When the dry ingredients are nearly incorporated, stop the mixer. Scrape down the bottom and sides of the bowl with a rubber spatula, and finish mixing the cake by hand. Divide the batter between the prepared pans and smooth it into an even layer. If you’re using a scale, each pan should get about 10 oz. Bake the cakes for about 20 minutes, until a toothpick inserted into the center comes out with just a few moist crumbs attached. Cool the cakes completely before using.
- The cakes can be made several days in advance and kept, well-wrapped and refrigerated or frozen, until ready to use.
To Make the Frosting:
- Combine the whites, powdered sugar, and salt in the bowl of a large stand mixer fitted with a paddle attachment. Mix everything together on low speed, until the sugar is moistened and no dry patches remain. Turn off the mixer, scrape down the sides and bottom of the bowl with a spatula, then turn the mixer to medium speed. Beat on medium for 5 minutes.
- After 5 minutes, turn the mixer to medium-low and start adding the softened room temperature butter, 1-2 tablespoons at a time. Once all of the butter is incorporated, add the vanilla extract and mix it in. Stop the mixer and scrape down the bottom and sides once more. Turn the speed to medium and beat the buttercream for 10 minutes. At the end, you’ll have a frosting with a wonderfully light and creamy texture. Add green food coloring to get a grassy green shade. I used Americolor Leaf Green, with a bit of Avocado Green and Lemon Yellow to make a bright grass color.
- This frosting can be used right away, or stored in the refrigerator for up to two weeks, or the freezer for up to two months. If you have chilled the frosting, let it come to room temperature COMPLETELY and then mix it for several minutes to smooth it out and restore its texture before using it.
To Assemble and Decorate:
- Place the cake rounds on 8-inch cardboard cake circles. Place one layer on a cake turntable. Place a big dollop of frosting on the cake layer—about 1 cup—and use a metal spatula to spread the frosting into an even layer going all the way out to the edges of the cake.
- Top the cake round with a second cake layer, and repeat the frosting process again. Do it with a third layer, and finally, add the last cake layer. Cover the top and sides of the cake with a very thin layer of frosting—this is the crumb coat, which locks crumbs into the frosting and also provides some stability to the cake. Refrigerate the cake for 45-60 minutes, until the crumb coat is set and the cake feels firm and stable.
- If the buttercream has started to get spongy, re-whip it briefly on medium speed until it is smooth and silky. Cover the top and sides of the chilled cake with a second layer of frosting. It doesn’t need to be thick, but it does need to be enough to give the cake some stability. Use a bench scraper or metal spatula to smooth out the sides and top of the cake as much as possible. Chill for another 30 minutes before adding the fondant decorations.
- While you wait for the cake to chill, prepare the fondant decorations! Take about a quarter-cup sized piece of fondant and knead some green food coloring into it (wear gloves to protect your hands!). Dust your work surface with powdered sugar.
- To make fondant cabbages: Roll a strip of green fondant out, about 1-inch wide and 5 inches long. Trim 1 end if you’d like, but leave 1 edge raggedy. Roll the strip of fondant up, raggedy edge on top. Let the raggedy part naturally curl outward into a cabbage shape. If you have yellow or lime green petal dust, brush the inside of the fondant cabbage with a bit of that! Repeat to make several more cabbages.
- To make fondant carrots: color a bit of fondant orange. Pinch off an almond-sized ball of orange fondant, and roll it until it is a tube about an inch and a half long that tapers at one end. Take a sharp knife or razor, and score lines in the top of the tube. Take a toothpick and poke a hole in the top of the tube. Take a small piece of green fondant and pinch one end into a point. Flatten out the other end and use a knife to feather it. Insert the point of the green fondant into the carrot. Repeat to make 4-5 more carrots.
- To make a fondant bunny butt: color a small amount of fondant pink. (You will need VERY little pink!) Make 4 balls of white fondant: 1 golf ball size, 1 quarter size, and 2 dime size. Flatten out the 2 small balls into an elongated foot shape, and use a knife to trim them and make 3 toes. Brush a very light layer of water on the large ball of fondant, and press white sparkling sugar all over the surface. Skewer the medium ball on a toothpick, lightly wet the medium ball, and roll it in sparkling sugar as well. Attach the medium ball to the large ball. Make small pads of pink fondant to go on the bottoms of the bunny feet, and attach them with a bit of water. You can either attach the feet to the body with water if you’re making it a day in advance, or wait to attach it on top of the cake if you’re assembling it right away.
- Color the remaining fondant with brown food coloring. Dust your work surface with cocoa powder, and roll out your fondant until it is less than 1/4-inch thick, and approximately 28″ long and 6″ wide. Dust the top of the fondant with a little more cocoa powder. Set the impression mat on top, and gently roll it over the fondant to impress the wood pattern on the fondant.
- Either cut a freehand spiky fence shape on the fondant, or make a paper template of the shape you want to cut out of the fondant using poster board. Cut the top of the fondant strip into spikes, then start at one end and roll the fondant over itself into a tube.
- Make sure your cake is well-chilled. Take your tube of fondant, and press one end against the side of the cake. Carefully and gently unroll the fondant around the cake, taking care to keep it pressed against the side as you go. Once you make it around the cake, trim any excess fondant. Take a wet paintbrush and brush one fondant edge with water, then press the two edges together to seal them.
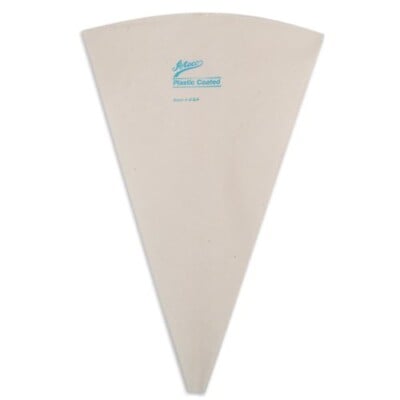
- Transfer the remaining green buttercream to a piping bag fitted with a grass tip. Pipe buttercream grass onto the exposed portions of the frosted cake. Finish by adding your fondant bunny butt, carrots, cabbages, and any other Easter candies you want!
- This cake is best enjoyed at room temperature. Extras can be stored in the refrigerator, well-wrapped, for up to a week. The fondant will become soft and sticky over time, so it is best to remove the fondant if you will be storing it in the refrigerator for long periods. Always let it come to room temperature before serving.
Recipe Notes
Measuring Tips
Our recipes are developed using weight measurements, and we highly recommend using a kitchen scale for baking whenever possible. However, if you prefer to use cups, volume measurements are provided as well. PLEASE NOTE: the adage “8 oz = 1 cup” is NOT true when speaking about weight, so don’t be concerned if the measurements don’t fit this formula.
Want to learn more about baking measurements and conversion?
Nutrition
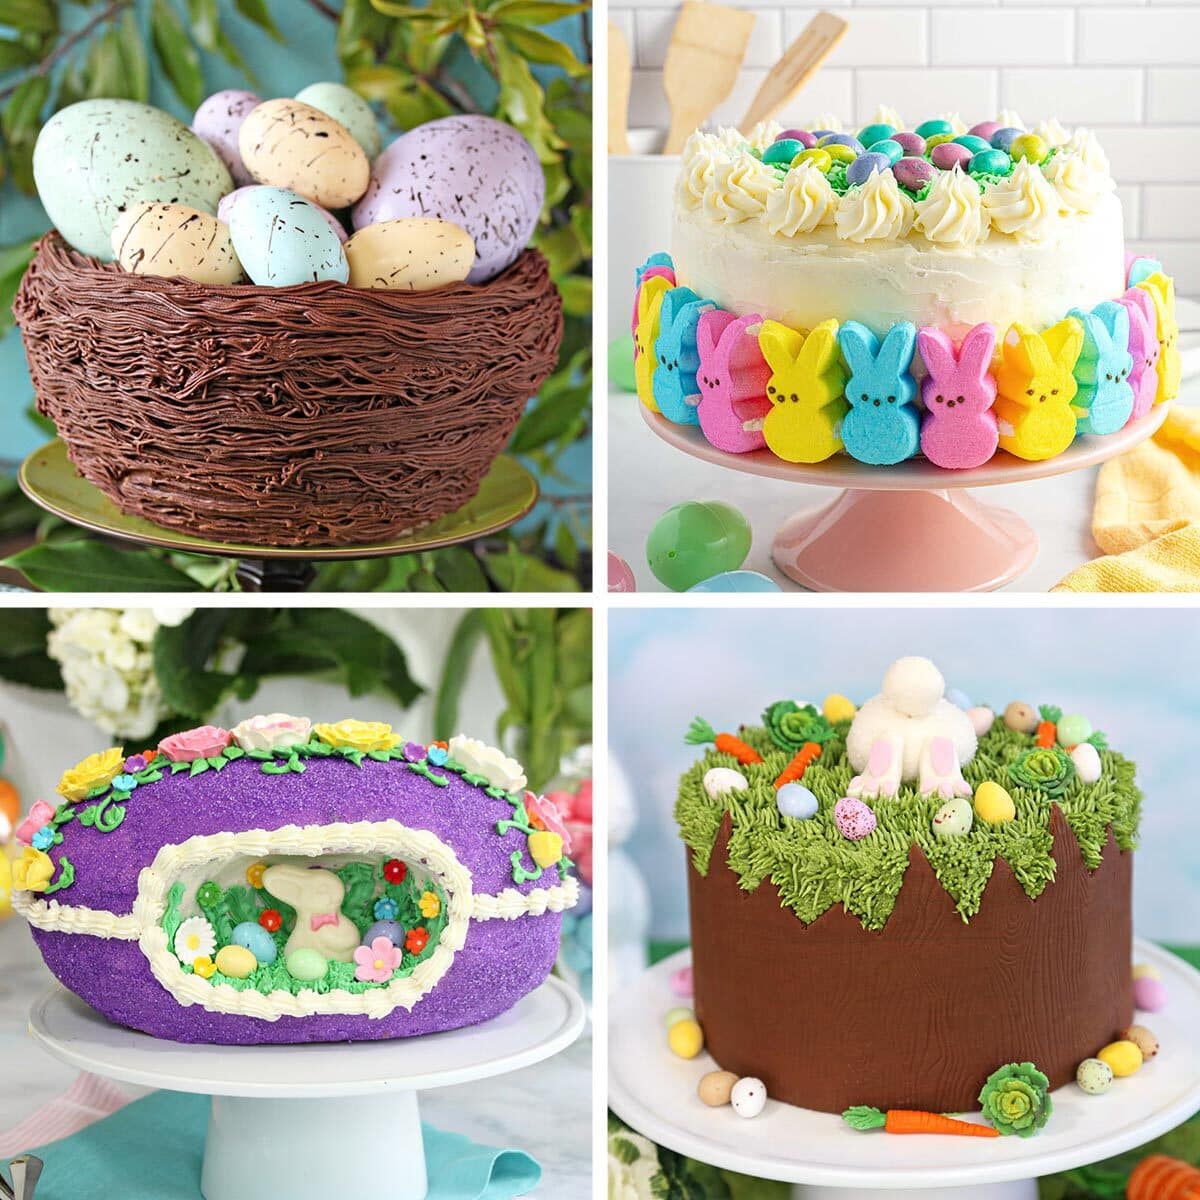
EASTER CAKE RECIPES 🐇
We’ve rounded up 35 adorable Easter cake recipes that will make your holiday extra-special — click here to get all the recipes!


This cake is totally adorable! What a cute little bunny butt!
Hey Heather, Thank you so much! I really appreciate it! 😀
I had such a fun time making this cake. I didnt have all the tools to do the wood impression and it was my first time working with fondant, but it tuened out. Everyone raved bout how good it looked. So thanks for mking me look like a pro!!
Hi Alana! Sounds like you did an amazing job trying something new and had fun doing it. Way to go! And, thanks for the recipe review and rating. It means a lot. Cheers!
Ist mit “Allzweckmehl” griffig oder glatt gemeint?
Universalspeisemehl ist ein feines Mehl, das sowohl aus Hart- als auch aus Weichweizen hergestellt wird. Es hat üblicherweise einen Proteingehalt von 10 bis 12 %. Falls Universalspeisemehl an Ihrem Wohnort nicht erhältlich ist, verwenden Sie für den Kuchen einfach ein gewöhnliches, feines Mehl. Ich hoffe, das hilft Ihnen weiter und dass Google Translate alles korrekt übersetzt hat. Viel Erfolg!