


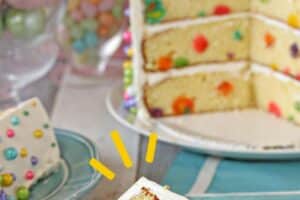
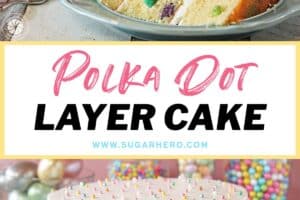
This Easter Polka Dot Cake is a gorgeous spring cake with polka dots on both the outside AND inside of the cake! Learn how to create this cute, easy cake with surprise polka dots inside.

The Cutest Polka Dot Cake for Easter
When it’s time to celebrate any big holiday, I gravitate toward big, flashy desserts that taste amazing and bring the bling. Over-the-top desserts are my specialty, and I love blogging about desserts that are exciting! What excites me most are semi-ridiculous things like sky-high mousse desserts, homemade stuffed doughnuts, eight layer cakes, and swirled tarts topped with whipped cream, chocolate curls and homemade truffles! In my world, more is more, and I own that.
So without further adieu, let me introduce you to my newest fancy cake — The Easter Polka Dot Cake.
Table of Contents
- The Cutest Polka Dot Cake for Easter
- More Easter Desserts
- How to Decorate the Outside of a Polka Dot Cake
- Variety is the Spice of Life
- Easy Colorful Cake Balls
- Equipment You’ll Need to Make a Springy Lemon Coconut Layer Cake
- 💗More Spring Layer Cakes You’ll Love
- Easter Polka Dot Cake Recipe
- EASTER CAKE RECIPES 🐇

More Easter Desserts
Looking for more Easter dessert inspiration? Try these…
- Cupcakes: Easter Basket Cupcakes, Spring Chick Cupcakes and Easter Baby Chick Cupcakes.
- Candy: Marbled Easter Egg Truffles and Peanut Butter Easter Eggs.
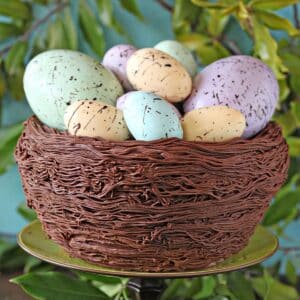
- Unique Treats: Easter Push-Up Pops and Chocolate Easter Nests (Birds Nest Cookies)
How to Decorate the Outside of a Polka Dot Cake
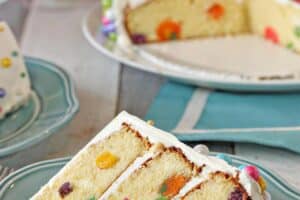
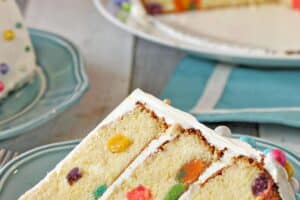
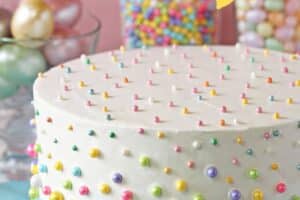
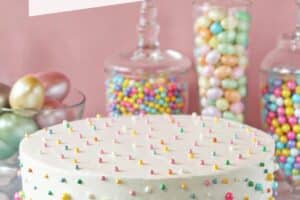
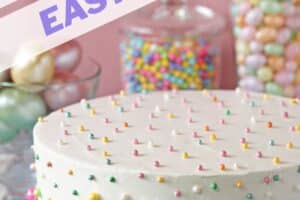
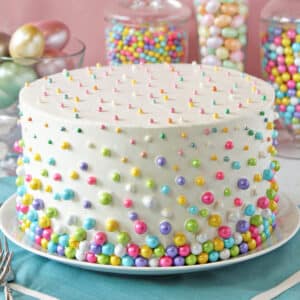
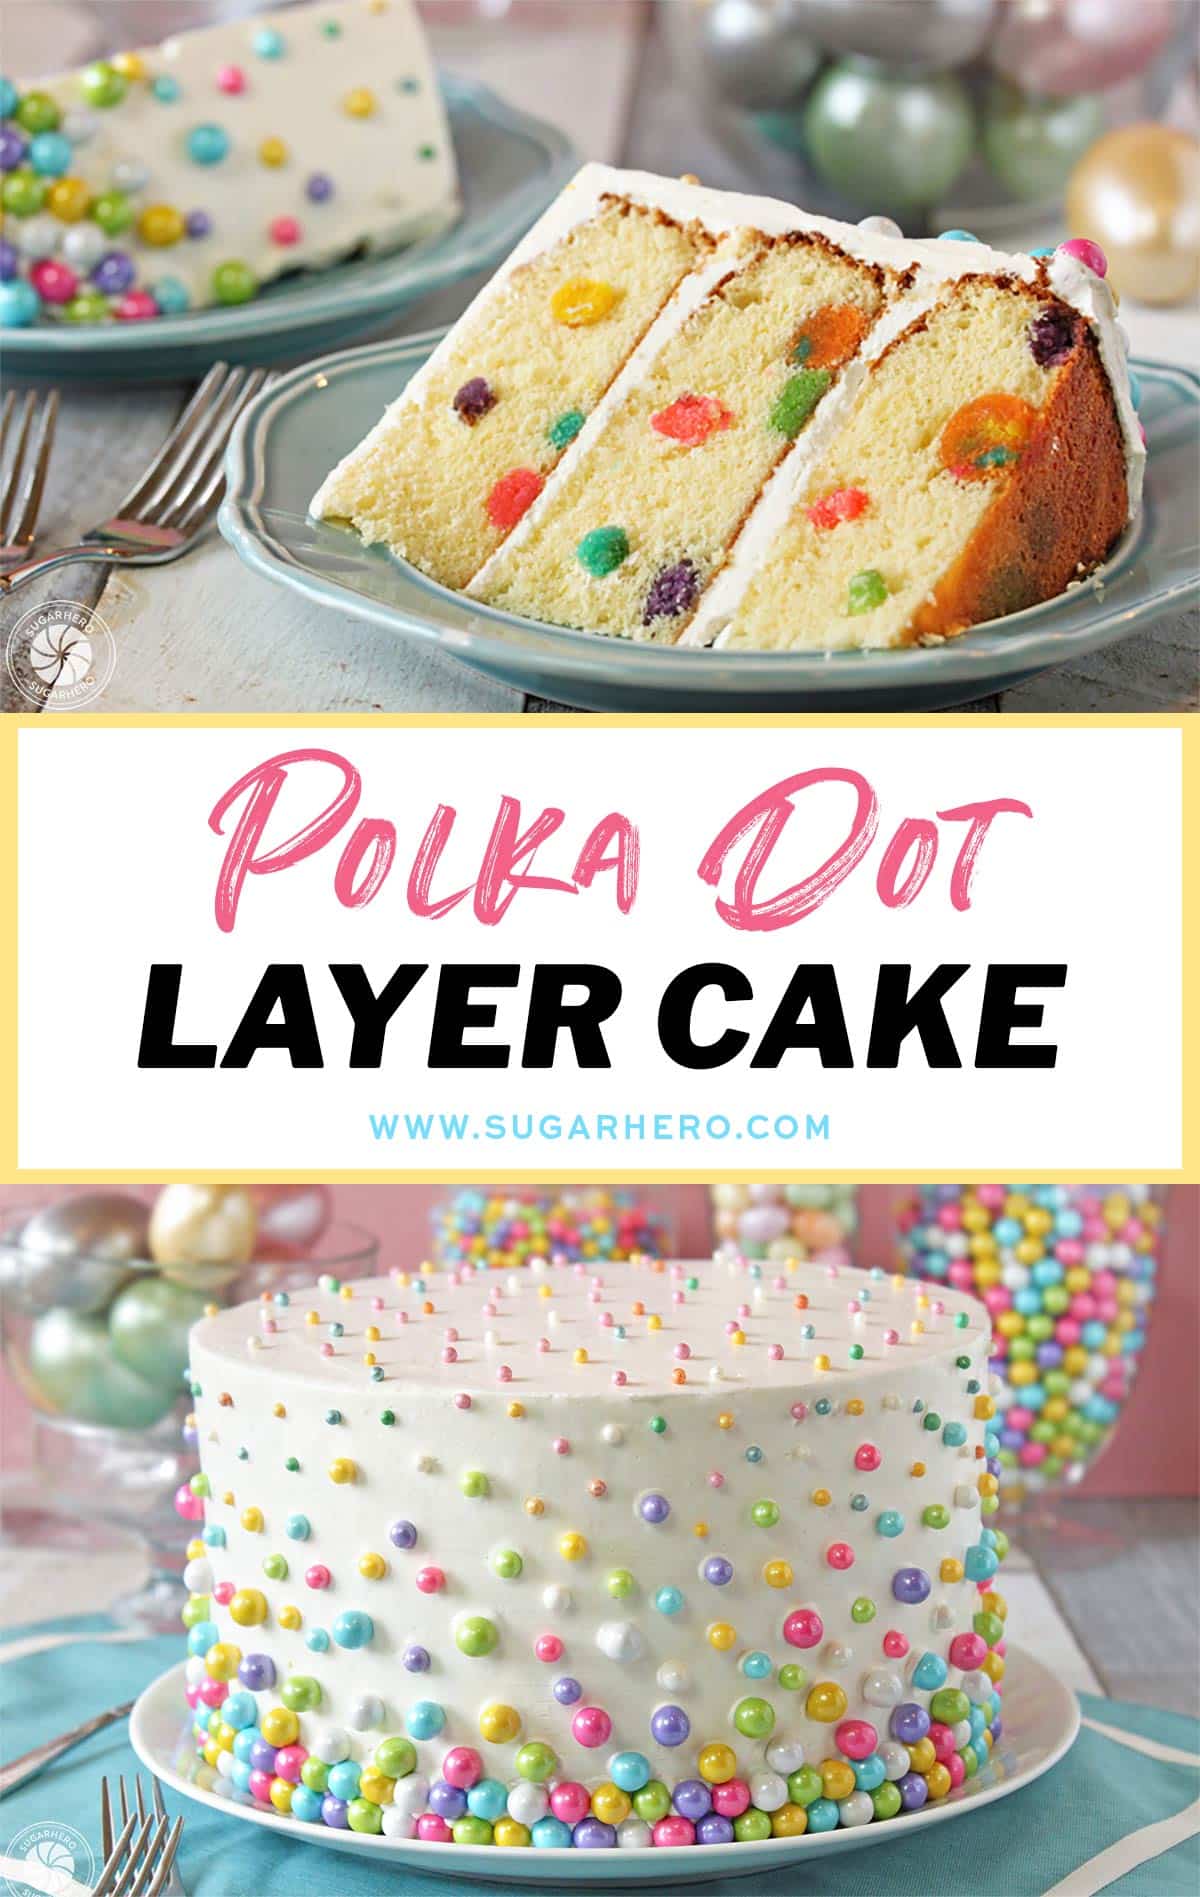
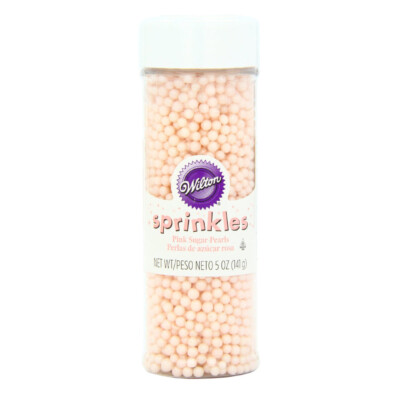
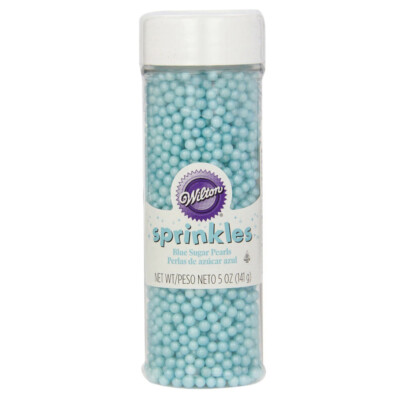
The outside is relatively easy to put together compared to some of my other creations; it’s got shiny Pastel Sixlets, pastel sugar pearls and mini pastel sugar pearls (or round sprinkles) pressed into creamy coconut buttercream. You can make your outside decorations as simple or intricate as you want. It makes a sweet presentation, but the real magic happens when you cut into the cake. It’s filled with the cutest, colorful polka dots made from homemade cake balls!
Variety is the Spice of Life
Use different sizes of round candy to give the outside of the cake depth and visual interest. I used Sixlets and sugar pearls between 10mm and 2mm in diameter, but you can use any type of candy or sprinkle you like.

Easy Colorful Cake Balls
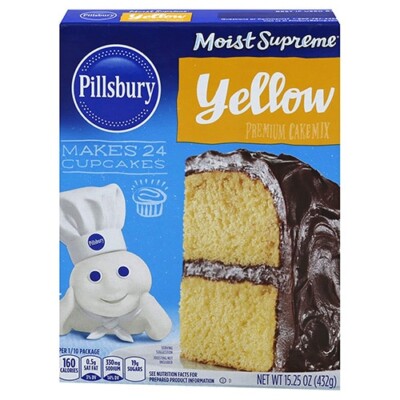
The mini cake balls are very easy to make (promise!). We’ll be using a yellow cake mix to color and bake several mini cakes. Depending on how many colors you choose to make, you could use small glass bowls, small round cake pans cake pans, pie tins, or even a cupcake pan to make the mini cakes. Just make sure the containers are oven-safe and watch them closely for doneness.
Once they are done baking and completely cooled, it’s time to start crumbling each of the mini cakes into crumbs, mix them with frosting, and roll them into colorful cake balls! You can make a variety of sizes of cake balls and experiment with combining colors to form cool patterns. Let your creativity go wild!
Place them on a parchment paper lined baking sheet, cover with cling wrap and keep them in the refrigerator until you’re ready to make your cake layers. (Make-ahead information: the polka dots can be made up to a week in advance, and kept in the refrigerator or freezer until ready to use!)
The pre-made cake balls will be suspended in the layers of homemade lemon cake batter. You’ll take the cake balls and press them into the batter, pressing some all the way to the bottom, some into the middle, and leaving some on top. You don’t have to use all of the cake balls, but do use a lot of them—it takes a surprising amount of polka dots to make the cake slices look well-dotted!
What You’ll Need to Make the Cake Balls
- Mini oven-safe baking containers
- Yellow cake mix
- Frosting (homemade or store-bought)
- Assorted gel food coloring
- Baking sheet
- Parchment paper
- Plastic wrap

Equipment You’ll Need to Make a Springy Lemon Coconut Layer Cake
The cake itself is a lemon cake with coconut buttercream, so it tastes light and springy. You’ll need a few important tools to make this cake. Make sure to have 9×2-inch cake pans (you’ll need three), parchment paper and a cardboard cake round. It’s also helpful to have a revolving cake stand and offset spatula to smooth the frosting and add the decorations.

Trust me when I say, this cheerful Polka Dot Cake is the perfect way to end a special Easter dinner, or any other special occasion. Birthdays, anniversaries, and major holidays all call for surprise polka dots, in my opinion.
Enjoy!
💗More Spring Layer Cakes You’ll Love
- Spring In Bloom Layer Cake
- Chocolate-Covered Strawberry Cakes
- Sugar Easter Egg Cake
- Blueberry Layer Cake
- Strawberries and Cream Layer Cake
- Hydrangea Cakes
Chocolate Easter Bunny Cake
Easter Nest Cake
Easter Polka Dot Cake
Ingredients
For the polka dots:
- 1 yellow cake mix, or white cake mix, plus ingredients to prepare mix
- Assorted gel food coloring
- 2 cups prepared frosting, homemade or store-bought
For the lemon cake:
- 9 large egg yolks
- 1 1/2 cups milk
- 1 tbsp lemon extract
- Zest of 2 lemons
- 15.75 oz granulated sugar, (2 ¼ cups)
- 15.75 oz cake flour, (3 ⅔ cup)
- 2 tbsp baking powder
- 1 tsp salt
- 9 oz unsalted butter, at room temperature
For the coconut buttercream:
- 9 large egg whites, at room temperature
- 14 oz granulated sugar, (2 cups)
- 1 lb unsalted butter, softened but still quite cool
- 1/2 tsp salt
- 2-3 tsp coconut extract, to taste
To Assemble:
- Pastel sixlets, sugar pearls, or other sprinkles
Instructions
To Make the Polka Dots:
- Preheat the oven to 350 F. Prepare the box mix according to the package directions. Divide the batter between five or six oven-safe small bowls/pans. Add a small amount of food coloring to each bowl to make different pastel shades.
- Scrape the colored batter into the small oven-safe containers you've chose. Bake until a toothpick inserted into the center comes out clean and the top springs back when lightly pressed. The baking time will vary depending on how much batter you use and the size of the pan, so watch the cakes carefully and start checking for doneness after 10-15 minutes of baking.
- After the cakes are baked, let them cool completely. Crumble the cooled cakes into separate small bowls, then add a spoonful or two of frosting to each bowl.
- Work the frosting and cake together with your fingertips until the cake is moistened and holds its shape when rolled into a ball. (If you have ever made cake balls before, you are looking for the same texture as cake balls.) If necessary, add more frosting until you get a consistency that's easy to work with, but stop adding frosting before the cake gets greasy or gummy.
- Roll the cake into small balls of different sizes, and place them on a parchment paper lined baking sheet. Cover the sheet with cling wrap and keep it in the refrigerator until you're ready to make your cake layers. The polka dots can be made up to a week in advance, and kept in the refrigerator or freezer until ready to use.
To Make the Cakes:
- Preheat the oven to 350 F. Line three 9×2-inch cake pans with parchment paper, and spray them with nonstick cooking spray. Combine the yolks, 1/2 cup of milk, and lemon extract in a small bowl, and whisk gently to combine. Set aside for now.
- Combine the lemon zest and sugar in the bowl of a large stand mixer, and rub them together with your fingers until the sugar is moist and fragrant. Add the flour, baking powder, and salt, and mix together with a paddle attachment on low speed for 30 seconds.
- Add the room temperature butter and the remaining 1 cup of milk to the flour, and mix on low speed for 30 seconds, until the dry ingredients are moistened. Turn the speed up to medium and mix for 90 seconds. With the mixer running on medium-low, add the egg yolks in three batches, mixing for 30 seconds after each addition. At the end, stop the mixer and scrape down the bottom and sides with a spatula so that the batter is well-mixed.
- Divide the batter evenly between the three cake pans. Take the cake balls and press them into the batter, pressing some all the way to the bottom, some into the middle, and leaving some on top. You don’t have to use all of the cake balls, but do use a lot of them—it takes a surprising amount of polka dots to make the cake slices look well-dotted!
- Bake the cakes at 350 F for about 25 minutes, until they’re puffed and golden on top, and a toothpick inserted into the center comes out with just a few moist crumbs attached. Cool the cakes completely.
To Make the Coconut Buttercream:
- Combine the egg whites and the granulated sugar in the bowl of a large stand mixer, and whisk them together. Choose a small saucepan that lets you fit the base of the stand mixer snugly into the top of the saucepan—this is your makeshift hot water bath. (Alternately, you can use a different bowl or an actual bain marie and then transfer the mixture to a mixing bowl once it’s heated.) Add an inch of water to the bottom of the saucepan, and bring the water to a simmer.
- Place the mixing bowl on top of the saucepan, making sure that the bottom isn’t in contact with the water, and heat the egg white mixture. Whisk frequently so that the egg whites don’t cook. Continue to heat the whites until they are hot to the touch, and when you rub a bit between your fingers, you don’t feel any grittiness from the sugar. Once the whites are hot, transfer the mixing bowl to your mixer and fit it with a whisk attachment.
- Beat the whites on medium-high speed until they are no longer warm to the touch—feel the outside of the bowl, and make sure that it is around room temperature. Depending on your mixer and the temperature of your environment, this may take 15-20 minutes, or more. Reduce the speed to medium-low and add the softened but cool butter in small chunks, a tablespoon at a time, making sure to wait in between additions. It may separate or look a little gloopy at this point—fear not. Once all of the butter is added, increase the speed again and whip until it comes together and is light and fluffy. If, after 5 minutes, it hasn’t come together, refrigerate the mixing bowl for 5-7 minutes, to cool the mixture down, and whip it again.
- Add the salt and 2 tsp coconut extract, and mix until well-blended. Taste the frosting and add more coconut flavoring if desired. The buttercream can be made in advance and kept at room temperature if you’re going to use it the same day, or refrigerated. If it’s been chilled, let it sit at room temperature until it softens, then re-whip it to get the fluffy texture back before you use it.
To Assemble:
- Trim the tops of the cakes so that they are level. Place one cake layer on a cake cardboard (ideally) or a plate. Spread a generous cup of frosting on top of the cake, extending out to the sides. Place a second cake layer on top of the first, and top that one with frosting as well. Finish with the third cake layer, then cover the sides and top of the cake with a thin layer of frosting, then refrigerate until firm.
- Once firm, spread the top and sides with the remaining frosting. To get a very smooth finish, I like to run very hot water over an offset metal spatula, wipe it dry, then slowly run it over the sides and top, rinsing frequently. The heat of the metal helps to smooth out the frosting. Finish the cake by pressing Sixlets, sugar pearls, or other sprinkles into the tops and sides of the cake. For the best taste and texture, serve this cake at room temperature.
Measuring Tips
Our recipes are developed using weight measurements, and we highly recommend using a kitchen scale for baking whenever possible. However, if you prefer to use cups, volume measurements are provided as well. PLEASE NOTE: the adage “8 oz = 1 cup” is NOT true when speaking about weight, so don’t be concerned if the measurements don’t fit this formula.
Want to learn more about baking measurements and conversion?
Nutrition
EASTER CAKE RECIPES 🐇
We’ve rounded up 35 adorable Easter cake recipes that will make your holiday extra-special — click here to get all the recipes!


A VERY striking effect, Elizabeth ! Perfect for my next cake. I am searching for the candy “pearls” you used, but not finding exactly what I expected. It appears you have used three sizes of candy, yet they appear to be the same colors. Are they all from a single source? Who makes these and where did you purchase them, please.
Thank you, Gary! The two largest sizes are by SweetWorks, and they’re Sixlets and Celebration Pearls. Unfortunately, I’m not sure about the smallest size, and since its been 4 years since I made the cake I no longer remember the source of the smallest sprinkles. Apologies!
I have found these at Walmart and also Jo/Anne’s Fabrics. I know I’ve seen at least two sizes. They are also sold in mixed colors or single colors which would let you chose a particular color scheme.
I have found them at Paper Party Outlet as well(Columbus Ohio). I found the tiny ones at Meijer, I believe.
Some of us do have time and love doing fun ‘wow’ stuff! So, keep being yourself, doing what you love to do! You are not alone!
It is true. Your work takes a while to learn. I made some marzipan eggs for Easter, and when I got to your instructions on chocolate, I was grateful that it isn’t usually used with the ingredients I chose. But, at least you got me thinking, and the eggs are a delicious representation of Florida, which I might never have attempted without your inspiration. Simple fondant was a good first step. Tempered chocolate, one day.
Bolos lindos, wonderfull
I from Brazil, i love cakes, so beautyful, delicious.
Thank you so much, Maria! I appreciate it.
I’m going to be making this Easter Polka Dot cake for the first time
Hey Juna, I am so excited! I would love to hear how it goes and see pictures!!
I only use cake mixes to bake with now.. I would to see what all you can do with cake mixes ♥️
Thank you
♥️
Great idea, Freda! I was actually just working on a sour cream doctored cake mix recipe this past weekend. 🙂 I will definitely try and post more cake mix versions of recipes in the future. 🙂
This is just perfect for Easter or Spring. Thank you for the inspiration. Gonna try it. Not sure I can get the decoerations. What sizes did you order for each sixlets……see they come in different mm’s.
Hi Susan! I hope you enjoy the recipe! I used Sixlets and different sizes of sugar pearls to decorate the outside of the cake. Sixlets are a little less than 10mm and sugar pearls come in a variety of sizes. When I made this cake, I pulled from my sprinkle stash on hand, but it’s safe to say they range in size from 10mm -2mm. I have links on the post, but I’ll put a couple here for you as well: [eafl id="67350" name="Pastel Sixlets" text="Pastel Sixlets"], Sugar Pearls, Mini Sugar Pearls